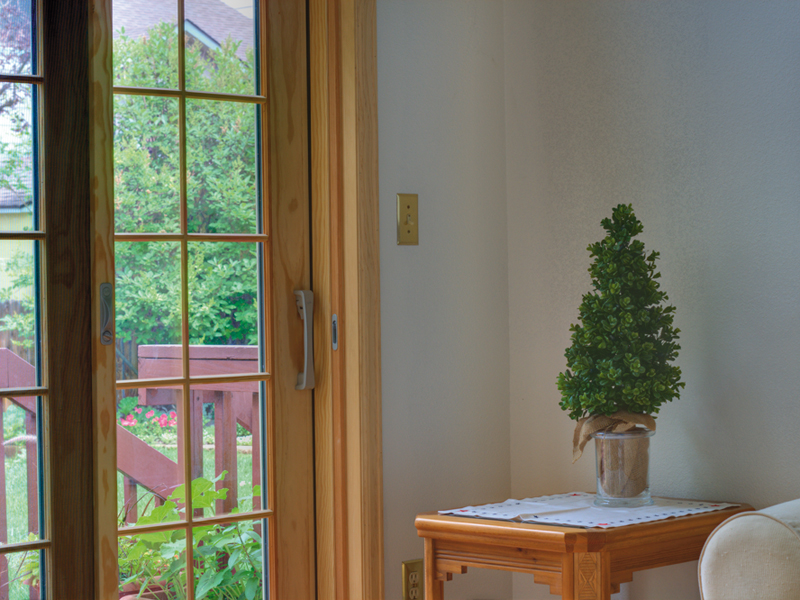
The sensor in a modern digital camera has less dynamic range than the human eye. That's why we're often disappointed with photographs we take: we don't see the sky as washed out, or the shadows as dark as they appear in our photos.
Naturally, there are now ways to circumvent this using the power of the PC: enter the high dynamic range image processing algorithms.
When we purchase a digital camera, we're often concerned with the resolution of the sensor (the number of megapixels), whether it produces images in JPG or RAW format, and whether we can use different lenses to get images from close up or far away. We're not generally concerned with the dynamic range of the sensor in the camera – in other words, the range of light levels that the sensor can capture.
It turns out that old-style film has less dynamic range than a CCD (charge-coupled device) – the sensor that registers light information that's built into modern digital cameras. If you like, we've moved forward in terms of dynamic range and also, incidentally, in terms of noise: film is noisier at low light intensities than digital.
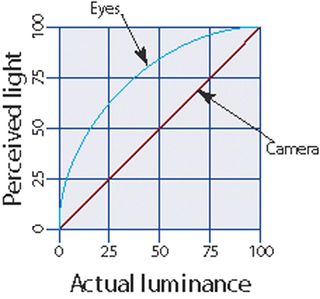
EYE VS SENSOR: How the eye perceives light intensity (blue line) compared to the way the camera does (red line)
Both types of camera perceive a narrower range of light levels than the human eye. That's why when we take a photograph of a landscape, for example, we get an image that doesn't register the cloud formations in the sky (the sky becomes washed out) and the shadows become undifferentiated black.
If you're anything like me, you tend to get a little frustrated and disappointed that the camera isn't recording what you're seeing exactly, but I dare say we've all become rather used to the problem.
Get daily insight, inspiration and deals in your inbox
Sign up for breaking news, reviews, opinion, top tech deals, and more.
What is HDR?
There is, however, a way around this called HDR image processing (high dynamic range). This is a set of algorithms that process images to increase their dynamic range.
With HDR, it's possible to produce an image that has a much greater range of light levels to approximate what the human eye can see, or even to make fantasy images that look nothing like real life.
However, I'll also note that you will run into some issues. For example, the monitors we use to view images also have a smaller dynamic range than the human eye.
Back in the days of film cameras, it was possible to increase the dynamic range of a photo when you printed the image after developing the film. Photographers like Ansel Adams were experts at using this kind of image manipulation – known as dodging and burning – to produce the dramatic photos we've all seen and perhaps bought as posters.
Dodging decreases the exposure of the print making the area lighter in tone, whereas burning increases it making the area darker in tone. Recall that in film photography, the film is a negative version of the photo. Dark areas on the negative will show up as lighter areas on the print paper because the light-sensitive silver salts in the paper will be less exposed, and therefore appear lighter once the print is fixed. Light areas will show up darker on the print, because more light hits the silver salts.
To apply dodging to the print, the photographer would cut out a shape from some opaque material like card to block off part of the scene, and then expose the print paper with that card between the projector and the paper. Because less light hit that part of the scene, it would appear lighter.
Burning was done in a similar way, but this time the photographer wanted to expose part of the scene longer than the rest. They would cut out a shape that would block off the rest of the scene, letting the part to be brightened receive more light.
There are other techniques and materials that can be used, but as you can imagine, dodging and burning this way was a labour-intensive process and was usually only done for art photos and the like.
Another issue is that dodging and burning are physical manipulations that happen in real time, and it's hard to replicate the same effects across a set of prints so that the resulting images are all the same. With digital photographs and programmatic image manipulation, it's a lot easier to create images with a higher dynamic range.
The process goes like this. First you take at least three photographs of a scene. Ideally, these photos are taken with your camera on a tripod so that they all register exactly the same scene. I've tried using a hand-held camera and it just doesn't work as well during the HDR processing – there's always some obvious scene shake that can be seen.
Similarly, the scene itself should be as static as possible: any moving parts (like leaves fluttering in the wind, waves crashing on the beach, or cars or people passing by, for example) won't be the same in each image, causing scene shake in the processed HDR file.
Although the photos are of the same scene and have the same focus and aperture settings, you take them using different exposure times. For best results, you should shoot one photo as normal, and the others two stops either side. Increasing exposure by a single stop doubles your exposure time, and decreasing by a stop halves it.
The dynamic range in photography is the number of stops between the darkest part of an image where you can still resolve detail and the lightest part. DSLRs generally have about 11 stops of dynamic range at low ISO values, and point-and-shoot cameras a stop or so less.
The external Viewsonic monitor I'm using with my MacBook Pro has almost 10 stops, which means that the photos I take with my camera already have twice the dynamic range that my screen can show.
Some cameras, especially DSLRs, have a mode whereby you can shoot three photos as a set, the other two bracketing the first in terms of exposure. The different exposures are regulated by the camera automatically.
On my Canon Rebel XTi (also known as the 400D), this is AEB mode (auto-exposure bracketing) and I can set the required +/- 2 stops there. If your camera shoots RAW instead of JPG and your HDR image processing application supports it, it's possible to just use one photo. The results won't be nearly as good though.
Once you have your three differently exposed photos, it's time to process them. The first stage is to analyse all three photographs in order to merge them as a single HDR image.
