How to turn your Windows laptop into a wireless hotspot
Share your internet connection with this clever Windows 7 or 8.1 feature
Introduction
It's become second nature to most smartphone or tablet users to have a personal hotspot option as standard in order to share their super-fast 4G wireless internet connection with other devices at any time. Things get a bit harder, however, if you try to achieve the same thing with a Windows 7 or 8.1 PC.
Many people may ask why, in this age of affordable home internet connections and Wi-Fi everywhere, you would need to set up your laptop as a wireless hotspot. It could be for a variety of reasons such as you still having a wired Ethernet connection you want to share, or a laptop that has a powerful 4G connection via a dongle.
When it comes to the options on the table for Windows 7 and 8.1 PC owners, there are two that entail different levels of expertise to set up. One requires you to download a free piece of software that does most of the legwork, whereas the other expects you to delve into the command line of the PC in question to set it up to share your connection. The following slides explain how to set each one up.
Virtual Router
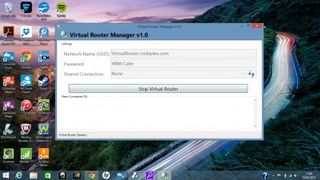
By far the easier of the two methods, Virtual Router takes the simple elements of setting up a connection and brings them together in a program that is free to download and takes away all the hassle of creating a hotspot.
When you have downloaded the program it immediately presents you with the option to give the network a custom name (SSID) as well as a password that can be changed at any time. From thereon in it's as simple as clicking 'start virtual router' and then letting it work its magic. Any device that is connected will be listed along with its IP address and MAC address to make sure you can keep tabs on everything that is going on.
Whilst it isn't a match for an actual Wi-Fi connection from a router, it will suffice if the Wi-Fi has been knocked out, all you have is a USB dongle, or you need to get the connection to every smartphone and tablet in your household.
Command Line
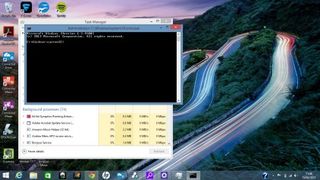
For anyone who doesn't fancy downloading another program onto their already packed hard drive there's good news – you can set up a wireless router on your Windows 7 or 8.1 PC by using the command line.
Are you a pro? Subscribe to our newsletter
Sign up to the TechRadar Pro newsletter to get all the top news, opinion, features and guidance your business needs to succeed!
You need to run an elevated command line to get to the correct page and this is easily done. First off press Windows+R at the same time to reveal the Run box. Here type in 'tskmgr' to open up the Task Manager. Navigate to File, then Run new task. In the text field type in 'cmd' and then check the box next to Create this task with administrative privileges.
When it opens, type in the following command:
netsh wlan set hostednetwork mode=allow ssid=MyNet key=MyPassword
Replace 'MyNet' with a name you want to use for the custom network, and 'MyPassword' with a password that is hard to guess. Press enter to create it and then type in the following text:
netsh wlan start hostednetwork
Press enter again to start it up.
Lastly, go to Control Panel > Network and Internet > Network and Sharing Centre > Change Adapter Settings, right click your internet connection and select Properties. Select the Sharing tab and then check 'Allow other network users to connect…' and pick the virtual Wi-Fi adapter name you just created.
Conclusion
Both methods are very useful ways to get a Wi-Fi connection to other devices around the home if you are not blessed with a router and set up takes just minutes regardless of the program you decide to use.
Microsoft may well decide to bring a dedicated wireless hotspot to the desktop version of Windows 10 later this summer, given the mobile version will certainly have one and the cross-platform approach will be music to the ears of anyone who doesn't have a router.
