How to convert videos with VLC
Convert video files easily
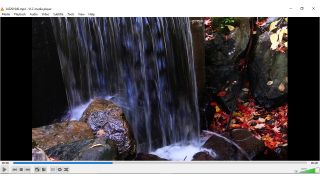
Convert video files with VLC
As much as we all love to watch our favorite films, TV shows and even record ourselves playing video games, the multitude of file formats can cause huge problems when you're trying to play your media on various devices.
Apple users who want to play home videos in iTunes for instance need to use the MOV or MP4 format. Meanwhile, some televisions come with a handy USB port to play your home videos but only support the AVI format.
Fortunately the free, cross platform VideoLan (VLC) Media Player can be used to convert your media files from one format to another - and it's a quick and easy process.
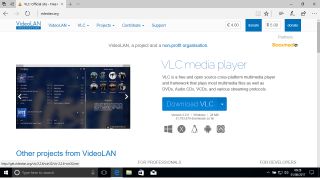
1. Download VLC
Open your web browser on your machine and visit the VLC website. Click 'Download VLC'. The website should automatically select the correct version of VLC for your OS.
If you're using Microsoft Edge in Windows, you'll be asked if you wish to 'Run' or 'Save' the file. Choose 'Save' for now. Once the download is complete, click 'Run'.
The system may ask if you wish to allow VLC to make changes to your device. Click 'Yes' to continue. The installer will now unpack the necessary setup files. Click 'OK' once this is complete to select your default language.
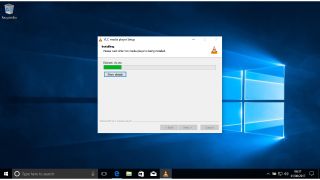
2. Install VLC
The VLC Player Setup Wizard will now open. Make sure to follow the instructions in the installer and close any other open applications. Click ‘Next’ to continue, then on ‘Next’ once again to agree to the License Agreement.
On the next window, the setup wizard will ask you to choose which components to install. By default VLC will become your new player for all media and will also install a special plugin if you use the Mozilla Firefox browser. You can untick any of these options if you wish. Click ‘Next’ to continue.
VLC will now ask you to choose your install location. Click ‘Install’ to begin the process.
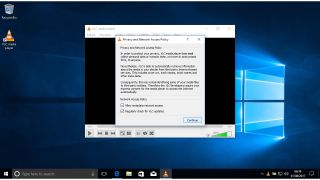
3. Launch VLC
Once setup is complete, Windows users will find a VLC shortcut has been placed on their desktop. Click ‘Finish’ to launch the program. If you're a Mac user you can launch VLC from your Applications folder.
On first run VLC will ask you to agree to its ‘Privacy and Network Access Policy’. This allows it to identify media files that you're playing to display metadata such as the name of a music album but this can also reveal information to third parties about the files on your computer.
Choose to tick or untick ‘Allow metadata network access’ and then click on ‘Continue’.
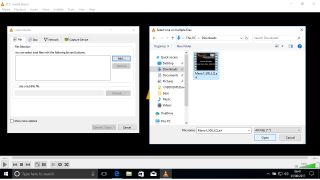
4. Locate original file
Once VLC opens click the ‘Media’ menu at the top left of the screen then on ‘Convert/Save’. This will launch the ‘Open Media’ window. Click on the ‘Add’ button at the top right and find the file you want to convert.
If your file uses subtitles, click on ‘Use a Subtitle file’ then on the ‘Browse’ button on the right-hand side to navigate to the relevant file.
If you only want to convert some of the video click ‘More Options’ and set the time index using the ‘Start Time’ field.
Click on the ‘Convert/Save’ button at the bottom right to proceed.
5. Configure conversion
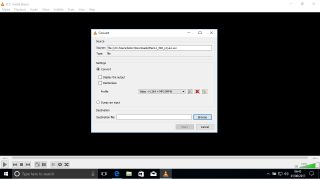
VLC's ‘Convert’ window will now open. There are two radio buttons ‘Convert’ and ‘Dump Raw Input’. Leave the default ‘Convert’ option checked. There are two tick boxes marked ‘Display the Output’ and ‘Deinterlace’.
If you choose ‘Display the Output’, the video will appear in the VLC window as it's being converted. It usually plays at roughly double the actual playing time. This takes much longer than the usual conversion process so you should only choose this if you've already tried to convert the video and had playback issues.
VLC switches off deinterlacing by default but you can enable it here, provided your graphics card is powerful enough.
6. Choose a profile
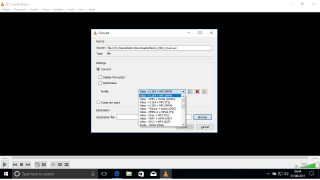
VLC comes with several default profiles for converting videos from one format to another. You can select these from the ‘Profile’ dropdown menu. The first profile offered 'Video – H.264 + MP3 (MP4)' is suitable for converting files you wish to import into iTunes for instance.
If you want to fine tune the profile settings, click the small icon to the right of the drop-down menu. This will allow you to choose the 'encapsulation' method such as MP4 or AVI. Use the ‘Video Codec’ tab to choose specific codecs as well as the bitrate of the converted video and audio.
7. Set destination and convert
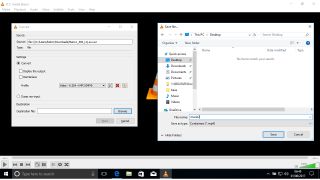
Once you've chosen the profile for the converted video, click on ‘Browse’ next to the ‘Destination file:’ field. This will open your file browser. Navigate to the folder where you wish to save your new video file and then enter a name for it. The file type will be selected automatically according to the profile settings you chose earlier. Click ‘Save’ to continue.
To begin the conversion process itself click the ‘Start’ button.
If you chose to ‘Display Output’ you will see the video clip as the conversion takes place. Otherwise only the playback timer along the bottom of the screen will move.
8. Play your converted file
Once the playback timer has reached the end of the bar, the conversion process is complete.
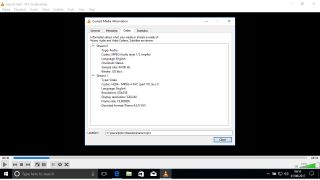
Click the ‘Media’ menu at the top left once again and choose ‘Open File’. Navigate to the file you created earlier under the ‘Destination File’ category. Double click to open the file using VLC Media Player. If the file plays without any issues, click the ‘Tools’ menu then ‘Codec Information’.
This will display information about the video such as the codec and resolution. You can now compare this to the playback requirements for the television or application where you want to use the file.
- Check out our list of the 5 best VLC alternatives
Nate Drake is a tech journalist specializing in cybersecurity and retro tech. He broke out from his cubicle at Apple 6 years ago and now spends his days sipping Earl Grey tea & writing elegant copy.
