How to create a website with Google Sites
Build a beautiful website in no time

If you’re bent on building a website for your business but don’t possess extensive technical expertise nor a budget to hire an expert - Google Sites might seem like one of your best bets.
As the name suggests, Google Sites is Google's website builder tool and it’s easy to use and free to boot. If you’ve ever used a beginner-friendly site builder such as Wix, you should have no problem getting the hang of Google Sites – it doesn’t require much technical know-how, no coding skills, and no experience in website design.
Google Sites started its journey in 2008 and came a long way since then. While the old version of Google’s site builder, called Classic Sites, can still be seen online it’s no longer available for use as it was phased out by Google in 2021 in the name of the newer version.
This new version comes as a part of Google’s cost-free, web-based office suite you’ve surely heard of – it’s Google Docs, and it’s as easy to use as they say. Plus, it puts no limit on the number of sites you can create – that is, as long as you don’t surpass the 15GB storage limit on your Google account.
So, to cut to the chase, let’s find out how you can get your Google site off the ground.
Steps to creating a website with Google Sites
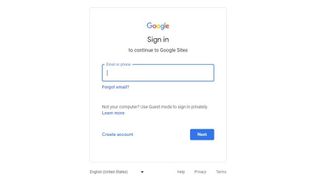
To make use of Google Sites you’ll have to log into your Google account or sign up if you don’t have one already.
To create a new account with Google you’ll be asked to supply your name and e-mail address, but you can also add your phone number and recovery e-mail address so you can recover your account if needed. Of course, you’ll also have to come up with a strong password.
Are you a pro? Subscribe to our newsletter
Sign up to the TechRadar Pro newsletter to get all the top news, opinion, features and guidance your business needs to succeed!
1. Go to the Google Sites homepage
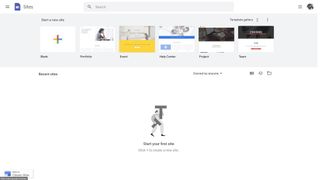
To start this adventure, go to Google Sites and click on the “+” button below the “Start a new site” title. However, before getting down to business feel free to explore templates available in Google's gallery (for personal portfolio, small business sites of several types, help centers, and such).
Also, if you want to find out a bit more about how Google Sites works, you can browse their well-supplied knowledgebase – just go to the main menu and select a “Help” option on the drop-down sidebar menu.
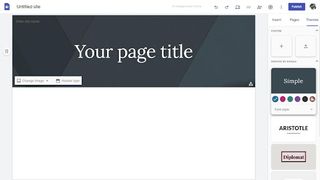
2. Pick out a perfect theme for your site
As soon as you arrive on the site builder’s dashboard you’ll want to choose a theme for your site and you’ll find them at the top of the right menu – just click on the “Themes” button.
While you’ll only find a handful of free themes there, you can adjust the main color and the font to your liking. Plus, if you already have a theme you want to use for your site, you can import it from your Google Drive account.

3. Edit layouts, text, and images
Once you’ve chosen your theme, go and give your site a catchy title – just click on “Enter Site Name” and type in what you have in mind. You’ll also want to title your landing page – there, you can choose the font style and size, and add links if you want.
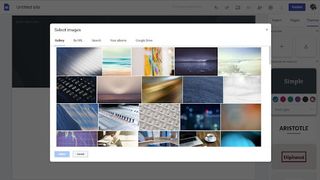
There are multiple site layouts to choose from (several combinations of text and images), and all are easy to add and edit – you can click on them or utilize drag-and-drop functionality to add them to your site.
As for images, you can upload them from your device, from your Google Drive account, or search for them on Google’s browser. In addition to images, you can add YouTube videos, maps, and calendars to your page layout straight away.
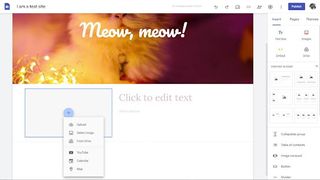
4. Add other elements to your site and adjust them
Now, it’s time to add all the content you’ve wanted to showcase on your site, and you can do that by utilizing the right-down menu of the editor – just scroll down to see everything.
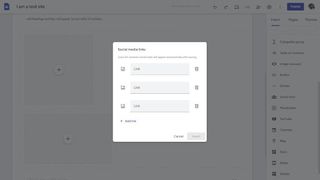
There, you’ll find options to add collapsible menus, tables of contents, image carousels, buttons, dividers, and so on.
Also, if you scroll up a bit you’ll see an option to embed HTML code (JavaScript and CSS are also supported), so if you want to do that just paste the code there, hit the “Next” button, check the preview how your code will look, and hit the “Insert” button to finish the process.

5. Add other pages and sub-pages
To add pages to your site go to the right menu, tap into the “Pages” button, and then hover your mouse over the “+” symbol which will give you a couple of options - adding a new page is one of them. All pages you add will automatically appear on the site navigation menu on the right.
If you click on a page on this list, you’ll be given a couple of choices: to set the page as a homepage, duplicate it, add sub-pages, hide it from the menu, or completely delete it.
6. Integrate your site with other Google apps
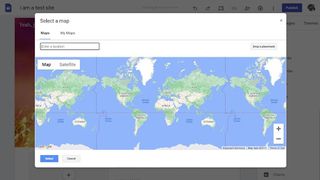
One of the major benefits of using Google Sites to build your site is that it integrates well with other Google apps – such as Google Maps and Google Drive.
To add Google elements to your site, tap into the “Inset” button on the right menu and find whatever you want to include – yes, it’s exactly the same as adding other elements to your site.

7. Preview and publish your site
Once you’re finally happy with your work, find the “Preview” button on the top menu (next to undo/redo buttons) and see how your site will look on different devices – desktops, tablets, and phones.
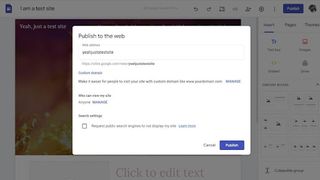
After making the needed adjustments, go back and hit the “Publish” button - the big, blue button in the top right corner - and share your site with the world. However, before that, make sure to adjust the site’s URL, choose who can access it and whether you want search engines to display your site or not.
That’s it, you’ve successfully created a site with Google Sites!
Is Google Sites website free?
Yes, you can use Google Sites for free forever but there are a couple of things you’ll want to consider first.
Firstly, to own a site you’ll need a domain and if you don’t want to use the one assigned to you by Google Sites you’ll have to purchase one – however, with the right domain name registrar a top-level domain (such as .com, .org. or .net) shouldn’t set you back for more than $15 per year.
Meanwhile, while you won’t be charged for adding features or support like with other site builders, once your site surpasses the specified storage limit (it’s 100MB per site), you’ll have to pay for additional storage space.
Also, while we’re at limitations, the maximum attachment size is 20MB, which isn’t all that much.
What is Google Sites best for?
Google Sites can work wonders as a collaboration solution for teams or as a presentation tool, but it lacks functionality and features that would make it a fully-functional site builder.
For instance, it offers no e-commerce tools so you can’t create an online store with it – although you might create a site that looks like it. Also, it can’t help you make a professional-looking personal blog since it offers no blogging tools.
However, if you’re looking for a safe space where you can practice your web design skills, Google Sites can be of help.
Plus, it can serve as an online portfolio where you can showcase all your spectacular skills.
Pros and cons of using Google Sites to build a website
While we’ve covered most of the pros of using Google Sites already, let’s point out the principal ones – it’s completely cost-free, it’s integrated with other Google products, it’s very secure, and it’s simple to understand and use.
On the downside, Google Sites doesn’t possess a full set of functionalities and features a professional site builder should possess such as a high level of customizability and tons of templates, advanced marketing tools, support for third-party integrations, essential e-commerce tools, or proper SEO tools. Also, there are no dedicated customer support channels.
Even non-techies with very limited time can understand and utilize Google Sites to create professional-looking (yet not professional) sites without a hitch.
Google’s site builder is an impressively intuitive tool and it can help businesses build simple intranets and boost engagement, education, and collaboration.
However, its strong dependence on Google’s own products and overall simplicity makes it less than ideal for public sites.
Mirza Bahic is a freelance tech journalist and blogger from Sarajevo, Bosnia and Herzegovina. For the past four years, Mirza has been ghostwriting for a number of tech start-ups from various industries, including cloud, retail and B2B technology.


