How to back up your Android phone
A simple (albeit tasteless) recipe for data redundancy
In the words of singer-songwriter Joni Mitchell, you don’t know what you’ve got till it’s gone.
Take your smartphone for example. You probably couldn’t accurately tell anyone exactly what you’ve got on there, what with the countless selfies, memes, WhatsApp convos, emails, contacts and more, but if your phone inexplicably vanished tomorrow, you’d be crushed.
For most of us, our phones are an important archive. Selfies from your first date. A video of little Timmy’s first steps. The speed dial number to your local Dominos pizza. All precious digital objects that we’d mourn for if lost.
Thankfully you have the power to protect all of your vital information with just a few clicks, so if the worst happens and your phone is lost, stolen, or teleported to another dimension, your important information, memories, and Candy Crush high scores, will be safe.
This particular guide will show you how to back up your Android phone, so that you can restore anything that’s lost, or port things over to a new handset so that business can carry on as usual. If you’re a card-carrying Apple fan, then head on over to our iPhone back up guide instead. It’s not that you’re not welcome here, but you’re hardly going to enjoy yourself.
As for our Android readers - first, check out our best Android phone guide - then grab a coffee and buckle up. While none of the below is hard, it’s not quite as easy as the iPhone’s one stop shop iCloud backup solution. Rather annoyingly, there are a few things on Android that need to be backed up using different methods and/or apps, but it’s honestly nothing you can’t handle. We believe in you.
Google’s own services have all of your backup needs covered, so grab your favorite data backup outfit, and let’s dive in.
Get daily insight, inspiration and deals in your inbox
Sign up for breaking news, reviews, opinion, top tech deals, and more.
How to back up an Android phone’s photos to Google Photos
Apart from our contacts, the photos stored on our phones are probably the most precious asset we own. Thankfully backing them up is an absolute breeze, thanks to the power of Google Photos. If you haven’t already got it installed, you can grab it from the Play Store.
Once that’s done, crack on with the steps below, and you’ll sleep easy knowing that your shots are automatically backed up to the cloud, every single day.
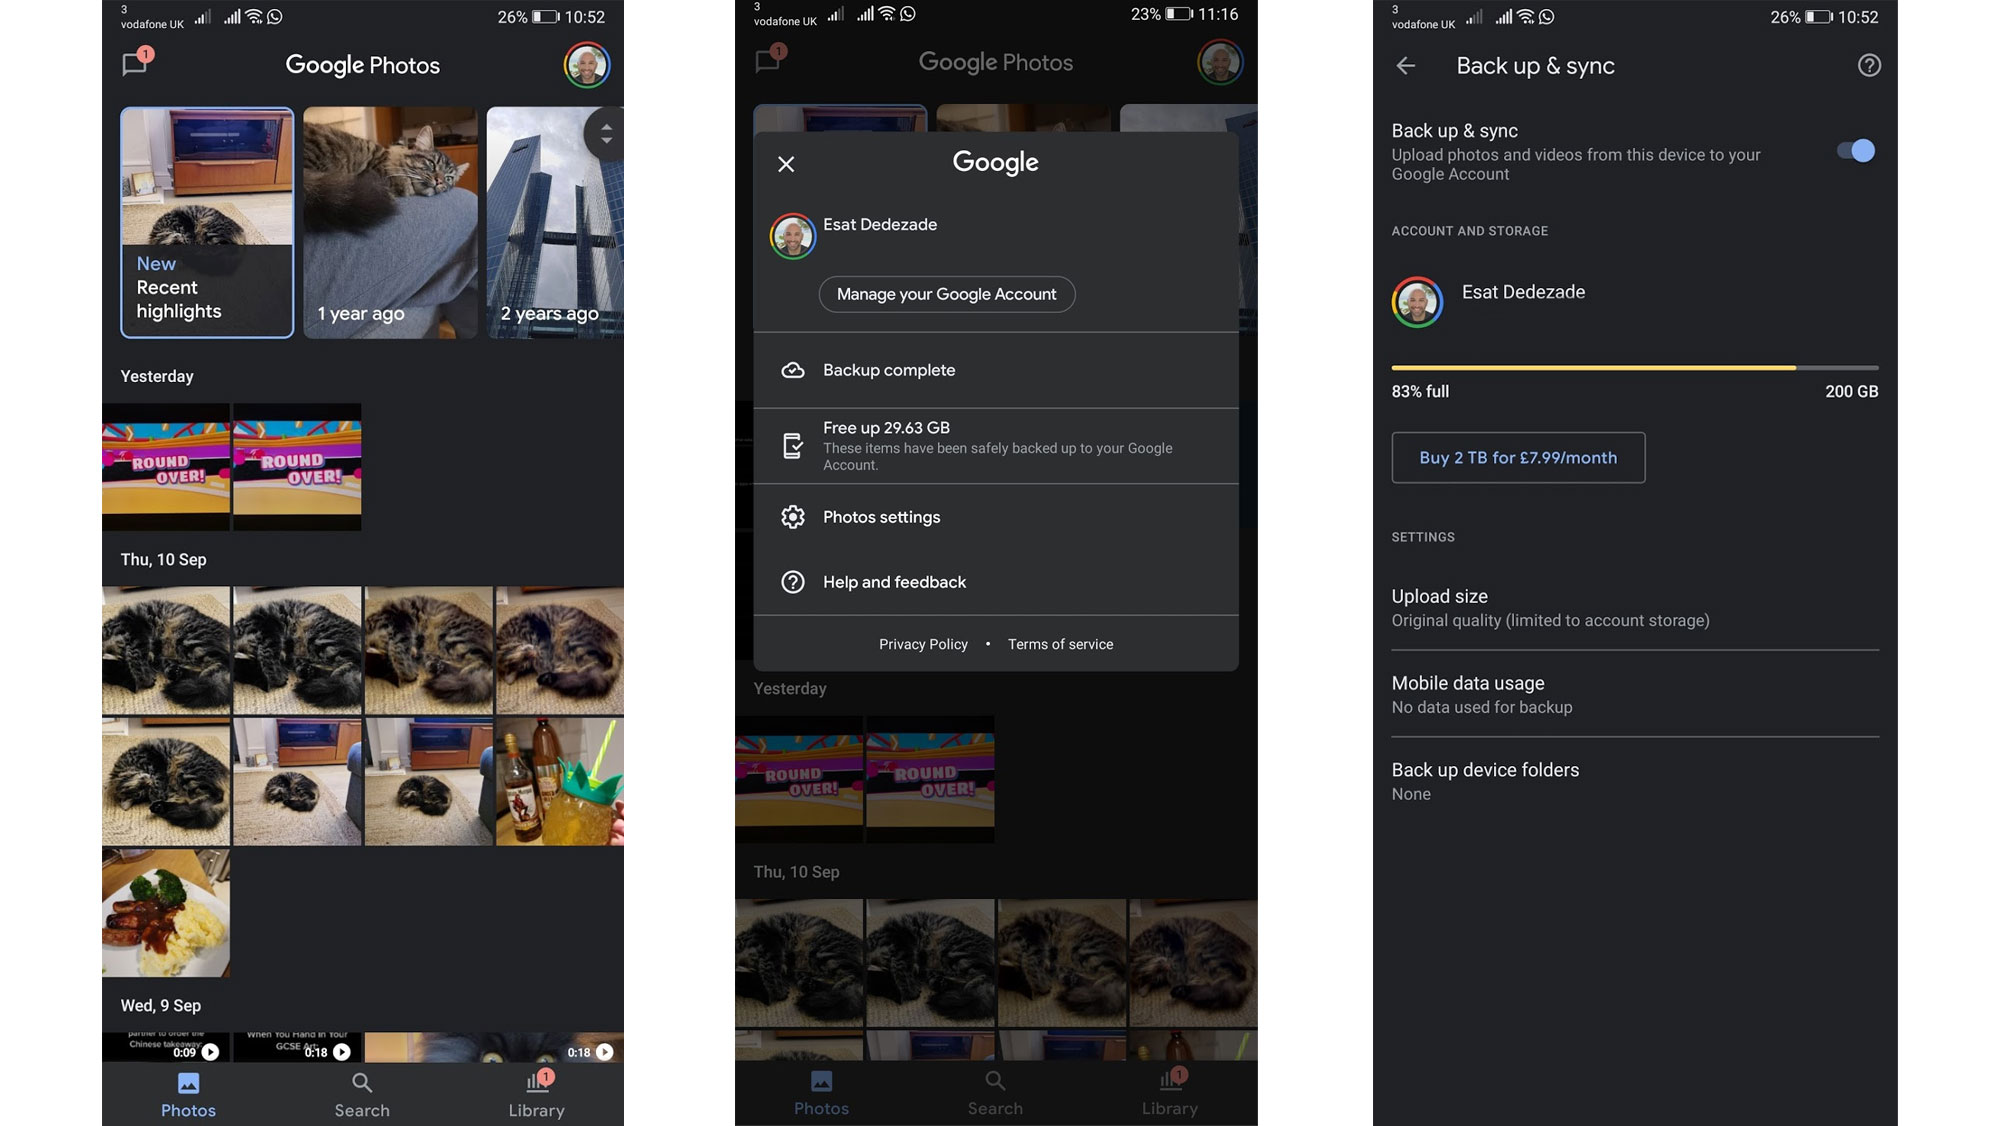
- Open the Google Photos app
- Tap your profile picture on the top right to open the menu, then select ‘Photos Settings’
- Select ‘Backup & sync’
- Turn it on if it’s not already
- Tap on ‘Upload size’ and check it’s set to what you want, High quality is the one we’d go for, as you can upload unlimited photos at this quality setting. If you want to upload photos in their original quality, you’ll soon run out of space, and will have to pay for extra storage, but that’s something you’re welcome to do. Most people will have no qualms with the high quality option as the photos are still more than clear enough.
- Make sure the option for ‘Mobile data usage’ is set to off, so that photos are backed up when you’re connected to Wi-Fi only, otherwise you’ll rinse your data.
- The last option on the page is ‘Back up device folders’, which lets you manually select other folders on your phone apart from your camera roll, that you’d like to back up. WhatsApp images are a common example of other folders people often like to back up
How to back up an Android phone’s contacts to Google
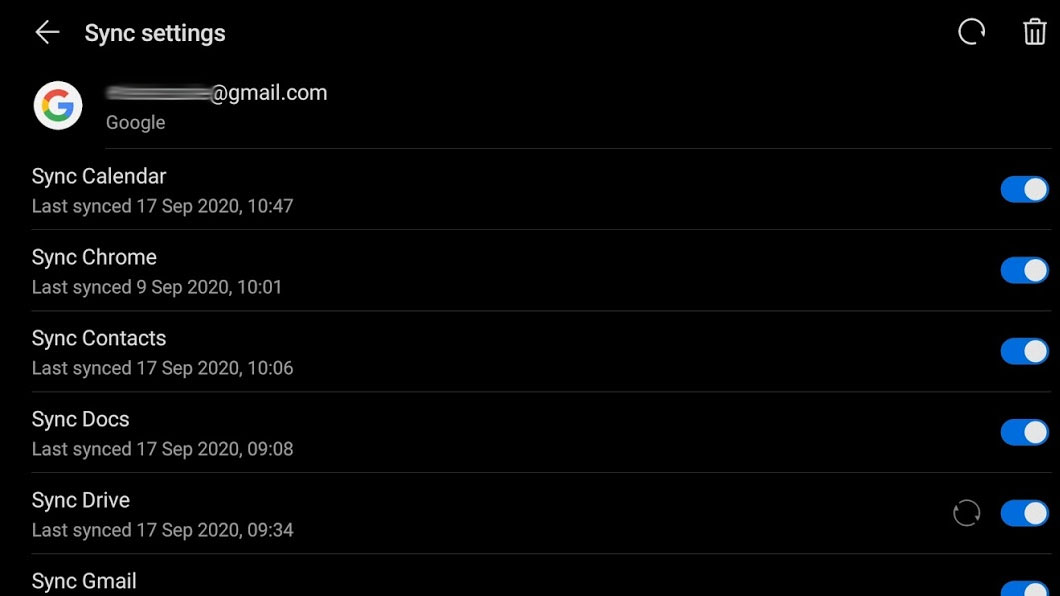
Your contacts are precious. Thankfully, backing them up is incredibly easy. This method will ensure that they’re regularly added to your Google account, including any new ones you add in the future.
- Go to Settings on your phone
- Select ‘Accounts’ (or ‘Users & accounts’)
- Select your Gmail or Google account
- Make sure contacts is turned on in the list, so that it’s automatically syncing
- Other things in the list include Docs, Gmail, Calendar and more. Make sure these are all turned on too if you want them backed up as well
How to back up WhatsApp conversations and media to Google Drive
WhatsApp has become the default messaging app for millions of Android users, and losing all of your conversations would be quite a blow, especially if they also include sentimental photos (or particularly dank memes).
Thankfully, there’s a robust, easy way to have your entire WhatsApp contents backed up every single night automatically, so you can rest easy in the knowledge that nothing will ever be lost.
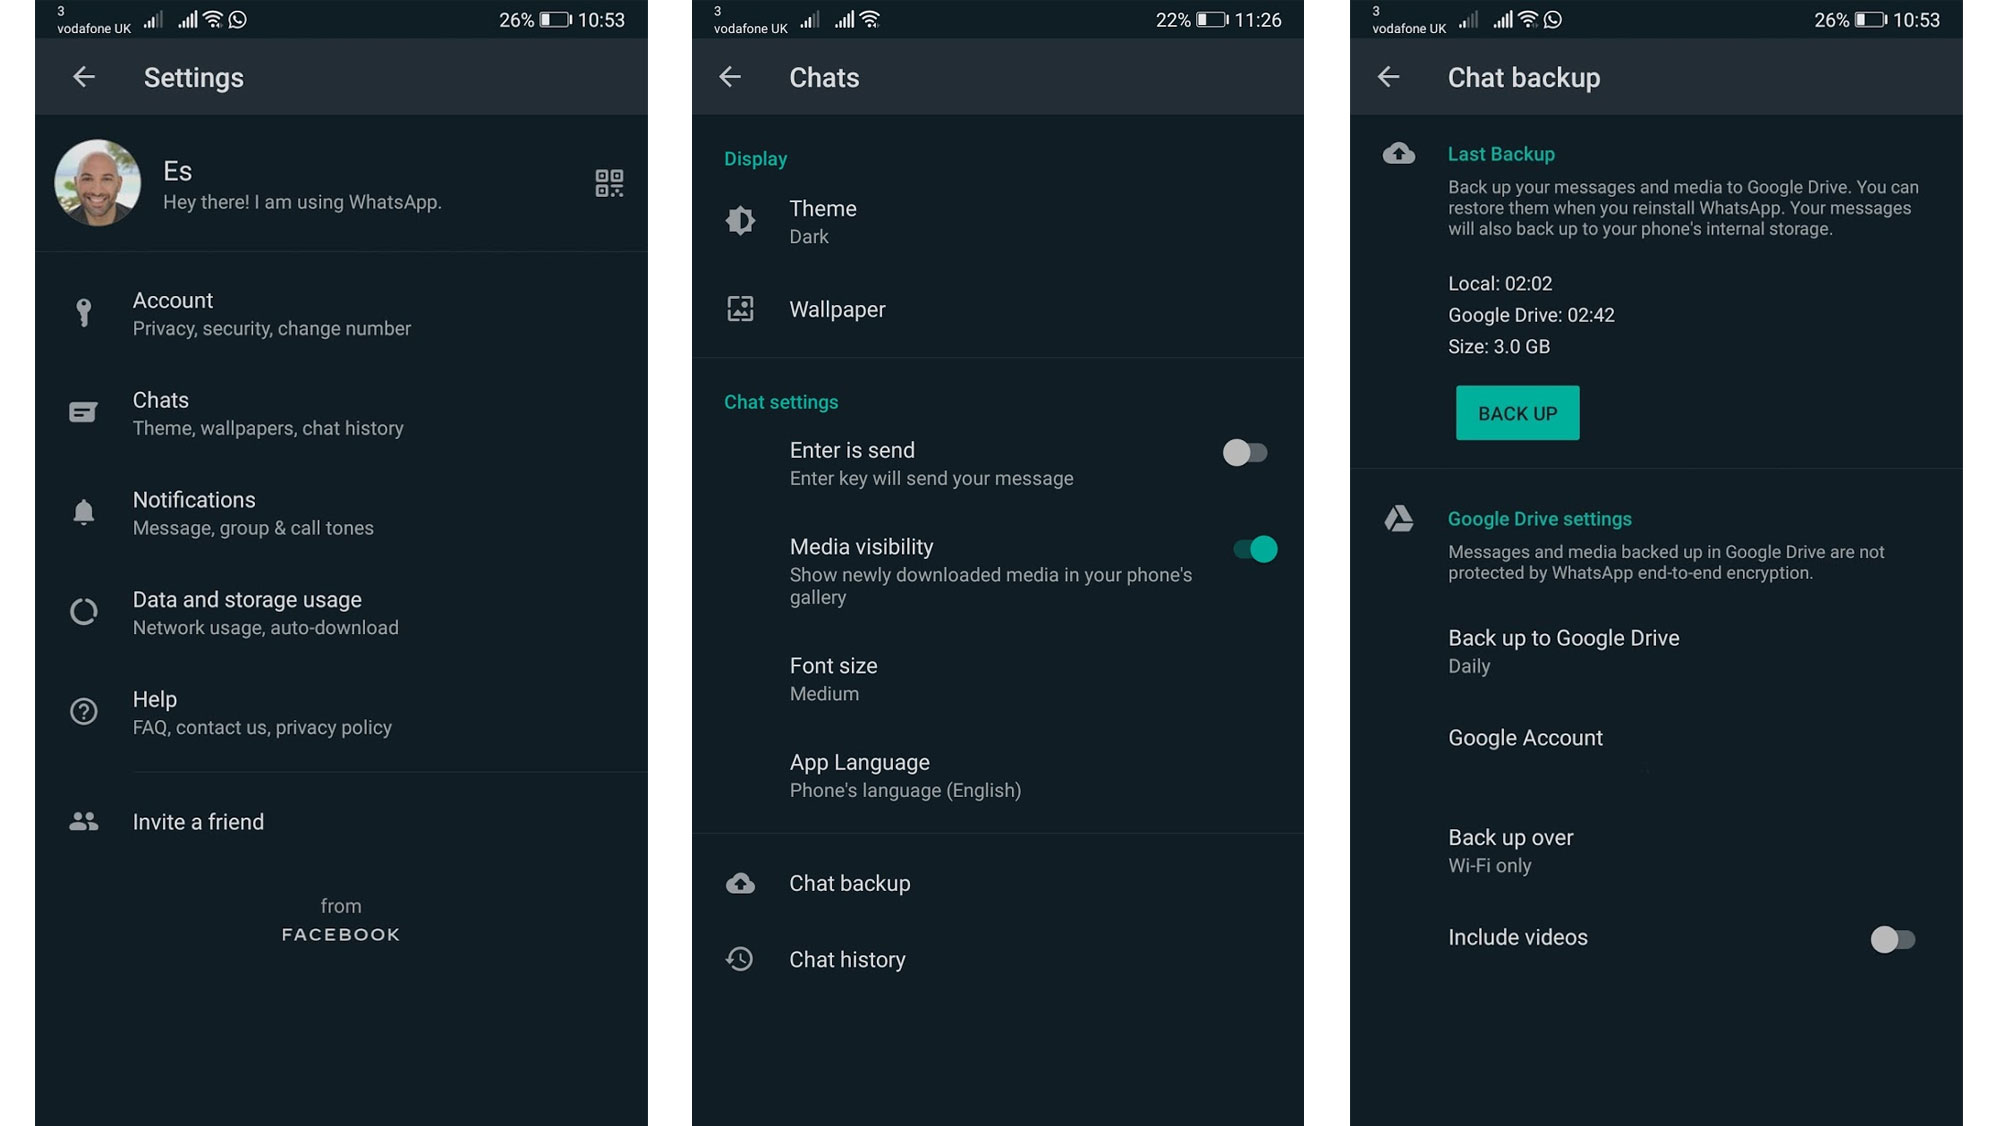
- Open WhatsApp
- Tap the three dots on the top right and choose ‘Settings’
- Tap ‘Chats’
- Tap ‘Chat backup’
- Set ‘Back up to Google Drive’ to Daily.
- Ensure that ‘Back up over’ is set to Wi-Fi only, to save you burning through your data
- If you also want your videos backed up in addition to your chat conversations, groups and photos, you can select ‘Include videos’ at the bottom
How to back up all other settings and apps to Google
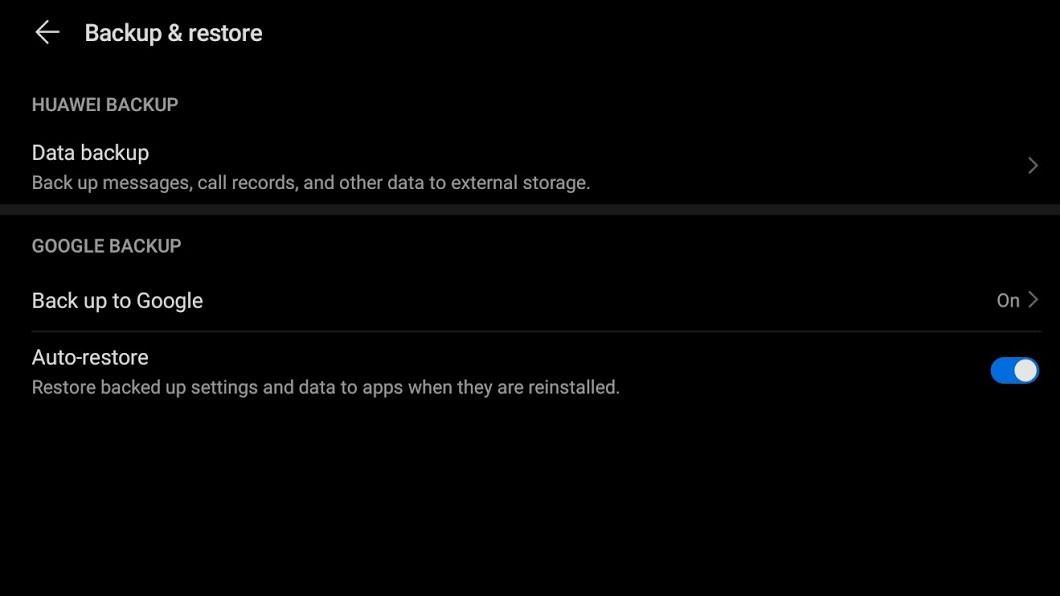
Another handy feature built into Android is the ability to back up device data such as Wi-Fi passwords, call history and app data (such as settings and files stored by apps).
This is particularly handy for when you’re setting up a new phone, as you can choose to restore the new handset based on this backup, essentially turning it into your old phone, complete with all the apps you previously installed.
- Open your phone’s Settings
- Scroll down and select ‘System & updates’
- Tap on ‘Back up to Google’
- Ensure the ‘Back up to Google’ switch is turned on if it isn’t already
How to back up your Android phone using third-party apps
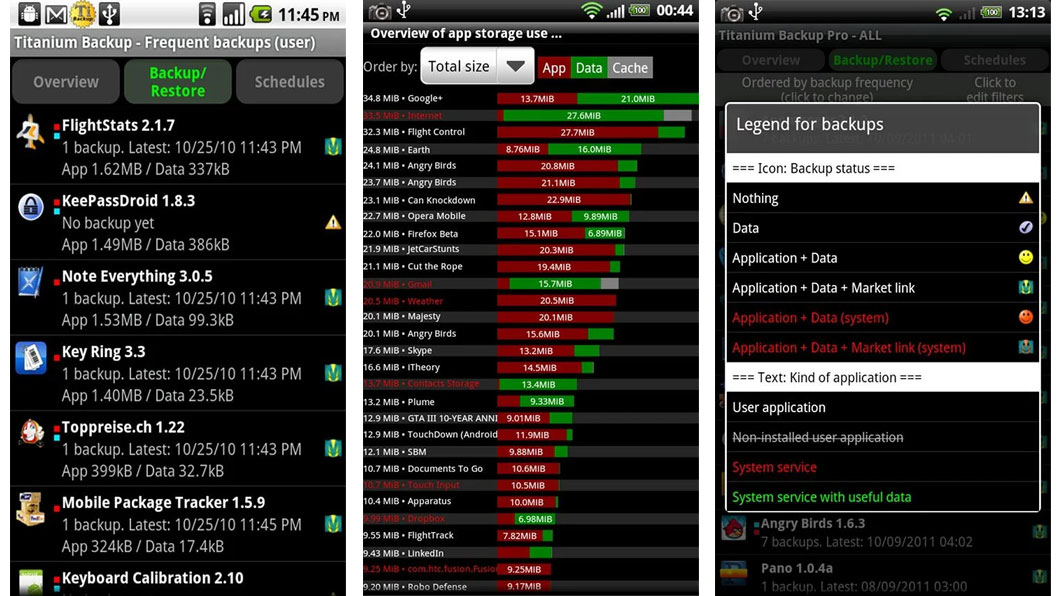
There are a few third-party apps available that also provide extra options in addition to those we’ve already covered. At the time of writing however, we feel that the options covered above - which are all free - will be more than enough to meet the needs of most people.
If you’re an Android enthusiast though and like to tinker around, then Titanium Backup is the absolute king of third-party Android backup apps. In essence, it completely clones your entire phone, from every single app, to each and every setting, and allows you to move it all over to another phone, saving you the hassle of backing portions up in various different steps.
The only downside (apart from its incredibly outdated design)? You need to have a rooted Android device. Instructions for how to do this are beyond the scope of this article, but if you are rocking a rooted Android phone already, then you’ll have no problems using Titanium Backup to clone your phone.
Esat Dedezade is a freelance writer, journalist, and content creator. After six years as a staff writer and deputy features editor at Stuff, he left to pursue a new challenge at Microsoft, where he was the editor of their European news centre for three years.
Esat experience enabled him to write about and review consumer tech and lifestyle, in addition to corporate/agency copywriting, and thought leadership pieces for large companies.
