How to install CyanogenMod 13 on your Android phone
Android for power users

CyanogenMod 13
Update: CyanogenMod will no longer be updated. While you can still download and install previous versions of CyanogenMod, you're better off using its successor, Lineage OS, which is built to continue CyanogenMod's legacy. Check out our guide on how to download and install Lineage OS for more information.
CyanogenMod is a smartphone OS based on Android but taking a slightly different direction to the one Google goes in. First and foremost it gives you even more flexibility and customization options for your handset, as well as reducing app bloat.
It can basically be thought of as Android for the power user and it's worth stating at the outset that this will probably void your phone's warranty. Messing around with CyanogenMod is fun but can cause problems if you don't know what you're doing.
That said, you don't have to be a coder or Android expert to use it though - the installation process shouldn't take too long a lot of major handsets.
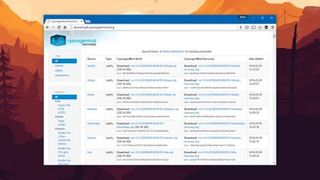
1. Choose your smartphone
Cyanogen has tried to make the installation process for CyanogenMod 13 as simple as possible, but it's easier for some devices than others - check the full list of supported devices to see what's available right now. It can take some time for newer, high-end handsets to be supported.
There are some unofficial ports of CyanogenMod too but if your device isn't on either list you might be out of luck for now (try a quick web search to check). We're using a Nexus 6 for the purposes of this guide but if you're using a phone or tablet that's on the official list then the process should be very similar.
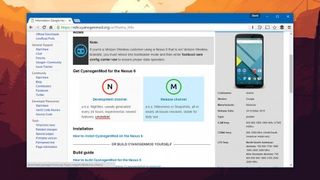
2. Browse for your make and model
Head to the CyanogenMod Wiki for up-to-date information about your chosen handset and whether or not you're going to be able to get the software running on it. Follow the 'Devices' link to begin with, then find the phone you're using. An OS download and instructions are both provided.
You can opt for the cutting-edge, unstable development channel or stick with the safety of the release channel (which we'd recommend). Choose the latest release from the list that appears, which will come in the form of a big zip file - save this to your hard drive in a folder of your choosing.
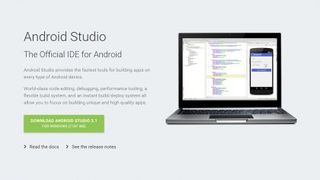
3. Install Android Studio
Now you're going to pretend to be an Android developer by installing Android Studio on your computer - it's the fastest way to get hold of two tools we're going to need for this task, namely fastboot and the Android Debug Bridge (adb). Download the version for your OS and install it on your laptop or desktop computer.
Fortunately, you don't actually have to learn to make an Android app: we just need Android Studio to install the CyanogenMod 13 zip we downloaded earlier. The next step is to unlock or root your phone, which (as we mentioned earlier) is going to void your warranty. It's the point of no return.
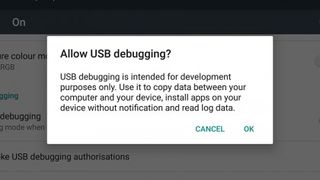
4. Enable USB debugging
From the Settings app on your Android device, choose 'About phone' and then tap the Build number seven times. Go back to Settings and you should see a new 'Developer options' entry - go into this menu and turn the USB debugging slider to on, which lets you get at your phone's inner workings from adb and fastboot.
Some phones with have an OEM unlock option on the Developer options page, which you should also enable. Now you're ready to connect phone to computer: use the USB cable that came with your device, and make sure there's a USB debugging message on the screen of your phone and tablet.
5. Unlock your device
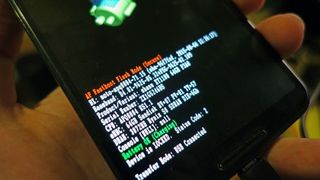
Next, you need to unlock your device by running the fastboot and adb tools we installed with Android Studio. On Windows, head to C:\ Users\ \ AppData\ Local\ Android\ sdk1\ platform-tools in File Explorer, right-click inside the window, then choose Open command window here.
Type "adb reboot bootloader" and hit Enter to put your phone into a special access mode, then type "fastboot oem unlock" (then Enter) to unlock the handset ready for CyanogenMod 13. When the device reboots, you need to enable USB debugging again, as we did in the previous step.
6. Install TWRP
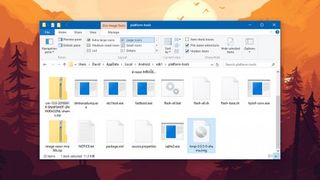
Next we need to install a tool to enable us to install CyanogenMod 13, and TWRP is recommended for the job - again, find the right download for your device and download the standalone file (it will end with .img). Move it to the same folder as the adb and fastboot utilities (see previous step).
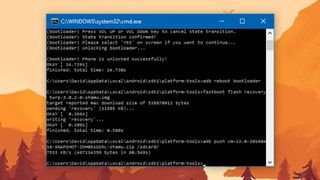
Back to the bootloader again: type in "adb reboot bootloader" then press Enter. This time type "fastboot flash recovery recovery_image.img", inserting the name of the TWRP image you just downloaded. The custom recovery is transferred over, then use the volume buttons to select Recovery Mode. Hit the Power button to confirm.
7. Install CyanogenMod 13
After all that, you're finally ready to install CyanogenMod 13 on your device... phew. As before, adb is our friend: find the CyanogenMod download we picked up back in step 2 (from this list) in the same folder as adb and use "adb push filename.zip /sdcard/" to move it over to your phone or tablet.
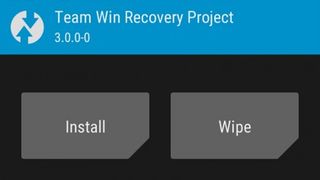
The transfer may take a few moments to complete. When it's finished, tap on the 'Install' button inside the TWRP app and select the zip file you just moved over: you can then swipe along the bottom of the screen and the installation process begins. Tap Reboot System and you should see CyanogenMod 13.
8. Troubleshoot CyanogenMod installation problems
For the sake of brevity we've breezed through those steps very quickly and focused exclusively on Windows (and not said much about adb and fastboot) - if you find yourself lost, the instructions for your chosen device on the CyanogenMod Wiki should be enough to get you back on the right track again.
Don't be disheartened if you run into problems, because this can be quite a fiddly process. Often you'll just have missed out one step or the right process for your device will just be slightly different - a quick web search for CyanogenMod and your phone make and model will often turn up some potential troubleshooting tips.
9. Get started with CyanogenMod 13
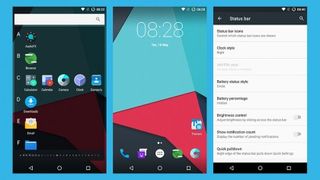
At first glance, CyanogenMod might seem a lot like Android, but there's plenty to explore here: you can tweak the look of the status bar, access a fully fledged file manager straight from the off, and configure multiple settings profiles for different situations (in the car, at work and at home for example).
You just get the basic apps to begin with when you install CyanogenMod 13, and for a lot of people, that's the way it should be. If you want to be able to install additional themes and the apps that you're used to on top of it, then we need to go back to adb and TWRP to install a Google Apps component.
10. Install Google Apps
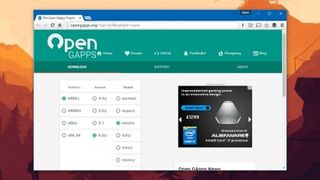
First, repeat steps 4 and 5 to enable adb again, head to the Google Apps page and follow the links to find the right download for your particular device, then move it into the same folder where adb and fastboot are residing, just like you did before. Reconnect your phone and computer via USB if you need to.
Get the command prompt up again in the relevant folder, then use "adb push filename.zip /sdcard/" to transfer the Google Apps file. Use "adb reboot recovery" to enter recovery mode, then launch TWRP, and finally choose Install and then pick out the zip file. When prompted, wipe the cache and reboot your device.
You can now enjoy all of the standard Android apps on your CyanogenMod 13 device, though it's worth noting that this isn't officially supported by CyanogenMod itself. If you need more assistance or want to explore some more, then the CyanogenMod Wiki and CyanogenMod Forums are great places to start.

Dave is a freelance tech journalist who has been writing about gadgets, apps and the web for more than two decades. Based out of Stockport, England, on TechRadar you'll find him covering news, features and reviews, particularly for phones, tablets and wearables. Working to ensure our breaking news coverage is the best in the business over weekends, David also has bylines at Gizmodo, T3, PopSci and a few other places besides, as well as being many years editing the likes of PC Explorer and The Hardware Handbook.
Most Popular


