50 really useful OS X timesaving tips
Quicker ways to find files, launch apps, and more

Mac OS X is the best-looking operating system around, but it's also one of the most capable. Underneath all the eye candy is a serious amount of functionality and although you may not have realised it, there are many different ways to carry out everyday tasks using your Mac.
The Finder and the other tools and apps that run on OS X are a treasure trove of shortcuts, tricks and techniques that can help you do more and do it faster.
As the OS has changed it's added features from iOS and also taken on many more online features with the inclusion of iCloud in 10.7 Lion. As is the Apple way, these features tend to fit seamlessly together and it's often possible to sync, share and send files and information between lots of different devices with ease - if you know how.
Some of these tips may be shortcuts that will save you time. Others could be things you may not have even known were possible, like compressing an iMovie project for lots of different devices with a single click or sending iPhoto albums directly to Facebook. With more and more people using their Macs both at home and at work, there's never been a better time to unlock the true potential of your system with these insider tips…
1. Send items directly from the Finder
If you are using OS X 10.7 or 10.8 you will be able to open a Finder window and then select one or more items in a folder or on your Desktop, then use the Share button from the window's title bar to send those items.
There are three options available. Email opens a new message in Mail with the files included as attachments. Messages opens a new iMessage with the items attached, and lets you specify one or more recipients. AirDrop shows you the shared folders of nearby users who have AirDrop enabled, and lets you fire the files to them. Obviously Mail and Messages work better with smaller files, and AirDrop is capable of dealing with larger ones.
2. Learn more about your wireless connection
If you hold down the Option key while clicking on your Airport Wi-Fi icon in the menu bar, you can make OS X show you more detailed information about your current connection. Above the list of available networks it will display the wireless mode, wireless channel in use, wireless security type and transmit rate, all of which can help to troubleshoot problems with your connection.
Get daily insight, inspiration and deals in your inbox
Sign up for breaking news, reviews, opinion, top tech deals, and more.
3. Change your default Finder view
When you open a new Finder window, OS X 10.8 defaults to showing you 'all your files'. To change this, go to Finder > Preferences from the menu bar and locate the option 'New Finder windows show'. From its drop-down menu you can choose your boot drive, Home directory, Desktop, Documents or a custom folder, all of which offer a clearer idea of what you're looking at.
4. Reveal your Library folder
OS X 10.7 and 10.8 hide your User > Library folder by default but it's sometimes necessary to access it for troubleshooting or other reasons, since important items live in it.
In the Finder, choose Go > Go to Folder. From the resulting window, enter the folder's path, which will be /Users/username/Library. Once the folder appears you can drag it to your Favourites list to the left of the Finder window and it will then be permanently accessible.
5. Take advantage of Quick Look

Quick Look can preview multiple documents at once. Select a number of items in the Finder then hit the space bar. Pressing the left and right arrow keys on the keyboard will now cycle through them, and pressing the Grid button in the Quick Look window will display all items in a single window.
It's possible to open a document in its associated application by using the Open In button at the top right of the Quick Look window.
6. Use Smart Folders effectively

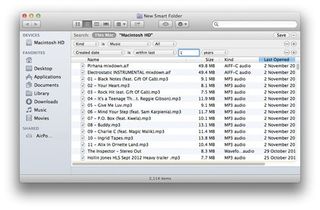
Often overlooked, Smart Folders can be really useful. Select File > New Smart Folder in the Finder and then add criteria to the folder as you would if performing a search. For example, 'kind is image' and 'last opened is in the last one month'. Then click Save. This folder will always show files that match those criteria, automatically updating itself so it stays current.
Another great timesaver is to select several items in the Finder then choose File > New Folder With Selection, which places the items into a new folder automatically.
7. Collect items together in an archive
Multiple-select items in the Finder then right click on them and choose Compress Items. This creates a smaller-sized zip archive that is much easier to email, send by iMessage or upload to a file sharing service like Dropbox than lots of individual files. If you need to add password protection to the archive, use a third-party compression app instead.
8. Customise your desktop & screen saver

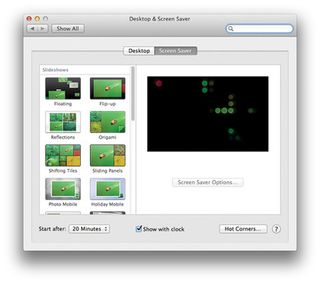
Go into System Preferences and locate the Desktop & Screen Saver section. Under Desktop, you can choose from the included images, or select one from your iPhoto library or a custom folder. You can even specify times changes if you like, to keep things interesting.
In the Screen Saver tab, you can assign hot corners to start your screensaver as well as showing a clock whenever it's running. In the Security & Privacy tab of System Preferences you can choose to require a password to stop the screen saver, which is still the simplest way of securing an unattended Mac - extremely useful in an office environment or one in which kids are apt to fiddle.


