Breathe new life into your Windows XP PC
Give your XP PC a refresh
There a number of ways to squeeze out extra system performance in Windows XP, especially for older systems. In this section we'll cover a cluster of handy Registry and hardware control tweaks.
27. Unload application DLL files on closure
It's possible to configure Windows XP systems with large amounts of memory such that the core operating system files are never paged to virtual memory, thus improving responsiveness and performance.
Similarly, it's also possible to force Windows XP to automatically unload DLL files from memory when an application is closed. To do so, open Registry Editor, browse to HKEY_LOCAL_MACHINE\SOFTWARE\Microsoft\Windows\CurrentVersion\Explorer and create a sub-key named AlwaysUnloadDLL. Double-click the (Default) value and change it to '1'.
28. Keep the Windows XP OS in RAM
This tweak is relatively easy to apply. Open the Registry Editor and browse to HKEY_LOCAL_MACHINE\SYSTEM\CurrentControlSet\Control\SessionManager\Memory Management. Change the value of the DisablePagingExecutive DWORD value from a '0' to a '1', and you're off to the races.
This will limit the kernel files to physical RAM, which means you should only consider applying this tweak on systems with more than 256MB of RAM.
Are you a pro? Subscribe to our newsletter
Sign up to the TechRadar Pro newsletter to get all the top news, opinion, features and guidance your business needs to succeed!
29. Disable unnecessary services
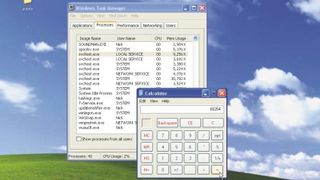
Reclaim memory and other resources by streamlining which services run on your PC. Open Task Manager (Use shortcut [Ctrl]+[Shift]+[Escape]) on the 'Processes' tab.
Click the 'Image Name column' header once to sort processes by name, then find all the svchost.exe entries. Make a note of their size in KB. Next, you'll need to open the Services console. Click 'Start > Run', and type 'services.mmc'. A list of all currently installed services is displayed in alphabetical order, along with their statuses, telling you if they are running or not.
Double-click a service and identify its file from the 'Path to executable' box. Search for this file name in your favoured search engine to find out more about it.
Various services rely on other services to function, so you need to verify your service isn't required by another one you want to use. Switch to the 'Dependencies' tab to check for dependants.
Once you've verified that you don't need a service, change it to Manual by double-clicking its entry and changing its Startup type. Don't disable it unless the service could be a security risk.
After disabling the unnecessary services, restart Windows XP. Check the memory consumption of svchost.exe in Task Manager again - use the Commit Charge figure to help determine how much memory you've saved.
30. Reduce hanging time
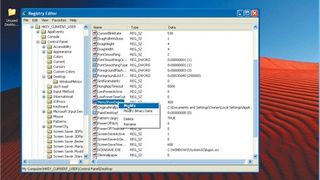
By default, Windows waits for five seconds to allow time for any hung applications to be closed properly as you shut down your computer. You can change this hanging time with a registry edit.
Browse to HKEY_CURRENT_USER\Control Panel\Desktop and select the string entry called 'HungApp Timeout'. If you're using Vista, you'll need to create this entry. Right-click this and choose 'Modify'.
The number is in milliseconds, so the default of 5,000 is a wait of five seconds. Simply choose a lower number to shorten the wait time.
31. Improve performance by configuring custom hardware profiles
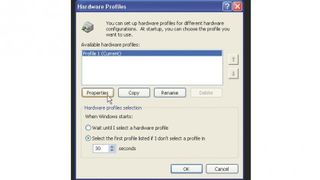
Windows XP has a default hardware profile that loads drivers for all your installed hardware. If you have an older PC there will be times where you won't want all hardware to be functioning, for instance when watching a DVD. To avoid choppy playback as a result of resources being consumed by loaded drivers, applications and services, here's how to set up a custom hardware profile.
Open the System applet through the Control Panel. The Hardware tab gives access to the Device Manager, as well as driver signing options and hardware profiles.
Click the 'Hardware Profiles' button to open the Hardware Profiles window. You can view available profiles and configure how hardware profiles will be displayed during the boot process.
With 'Profile 1 (Current)' selected, click 'Properties' to configure basic settings, such as specifying whether the system is a portable computer. Then click 'OK'.
Click 'Copy'. In the Copy Profile window, give the new profile a descriptive name, such as 'Basic', and click 'OK' to create a second, identical profile you can configure with different settings.
Click OK to close the applet. Reboot Windows XP. From Hardware Profiles, select the new profile, then log on. Open the System applet, return to the 'Hardware' tab, click 'Device Manager'.
Expand a device type such as 'Network Adapters', then right-click the device and choose Disable or Enable - if disabling, click 'Yes'. Disabling devices frees up resources for this profile's specific job.
Current page: Windows XP performance tweaks
Prev Page User control tips for Windows XP Next Page Remote access features in Windows XPChris Thornett is the Technology Content Manager at onebite, editor, writer and freelance tech journalist covering Linux and open source. Former editor of Linux User and Developer magazine.

