How to digitise your old movies
Follow this guide to learn how to digitise your analogue VHS tapes
How to digitise your old movies
If you're over the age of thirty, then there's a pretty good chance you have a stack of VHS tapes lying around your home somewhere, collections of home videos and recorded TV shows so obscure that they haven't turned up on YouTube or BitTorrent.
You come across them every year during your spring clean, and wonder if it's too late to convert them to a format that you actually still use. The answer to that question is no, it's not too late but it's getting there. It's probably a good idea to get it done now, before you no longer can.
So that's what this is: a quick guide to converting your old analogue tapes to digital. We're going to focus on VHS primarily, but it also applies to VHS-C and 8mm (Video8/Hi8) tapes as well.
Image: Rob Pearce Flickr
Quick and dirty method
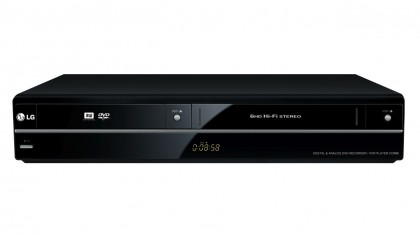
If you try shopping for a new stand-alone VHS player today, you won't find one. What you'll find instead is VHS/DVD combos. One of the features of most of these products is the ability to dub your VHS tapes to DVD, which makes them a very easy tool for converting your tapes.
Quick and dirty method: The process
1. Hook up the player to your television set (well technically this isn't necessary, but it does make things easier!).
2. Place the VHS tape into the player and a blank DVD-R disc into the DVD tray.
3. Select a recording format in the player's options. Most combos have options with respect to the quality/recording length trade off (i.e. high quality/short record time or low quality/long record time). DVD-Rs are pretty cheap, so you should probably go with higher quality – especially since VHS recordings are 'noisy' and tend to require a lot of data to capture.
4. Press play on the VHS tape. When it starts, press the dubbing button on the remote. The recording will happen in real time, so you'll just have to let it play. If the DVD runs out of space, you may have to stop the VHS playback and insert another, then start dubbing again.
5. When it's done, you'll have to finalise the DVD. Don't just eject it. That usually requires going into the setup menu and finding the edit disc/finalise disc option. This will turn it into something that can be played in any DVD player. Then you can eject it.
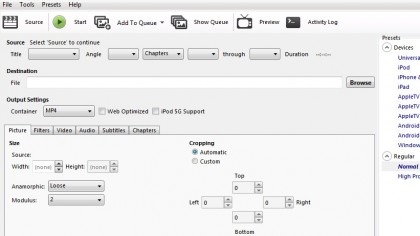
6. If you'd like to copy the video to your PC for backup or editing in an app like VirtualDub, Windows DVD Maker or iMovie, you'll need to use a DVD ripper. We recommend Handbrake, a free app that can grab the movie off the disc and turn it into a common format like MP4.
Now we get to the 'dirty' part of this equation. All but the most expensive 'combo' players don't have great image-correction tools. They won't remove image distortion or chroma shifting.
Unless the quality of your VHS tapes is absolutely top notch, you're going to get at best a mediocre-looking recording on DVD. You might be able to rip them to PC and run some filters on them (see step 3 below), but nothing beats a good source.
If you want to make something that's a bit higher quality we'd recommend the following steps.
Setting up your source
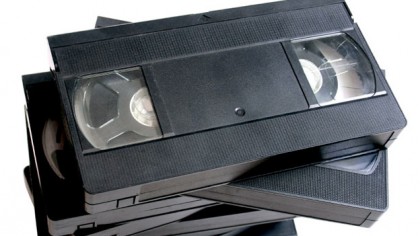
More than any other step, this will affect the quality of your recordings. And we're not just talking about the quality of the tapes. VHS players are certainly not all the same, and a better-quality model will produce a high-quality output.
If you're set on dragging your own old VHS player out of mothballs and putting it to this task, there are some things you should do first:
1. Clean it. VHS head cleaners and cleaning fluid are still available from eBay and other sources, and there are good guides on YouTube for opening machines up and cleaning them.
2. Test it. Not with a VHS tape you actually care about. Play a tape for a good stretch and fast forward and rewind it to the ends to see if it's more inclined to eat tapes than play them.
3. Connect it to the capture device using the best available connection type. Essentially HDMI (which is available in new VHS players, but non-existent in old ones) is better than component (YPbPr), which is better than a composite cable or a coaxial loop-through. The latter also requires a TV tuner in the capture device to work.
If you're willing to buy or rent a 'new' VHS player, however, then there are some models that come highly recommended. The 'new' in this case, means 'new to you', not actually new out of the factory. The best consumer VHS players aren't made anymore.
High-end S-VHS players from JVC and Panasonic are generally considered the best options. Not because of S-VHS (which almost nobody used), but because they have an inbuilt feature called a time base corrector (TBC). TBCs were used in professional environments like television studios for smooth switching between sources, but they also have important image-correction capabilities, fixing distortion and in some cases cleaning up noise and irregularities.
As an alternative to a player with an inbuilt TBC, you can get stand-alone TBCs that sit between the player and capture device. They're pretty expensive, however, and you're better off renting than buying if you want to go this route.
Capturing your source
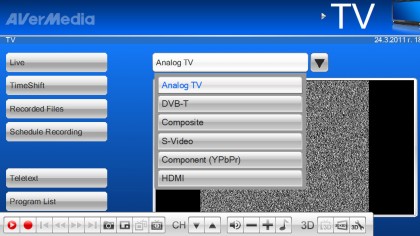
After the source device, you'll need a capture device for your PC, one that supports whatever format the VHS player outputs (HDMI, component, composite).
In general, we'd actually recommend using whatever capture software comes with the capture device. It's possible, of course, to use third-party apps like VirtualDub or Debut, but you can probably save yourself a lot of hassle by using the app that's built to work with your device. The process is quite straightforward in most cases:
1. Hook the VHS player/8mm camera to your capture device.
2. Start the capture software.
3. Select your source (component, composite).
4. Configure the recording settings in the app settings – where it's saved, the video format and resolution. Be generous with the quality and bitrate.
5. Then press play on the VHS tape, and press record in the capture software. Press stop on both when you're done.
6. Depending on the software, you may have post-capture options, like editing and DVD creation.
Certain devices also require no PC app at all. Primarily designed for game capture, there are standalone devices boxes like the Elgato Game Capture HD and Hauppauge HD-PVR Rocket that can also grab component signals. You can then connect them to your PC via USB and copy the recorded video across.
Post-production
Hopefully, you're happy with the quality of the recorded video. If that's the case, then you can burn it to a DVD or save it to an external drive and forget the rest of this article. If not, then there are tools you can use to tinker with the video.
We'll be honest: there's a deep, dark hole of post-production frustration waiting for you if you choose to go down that route. The tools available often require an expert's touch, and a lot of trial and error.
Post Production: VirtualDub
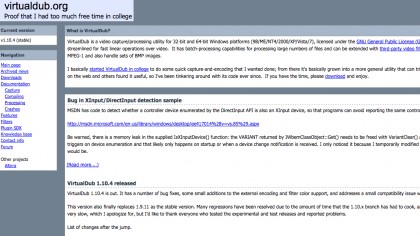
Probably the most common tool in use is VirtualDub, a tool for capture and post-processing of videos. It's a relatively complex tool, and we don't have room here to provide a complete guide, but we'll walk you through a few of the simpler things you can do with it.
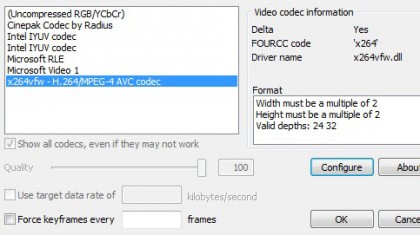
Before running VirtualDub, there are a few things you'll probably need. You should start with x264vfw. Installing this will allow VirtualDub to record with x.264 compression.
Then there are a couple of plugins you'll likely need. To add a plugin, just download it and then copy and unzip it into the 'plugins32' subfolder in your VirtualDub folder.
First, you should grab hold of the Virtualdub FFMpeg Input Plugin. This enables you to open most video file formats in VirtualDub.
Second, grab the FlaXen VHS filter. It's the best filter we've found for improving VHS recordings. There are individual filters around for chroma shifting, noise reduction and image sharpening, but FlaXen has them all built in.
VirtualDub: The process
1. Run VirtualDub.
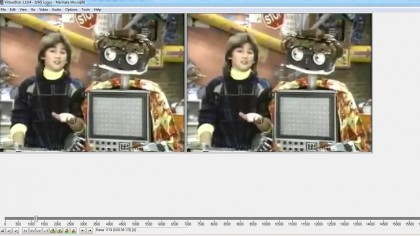
2. Drag and drop your captured video file into the main window. You'll see it appear twice: the one on the left is the original video, the one on the right is the output.
3. Click on Video->Compression. Select x264vfw and click OK. (You can also click Configure to change the quality settings, but the defaults aren't bad for VHS).
4. Click on Video->Filters. Then Click on Add. Scroll down and select VHS and click OK.
5. The FlaXen VHS filter settings will appear. Here's where the tinkering starts:
- The stabilizer reduces some jitter and static from the video.
- Noise reduction is designed to remove speckles and other "noise" elements from the video. You can check the box to have it remove the noise before and/or after the stabilizer works.
- Chroma shifting is probably its strongest feature. A poor VHS recorder will have the colour (chroma) and luminance information slightly out of sync, resulting in an offset or ghosting of the chroma information. It often looks like red/yellow blobs on the skin of people, or colour being weirdly offset like someone failing to colour within the lines. This fixes that, although the exact values to enter will probably require some experimentation. The numbers are the number of pixels that it should shift back. The worse an image is, the higher the numbers should be (although around 4 is a decent starting point).
- Sharpening works just like in an image program, increasing the contrast between pixels.
Whether you use each element will depend on the video in question. We can only really suggest trying them on and then making a comparison between the input and output videos.
6. Try other filters. There are some internal video filters you can possibly add:
- Deinterlace. It's likely that the capture app you used did this for you, but if the video is still interlaced (with alternate lines appearing out of sync with each other), apply the deinterlace filter.
- HSV adjust lets you change the saturation and brightness of the image, making faded video pop a little more.
- Sharpen is another filter that enables you to sharpen a blurry image.
7. Click on File->Save as AVI. Give the file a name and let it process.
8. If you want to shift from AVI to a newer format that works on more devices (like MP4), you can use Handbrake (handbrake.fr) to convert the file.
Of course, that's really the tip of the iceberg when it comes to touching up your video captures. If you're keen on understanding it better, there are very good guides to be found here and here. There's certainly a lot you can do to try and touch up your videos – although you can run into diminishing returns pretty quickly!
- TechRadar's Movie Week is our celebration of the art of cinema, and the technology that makes it all possible.