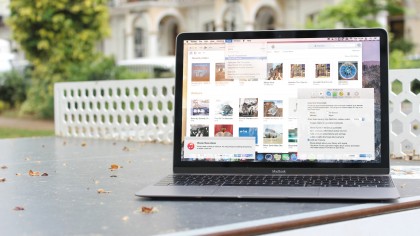
Declutter iTunes
Think for a minute about all the things that iTunes can do: it's a repository holding possibly many gigabytes of media, a library, a shop and an internal database, plus it has to stream and sync all that data wherever you choose.
No wonder it can sometimes run out of puff! Part of the problem is that Apple loves loading up iTunes with amazing new features, many of which you don't need. Things have got even worse with users complaining of long lags – even on powerful machines – when switching songs or views.
So what can you do to boost its performance? One of the best ways to stop iTunes slowing to a crawl is to take control of your Smart Playlists. It's easy to create dozens or even hundreds of these to wrangle your tracks in different ways, but they also force iTunes to work harder to maintain them all, especially if you choose to enable live updating.
Now, obviously, you don't want to just delete all those useful Smart Playlists willy-nilly, but it helps if you can cut them down.
Riding to the rescue is a Smart Playlist management app called Smarts from scripting wizard Doug Adams, which makes it easy to save, edit, export and (gasp) delete your Smart Playlists so iTunes works better. Read on to find out how.
1. Rebuild library cache
If iTunes is slow to open, try holding down the Option key as you launch the app. Click Choose Library…, select your existing iTunes folder and see if it speeds things up.
2. Disable Genius
This may be a clever feature, but the need to compare your playlists with millions of other iTunes users makes Genius a real resource hog. Make sure it stays disabled from the Store menu.
3. Turn off Home Sharing
This is another resource hog, so unless you're running iTunes as a server for the rest of your network, deactivate it in iTunes > Preferences > Sharing.
4. Tame the iTunes Store
Go to Preferences > Store and untick everything except 'Limit Ad Tracking' – doing so can significantly speed up sync operations.
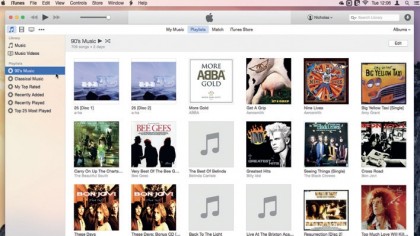
1. Manage Smart Playlists
Smart playlists are a great way to manage music in your iTunes library. But managing them can be tricky, especially if you have so many that they force iTunes to a crawl. This is where Smarts comes in.
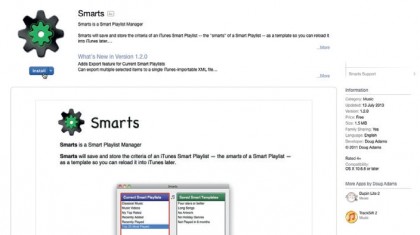
2. Install Smarts
Smarts is a free iTunes Smart Playlist manager from Doug Adams, the man behind iTunes AppleScripts. Smarts itself must be downloaded from the App Store, so go to it from the Apple menu and search for 'Smarts' – it should be the first entry.
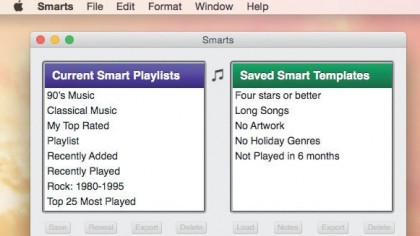
3. Compare your playlists
Open Smarts and confirm your iTunes media folder if necessary. You'll see two lists in its window: on the left, the Smart Playlists you have in iTunes; on the right, saved Smart Playlist templates, which are stored outside iTunes, so they can be used for backup or restoration.
4. Save your playlists
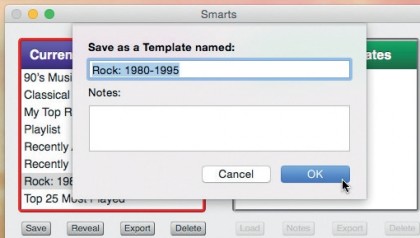
Before you delete any Smart Playlists, it's wise to back them up. Highlight one in the left-hand panel of Smarts, then click Save. Rename it if you wish, and add some notes to help you identify it in future if necessary, then hit OK.
Do this for every Smart Playlist you wish to keep.
5. Delete your playlists
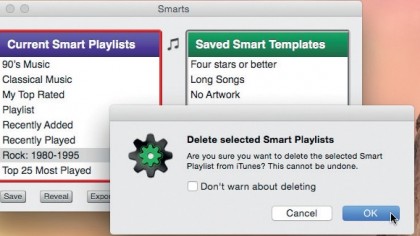
Now you can purge iTunes of unwanted Smart Playlists, safe in the knowledge that you can restore them later. To do this from Smarts' left-hand panel, highlight a playlist, click Delete and then OK to confirm your decision.
Repeat for each unwanted playlist until you're done.
6. iTunes optimised
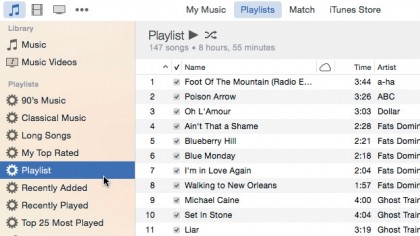
Your playlist sidebar will soon be much less cluttered. You should also notice a speed improvement each time you launch iTunes because it won't have to update all those Smart Playlists every time it starts up.
If you change your mind, restoring a Smart Playlist is simple…
7. Restore playlist
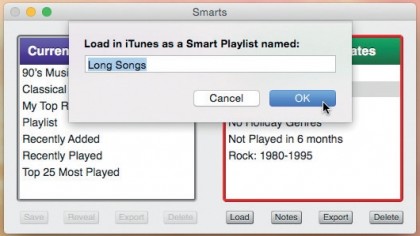
Your saved Smart Playlists remain in the Saved Smart Templates pane. From here you can restore them: click the Load button, rename the playlist if necessary and click OK.
iTunes should now automatically launch, so wait while Smarts updates the database with the restored playlist.
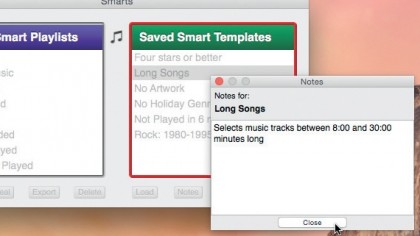
8. Manage templates list
You can also edit (or add) notes to a saved template – highlight the template and click Notes to review or make changes. Click Export to export the Smart Playlist as an XML file you can manually import into another copy of iTunes, or Delete to get rid of it permanently.
- Enjoyed this article? Get more tutorials, guides, and tips on how to get the most from your Apple devices inside MacFormat. Take advantage of an exclusive offer in our sampler today.