How to colorize your old family photos – with smartphone apps or PhotoShop
Make the perfect gift for your isolating relative with this guide
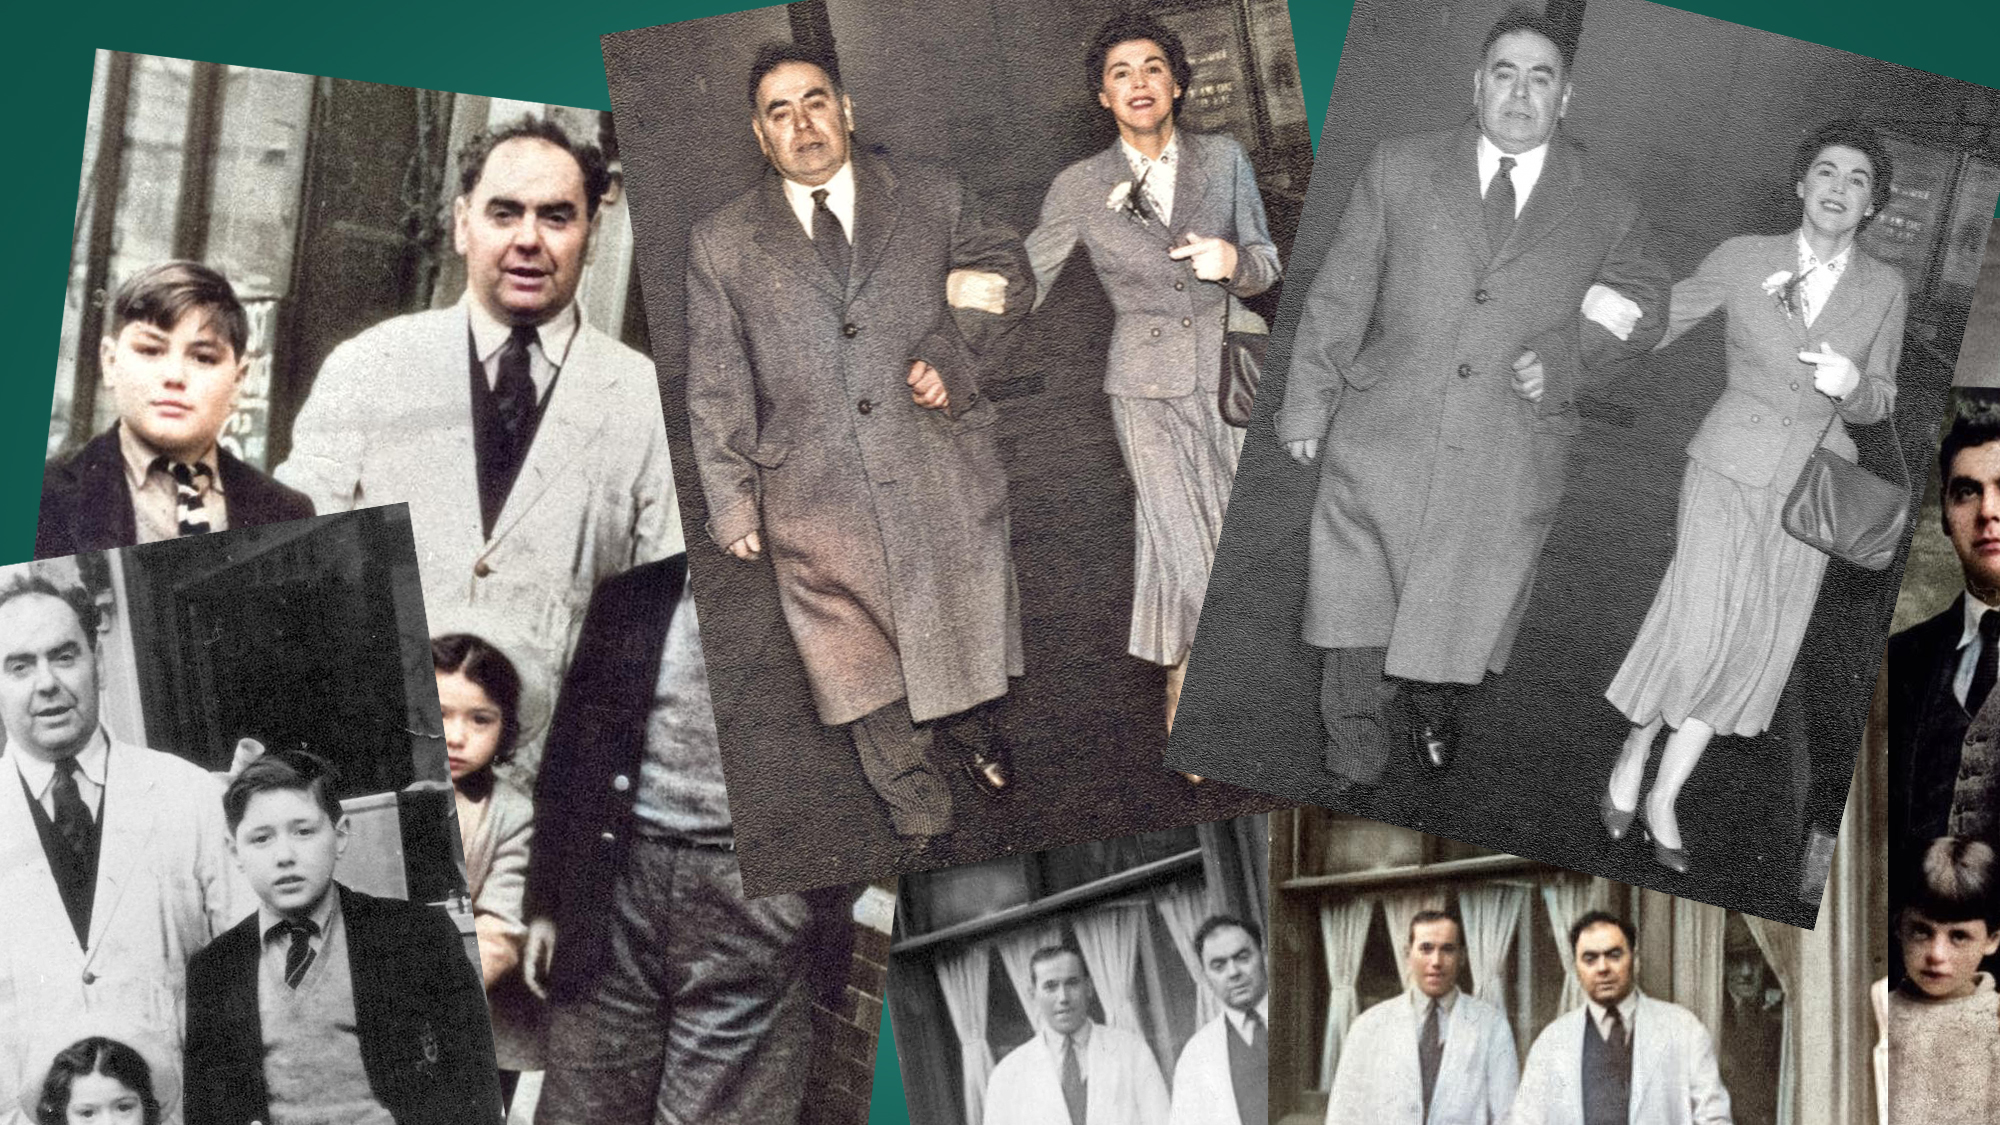
Black-and-white photos are timeless, but learning how to colorize your old family snaps can give them a new lease of life. That's why we've put together this in-depth guide to help you do just that, whatever your ability level.
It's a great time to learn how to colorize your old, black-and-white family photos. With many of our loved ones in isolation, a colorized version of treasured memories could make a great surprise gift. And it's never been easier to do, thanks to a range of smartphone apps, online services and, of course, Photoshop.
We've covered a range of techniques, from a quick one-button conversion with your smartphone to a detailed, step-by-step PhotoShop tutorial.
If you just need photos for social media, then the latest phone and web apps are a great place to start. All you have to do is upload your shots and wait for the algorithms to work their magic. Results vary according to the complexity of the images imported, with simpler scenes generally more successful than those with complex backgrounds.
For those with access to software such as Photoshop, we’ll show you how to achieve professional-level results with an in-depth hand coloring technique. But this approach takes time and a degree of editing experience, so it won’t be for everyone.
Whatever your skill level, we have an option here for everyone. Join us as we look at the best apps, websites and desktop software options, covering both semi-automatic colorization and manual hand-coloring. But first, assuming you don't already have your photos scanned, we'll tell you how to digitize those old prints...

First step: how to scan your old photos
If you've already got digital versions of your black-and-white prints that you're happy with, then you can skip this step. But if not, your first step is to get them scanned.
Get daily insight, inspiration and deals in your inbox
Sign up for breaking news, reviews, opinion, top tech deals, and more.
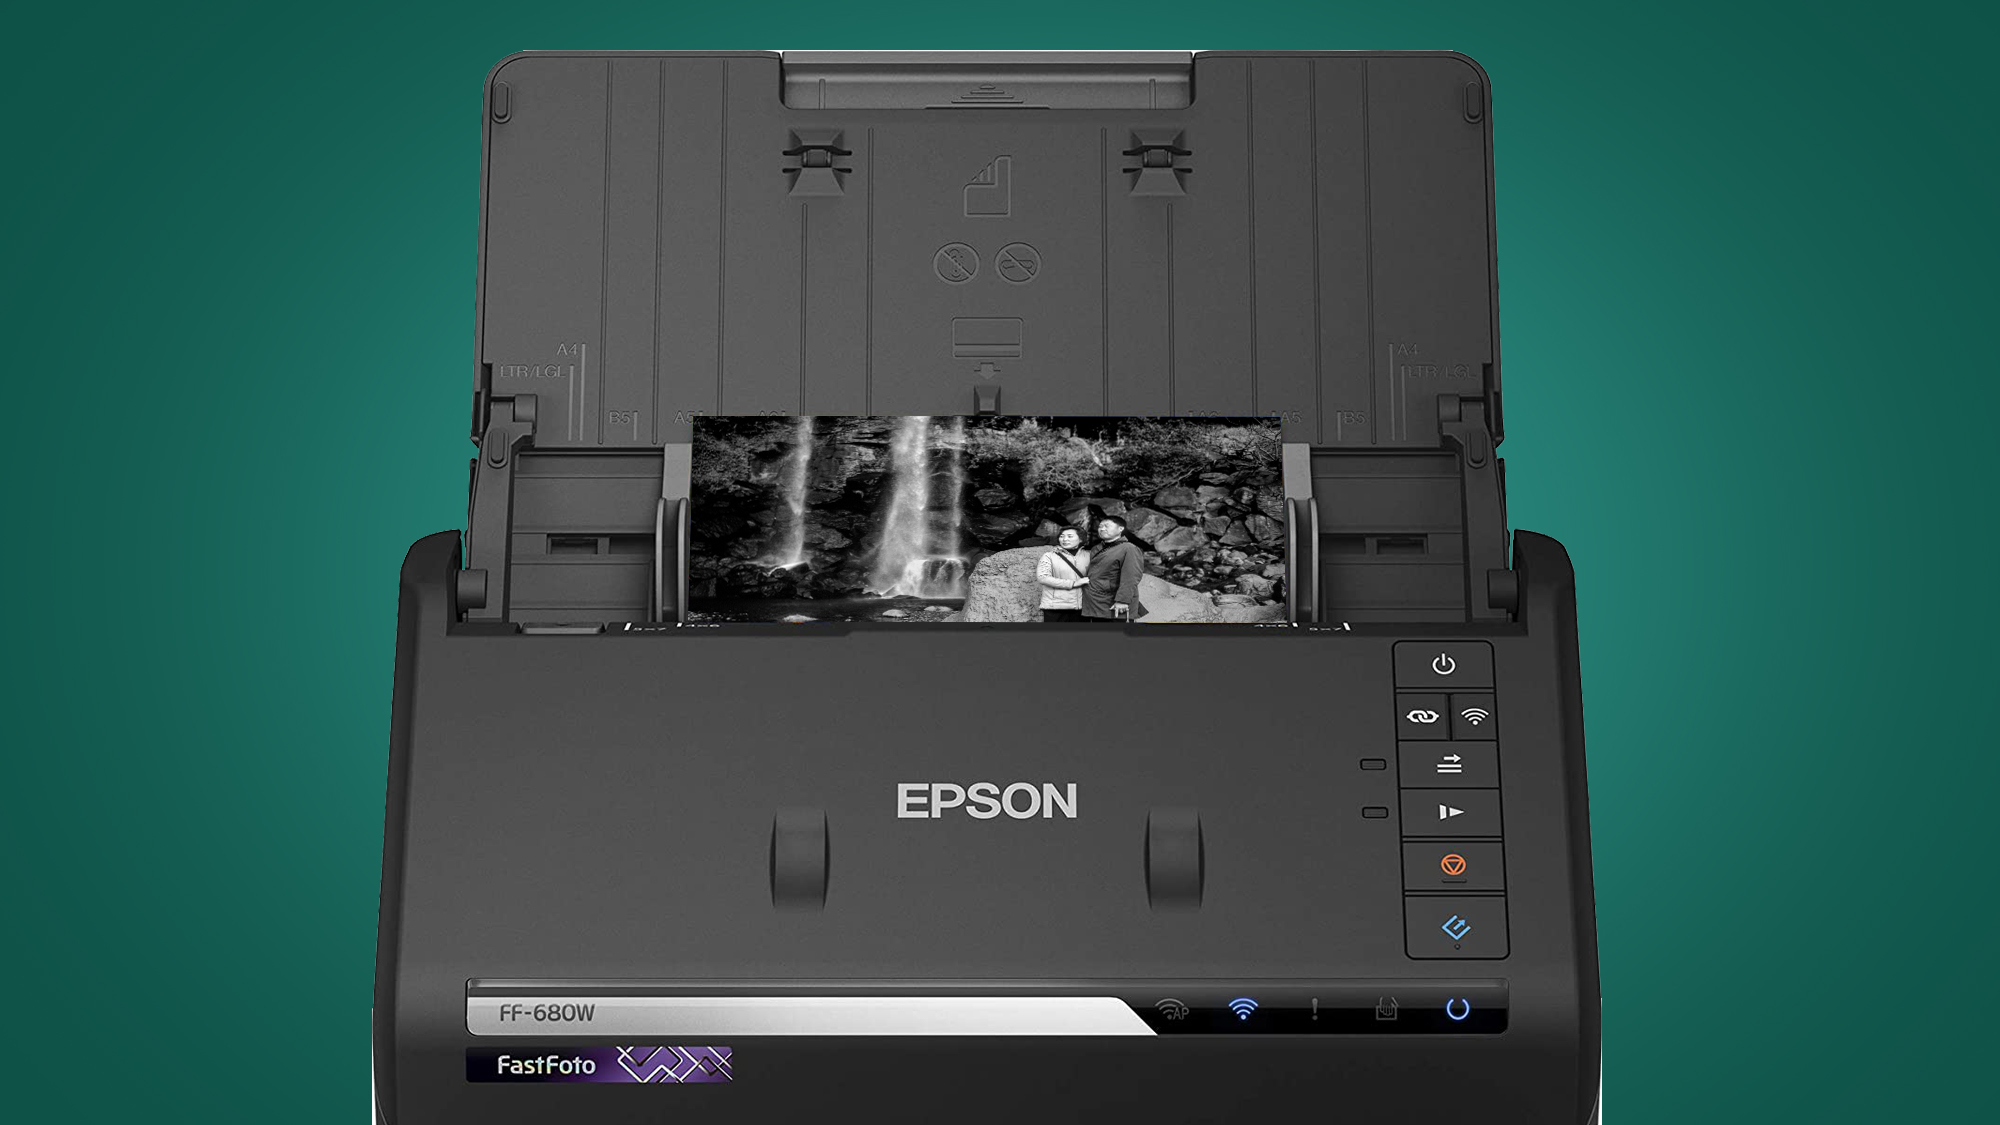
Scanning is a simple process – if you have a large number of old photos to scan, it pays to invest in a dedicated scanner, as you’ll get the best quality scans at a higher resolution than other methods. The Epson FastFoto FF-680W, which is designed specifically for quickly scanning prints, is our pick right now.
If you don’t have a large number of prints to scan, or the budget for a scanner, fear not – your smartphone is a powerful tool for small batch scanning using PhotoScan by Google Photos, which is available for both Android and iOS.
The app is incredibly easy to use and guides you through the simple steps required to scan photos – you really can’t go wrong.
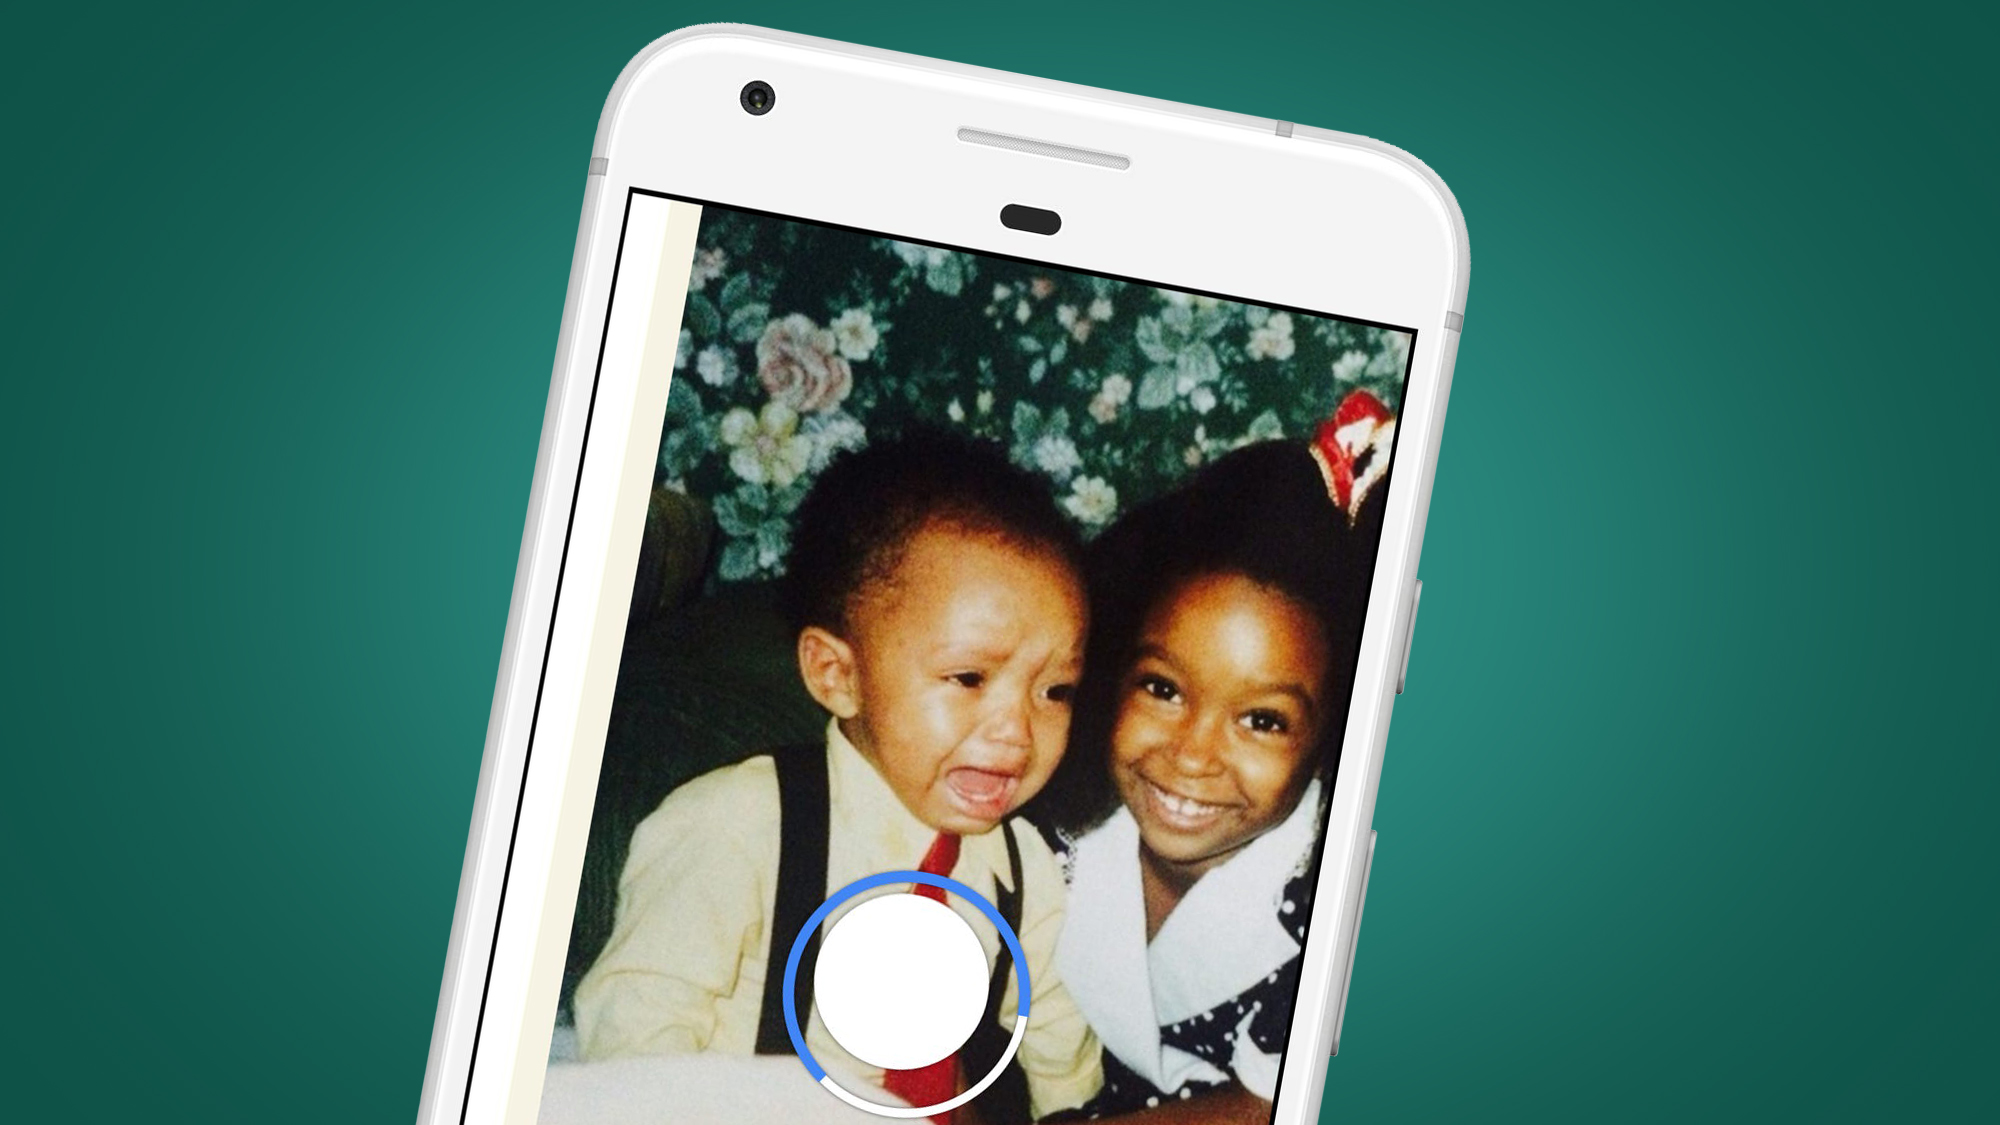
PhotoScan removes glare from glossy photos and uses smart automatic cropping with edge detection so the final image is presented perfectly, although there is also a manual override should you need it.
This scanning option is great whether you’re planning to use a phone app for colorization, or if you intend to import images to your computer to use a browser-based option, Photoshop Elements or Photoshop.
Download Google PhotoScan for iOS
Download Google PhotoScan for Android
- These are the best photo scanners you can buy right now

How to colorize your old black-and-white photos
Now you have digital copies of your old black-and-white photos, it's time to start colorizing. We've covered three options. Firstly, there's the fully automatic approach with smartphone apps – we've picked the best ones for iOS and Android.
If you want to get a bit more involved with fewer limitations, there's the semi-automatic approach with web apps and desktop software like PhotoShop Elements.
Lastly, if you're ready go really in-depth and do the best colorizing job possible without hiring a professional, we've got a step-by-step guide to manually hand-coloring photos in PhotoShop. Let's get cracking...
Option one: use a smartphone app
Colorize (iOS)
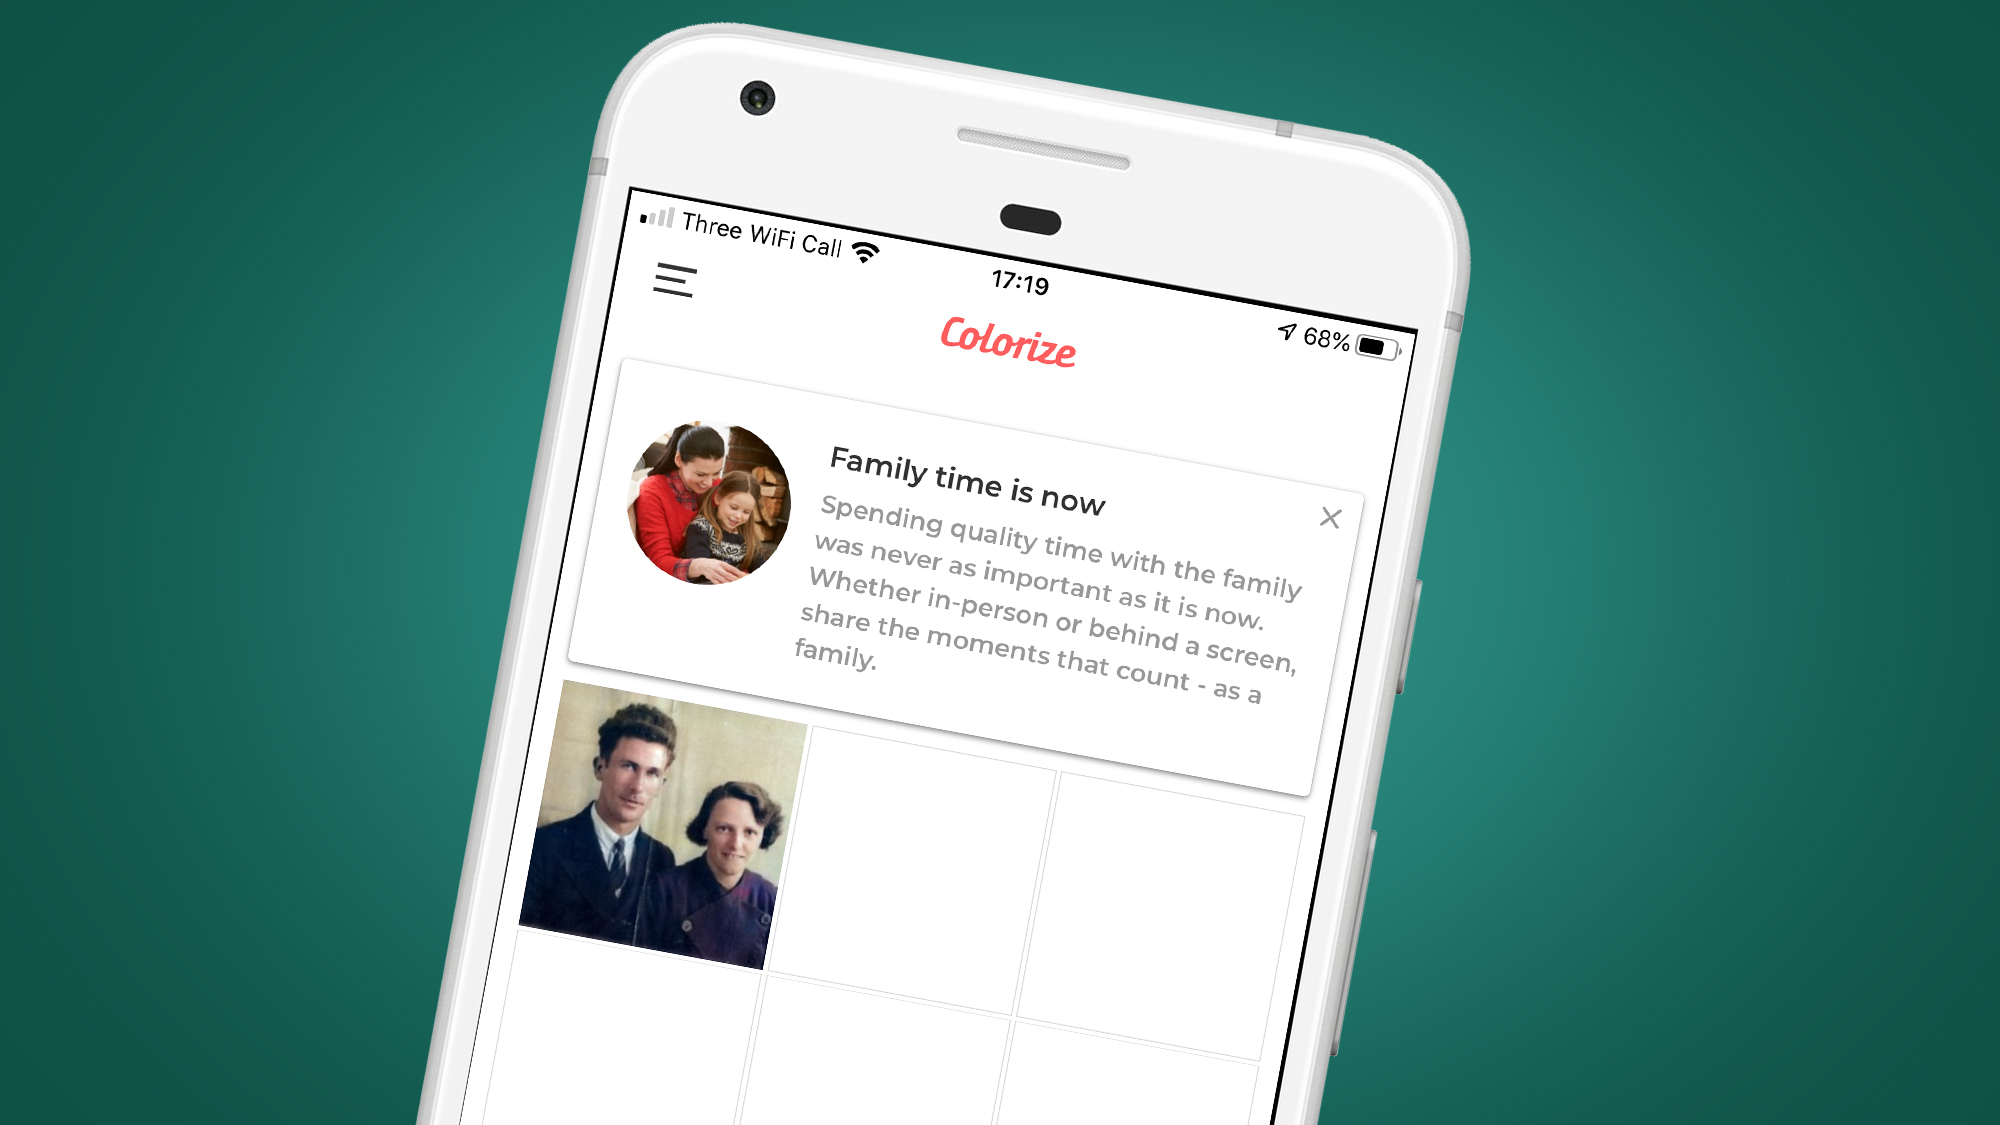
Colorize is a paid app for iOS offering a free, three-day trial of premium functionality, which later costs $4.99 / £4.99 / AU$7.99 per month. It's an expensive app for the long term compared to the Android app below, particularly considering there are free web-based options available, but Colorize does have one or two tricks up its sleeve.
One deciding factor for taking up a subscription to the app may simply be that you have a large number of images to colorize and prefer to do it on your phone. The fact that Colorize features the ability to scan photos from within its partner app, or to upload from the camera roll, is useful.
The app is fully automated so it’s simply a case of selecting the image to process and the app takes care of the rest. Colorization of images is more effective with simpler images than it is with more complex scenes. One downside of the app is that it reduces the dimensions of the output image, whereas the Colorize Images on Android (below) maintains original dimensions.

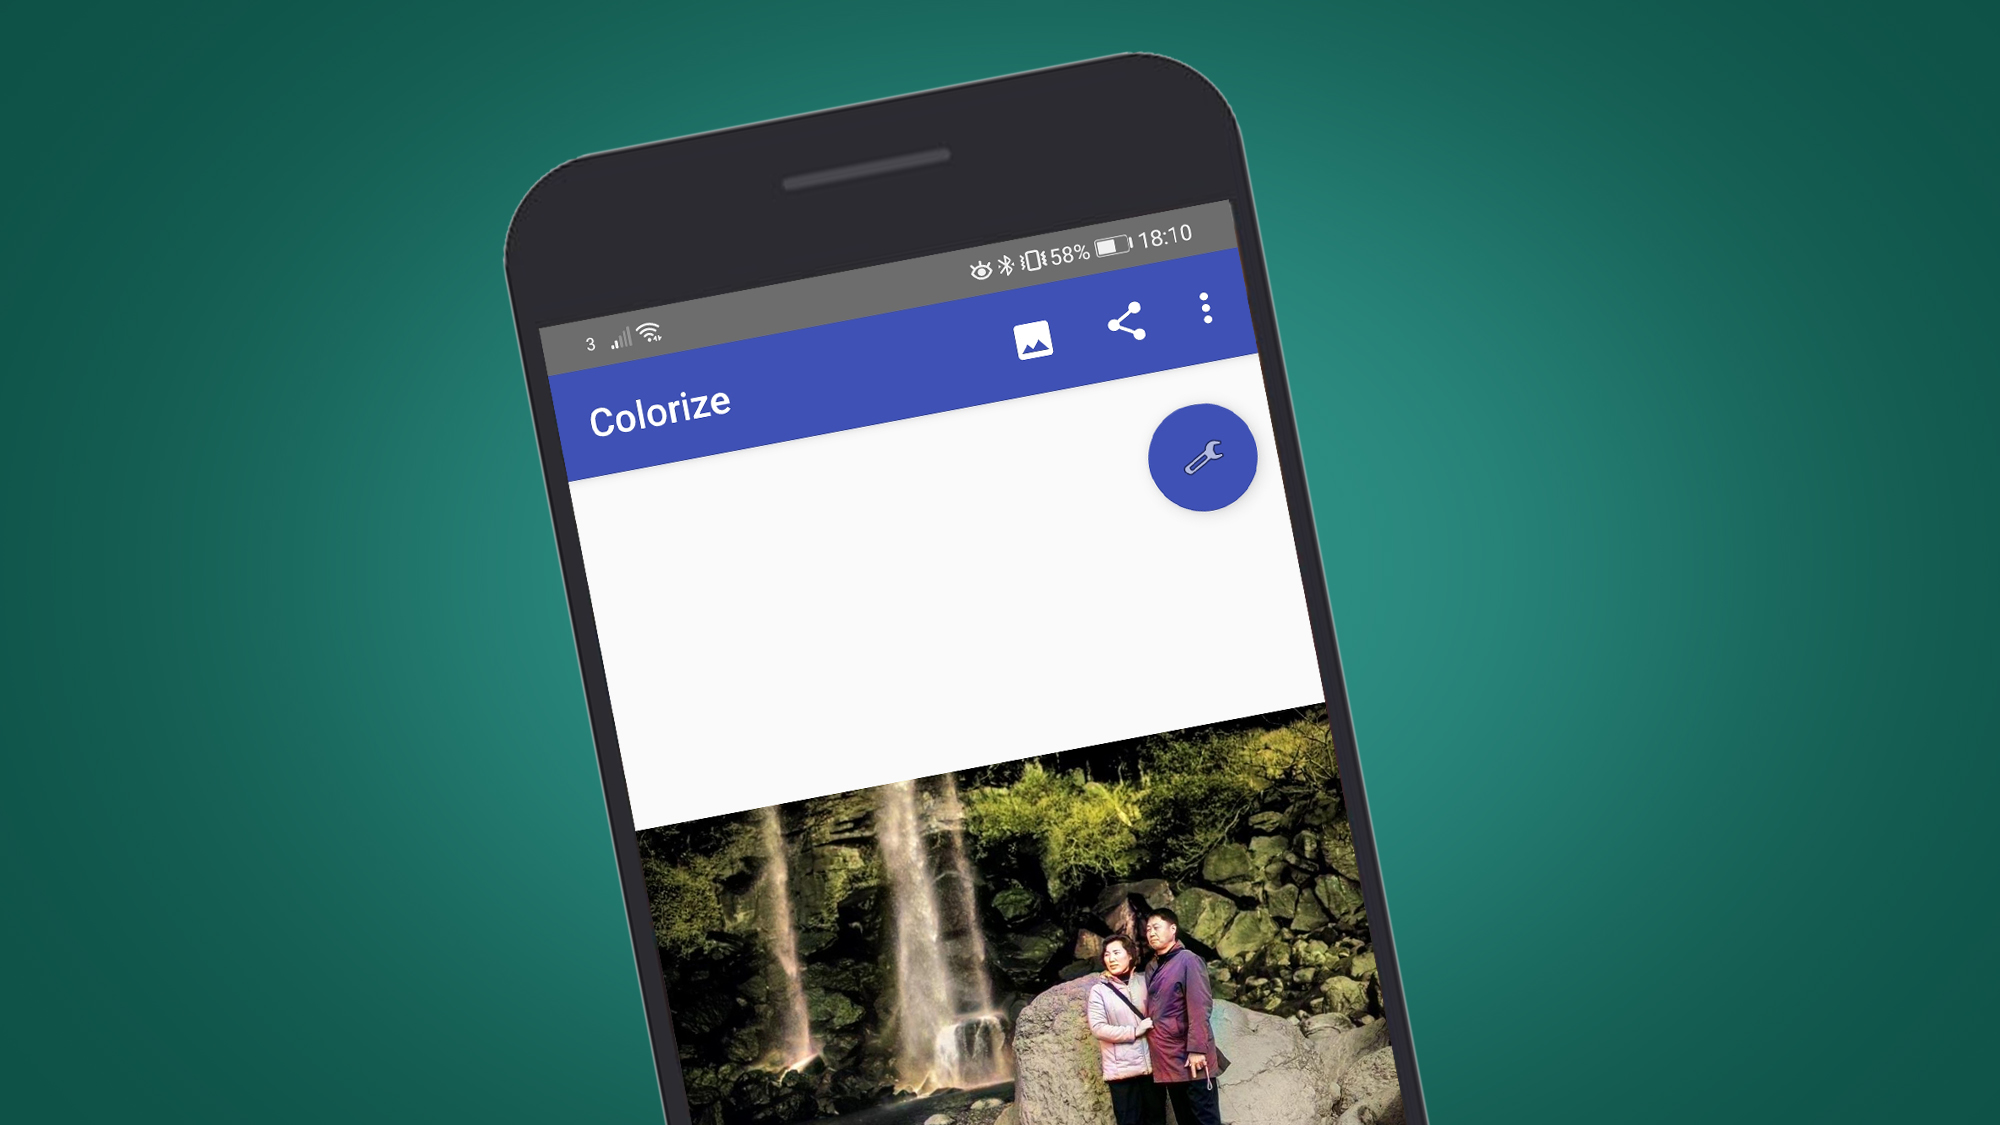

Colorize Images (Android)
Colorize Images is a paid app that offers ten automatic image colorizations before you’re asked to pay for a subscription for the app. Since the app uses the same processing algorithm as MyHeritage (see below), which is a free to use browser-based colorization option, the subscription is difficult to justify, though it's certainly fine if you only have a handful of images to colorize.
If you prefer the simplicity of using your phone rather than a laptop or desktop, it may also be well worth paying for a short subscription (there are eight-hour and one month options available). Despite using the same processing algorithm as MyHeritage, the results are different, and Colorize Images offers a small amount of control over how images are colorized too.
Two sliders allow you to control the process. While tips suggest how these help you to get the best result from photos with more or less contrast and varying image quality, the results of these tweaks can be slightly crude. In a nutshell, the Render slider produces a more saturated result at low settings and more subtle colors at higher settings, while Auto Contrast Cutoff is designed for use with low contrast images.
The overall quality of results are similar to MyHeritage, but colorization of elements within the scene do differ between the two.
Download Colorize Images for Android

Option two: colorize your photos with a web app
ColouriseSG
ColouriseSG is a project that was created by the Data Science and Artificial Intelligence Division, GovTech Singapore. The team put together a deep learning colorizer that was trained specifically for Singaporean photos, but despite this angle towards South East Asian skin tones, the automatic colorization works well for all skin types.
The highest resolution image we tried with the free-to-use service was 3500 pixels on the long edge, which was then resized to 1800 pixels in the output image. Results were better with the image featuring a plain background, although coloring of clothing was patchy. For the image with a more complex scene, colors were much less effective although skin tones were fairly reliable.
With ColouriseSG skin toning is much better than MyHeritage (below), but with the latter the coloring of clothes and environments is better. Plus, with ColouriseSG no watermark is produced on the output image, so although smaller than the original upload, the output image is untouched in this respect. To colorize a photo, simply click on the Captcha, select your image and wait a few seconds.

MyHeritage
MyHeritage is a genealogy website first and foremost but, as you’ve guessed, it also includes an automatic black-and-white image colorizer called In Color.
The fact that it’s a website designed for something other than simply coloring images means you have to sign up to use the free service. This only takes a few seconds if you use the sign-up by Facebook or Google option, or a little longer if you sign up by email.
The great thing about MyHeritage colorization is that the output image remains the same size as the original upload. Again, the largest image we tried was 3500 pixels on the long edge which is generally larger than a scanned black & white print. Overall, colorization was consistently applied across the image with no significant areas of greyscale remaining.
The coloring of clothing and the background is superior to ColouriseSG, but where it fell down in comparison was with skin tones. For both images tested, skin tones weren’t realistic for either image and in the outdoor portrait the faces of the people in the shot appeared burned out. MyHeritage also added a watermark and paint palette icon to the colorized image. Still, it's another good free option for those who don't want to take the manual route and want to keep the same image size.

Option three: the semi-automatic approach with PhotoShop Elements
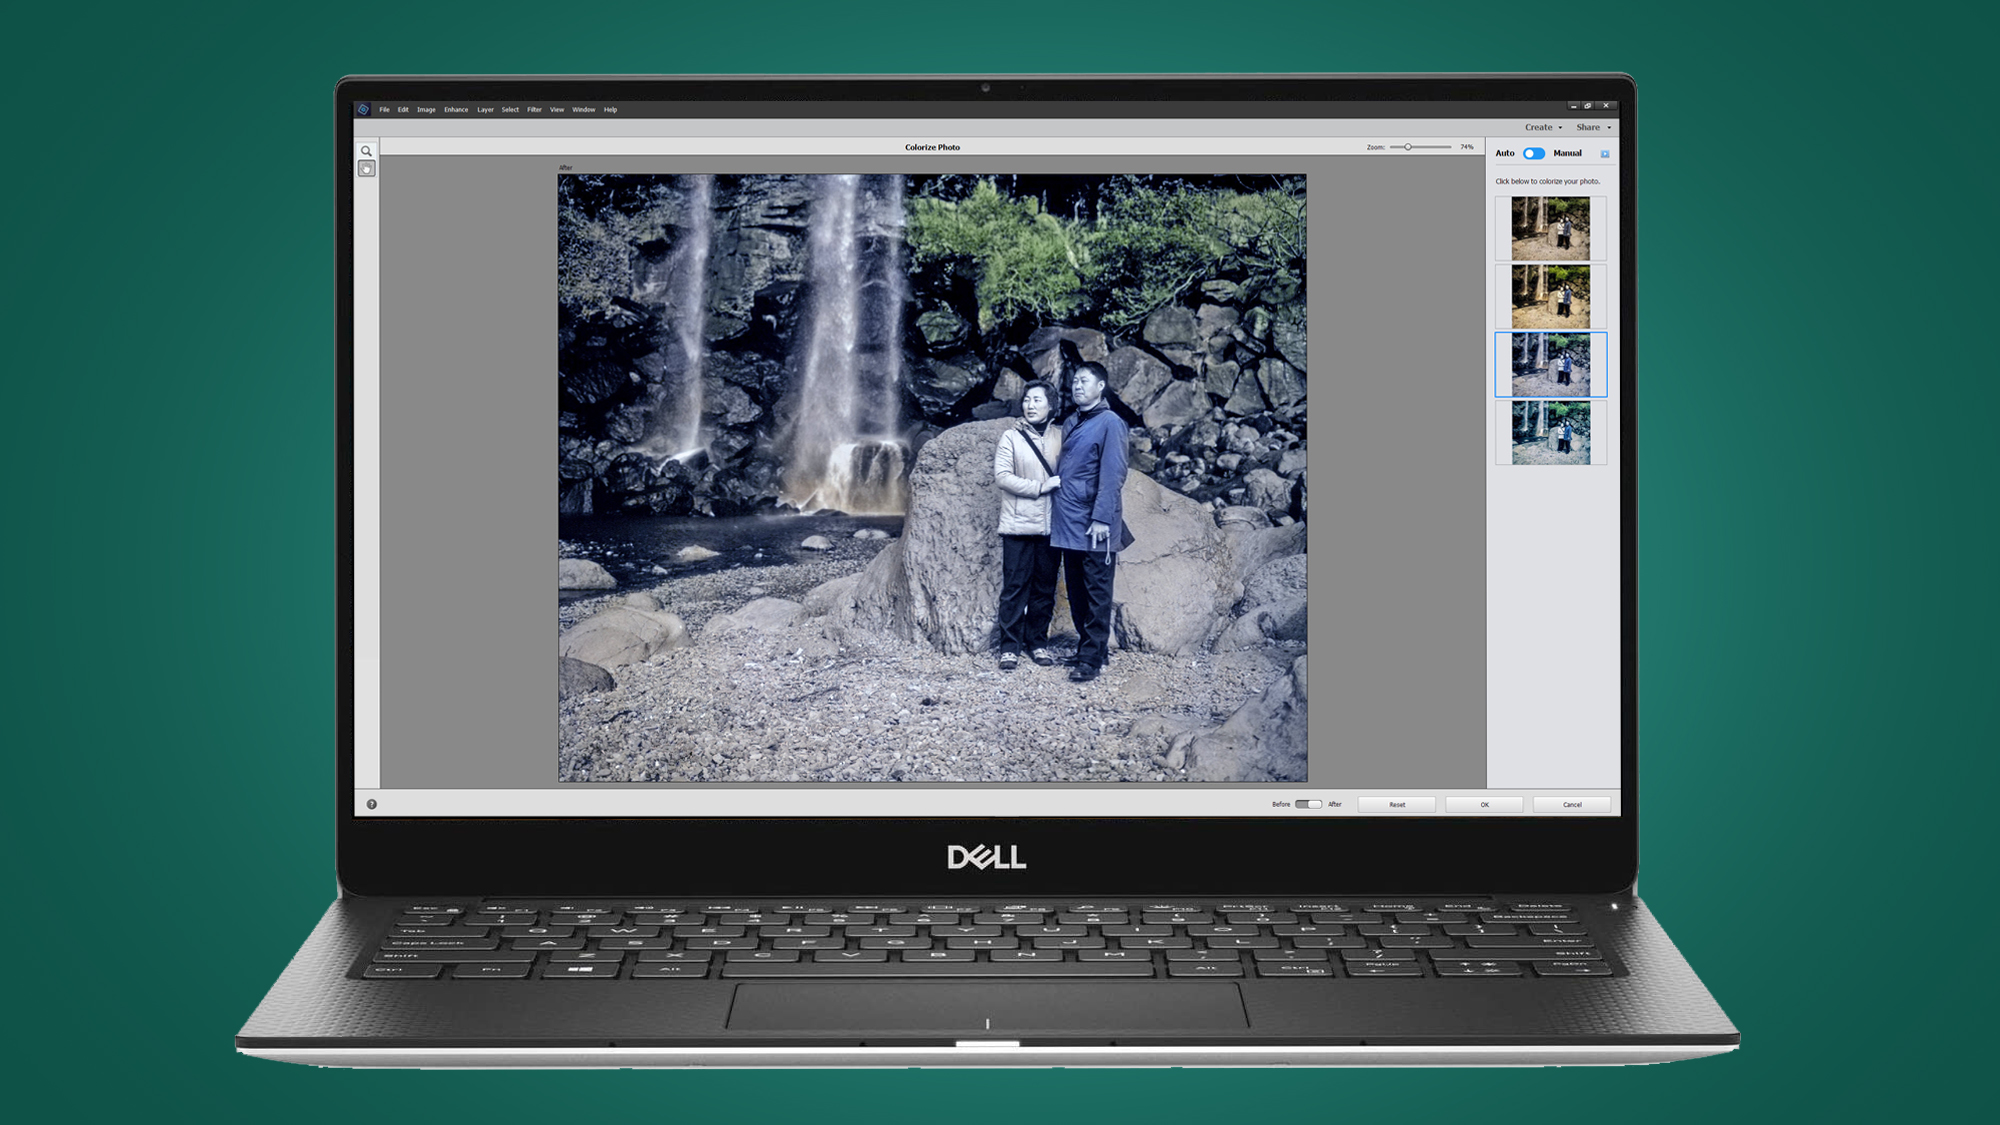
Photoshop Elements 2020 introduces the ability to colorize black-and-white images using automatic, semi-automatic and manual approaches. The process is a kind of Guided Edit, but rather than being found in this part of the Elements interface, it’s accessed via the main menu under Enhance>Colorize Photo.
The results are superior to the phone app and web-based colorization options above in that Elements offers four colorization options to choose from after automatic coloring. The overall quality can be as good and bad as the web and app-based options, but where Elements excels is that you can use one of these ‘presets’ as a starting point to then tweak the effect in the Manual section of 'Colorize Photo' for a semi-automatic result.
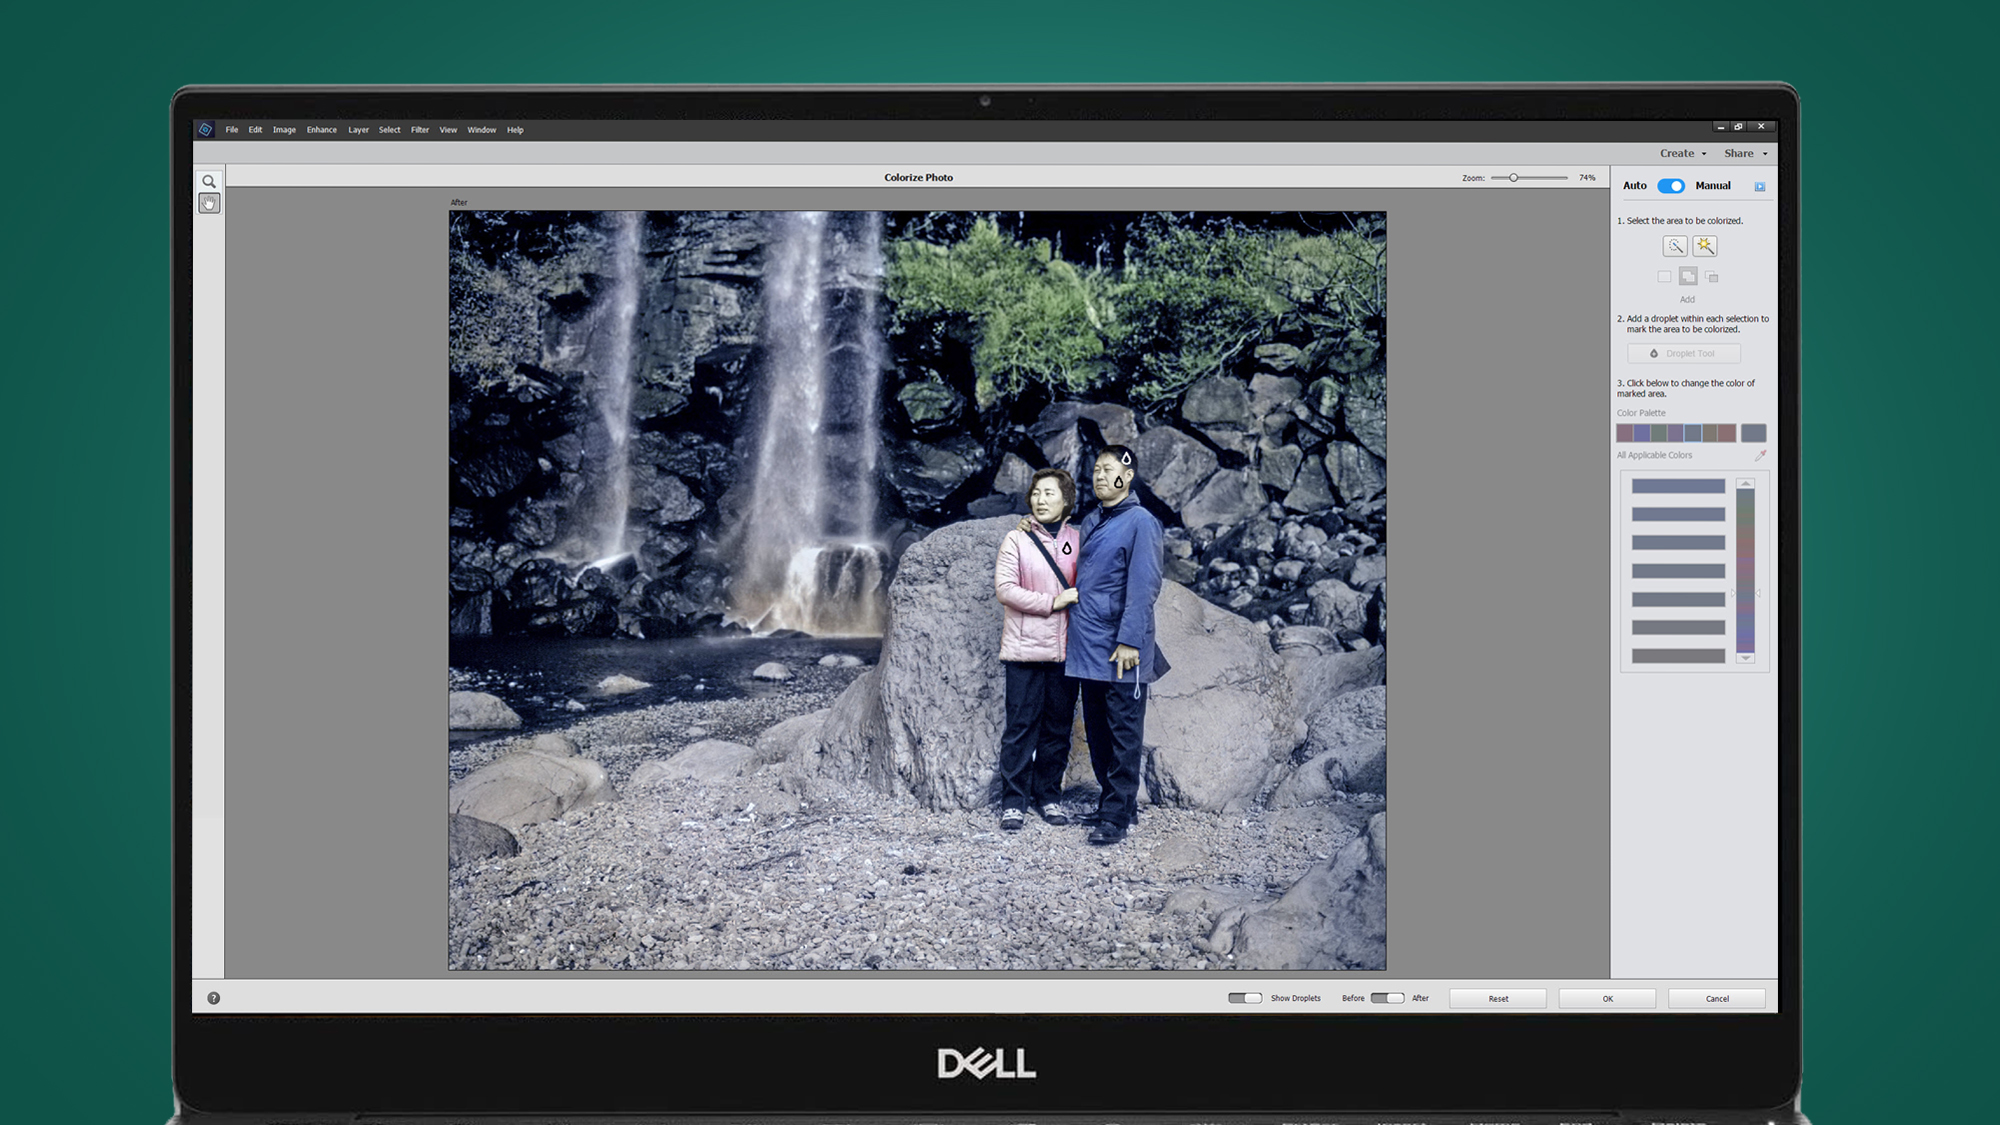
This approach requires you to use the Selection Brush or Magic Wand to make selections of specific parts of images and then apply color to them. Alternatively, you can hit the Reset button, switch to Manual and color the whole image from scratch using this process.
The results can be better than the web and app-based options when taking more control yourself, but the overall result is far from professional hand-coloring in Photoshop. That said, if you have a copy of Photoshop Elements 2020 you can color an image semi-automatically in as little as five minutes.

Option four: the fully manual approach with PhotoShop
For the very best colorization results, nothing beats using Photoshop and manually painting in every color using highly refined Layer blending.
The results are fantastic, but depending on the image being colored, it could take anywhere between 20 minutes to over an hour to hand color an image. If this sounds like something you’d like to try, to achieve the best results possible, here’s everything you need to know to get started.
We’ll show you the process of applying one color to an image, and the process can then be repeated with additional colors.
Step 1: Create color Layers
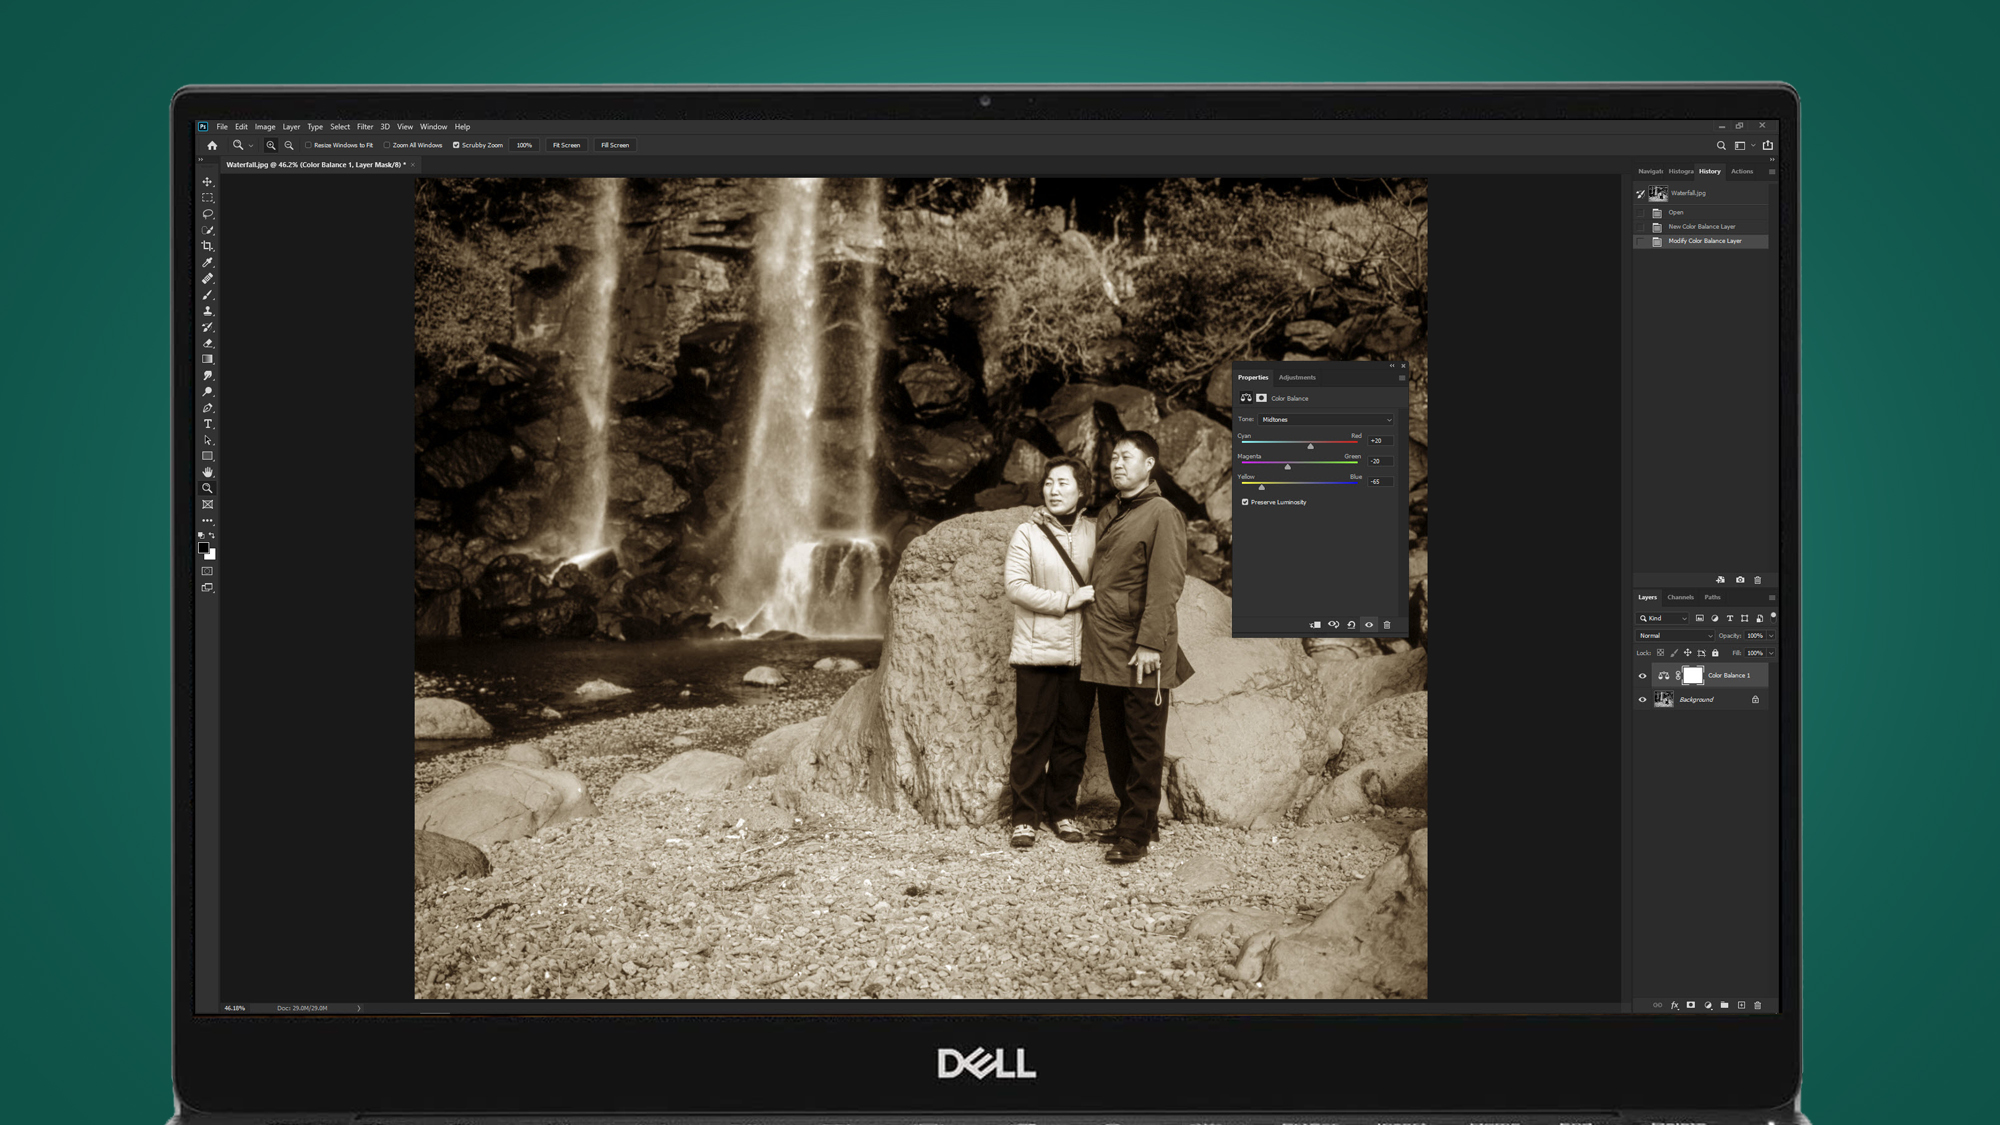
Click on the Create new fill or adjustment layer icon at the bottom of the Layers panel, it’s the half-black half-white circle, and select Color Balance.
For this color we’ll create the skin tone, so Red was set to +20, Green to -20 and Blue to -65. This will produce a color across the whole image which we’ll refine and mask out in the next steps. Close the Color Balance dialogue.
Step 2: Apply Layer Style
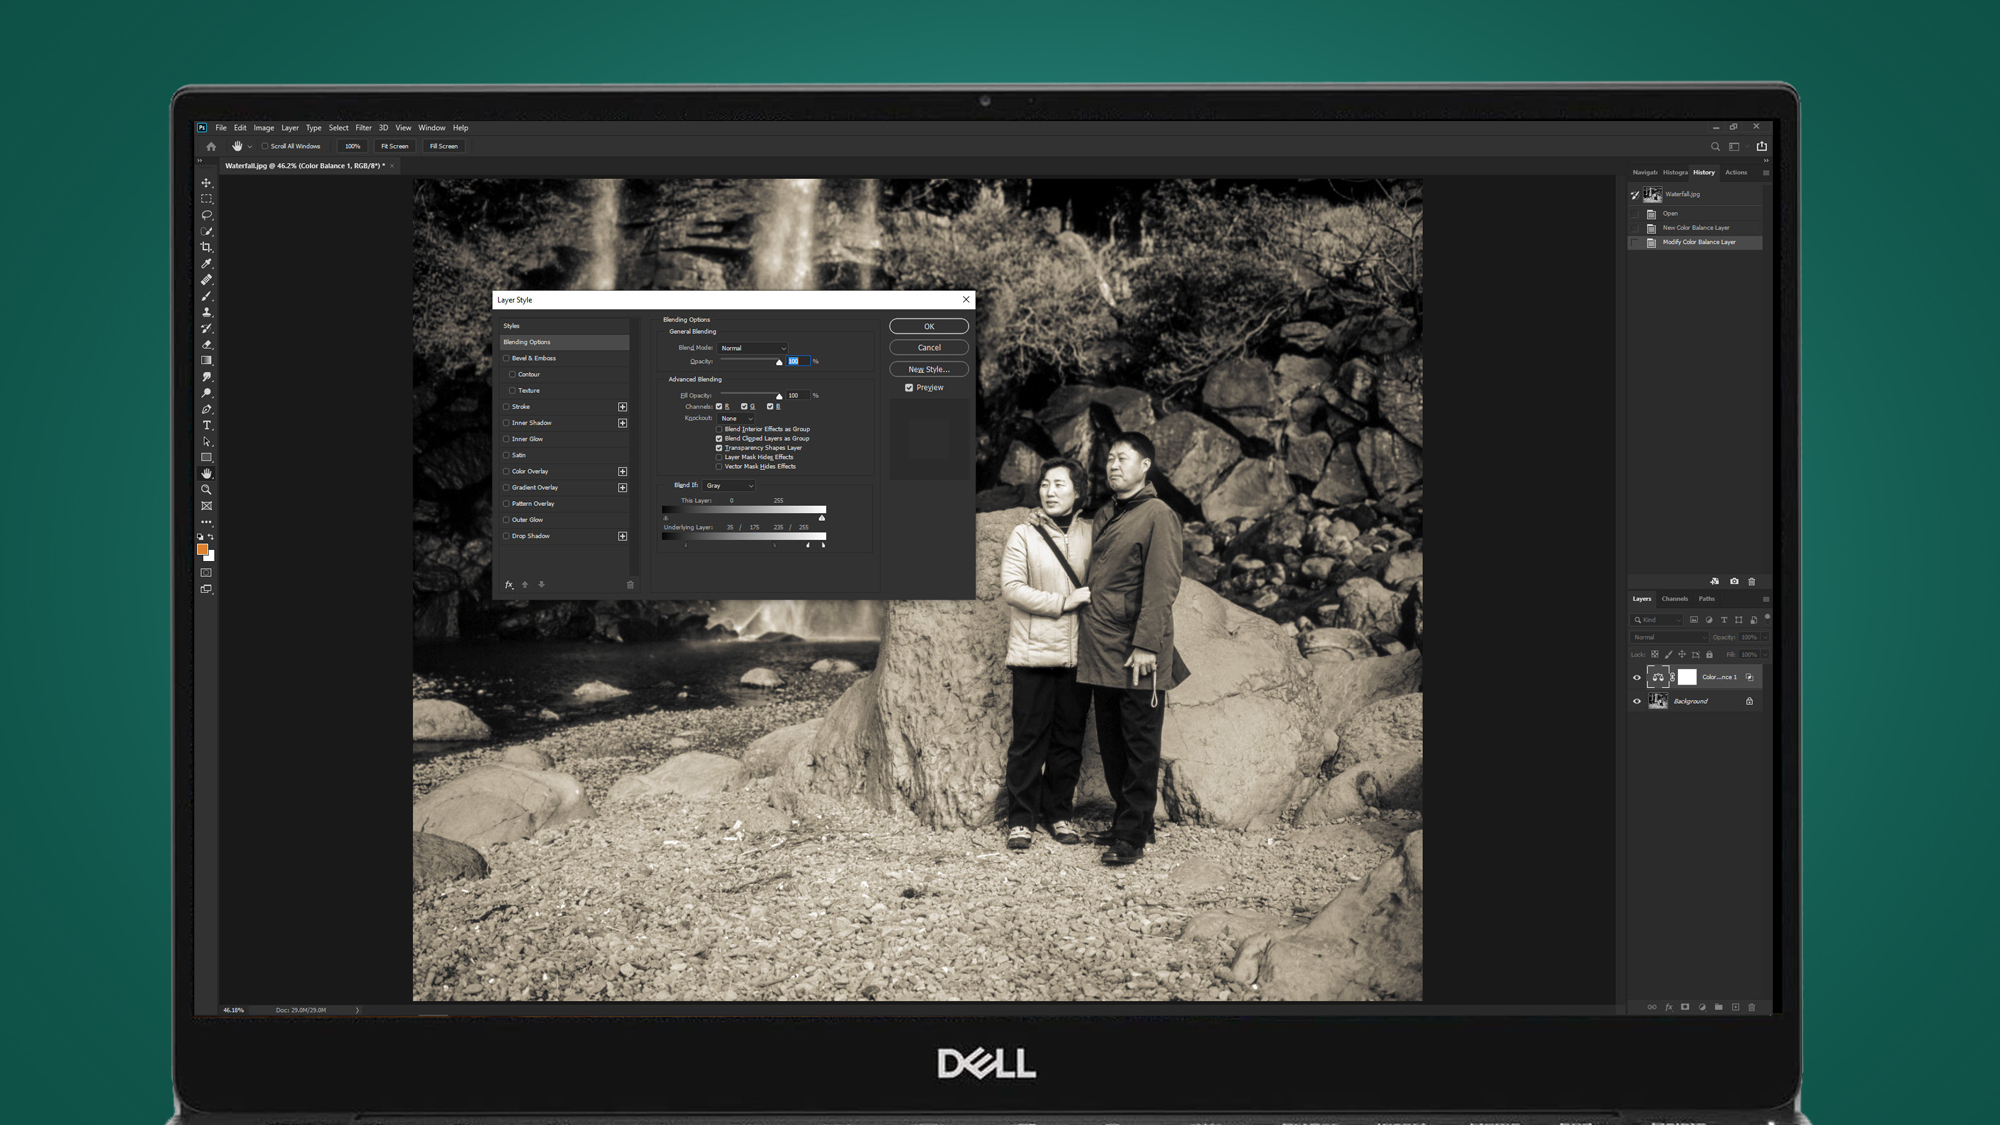
Right mouse click on the Color Balance 1 Layer and select Blending Options. Left mouse click on the black point for Underlying Layer and drag to 35. Hold down the Alt key and drag the black point – this will split – and drag the right half to 175.
Hold down Alt and drag the left half of the white point to 235 and press OK. This will make the color blend more effectively with the tones in the image.
Step 3: Brushing in the colour
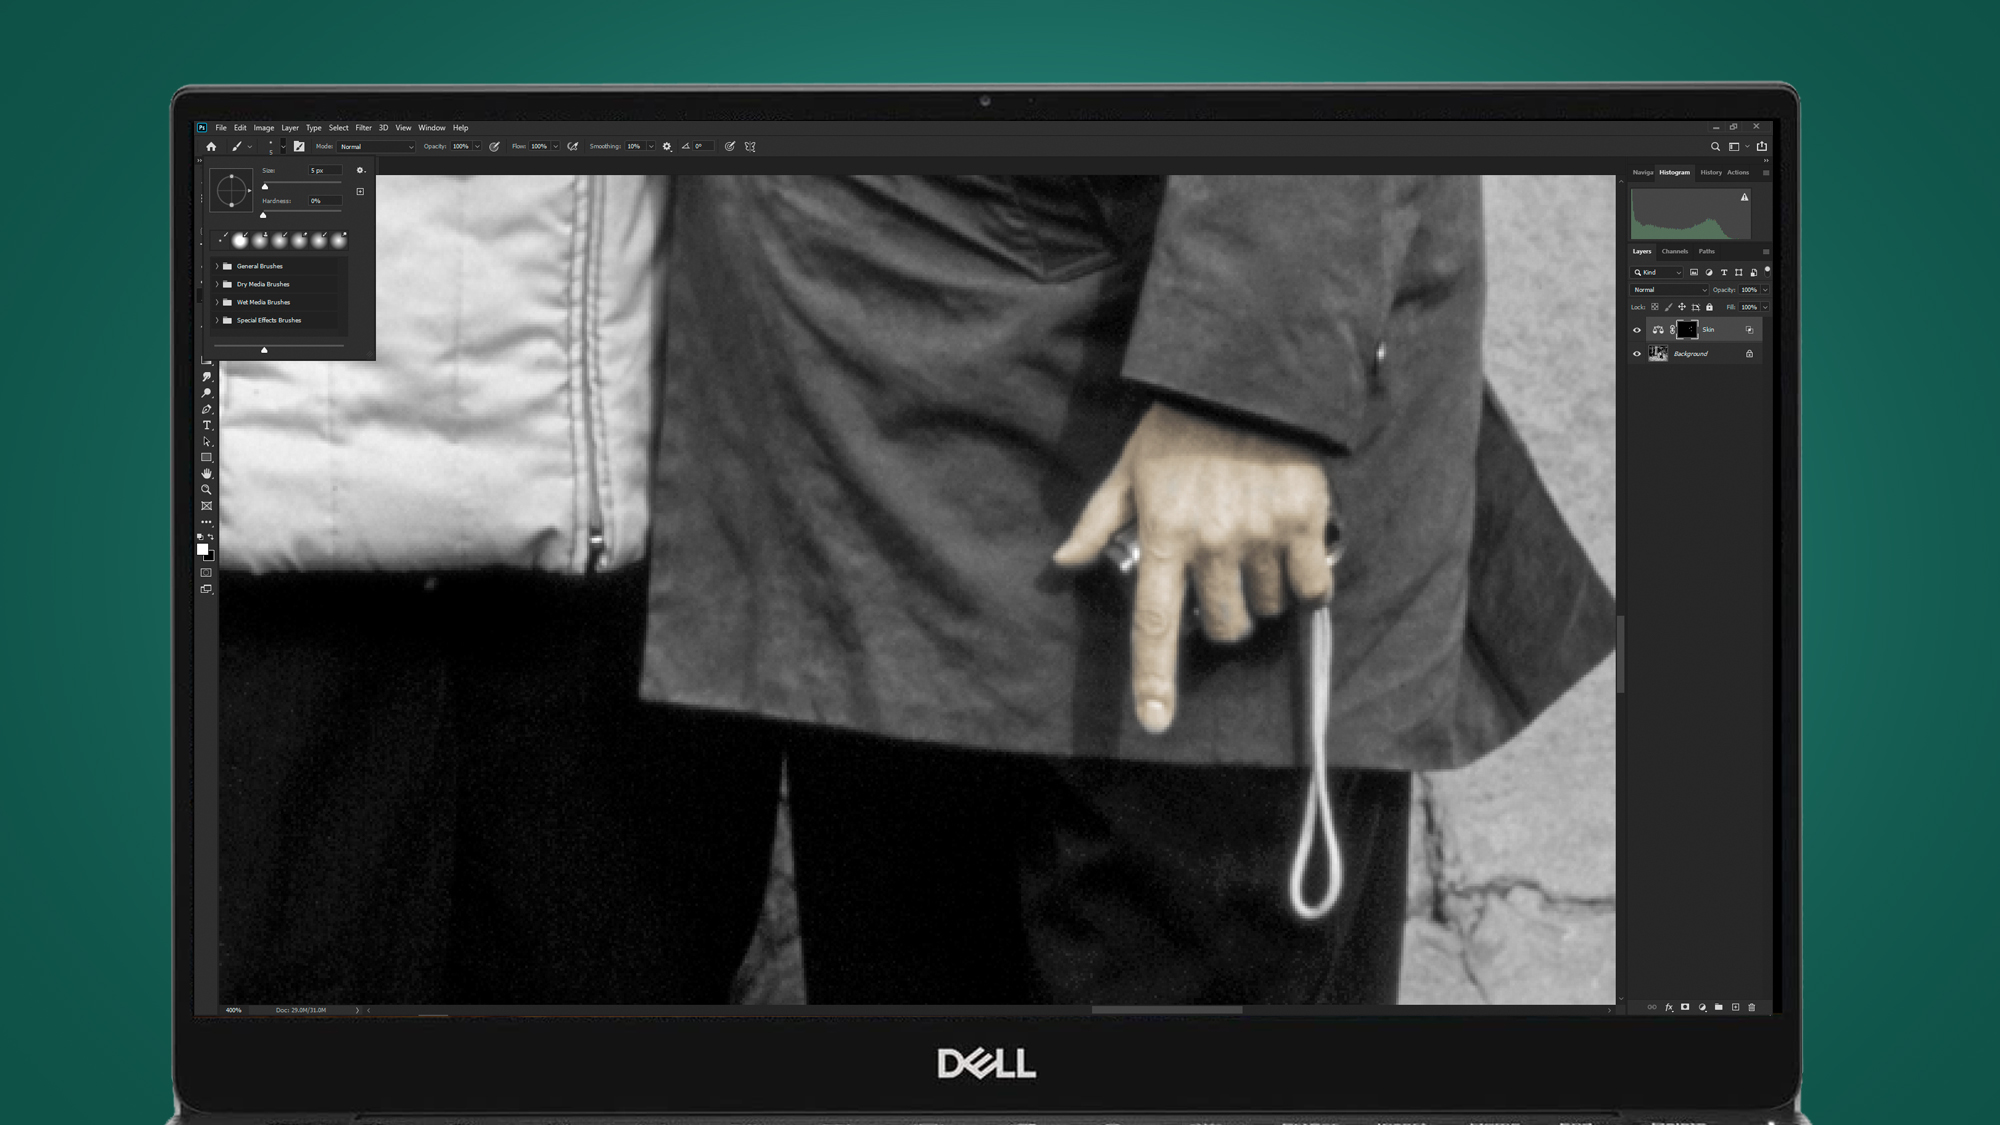
Make sure the mask attached to the Color Balance 1 Layer is active and press Ctrl to invert to black and hide the color.
Press D on the keyboard to set the palette colors to black and white and press X to toggle between the two. Use a soft-edged brush with white in the foreground to paint in the color, and if you make a mistake switch to black and paint over the mistake. Change brush size as required.
Step 4: Paint with care
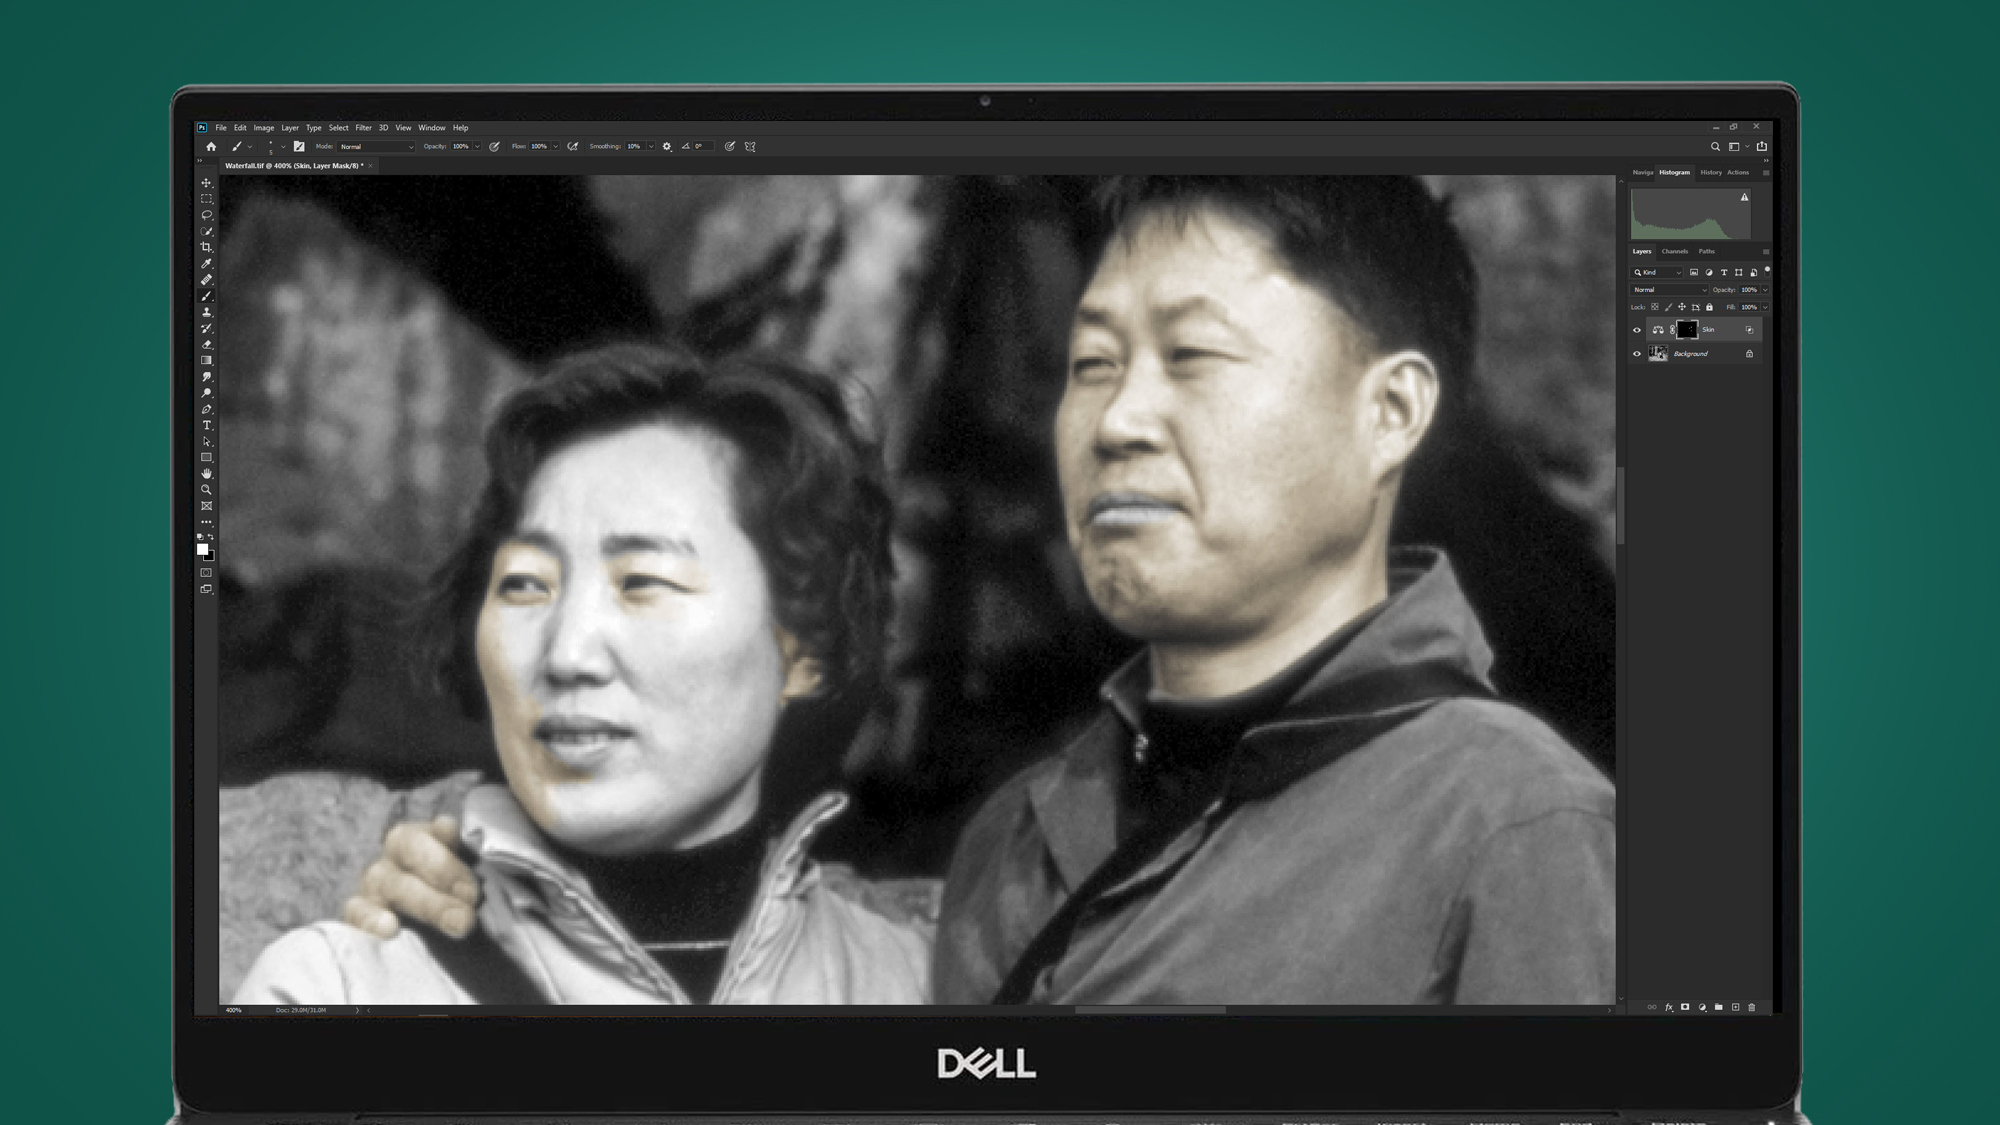
Taking care when painting around smaller areas such as facial details. Try not to paint over edges as this will cause color issues, so if you do paint over the offending area with black.
Once finished painting, right-click on the Layer and select Copy Layer Style, then create a new Color balance Layer, set the colors before right mouse clicking on the new Layer and select Paste Layer Style.
Step 5: Repeat and finish
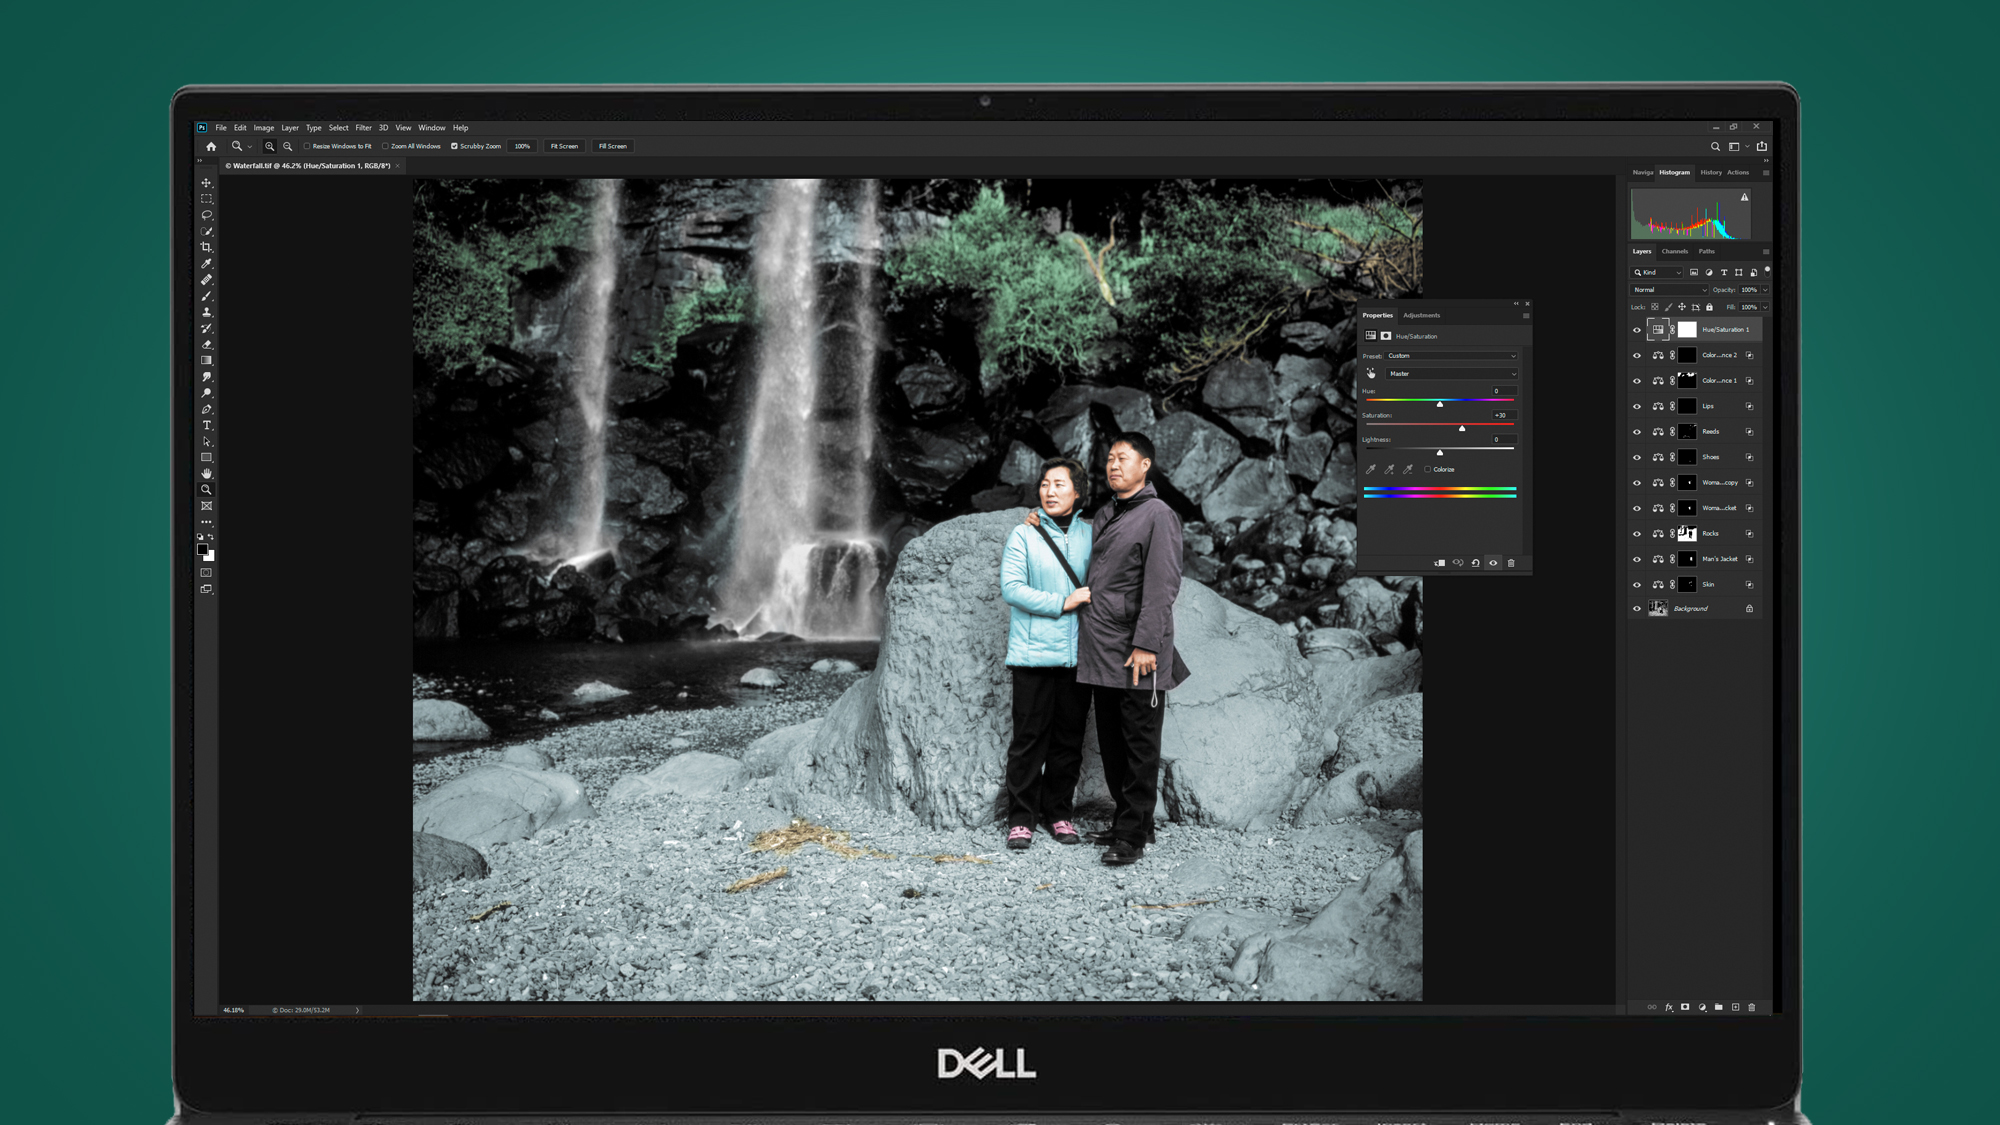
For each new color you create, simply right mouse click on the Layer once the color has been created and select Paste Layer Style to apply the blending.
This will save time and will make the process less tedious than manually applying the Layer Style each time. Once the image is colorised, if you’d like to make the color more vivid, create a Hue/Saturation Adjustment Layer and set Saturation to between +15 and +30.
You can see our 'before' and 'after' final result with this PhotoShop technique below.
Once done, your images will be perfect fodder for a sentimental photo book or to create the best photo gifts.
Ready to have a go? Use this color balance cheat sheet
Here’s a selection of Color Balance Adjustment Layer values that you can use to add color to your images.
These are just a starting point, and all can be tweaked to your liking, or you can start from the beginning to create your own colors. You can also use Photo Filter Adjustment Layers, which can be more effective for creating some colors.
Asian Skin
Red +65, Green -35, Yellow -75
Caucasian skin
Red +50, Green -15 and Blue -40
Brown skin/eyes/hair
Red +95, Green +65 and Blue +10
Lips
Red +40, Green to -15 and Blue to 0 to produce a pink result. If you’d prefer redder lips, increase the Red slider above +40 to the desired level. Alternatively, use skin tone values as a starting point and adjust accordingly.
Blonde hair
Red to +3, Green to -20 and Blue to -65
Blue eyes
Red -10, Green 0 and Blue +10.
Green eyes
Green +25
Foliage
Green +20 and Blue +25
Rocks
Red -10, Green +20 and Blue +25
- These are the best cameras you can buy right now
James Abbott is a professional photographer and freelance photography journalist. He contributes articles about photography, cameras and drones to a wide range of magazines and websites where he applies a wealth of experience to testing the latest photographic tech. James is also the author of ‘The Digital Darkroom: The Definitive Guide to Photo Editing’.
