How to create a course on Garmin Connect
A step–by-step guide to creating a route you can follow on your Garmin watch
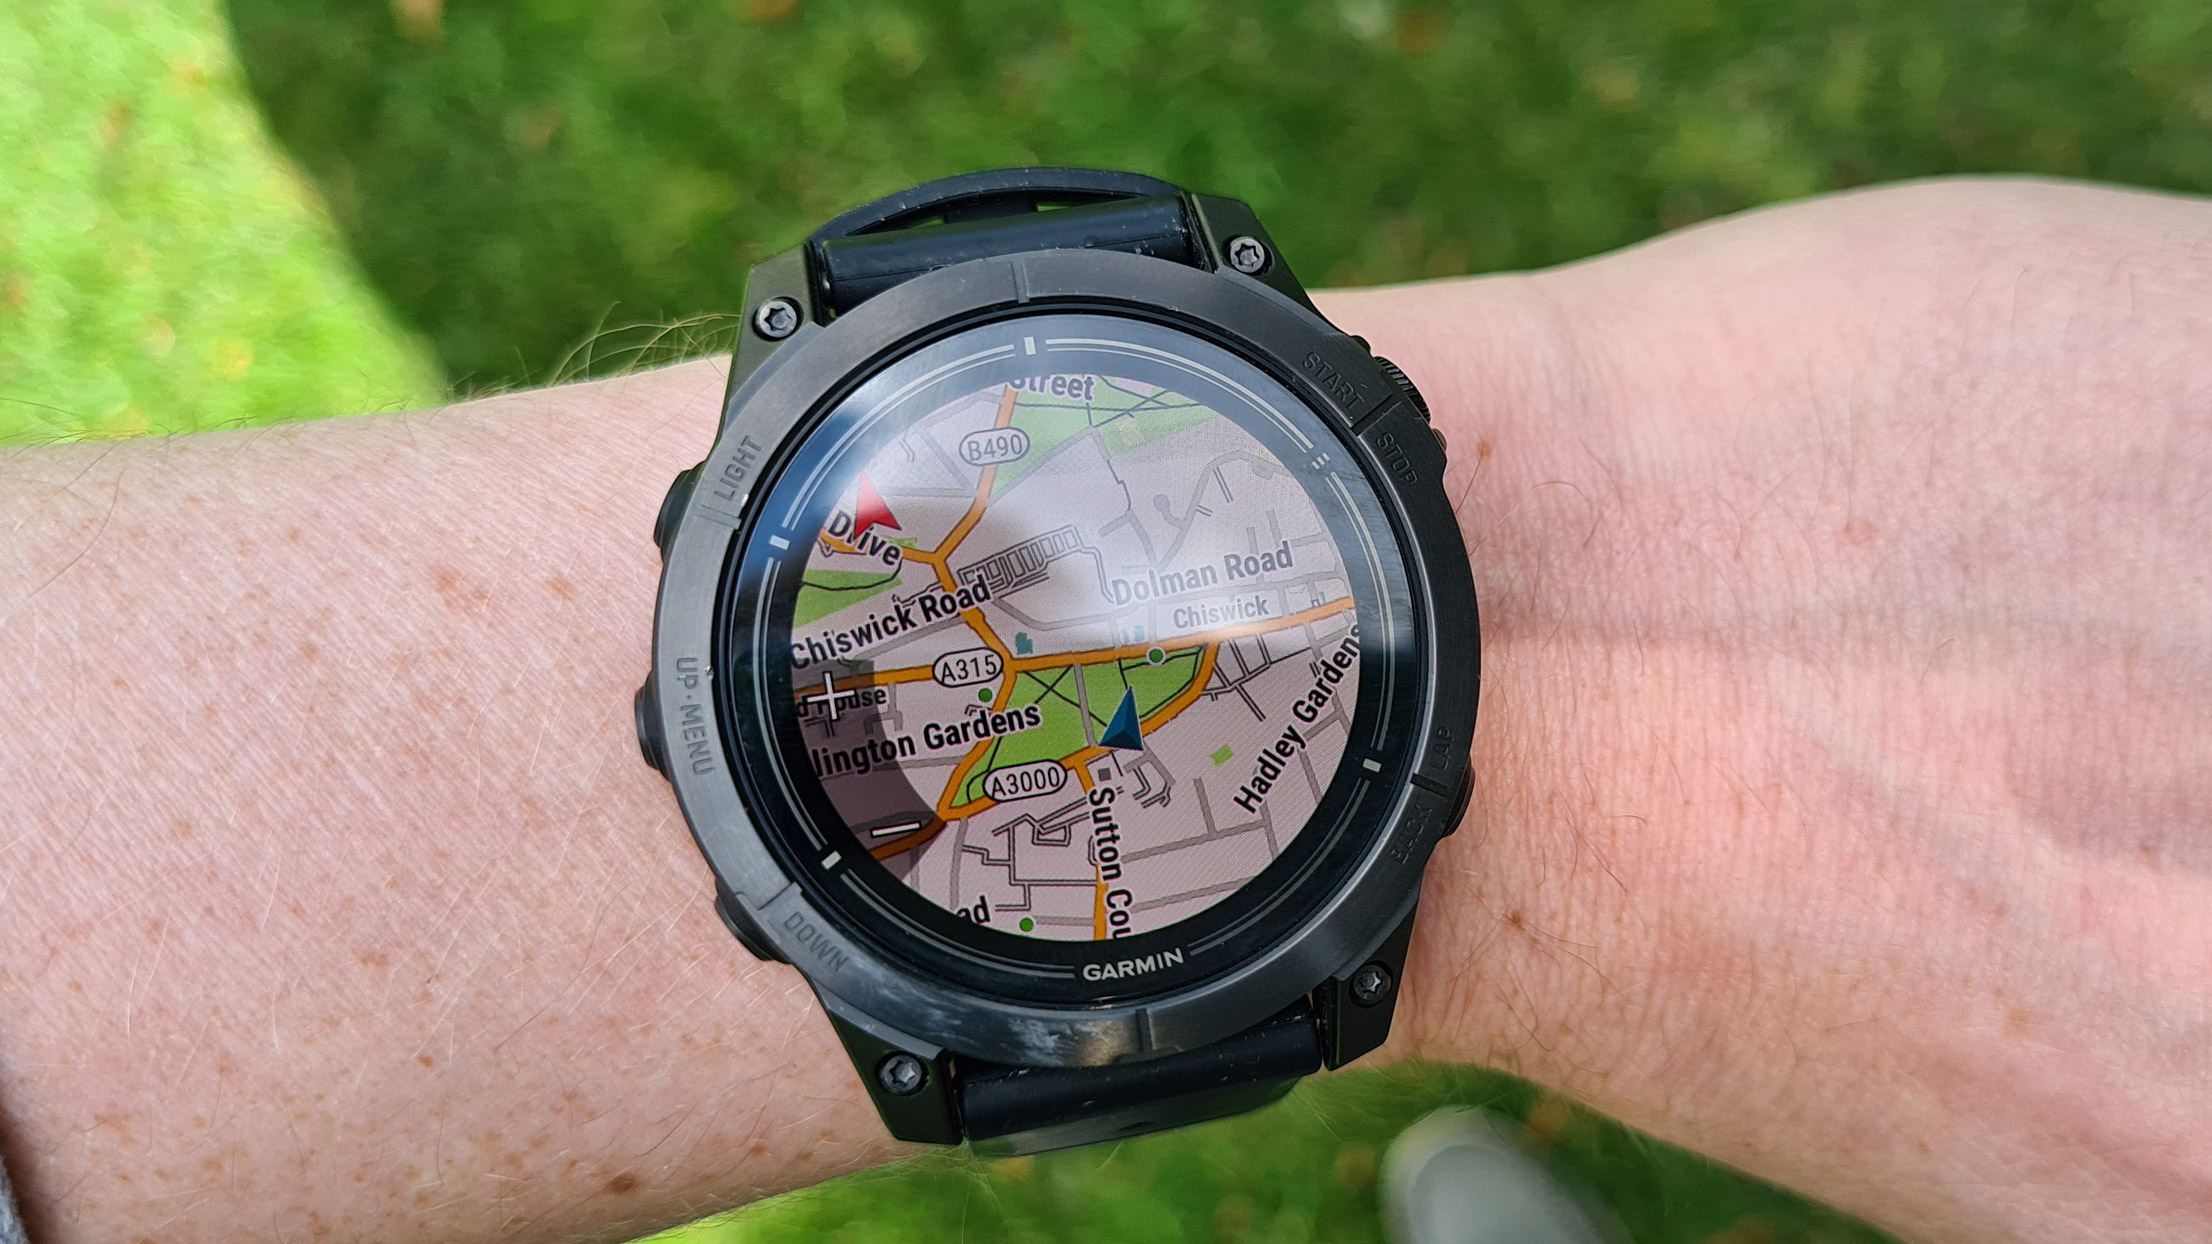
One of the many reasons for choosing one of the best Garmin watches is the ability to create a course, which is essentially pre-planning a running, riding or hiking route before you head out to tackle it, so that you know where you’re going and how long it should take you to complete the route.
Helpfully, Garmin through its Garmin Connect platform (both phone and web app) will let you do that in a pretty straightforward fashion. If you’ve just picked up a Garmin watch that supports courses and want to know how to get started, we’ve put together this quick and easy step-by-step guide.
Tools and requirements
- A compatible Garmin Watch that supports uploading courses. This includes the likes of the Garmin Forerunner 255, 265, Forerunner 965, Enduro and Instinct. Garmin has a list of compatible watches.
- Garmin Connect iPhone or Android app. You can also use the Garmin Connect Web app to create a course – you’ll need to download the Garmin Express desktop application if you want to upload the course to your watch.
How to create a course from the Garmin Connect iPhone or Android app
1. First steps
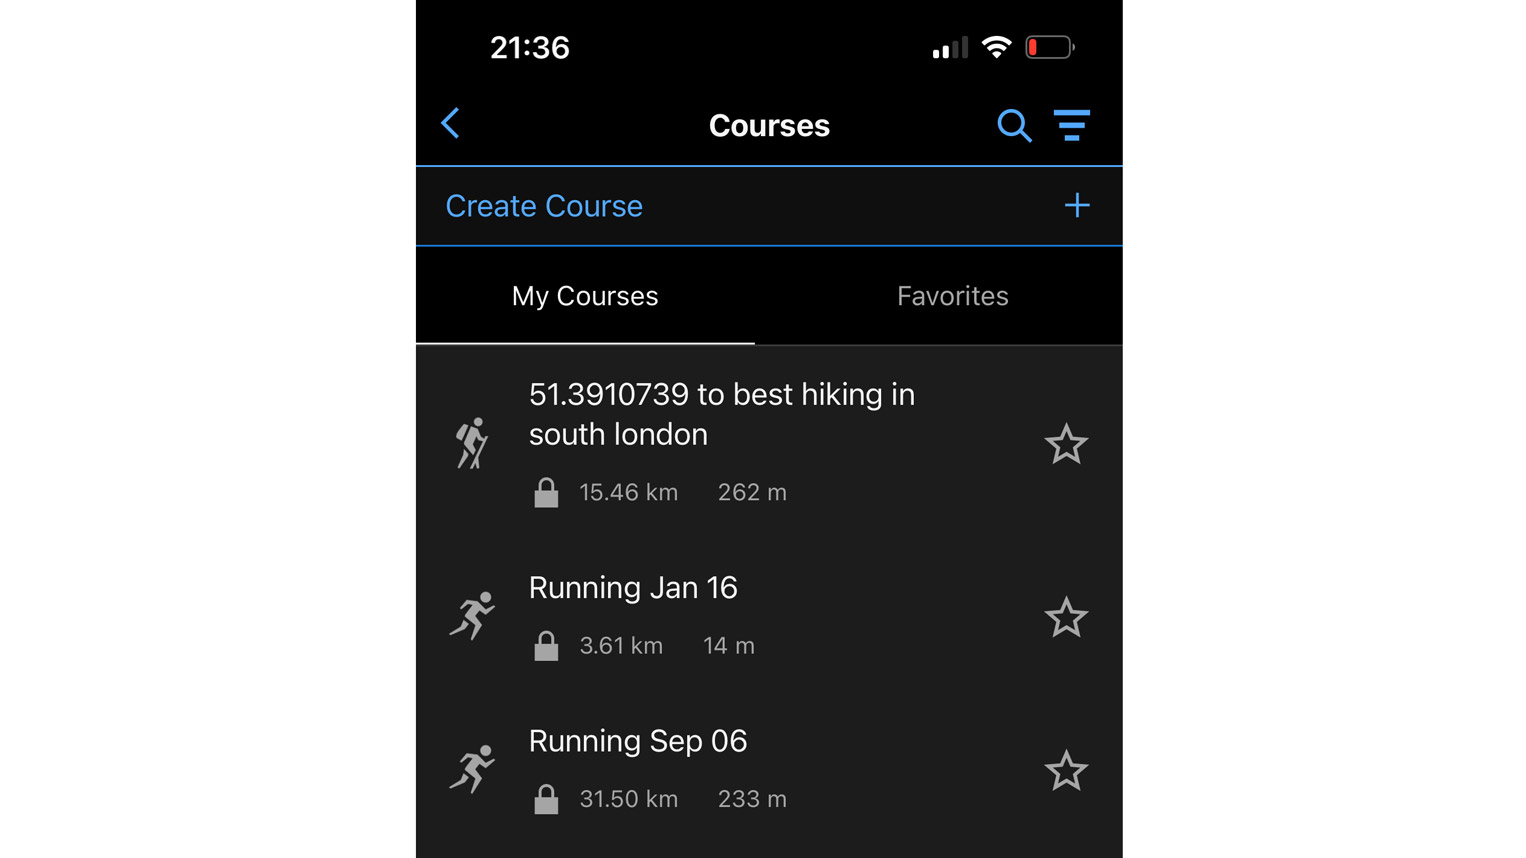
Go to your phone and launch the Garmin Connect app, if you’re using an Android phone, tap the three-line menu icon at the top-left of the screen. On an iPhone, you need to tap More, which should be at the bottom-right of the screen.
Tap Training & Planning, then tap Courses.
Tap Create Course or the + icon to start building a course. You can select your course type based on how you’re planning to tackle the route. Garmin courses cover cycling, running and hiking, plus another mode that covers other activities.
2. Creating a custom route
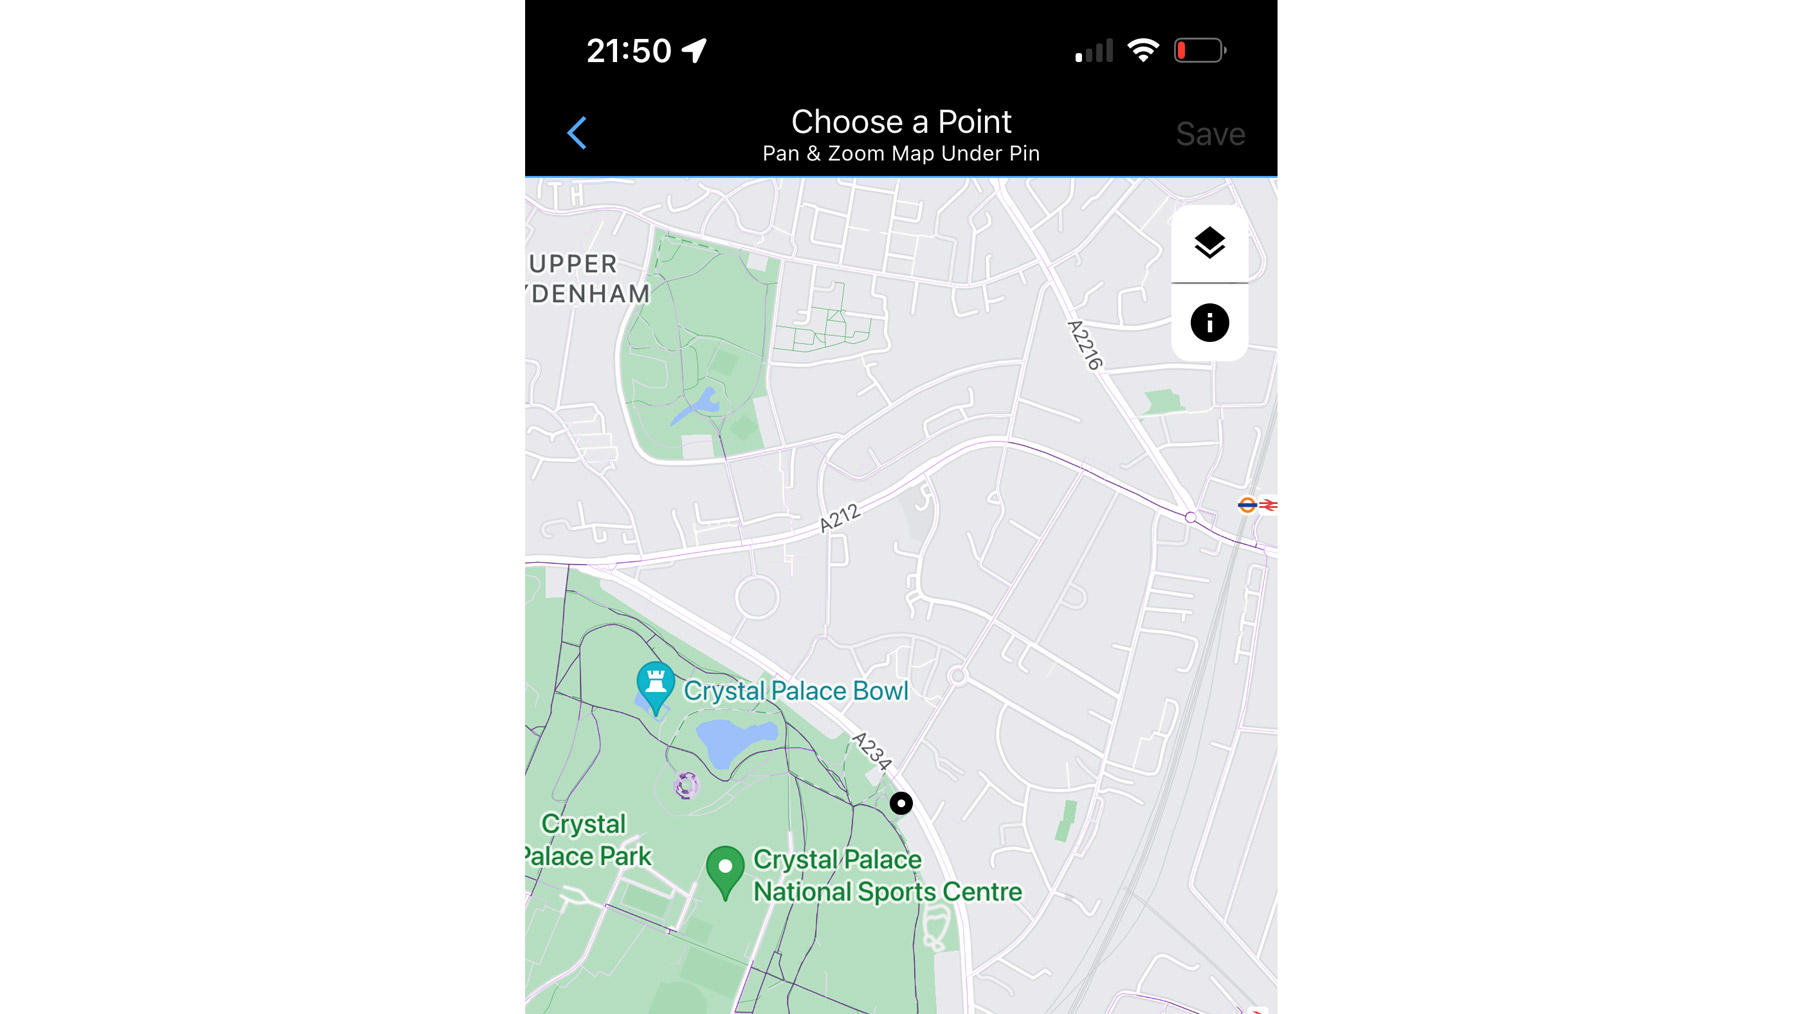
Once you’ve chosen your activity you’ll have the option to create a custom route, or one that’s automatically built for you based on a single starting point.
If you select the custom option, you can tap on the map to set your starting point. Next, tap on the endpoint for the course. Once you’ve done that the app will calculate the distance to that point, and details like ascent and descent information to better prepare you for how challenging your route is going to be.
If you’ve changed your mind about any aspect, you can tap the back arrow icon to redo your route.
3. Finishing touches
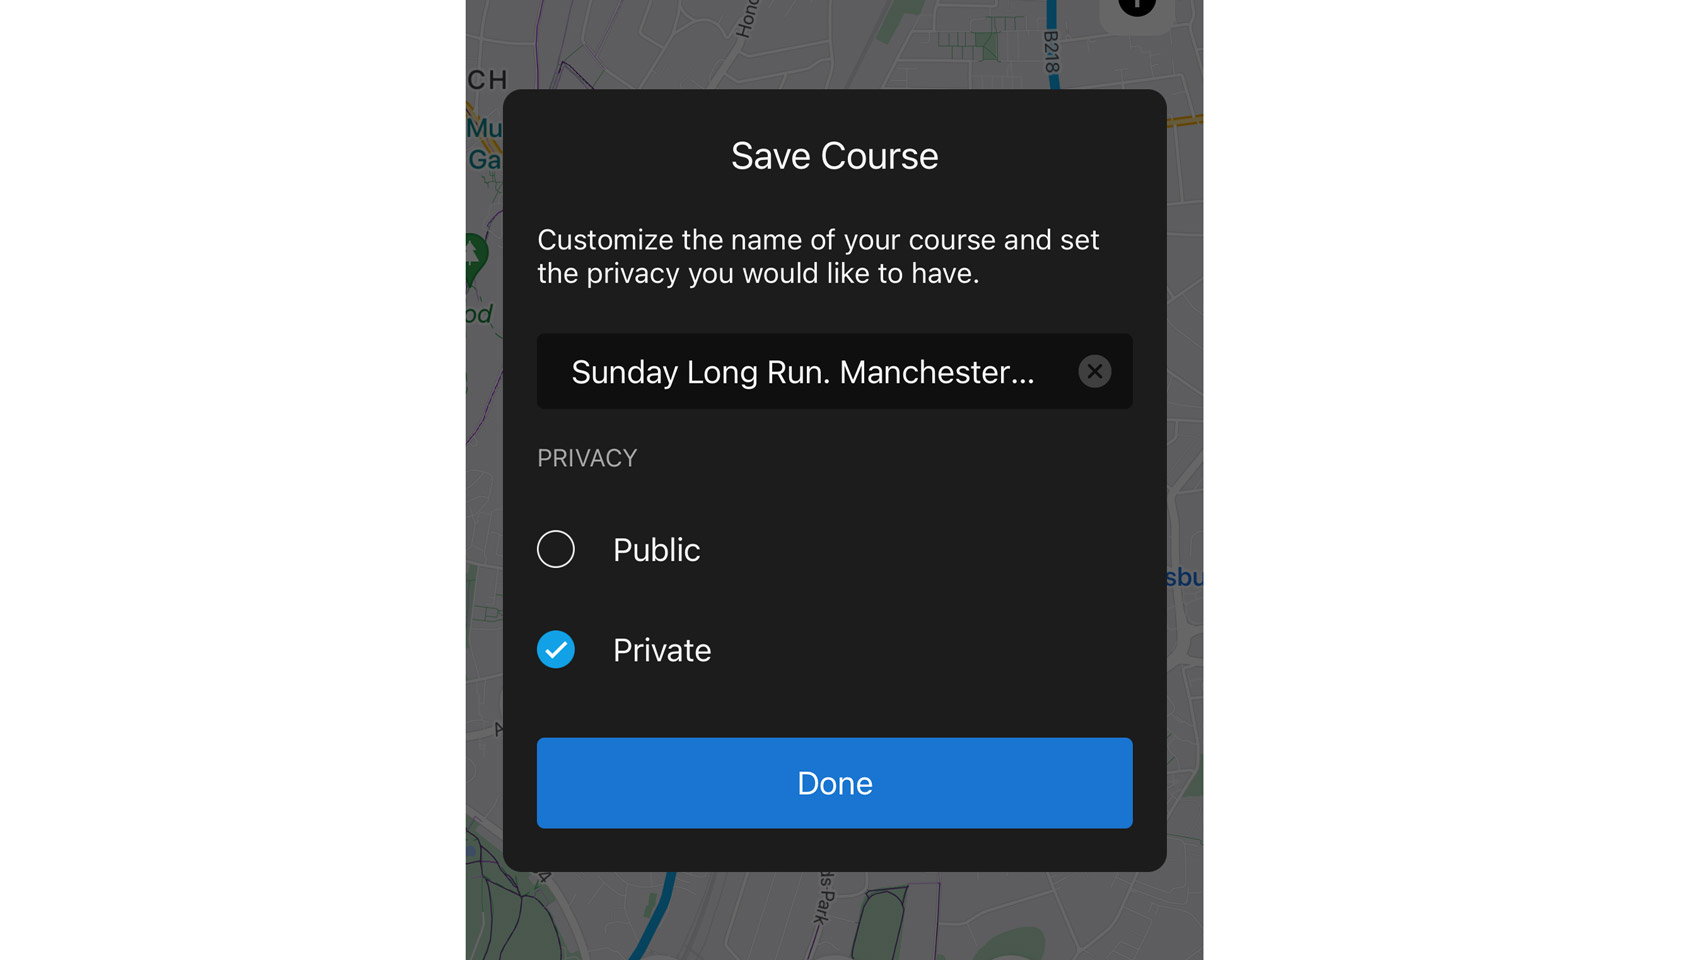
There are some additional course options that you can select by tapping the three dots icon. These include creating a loop back to your starting point, and you can also add course points like aid stations or service stations to refuel. When you’re satisfied with your route, tap Save.
On the next screen you can enter a name for your course, and choose whether to keep the route private or make it public so other Garmin users can try it out. If you want to send the course to your Garmin watch, tap the icon with the phone screen and arrow. From here you’ll be able to send it to your paired device.
How to create a course from the Garmin Connect web app
1. Select Courses
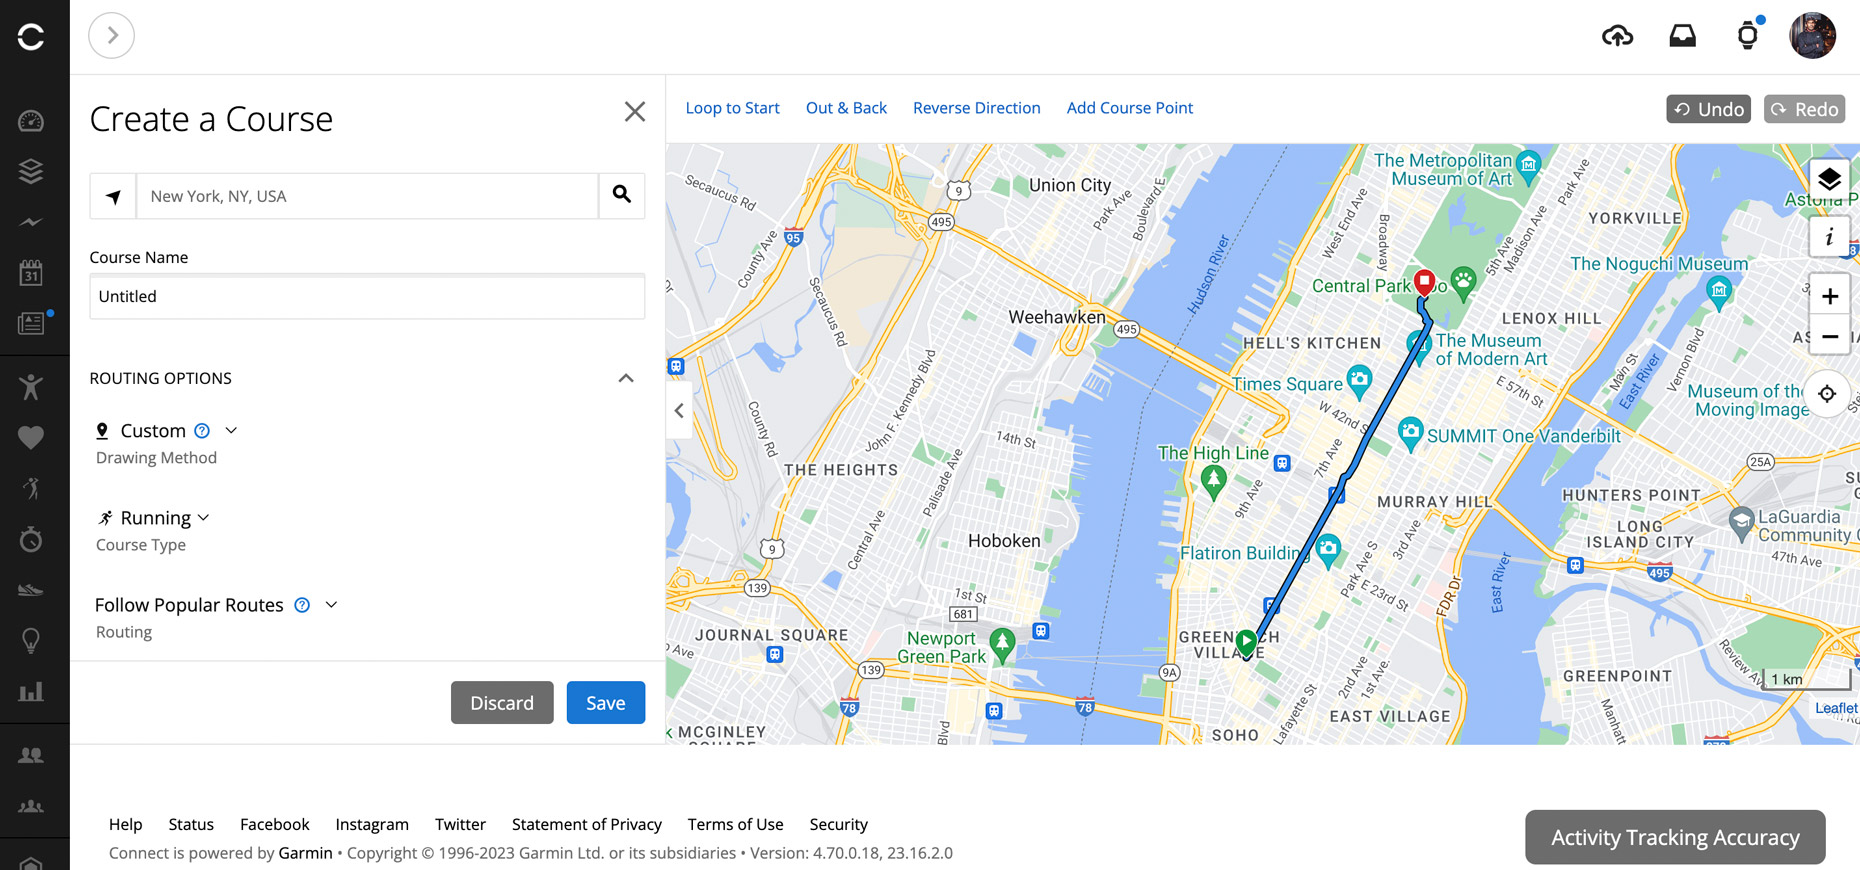
On your computer go to Garmin Connect and sign in using the email address and password you used to set up your Garmin watch. Using the dropdown menu down the side of the page, select Training and Planning and then Courses.
Select Create New, and as in the Garmin Connect phone app you can choose the type of activity you’d like to build the route for.
Click on the map to create a custom route, or let the app automatically create a route for you. You can additionally search for a location you’d like to include on the route.
There are some additional features here that aren’t available in the mobile app, like creating routes based on popular existing routes, following roads, or creating a freehand route. You can also choose to loop back to the start, add course points, reverse the direction of the route, and do an out and back-style route.
2. Create a new course
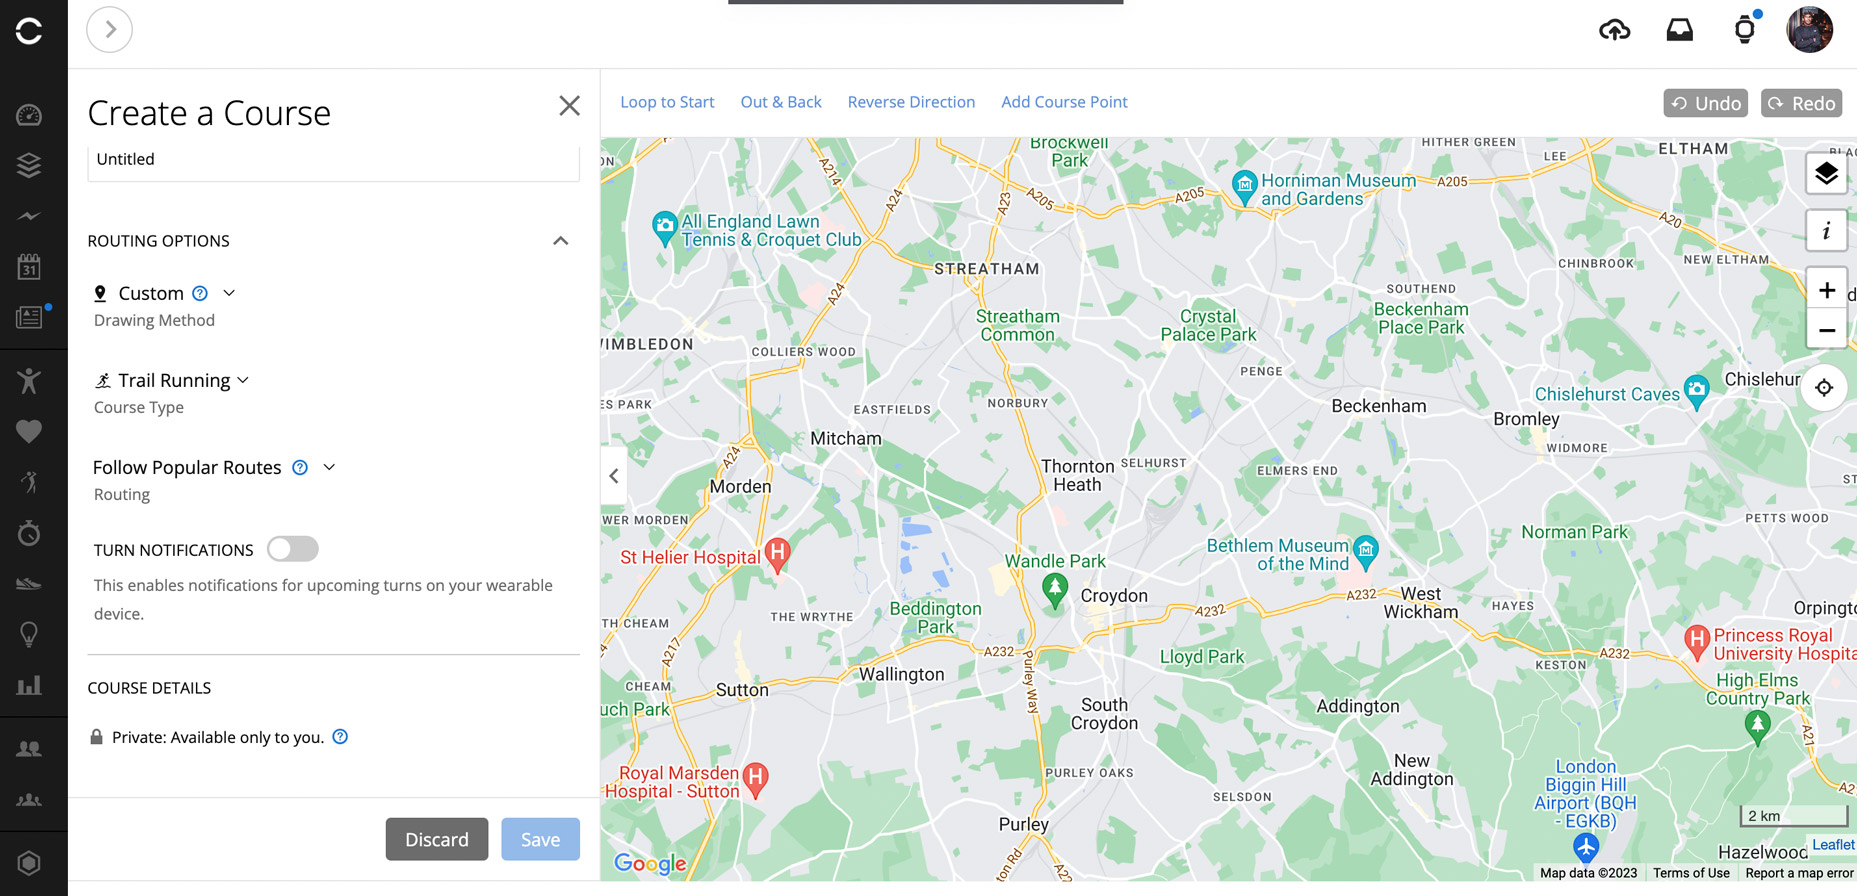
Select Create New, and as in the Garmin Connect phone app you can choose the type of activity you’d like to build the route for. Click on the map to create a custom route, or let the app automatically create a route for you. You can additionally search for a location you’d like to include on the route.
There are some additional features here that aren’t available in the mobile app, like creating routes based on popular existing routes, following roads, or creating a freehand route. You can also choose to loop back to the start, add course points, reverse the direction of the route, and do an out and back-style route.
3. Save your course
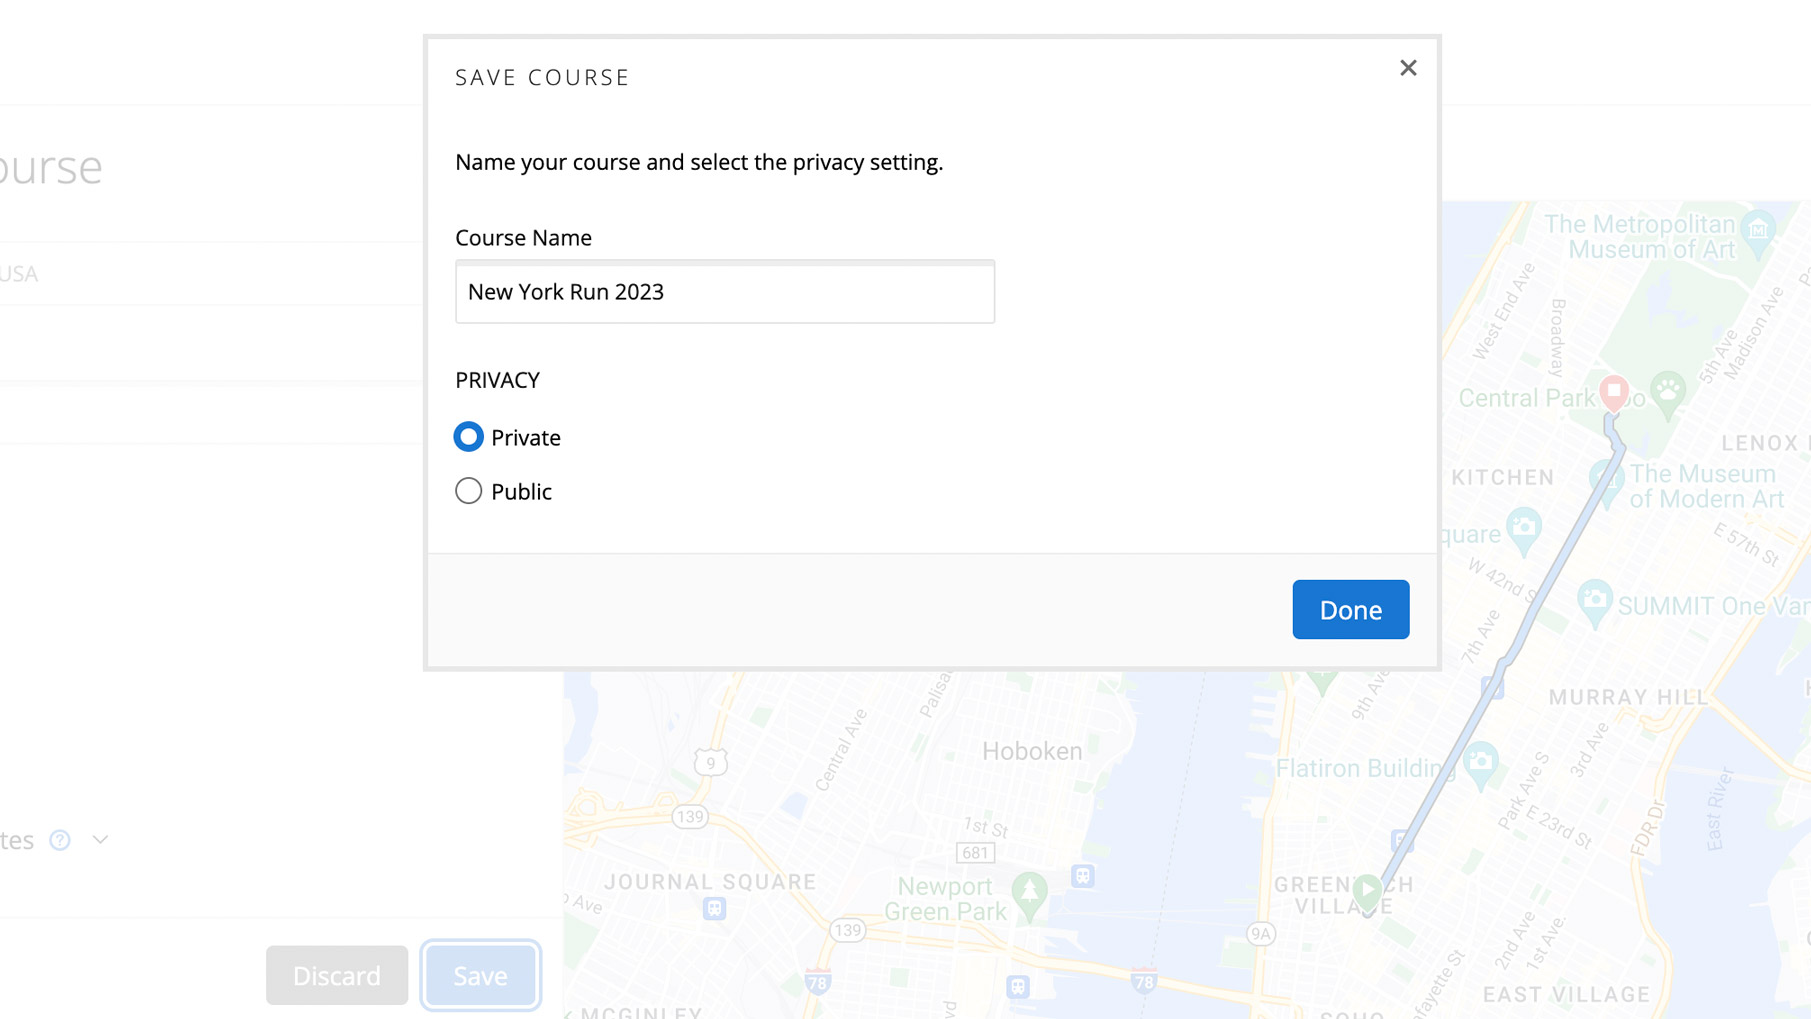
Hit Save to save your course, and choose whether you want the route to be public or kept private. If you want to send the route to your device, select ‘Send to device’ and you’ll then be able to select the watch or watches paired to that Garmin Connect account.
You’ll then be prompted to open Garmin Express, Garmin’s desktop application that lets you sync settings to your watch, including created routes when connected to your computer.
How to view a course on your Garmin watch
Simple steps:
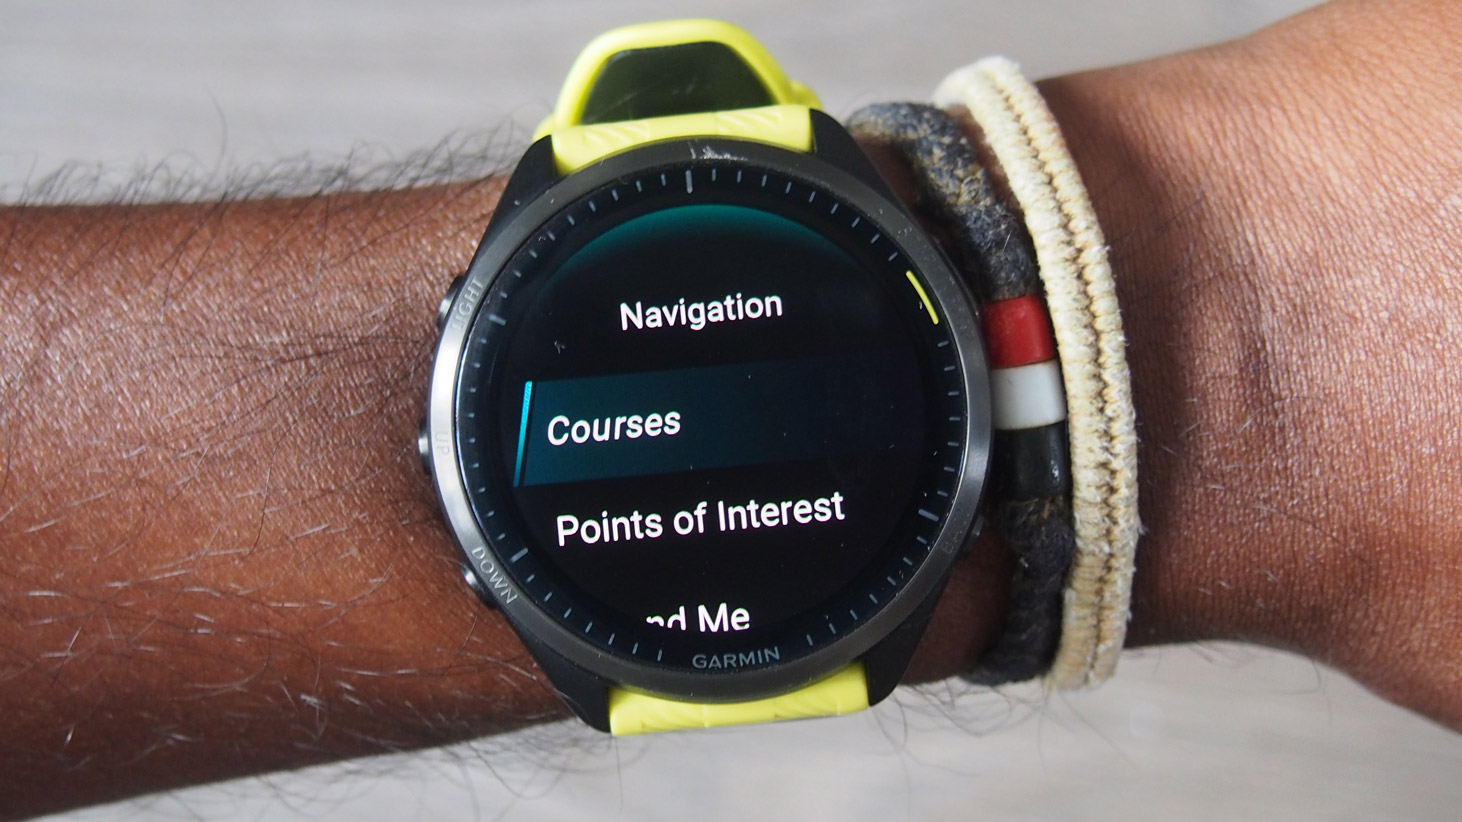
When you’ve successfully synced and sent your new course to your watch, you’ll need to go into the workout screen on your watch and select the activity you’ve created the route for.
If, for example, you’ve created a running route, select the Run mode and tap the menu button, which is typically assigned to the middle physical button on the left-hand side of a Garmin watch.
Select Navigation and then Courses. Select your route, and it will load, along with the distance and elevation details.
FAQs:
Can I create a route from a previous workout?
Yes, you can create a route from a workout you’ve previously completed.
From the Connect phone app, go to a recent outdoor activity you’ve completed and tap the three-dots icon, then select ‘Save to My Courses’.
From the Connect web app, go to Activities and open one of your logged outdoor workouts. Click the small cog icon and select ‘Save to My Courses’.
Can you share a course?
From the Garmin Connect phone app, you can share a course by following the above steps and selecting Share. From the web app, select a course that you’ve created, and choose to change it to a public course.
Can you remove a course from a Garmin watch?
You can delete a course loaded onto your Garmin watch if you no longer want to use it, or if you need to free up some space.
To do this, follow the instructions above for how to view a course on your watch, then when you’ve selected a course use the top-right button to scroll through the course settings, which include a Delete option.
You can also do this from the saved courses section on the Garmin Connect web app.
You might also like:
- Garmin has just resurrected a four-year-old watch, and it could be an Apple-beater
- The best Garmin watch 2023: Multisport watches for every outdoor pursuit
- Garmin Epix Pro review: One of Garmin’s best watches just got even better
Get daily insight, inspiration and deals in your inbox
Sign up for breaking news, reviews, opinion, top tech deals, and more.
Michael is a freelance journalist who has covered consumer technology for over a decade and specializes in wearable and fitness tech. Previously editor of Wareable, he also co-ran the features and reviews sections of T3, and has a long list of bylines in the world of consumer tech sites.
With a focus on fitness trackers, headphones, running wearables, phones, and tablet, he has written for numerous publications including Wired UK, GQ, Men's Fitness, BBC Science Focus, Metro and Stuff, and has appeared on the BBC Travel Show. Michael is a keen swimmer, a runner with a number of marathons under his belt, and is also the co-founder of YouTube channel The Run Testers.
