10 iPhone camera tips and tricks direct from Apple's experts
Top iPhone camera secrets you might not have known
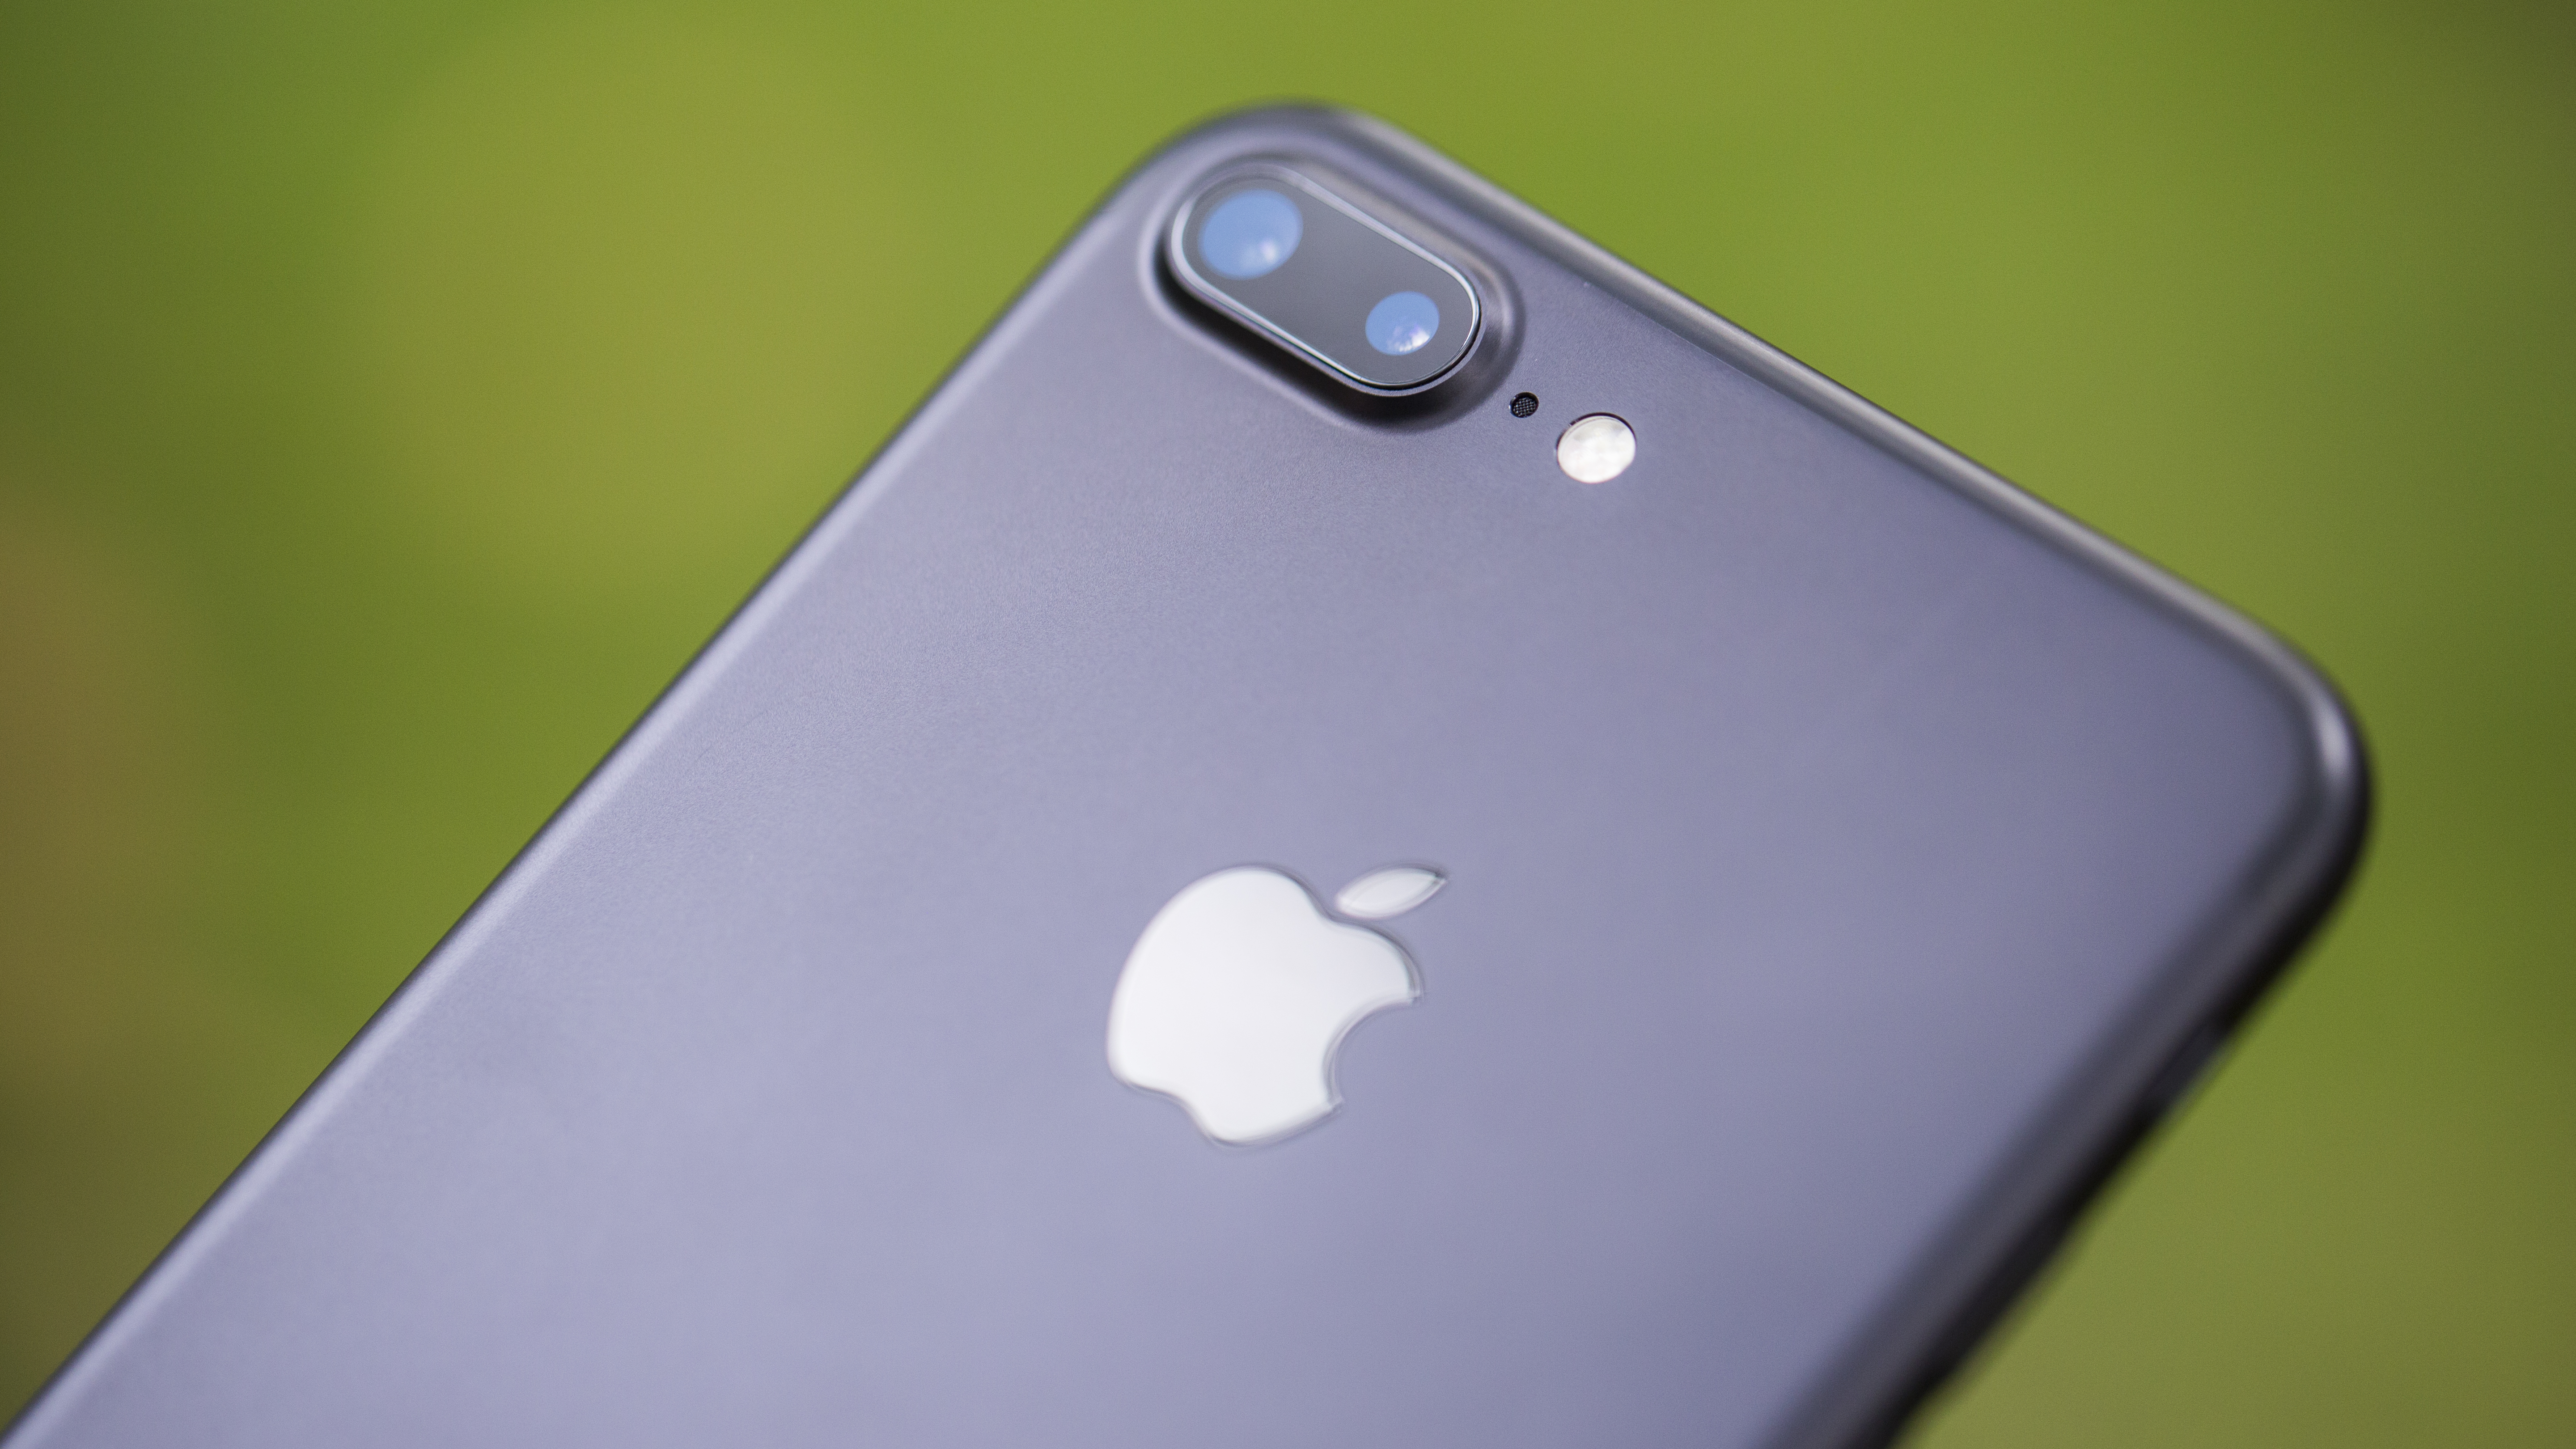
Apple's iPhone (and iPad) camera app is designed to be simple to use, but that means it could be seen as less feature-rich compared to rivals.
However, there's more to it than initially meets the eye, so we spoke to Apple's camera app experts during a photo walk around London to find out the features you may not know about.
What is it? A neighborhood walk near an Apple Store led by an expert, showing you how to get the most from your iPhone’s camera
Who's it for? Anyone who wants to improve their iPhone or iPad photography
How long is it? The whole session is about 90 minutes
How often are they? Generally weekly from key Apple Stores
How much does it cost? It's free!
How to do I join a Photo Walk? You can sign up online or in store
Most of these tips and tricks will work on any iPhone or iPad running iOS 11 with the standard camera app.
There should be something in here for everyone - perhaps the more ardent iPhone users will be aware of some of the early choices, but these are the features Apple's keen to teach owners of its devices.
So even if you've had an iPhone or iPad for years, these are the tips Apple wants to make sure everyone knows... and we learned a few new things, despite using these phone for years.
1. Lock the focus
A simple one to start us off, but something you may not have ever known.
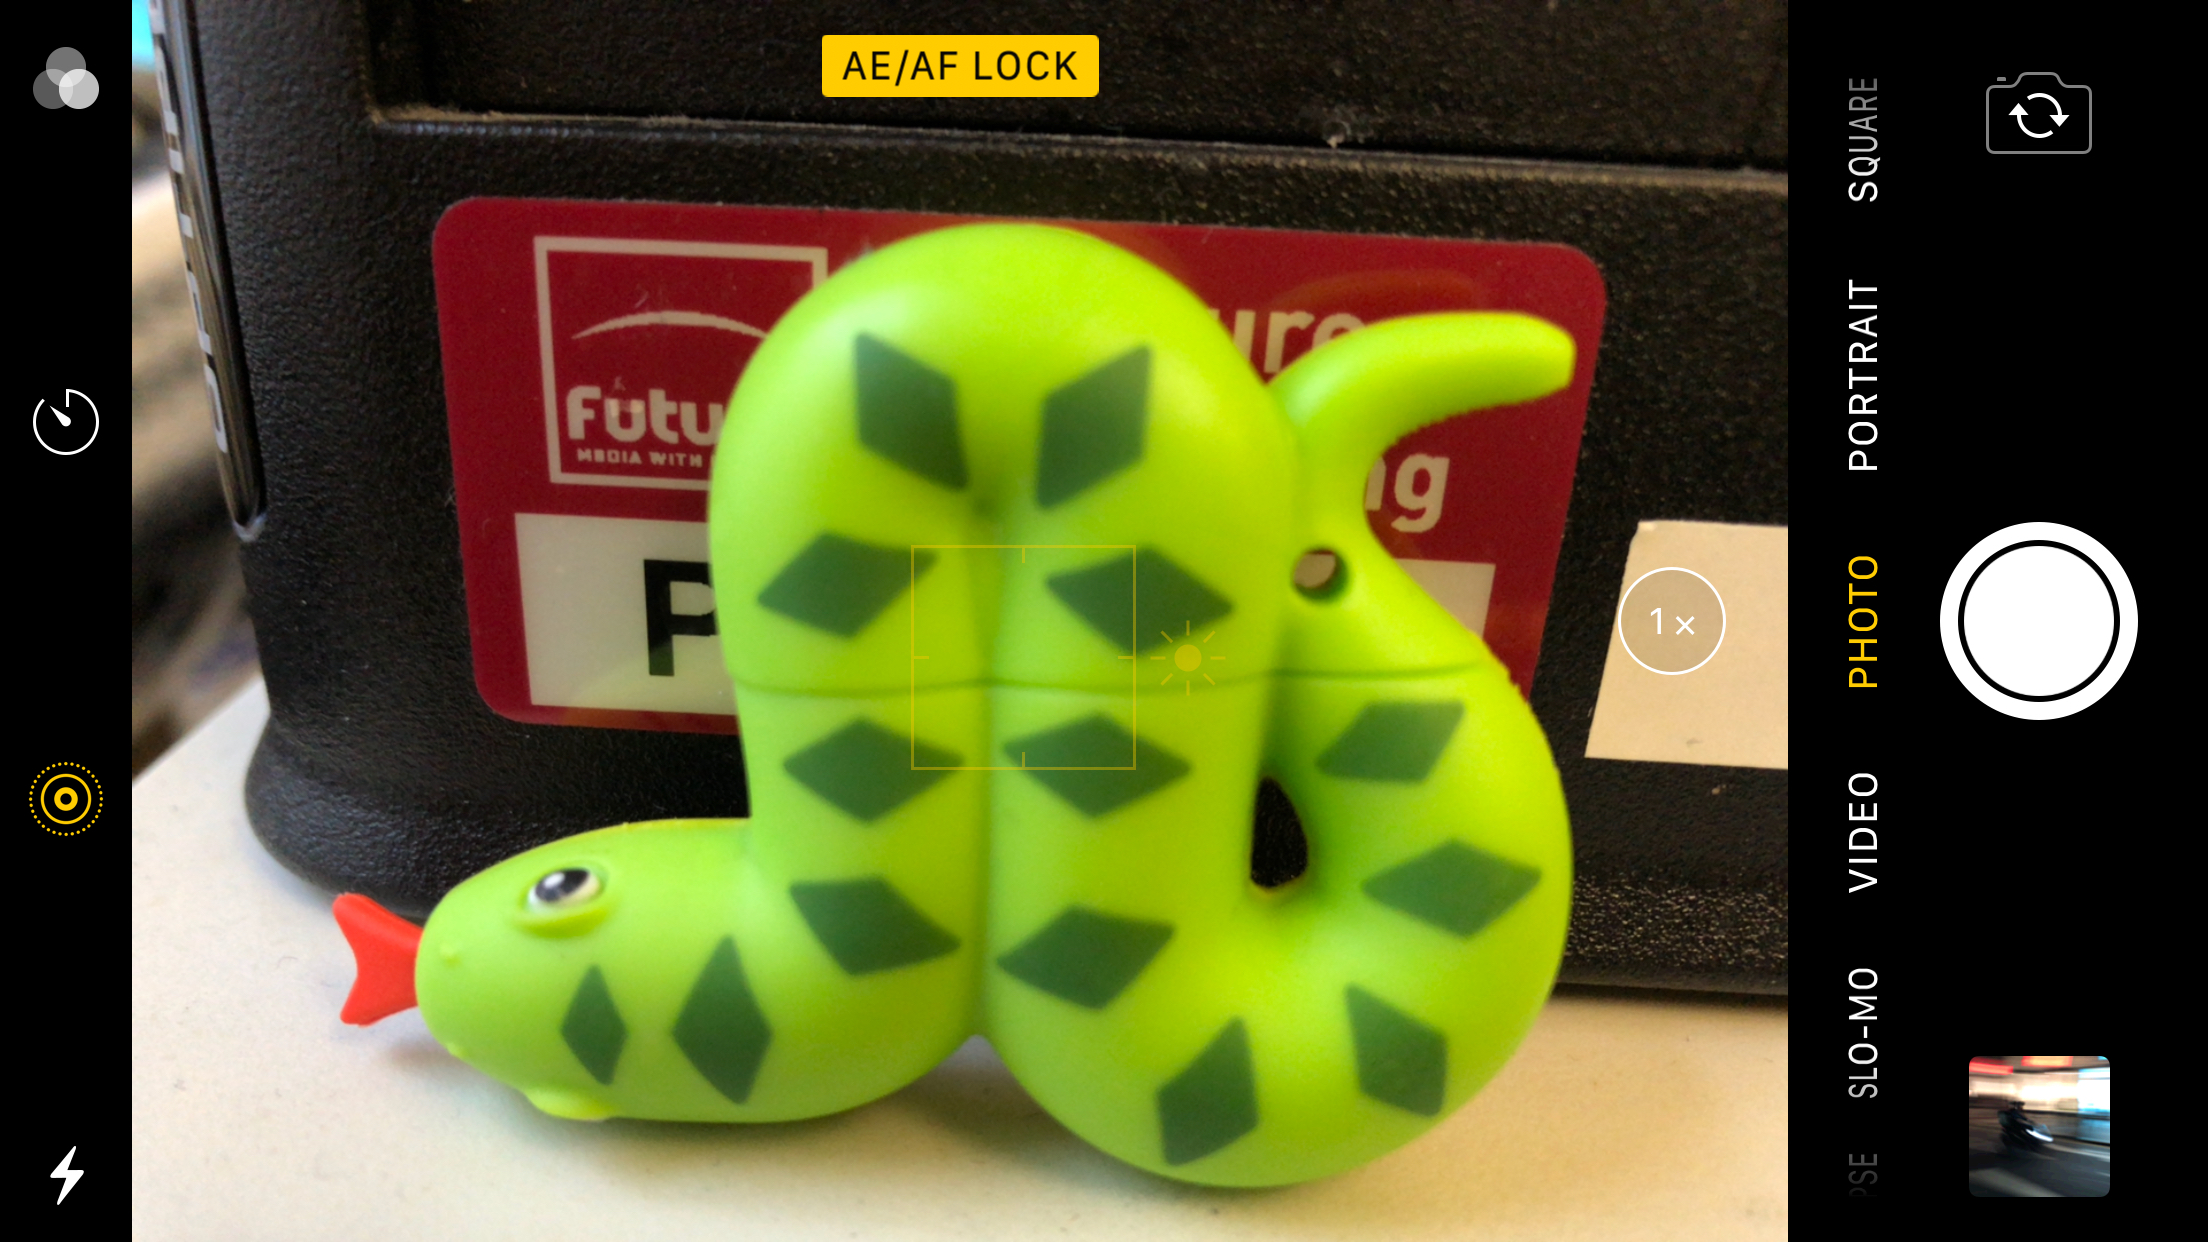
Ever got up close to a subject and tapped to focus, only then to move the camera and lose that focus? Or maybe the auto face recognition keeps focusing on a person rather another object in shot? Well, there's a way around it.
Get daily insight, inspiration and deals in your inbox
Sign up for breaking news, reviews, opinion, top tech deals, and more.
Pressing a finger on what you want the iPhone camera to focus on will lock the focus, allowing you the freedom of arm movement without having to tap again.
You'll know it's worked as ‘AE/AF Lock’ will appear on screen. Simple, yet effective.
2. Expose yourself
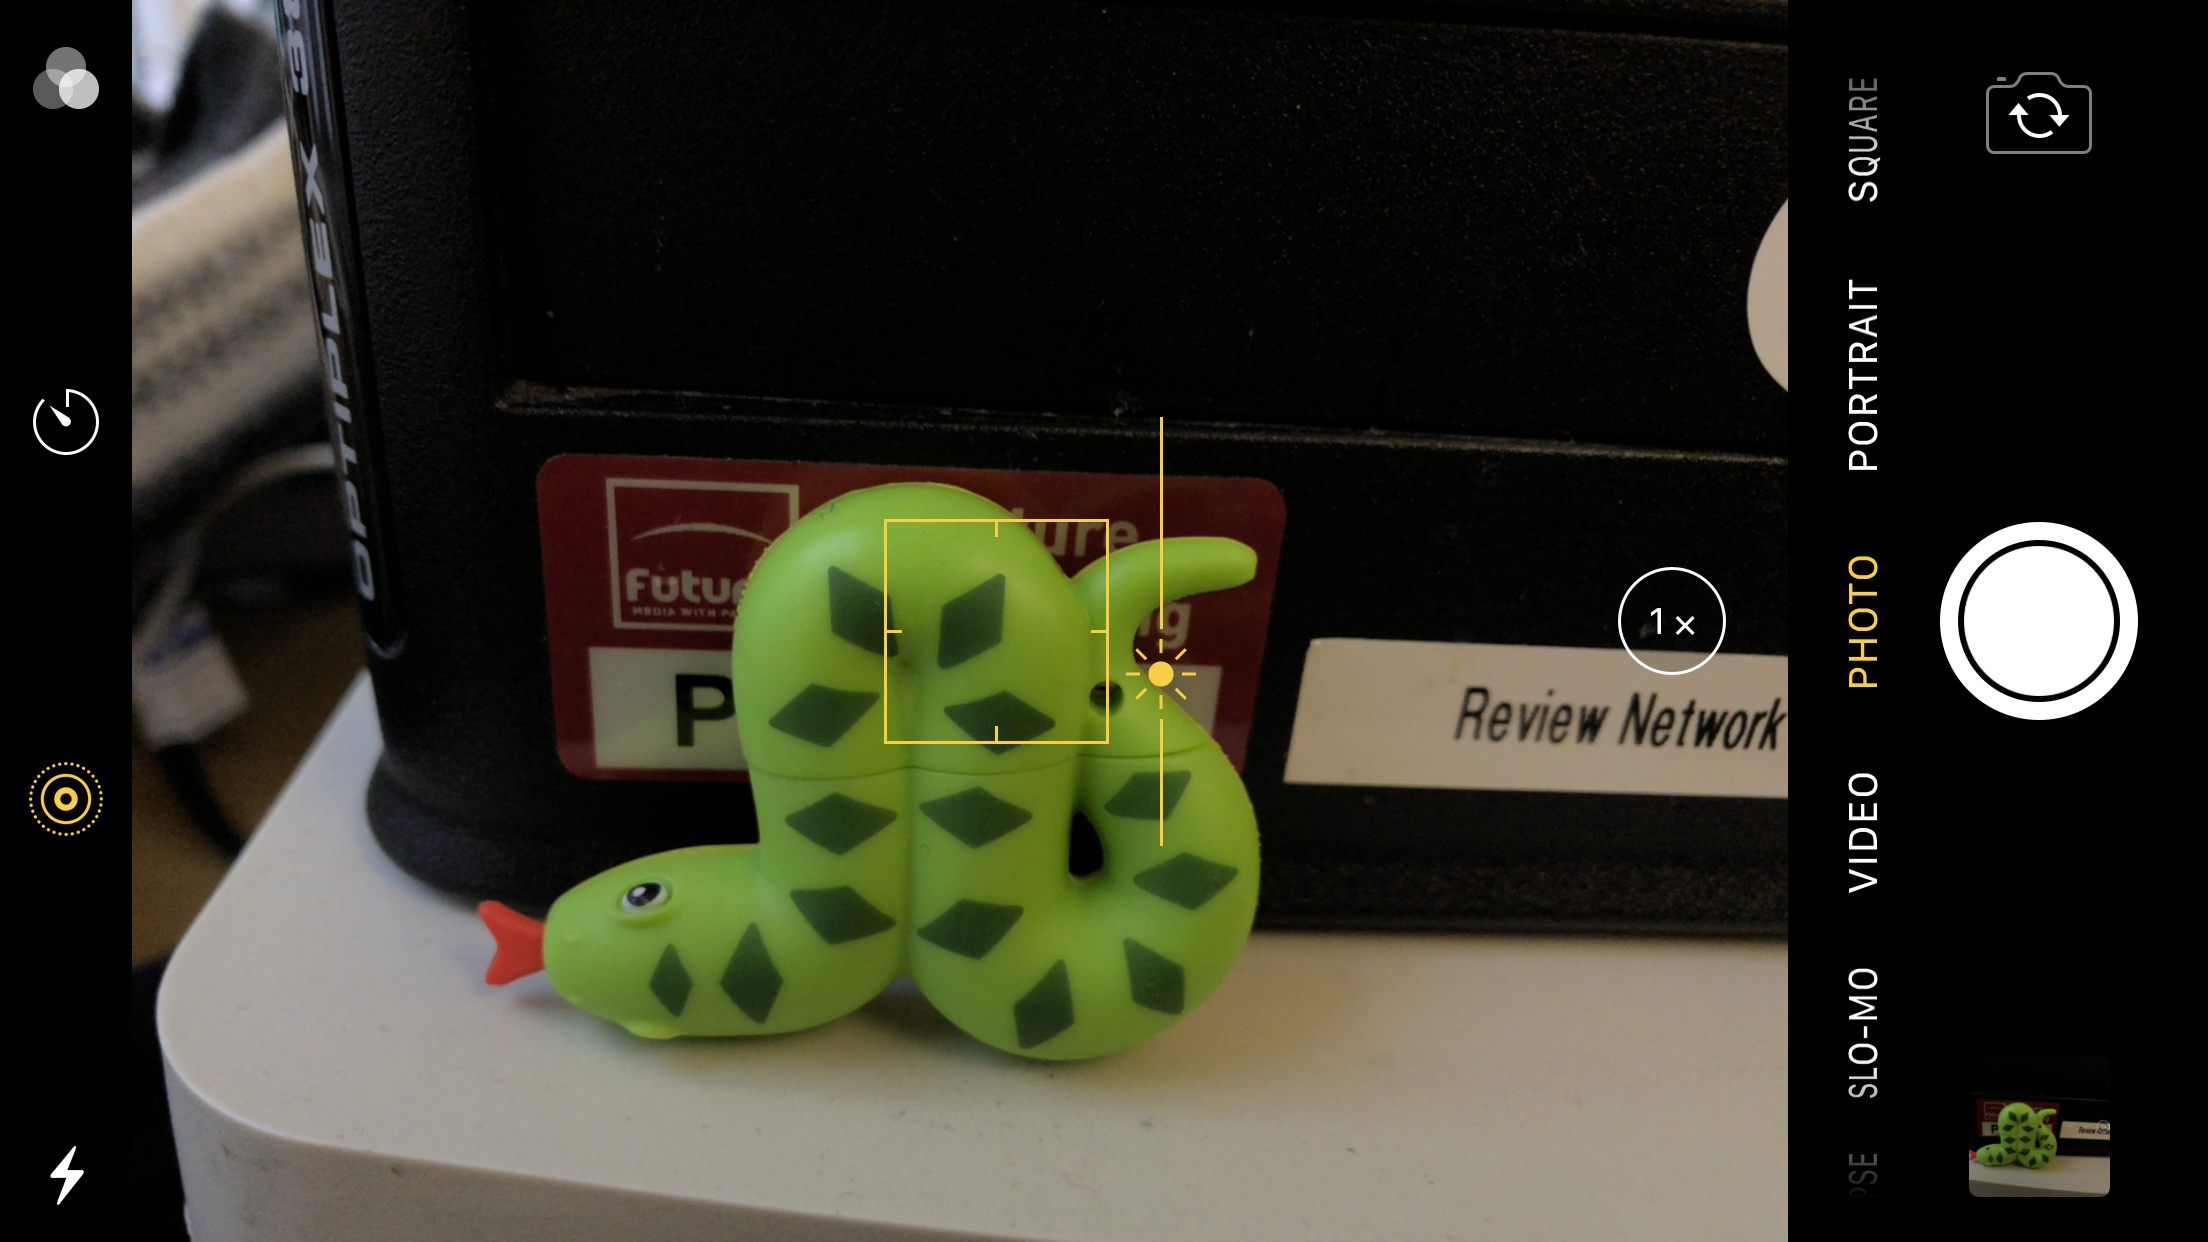
You can quickly change the lighting of your shot on iPhone. Tap to focus and then slide your finger up to brighten, or down to darken the image.
It's great for brightening up shots with darker areas, or creating moodier low light snaps which feature lights or bright spots.
3. Blurred lights effect
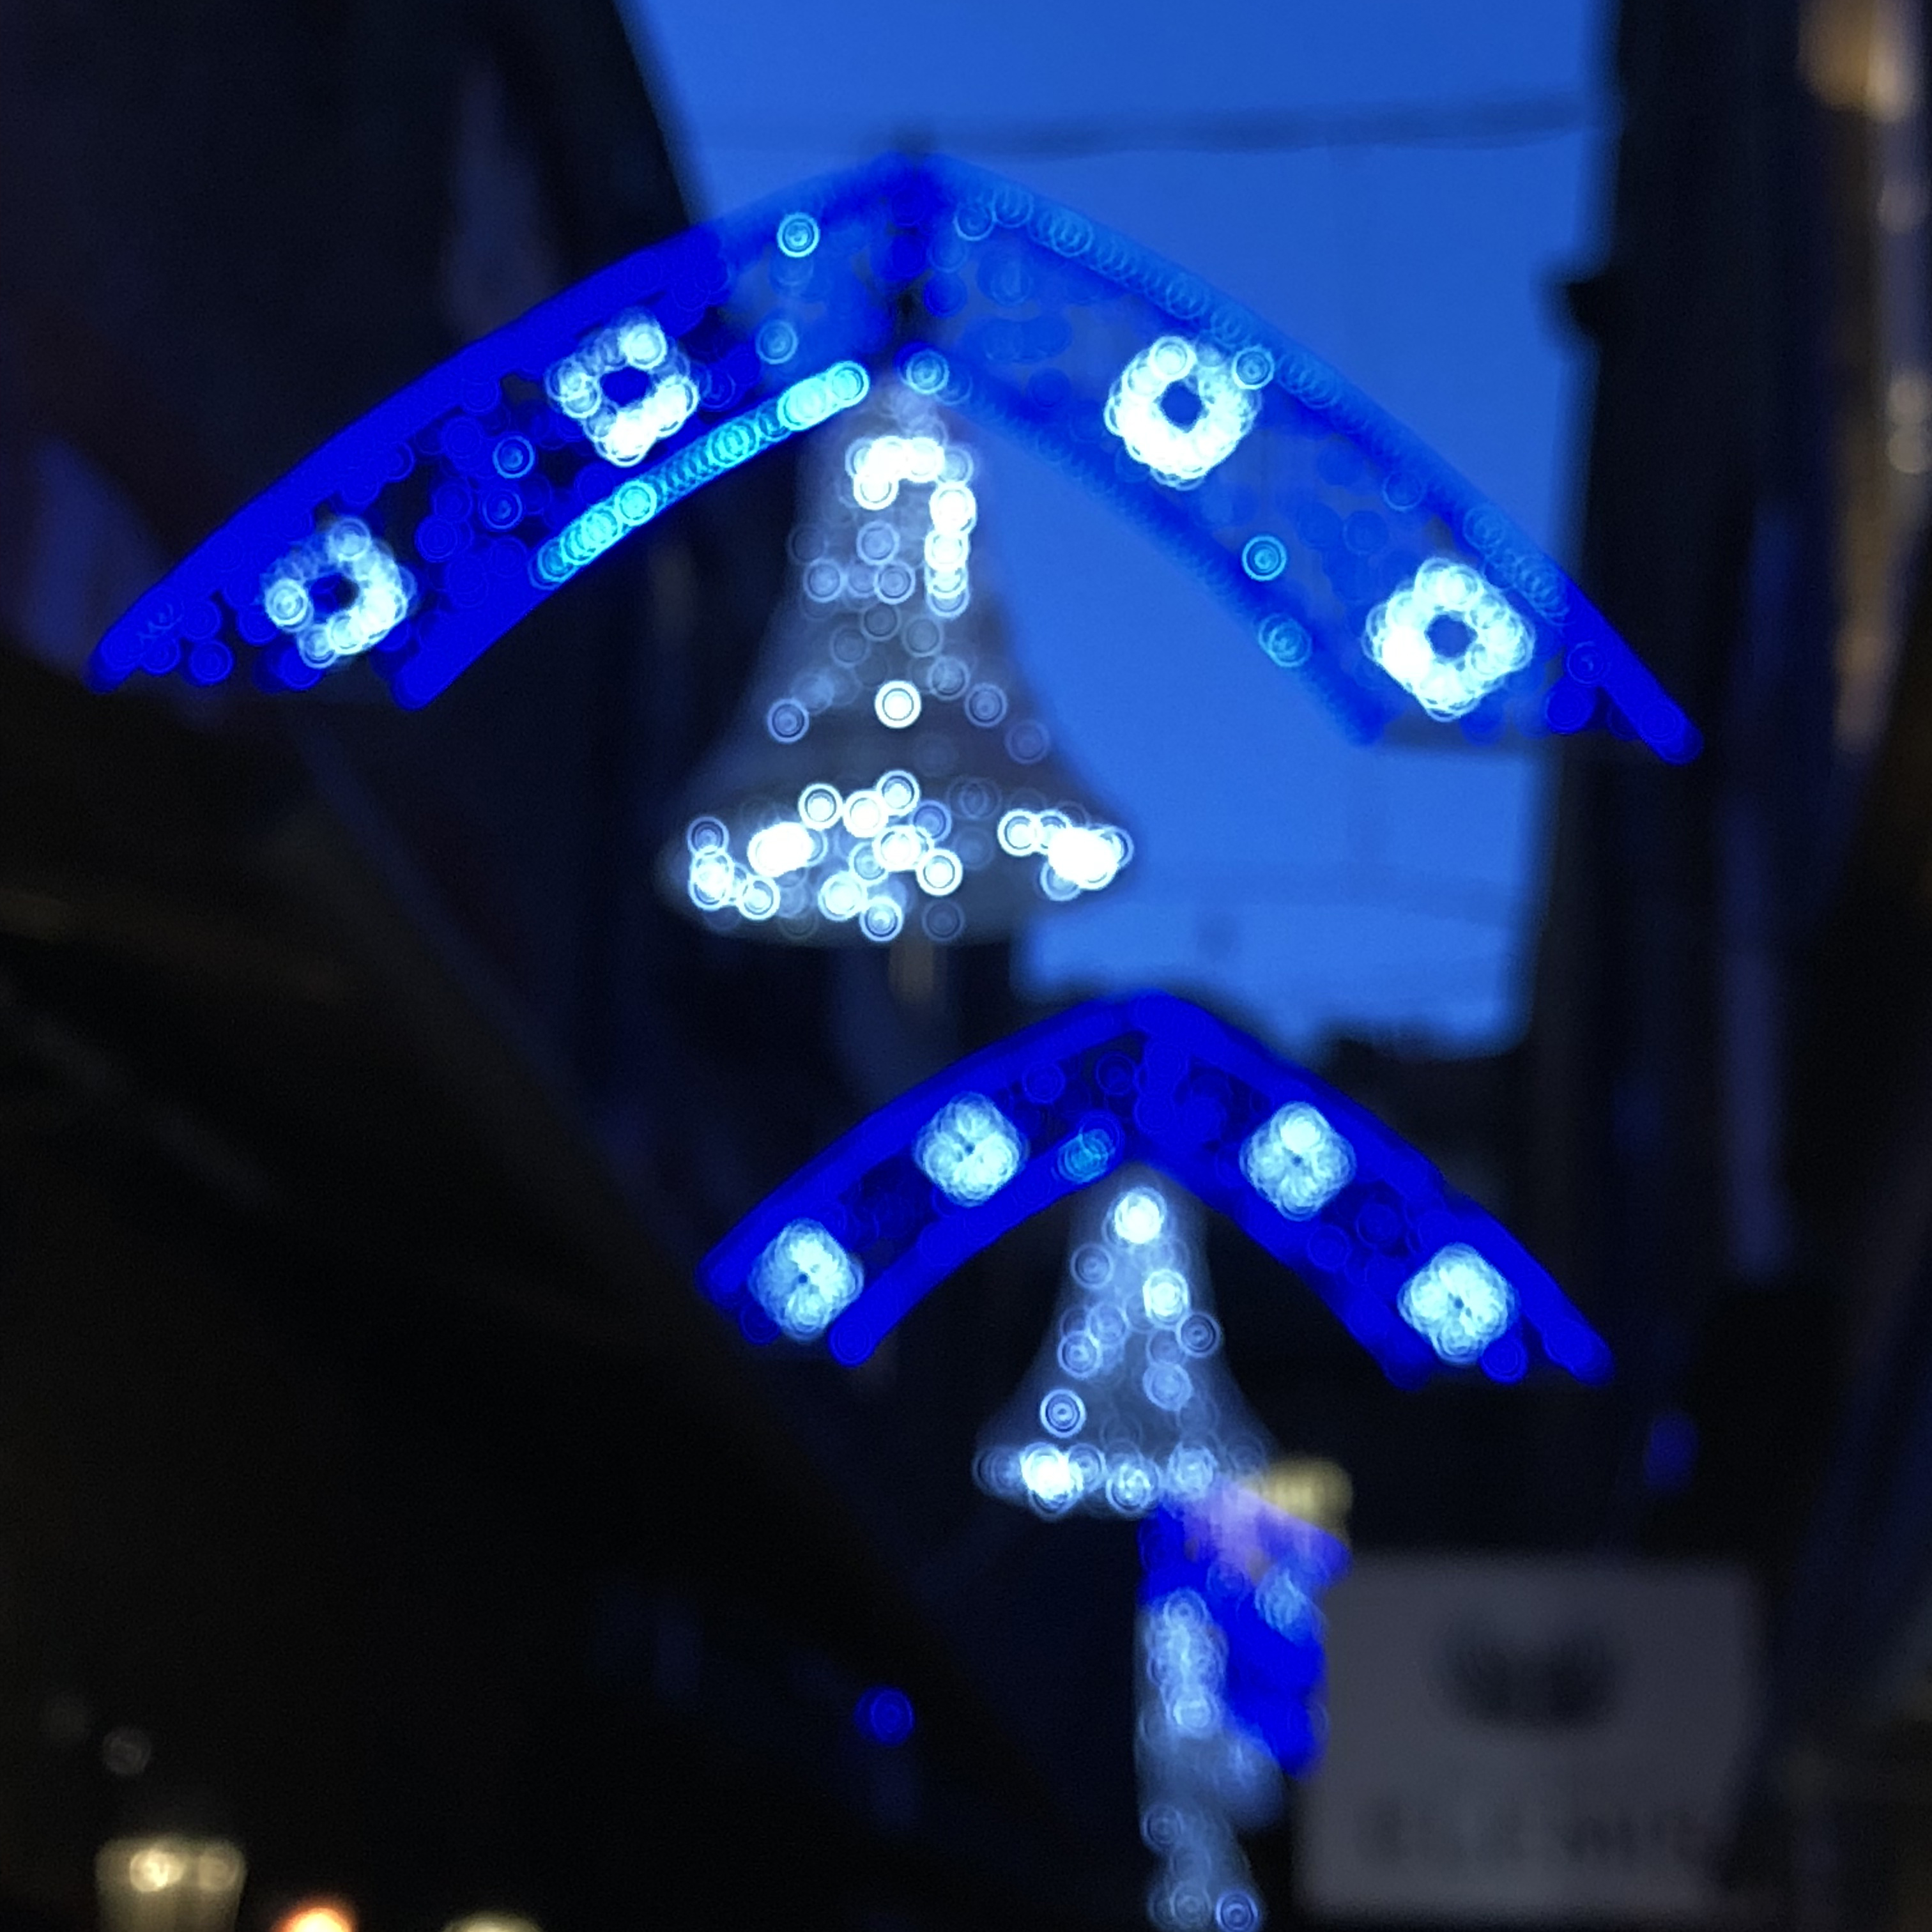
You may well have seen photos where lights are blurred out. It's an effect usually reserved for higher-end cameras, but smartphone snappers are now super smart and you can get the same results with your iPhone.
First of all you'll want to lock the focus (see tip one) on an object close to the camera, and in front of your light scene - we used our hand.
With the focus locked, remove your hand from view and your background is now blurred - like a Bokeh effect.
Next you’ll want to reduce the exposure (see tip two) to really highlight the lights you're trying to capture out of focus.
The result? A professional looking, arty shot that's taken you next to no time to snap.
4. Panorama like a pro
Panorama modes have been on our smartphones for years and are perfect for capturing sweeping vistas. But have you ever tried anything other than the prescribed left to right sweep on your iPhone?
Firstly, you don't always have to take your panorama from left or right. A tap of the directional arrow will reverse the sweep, allowing you to start from the right of your scene.
Secondly, try holding your iPhone (or iPad) landscape to capture skyscrapers or narrow alleys for striking, slightly bulbous results.
5. Be brilliant at burst
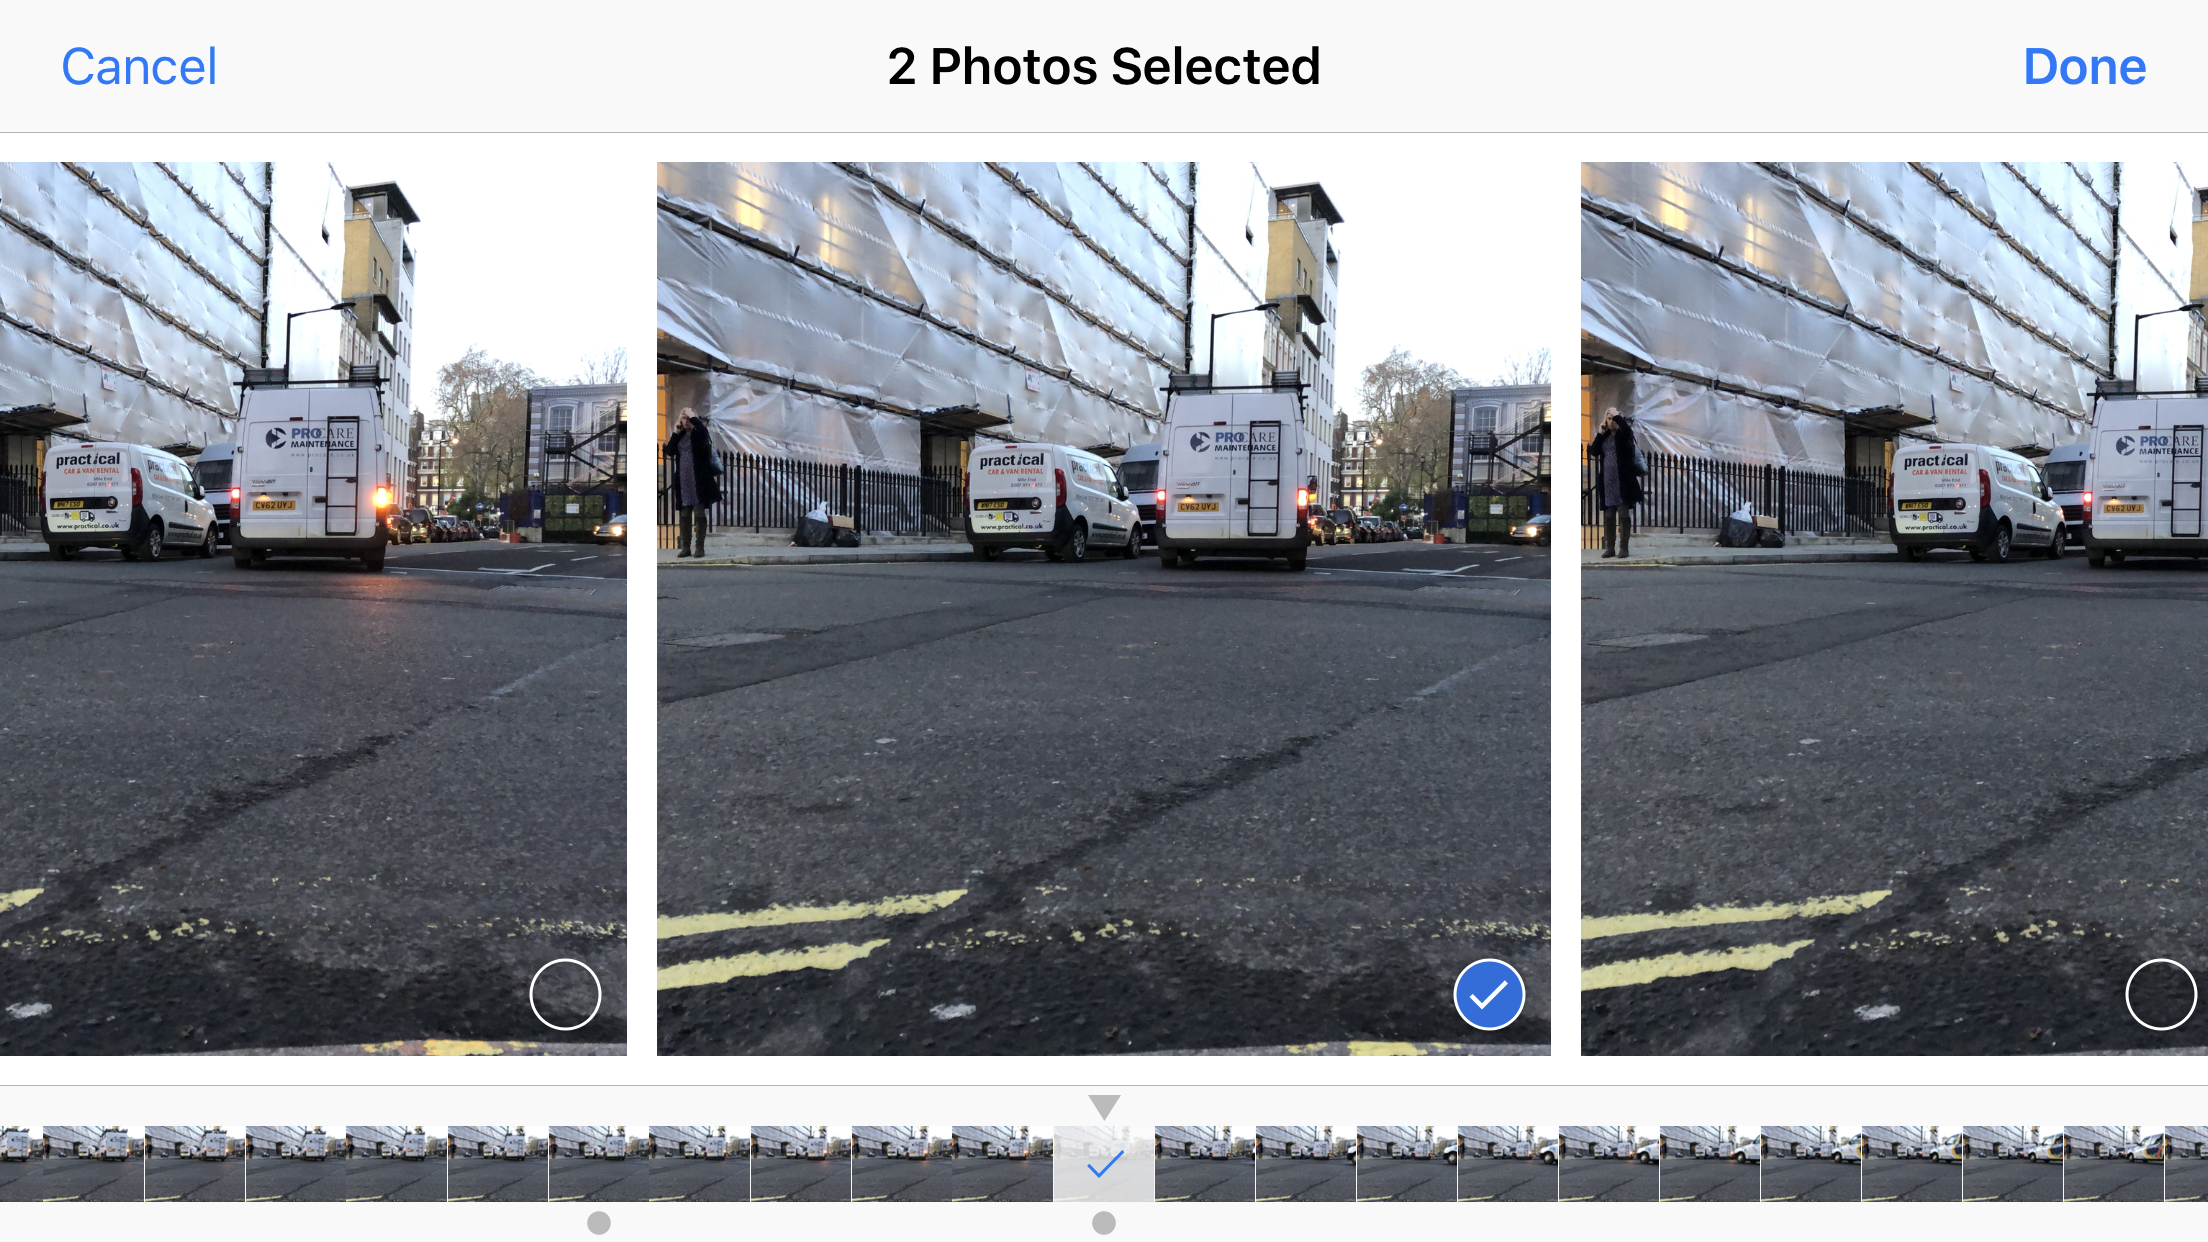
The iPhone can snap 10 photos a second with burst mode, but you'll notice from the mode slider in the app that it's not an option.
That's because burst mode is always available in Photo or Square modes. All you need to do is to hold down on the shutter button rather than tap it.
A counter will appear above to show you how many snaps you've bagged (you can take over 100 in burst mode).
Burst mode doesn't end there though. Head to the gallery and hit 'Select' to view all the shots you've just snapped. They display in a timeline of thumbnails at the bottom of the screen, with iOS picking what it believes is the best shot based on focus, exposure and machine learning.
The best shot is denoted by a grey circle icon below the thumbnail in the timeline, and you may see multiple dots if the software believes there are several decent images available.
If you're using an iPhone 7/7 Plus or newer, you'll also feel a vibration every time you scroll past a best shot in the burst timeline.
From here you can select which shots to select (and delete everything else), so you're not using up unnecessary storage.
6. Slick slow-mo skills
If you own the iPhone SE/iPhone 6S/6S Plus or newer, or any of the iPad Pro tablets, you’ll also have access to Apple’s slow motion video mode.
You’ll want to time your shot just right, so take a moment before hitting the record button to decide on what you’re attempting to shoot. Don’t forget about the focus and exposure controls, as you may want to adjust these before hitting the red record button.
Don’t worry if you’ve not quite timed the slow motion portion of your video right though, or you’ve accidentally recorded in slow motion rather than the standard video mode as there are workarounds.
Head to the gallery and hit edit below your video. From here you can use the timeline bar to adjust how much of the video you want to slow down - you can even select the whole thing for the reduced speed if you fancy.
However, if you’ve accidentally entered slo-mo mode rather than the normal video mode, you can pull the slow motion section together completely, removing the effect from your recording. If you want it to return - simply drag sideways from the line in the timeline to split it out again.
7. More to Live Photos than meets the eye
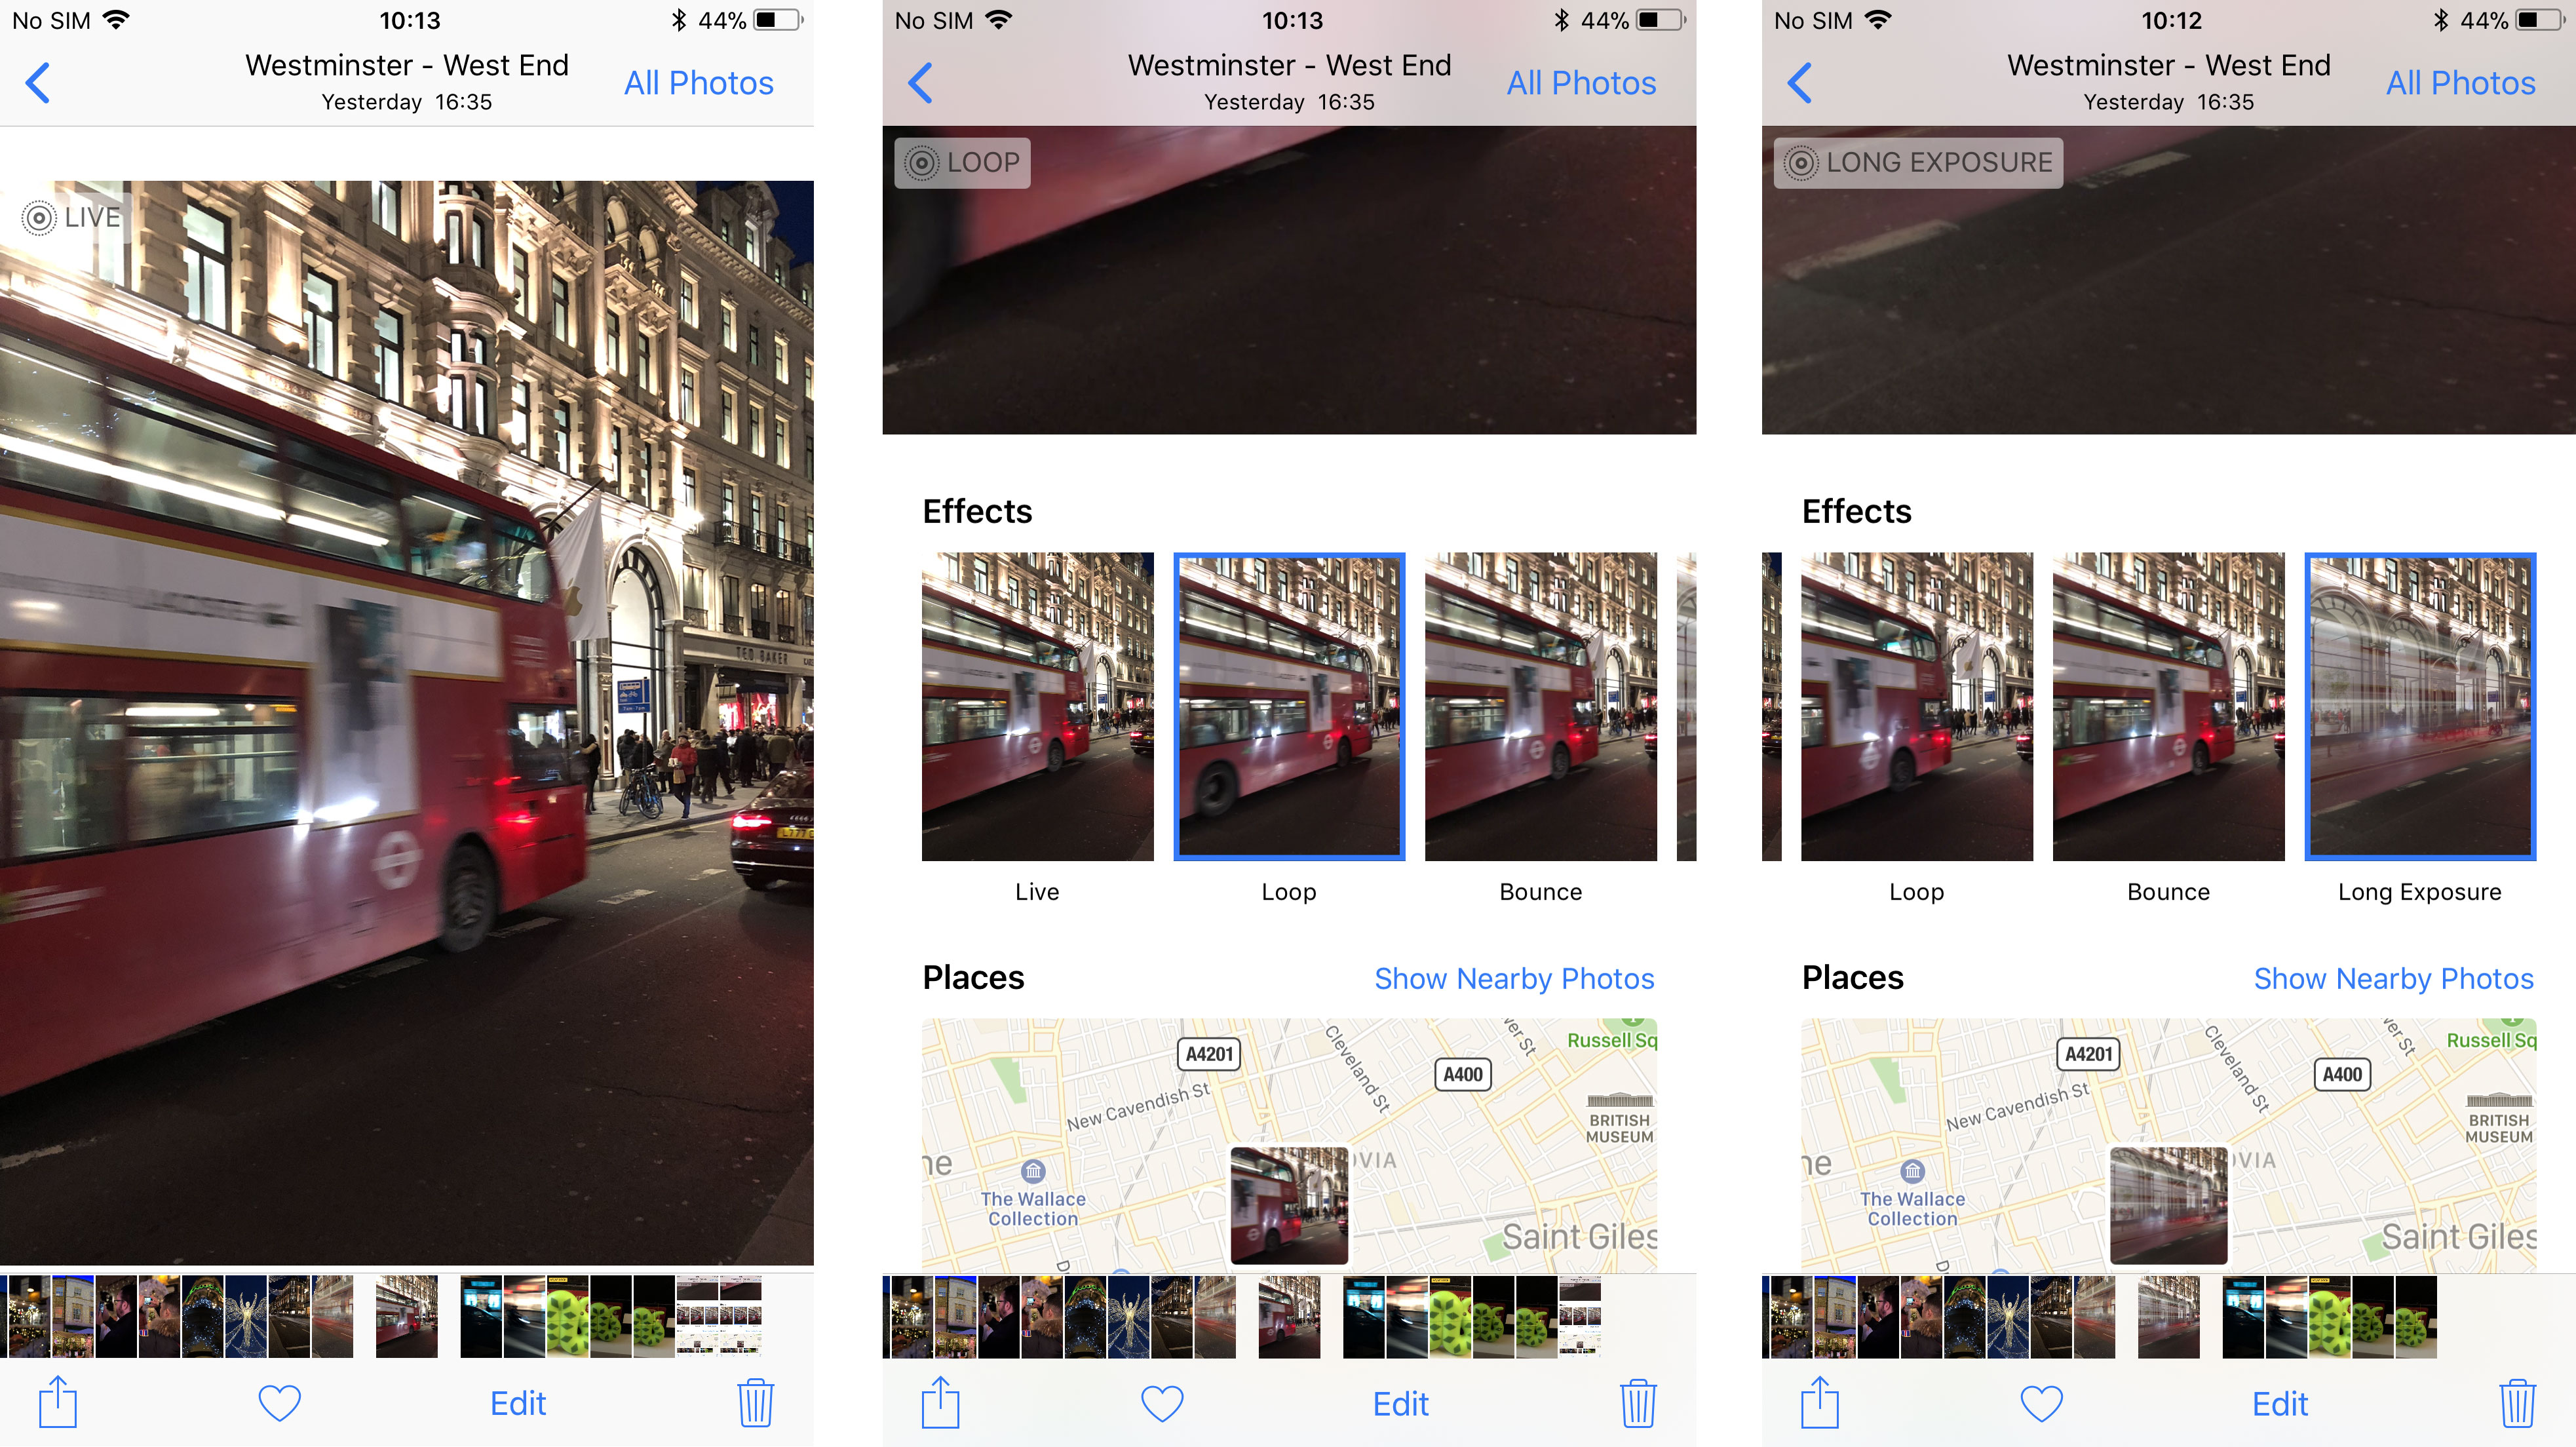
Live Photos on iPhone have been around since the iPhone 6S and 6S Plus, capturing a short snippet of video with each snap you take. It provides
With iOS 11, Apple’s added more functionality to Live Photos. Head to the gallery and swipe up over a photo to see more Live Photo options.
You can choose from four different animations for your Live Photo. The default Live option plays the captured video clip normally, while loop will see the movement constantly repeated.
There’s also Bounce and Long Exposure, with the former creating a back and forth animation from the video clip, while the latter gives you striking shots which work particular well with moving water and traffic.
8. Turn off Live Photos - before and after
Live Photos is turned on by default on supporting iPhones, but you can turn it off. Tapping the circular icon in the top bar of the camera app stops the effect being applied to shots, but what if you’ve already snapped a picture?
The good news is you can also turn off Live Photos after taking a shot. Find the picture in your gallery, hit edit at the bottom of the screen, and then tap the Live Photos icon at the top of the display.
If the image you’re left with isn’t quite right, you can use the timeline below the photo to scroll to the point of the video you want to capture. Holding on this area of the timeline will produce the ‘Make Key Photo’ pop up, which will then change the still image to that frame.
9. Figuring out filters
Chances are, if you own an iPhone (or iPad) you’ve already played around with the image filters available in the camera app.
It’s all well and good cycling through the selection of filters Apple offers in the app, but it’s not easy to compare the filters against the standard, non-filter look - or at least, there’s not an obvious way to do so.
Apple does provide a work around - hold down on a filter and the other options will disappear, leaving just your selection alongside the standard view. Sliding your finger side to side allows you to switch between normal view and your filter of choice, allowing you to see how it changes the scene.
Also, did you know you can also apply filters after taking a photo?
Tap edit below the image you’ve taken, and then hit the filter icon at the bottom of the screen. From here you can apply the same filters that are available in the camera app.
10. Perfecting Portrait lighting
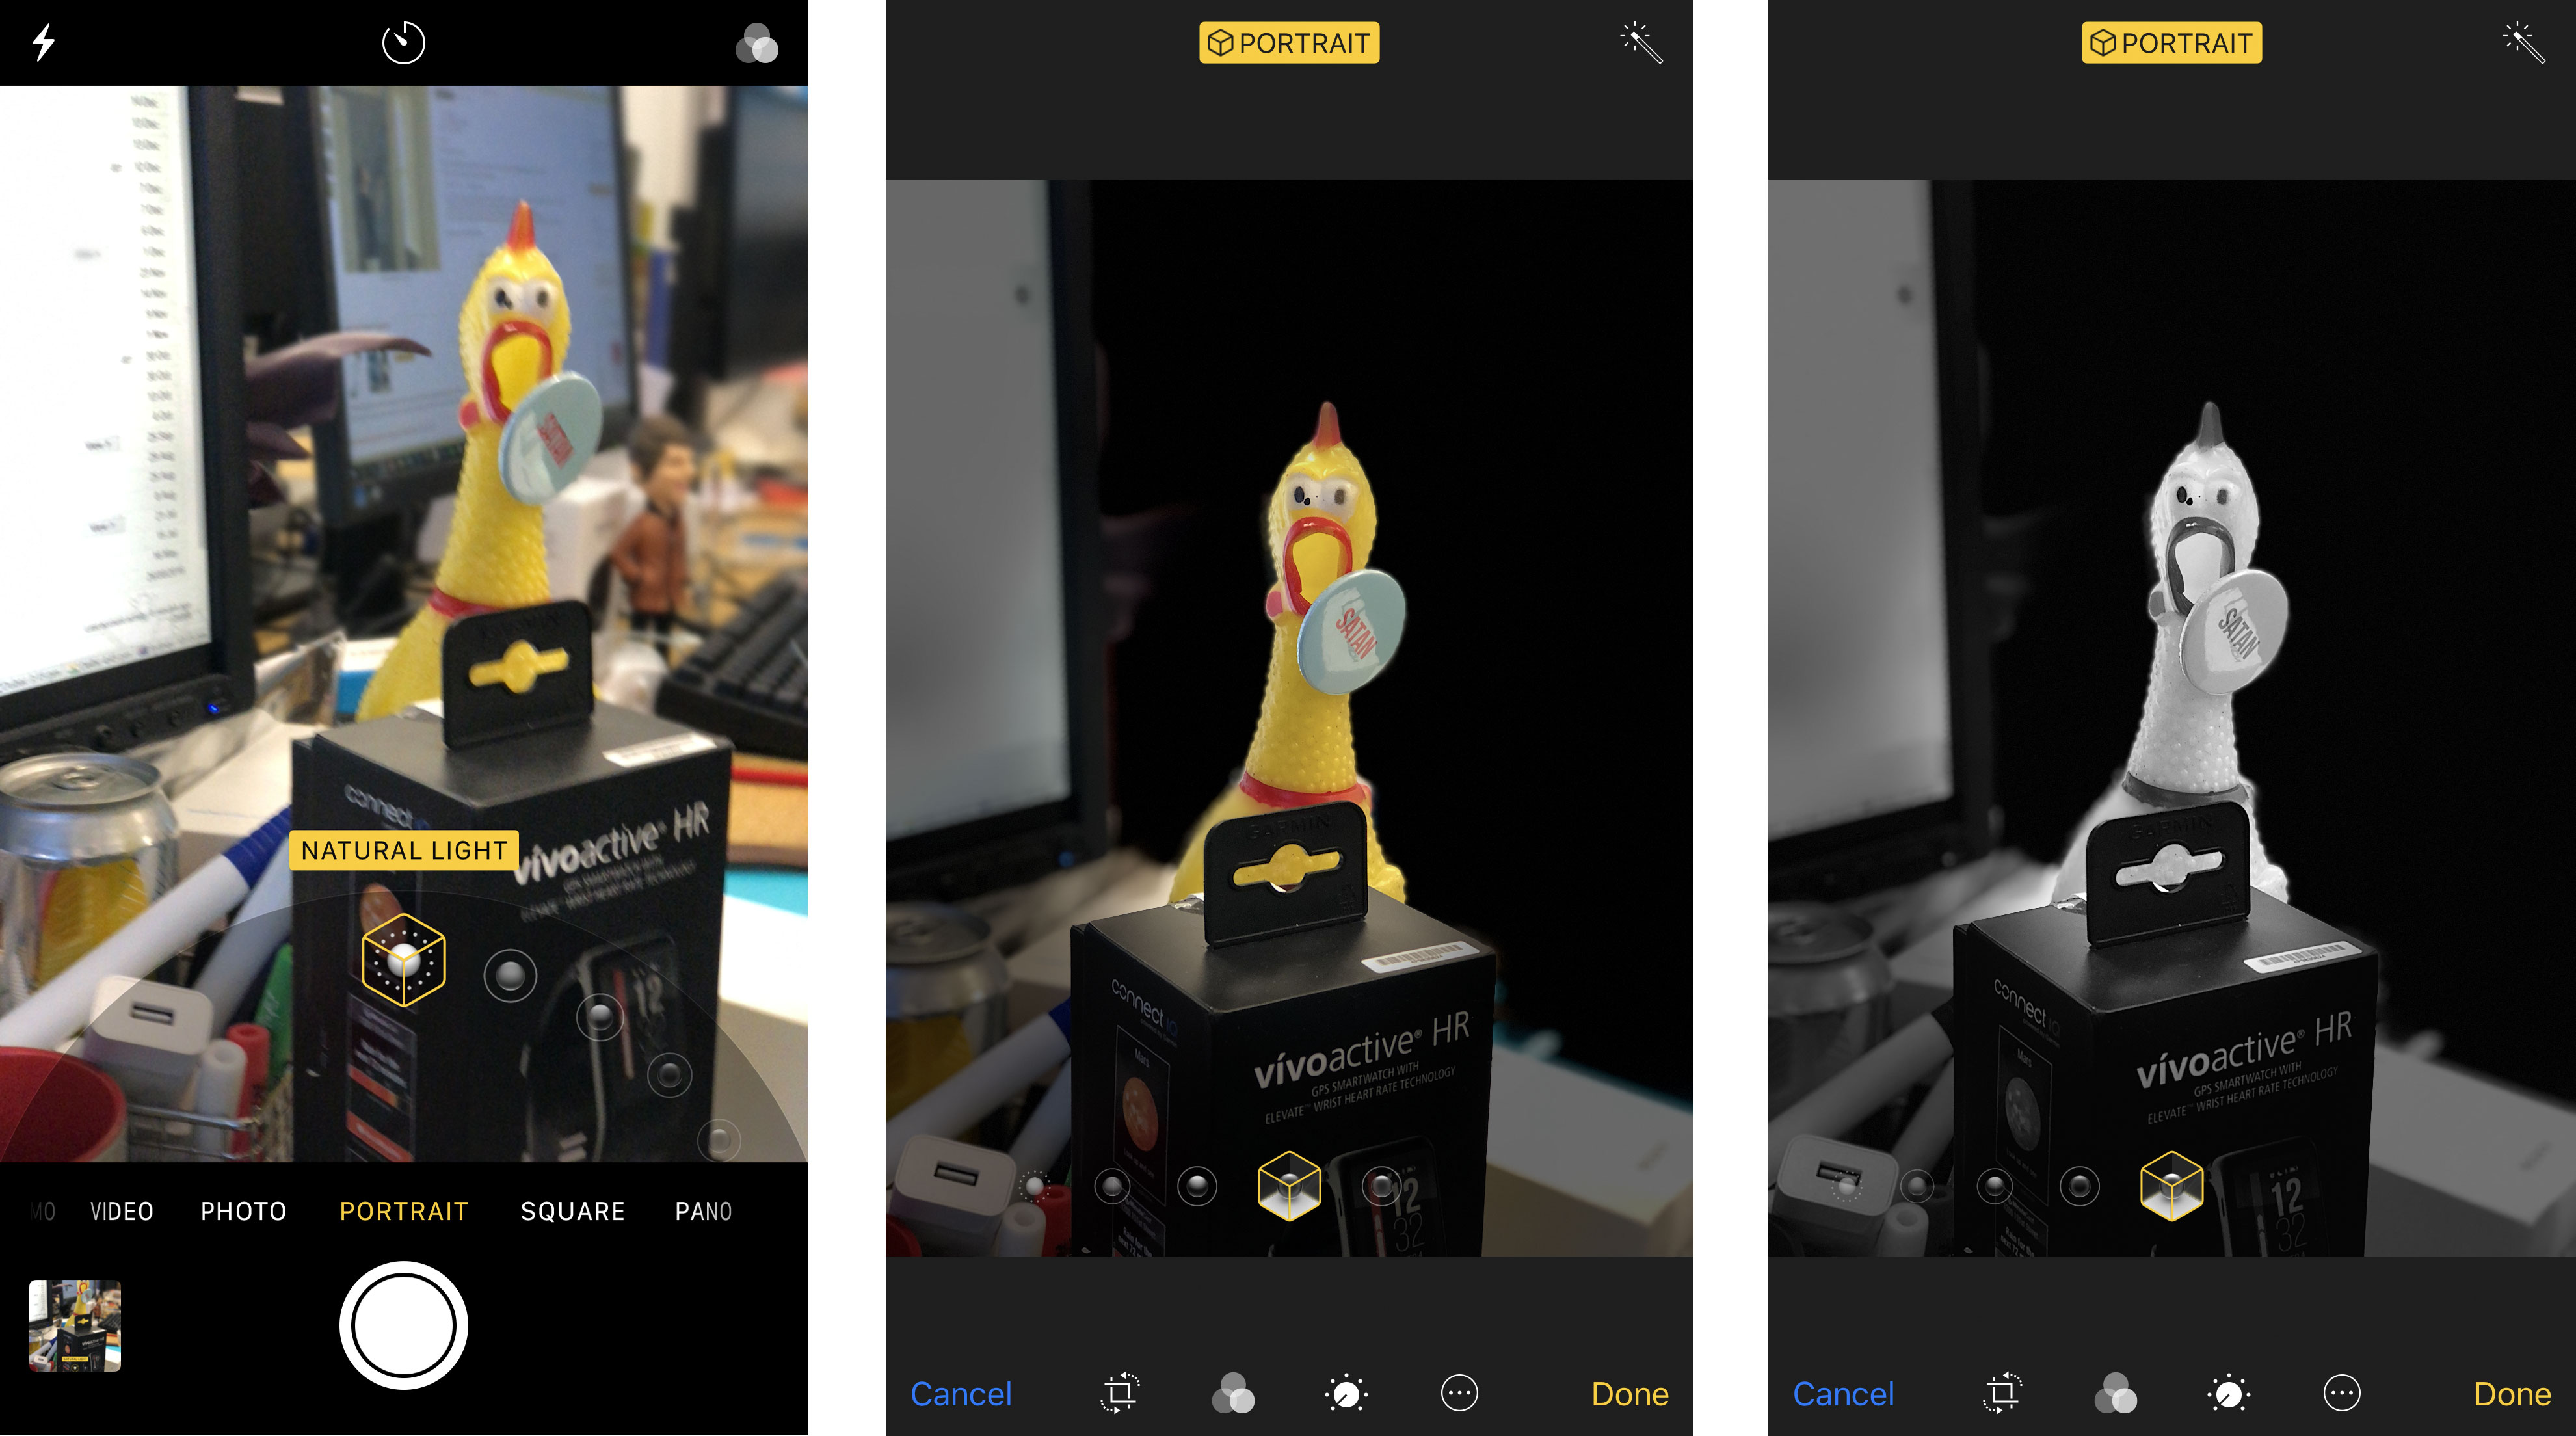
If you own an iPhone with dual rear-facing cameras (iPhone 7 Plus, iPhone 8 Plus, iPhone X) you’ll be able to use Apple's Portrait mode.
This camera effect sees the background behind your subject blurred in a similar fashion to a DSLR, providing a professional shot - but that’s just the start.
Portrait mode also offers a selection of different lighting effects, allowing you to create a more striking shot. You can simply select the lighting option you want by scrolling the cube icon at the bottom of the viewfinder.
If you're struggling to decide which lighting effect to use, don't worry, as you can switch between all the options after you've taken the picture. Tap 'Edit' below the image and you'll be greeted with the same lighting options - allowing you to quickly revert the previous effect.
- Read our latest iPhone reviews: iPhone X | iPhone 8 | iPhone 8 Plus

TechRadar's former Global Managing Editor, John has been a technology journalist for more than a decade, and over the years has built up a vast knowledge of the tech industry. He’s interviewed CEOs from some of the world’s biggest tech firms, visited their HQs, and appeared on live TV and radio, including Sky News, BBC News, BBC World News, Al Jazeera, LBC, and BBC Radio 4.