100 common Windows 10 problems and how to solve them
Easy fixes for widespread issues
28. Removing the annoying lock screen

The lock screen on Windows 10 can be annoying, especially on a computer that doesn't have a touchscreen to easily 'swipe' it away. Windows Hello makes things somewhat easier, but only if you have a compatible computer with the necessary hardware to run the authentication system.
Luckily, Microsoft has provided a solution to the problem of the lock screen, albeit a complicated one that shouldn't be tried if you're not confident in tinkering with the Registry. Note that a misstep here can cause serious problems, so if you're a computing novice, it's probably best to steer clear of this one.
Okay, warning aside, to do this you need to first head to the search/Cortana box (next to the Start menu) and type in a search for 'regedit'.
This will run the Registry Editor. From here, navigate to HKEY_LOCAL_MACHINE\SOFTWARE\Policies\Microsoft\Windows, select the Personalisation key and select New before choosing DWORD (32-bit) Value.
Select New Value #1 in the right-hand pane, and use F2 to rename it to the following:
NoLockScreen
Now double-click it, and change the value data to 1 and click OK.
Get daily insight, inspiration and deals in your inbox
Sign up for breaking news, reviews, opinion, top tech deals, and more.
It's a slightly complex process, but after a reboot you should be able to automatically bypass the lock screen.
29. Set auto login to avoid typing in passwords endlessly
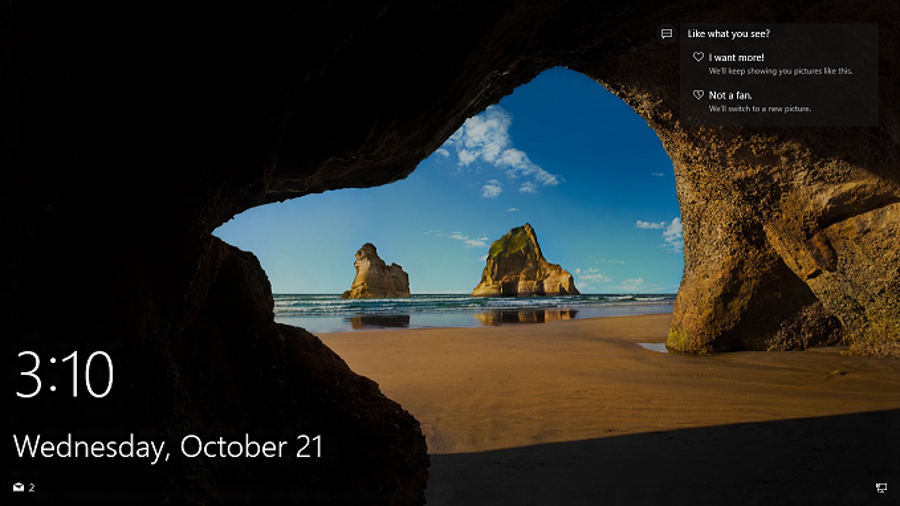
Want to dodge the lock screen login? There is one easy way to do this – first of all, you’ll need to bring up the Run command box. To do so, click on the Cortana/search box (next to the Start menu) and simply type in the following:
netplwiz
You’ll see a User Accounts window appear, and here, you need to select the account that will automatically login. Type in the credentials for this account and hit OK.
A new window, called Automatically Sign-in, will subsequently appear. Type your password again and hit OK. Go to Sign-in options, select 'Never' under the ‘Require Sign-in’ box, then hit OK one final time.
30. Keeping Cortana off the lock screen
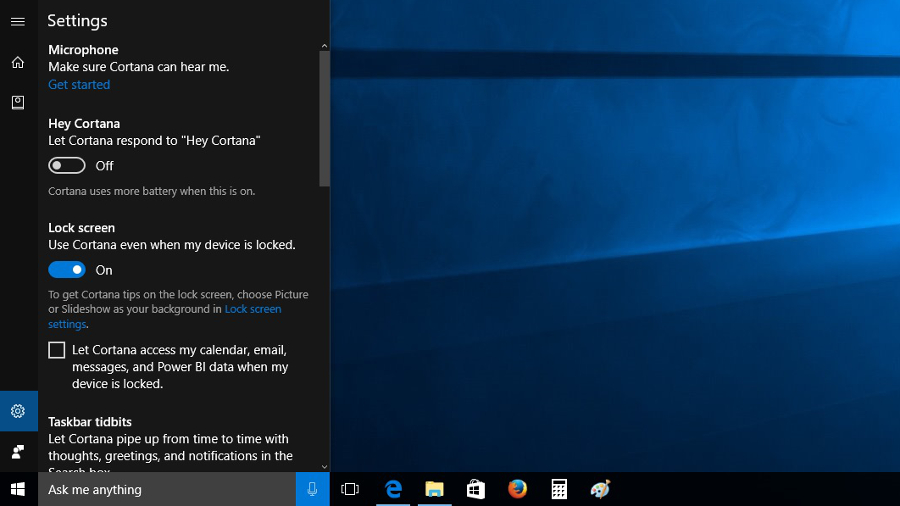
You can have Cortana on the lock screen for the sake of convenience, but doing so could pose a risk if you happen to leave your Windows 10 notebook unattended in a public place – any passerby could potentially abuse the digital assistant to peek at your messages or similar.
It’s easy to banish Cortana from the lock screen, however. Click in the Cortana/search box, click on the Settings cog, and look for the place where it says ‘Use Cortana even when my device is locked’. There’s a slider just underneath this which you need to turn off, and that’s all you have to do.
31. Make the Start menu smaller (or bigger)
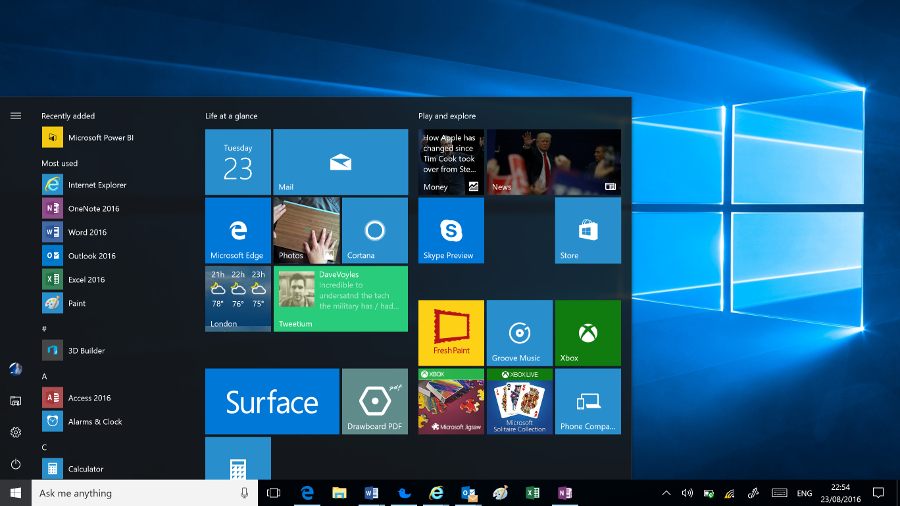
PCs come in all shapes and sizes which means that the Start menu, which takes up roughly the same amount of screen real-estate regardless of size, can definitely come in handy.
On a smaller display, however – such as that of a compact tablet – this can get annoying. Luckily, resizing the menu is simple: move the mouse to any corner and drag it whichever way you want. Once it’s the right size for your screen, let go of the corner and it’ll stay that big. If you want to adjust it further or move it back, just repeat the process until you’re happy.
32. Making DVDs work again

For some reason Windows 10 doesn’t come with DVD playing software out of the box. Microsoft does sell an app as a download from the Windows Store – imaginatively called ‘Windows DVD Player – but it costs £11.59 (around $15, AU$20).
The best bet for those who want to watch DVDs is VLC Media Player, which is a free download and was recently updated to support Windows 10. It also supports a host of other file formats – even the weird ones – making it a very useful tool to have around (or check out our 5 best VLC alternatives if you fancy something a bit different).
33. Tweaking Control Panel to fix common problems
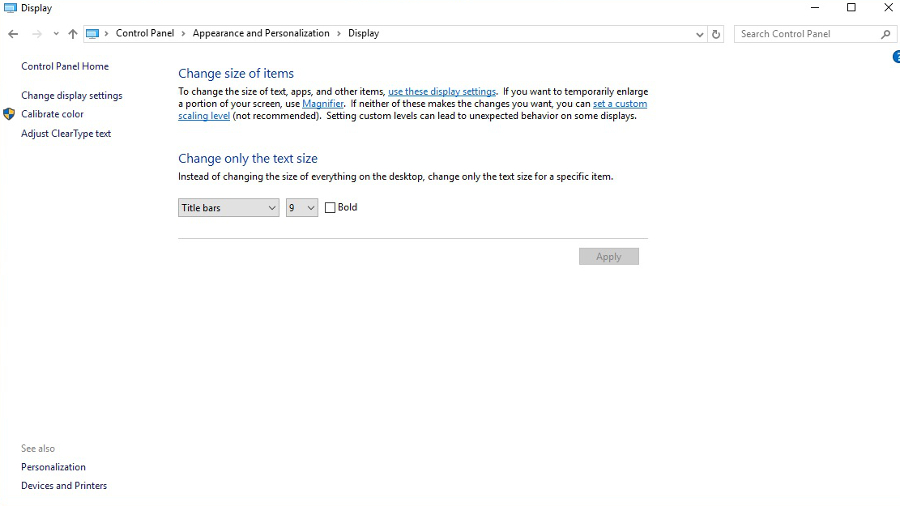
Control Panel is like the Settings app but on steroids, and it offers a large amount of menus and options to tweak Windows with, which can smooth over an array of potential niggling issues.
Control Panel, which has existed on Windows for many years now and will likely be familiar to most folks, can be accessed via a Cortana search, or you can right click on the Start button and select it from the ensuing menu.
When you’ve opened the panel, you can use it to change the settings for security, hardware, the operating system’s general appearance, date and time, and much more. If, for example, you want to change the size of text the OS uses – maybe you want the text on title bars to be larger – simply go to Appearance and Personalisation, click on Display, and you’ll find the relevant option in here.
34. Banish annoying notifications
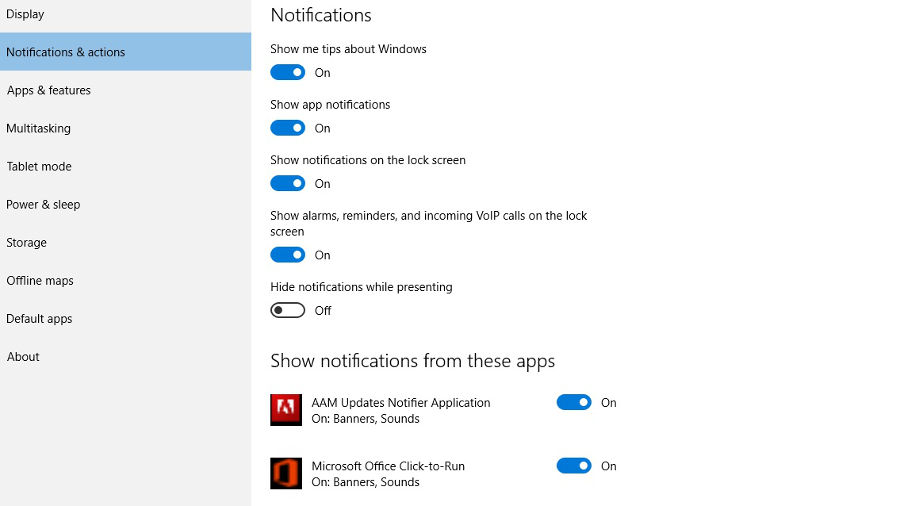
Microsoft introduced a nifty way to view all of your notifications at once in the Action Center, which is one of Windows 10's best features compared to Windows 7 or 8.1.
However, it does tend to get clogged up with notifications, including ones that are seemingly useless (we're looking at you, Windows tips). Luckily, turning these off is easy.
Go to Settings > System > Notifications & Actions, and then simply toggle off any that are not useful or relevant while keeping the ones that are. Individual third-party app notifications can also be switched off.
35. Stopping Windows 10 from using loads of data
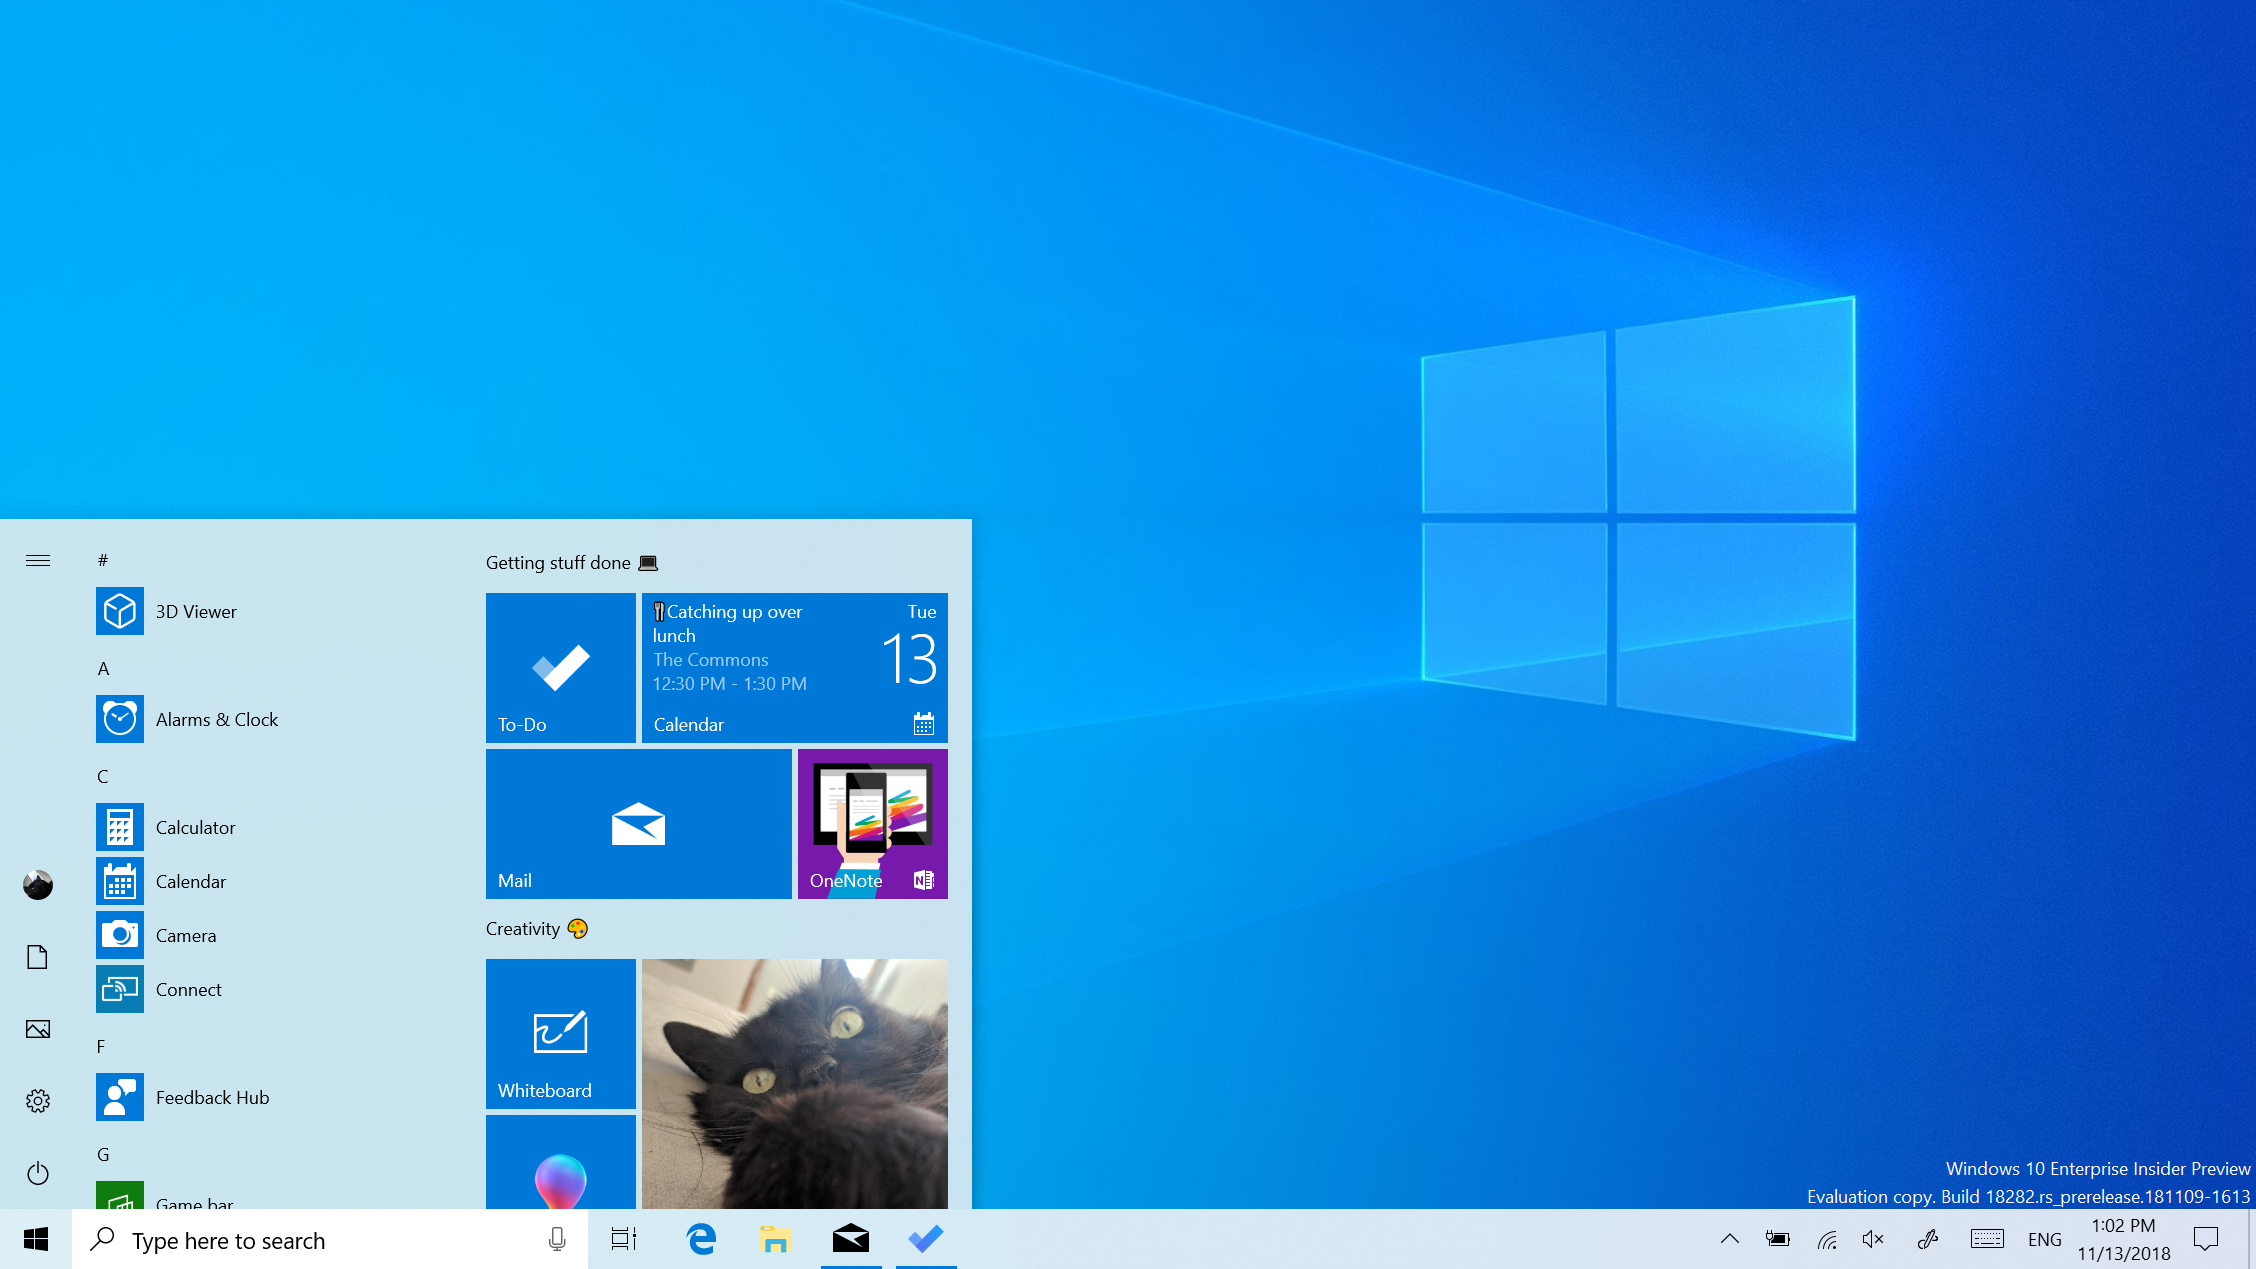
If you're on a tablet that has 4G, using a mobile hotspot, or surfing the web via a Windows 10 smartphone, then the operating system may have a nasty surprise for you.
Users have been reporting that the default configuration of Windows 10 sucks up data like there's no tomorrow, potentially putting you over your data allowance, and leaving you with a hefty bill.
Fortunately, there's an option that addresses the problem. Simply to go Settings > Network & Internet > Wi-Fi. Click Advanced Options and then Set as metered connection. This means that Windows 10 will stop collecting so much data in the background.
36. Getting Cortana to respond to one voice
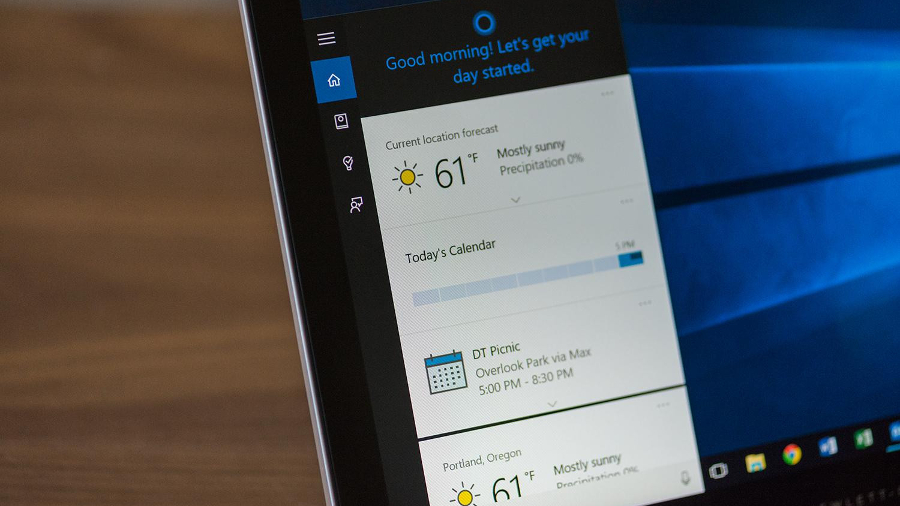
Worried someone else might use Cortana on your device? Well, one cool thing that Cortana can do is 'learn' a certain person's voice, making it far more secure than Siri or Google Now, which generally just accept simple commands irrespective of who they come from.
To do this, open Cortana, select the Notebook from the left-hand menu, select Settings, and make sure that 'Respond to' is set 'To me'.
It'll run you through a few test phrases to get the basics of your voice and tone correct before effectively logging what you say and learning – eventually – to just respond to you.
37. Use Quick Access to speed up navigation
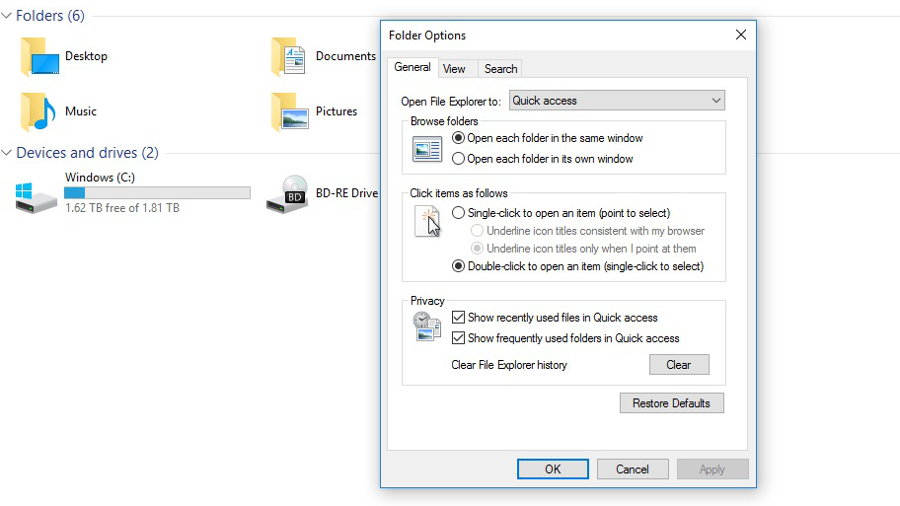
Do you feel like it takes you ages to get anything done in Windows 10? The Quick Access menu is located in File Explorer (right-click Start to see the option for File Explorer) and it can save a ton of time when navigating around the operating system.
To add files, folders or apps to the sidebar, right click on their icon and select Pin to Quick Access. This means that they will show up and can be easily accessed, which is useful for recently visited folders.
You can also set File Explorer to load the Quick Access menu by default when you bring it up, rather than This PC. To do so, with File Explorer open, click on the View tab in the top menu (next to Share), then click on ‘Options’ on the far-right of the menu that pops up, then select ‘Change folder and search options’. Now look where it says ‘Open File Explorer to’, and use the drop-down menu to select Quick Access.
38. Get even faster by using keyboard shortcuts

Another good method of getting things done quickly and being more productive under Windows is to use the plentiful keyboard shortcuts which are available.
The main key utilised for shortcuts is the Windows key – which can be used in combination with Tab (to open Task View), any direction key (to snap windows in place), C (to open Cortana), I (to open settings), etc.
The Control key is primarily used for in-app shortcuts like copying and pasting, which can save a ton of time. For more keyboard tricks, check out our guide to the 20 keyboard shortcuts Windows 10 users need to know about.
39. More keyboard shortcut wizardry
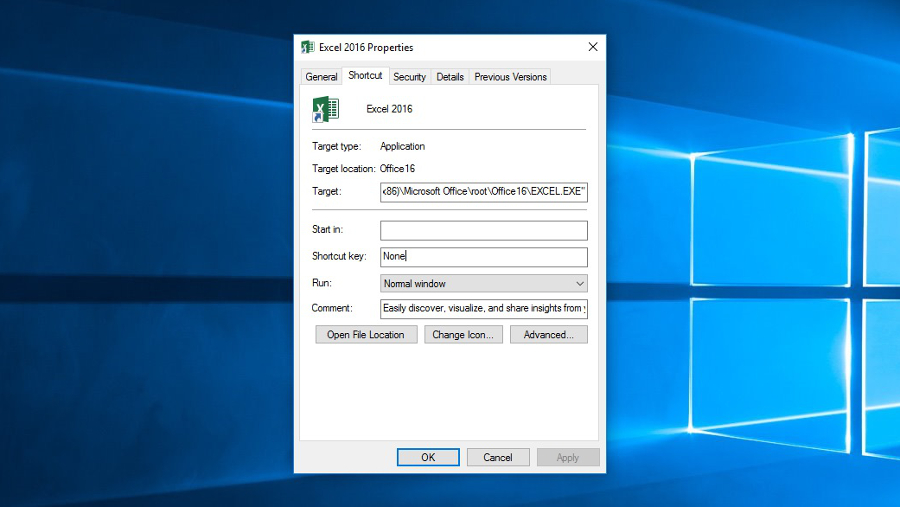
Here’s another shortcut tip for those whose frustrations revolve around the fact that they can’t work fast enough in Windows. Opening different applications with specific shortcuts is the power user dream – and it’s easy to do in Windows 10.
To do this, you’ll need to access the app’s properties. This is a more complicated process in Windows 10 than in previous versions of Windows. First, search for an app in the Start Menu and right click on it. A menu will pop up: select Open file location.
A File Explorer window will open containing the app’s EXE file already selected. Right click on it and select Properties. In the Properties box which pops up, go to the Shortcut tab and type in the keyboard shortcut you want for the app in the Shortcut Key box. Click OK and you’re set.
40. Take better screenshots in Windows 10
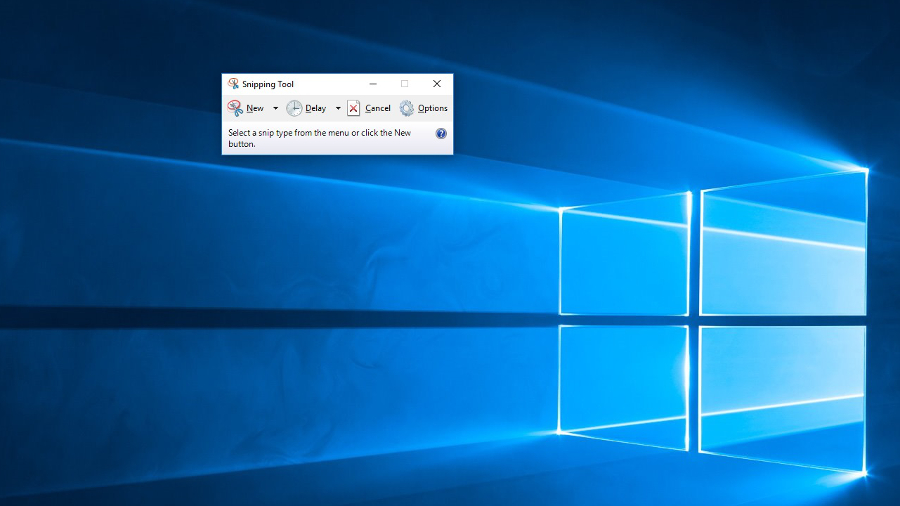
On a Mac, taking a screenshot is a simple process. On a Windows PC, however, it’s slightly more complex. To take a screenshot of the whole screen on Windows 10 you just press the PrtScn (PrintScreen) key, although you then have to paste that image into an app (like Microsoft Paint, where it can then be saved out as an image file, or Word, where it will appear in your document).
To take a screenshot of an active window or smaller section of the screen that’s in the foreground, press Alt+PrtScn together. There is no easy way to take a screenshot of a chosen area that isn’t the full screen (i.e. half an active window), so the best bet in this case is to use the Snipping tool.
To access this, go to the Cortana/search box next to the Start button and type in ‘snipping’ and it will pop up. In the tools menu, click on the arrow next to ‘New’, and you can then select either a rectangular snip, or a free form snip where you can draw a line around any region of the screen to capture it. You can then use the File menu to save the image for posterity.
However, if you’ve updated to the Windows 10 October 2018 Update, you’ll find that the Snipping Tool no longer exists. Instead, it’s been replaced with Snip & Sketch, which you can set to open when you hit the Print Screen key.
41. Getting Windows 10 working on high-res screens
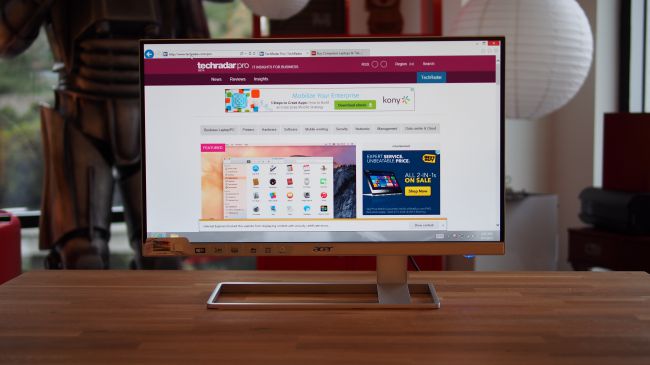
Windows supports a huge range of devices going back a long way which, inevitably, means that some don't work as well as others.
Users have reported issues with high-resolution displays and Windows 10, including experiencing blurriness in applications that had been rendering fine on previous versions of the OS such as Windows 8.1.
The easiest way to solve the issue of blurriness is by going to Control Panel > Display and fiddling around with the settings here. There is no one single setting that will fix all issues, so experiment and see what works (and what doesn't).
To fix blurriness in specific applications, right click on the app's icon and select Properties. Under the Compatibility tab there is an option to 'Disable display scaling on high DPI settings'. Tick this and – hopefully – the problems will disappear.
42. Using less battery on laptops and tablets
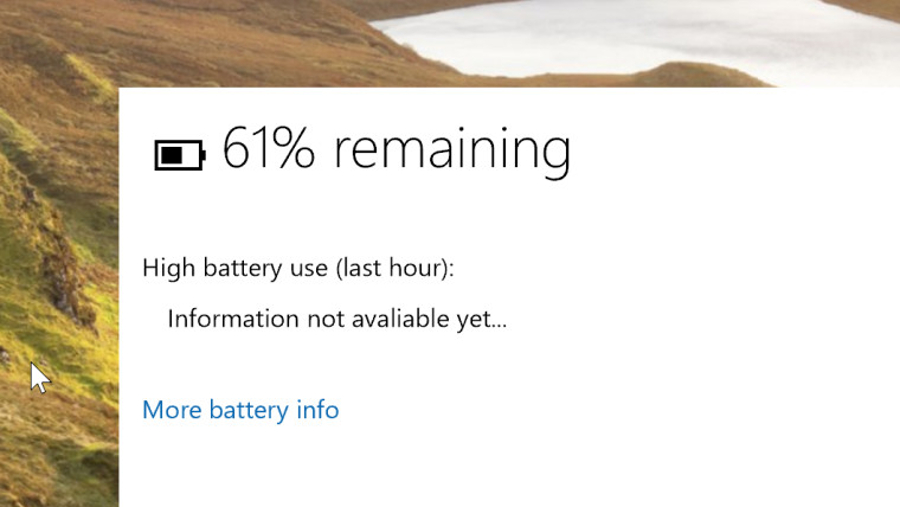
Battery life is important to anyone who regularly uses a laptop, tablet, or smartphone, and of course Windows 10 can be used on all three of those devices.
Microsoft recognises this – as shown by the marketing of its Edge browser as being battery-friendly – and has built several tools into Windows 10 to help cut down on excessive battery drain.
All apps that run in the background can be toggled off, for example, which stops them from sucking up precious juice. And as we saw in an earlier tip, a metered internet connection option can also be used, which cuts down on background data usage.
Windows 10 also includes a dedicated set of power options, which you can find via Settings > System > Power & Sleep. From here, display sleep times can be set and under Additional Power Settings you can select a power plan that means a lighter load for your battery.
- Check out our collection of tips for extending the battery life of your laptop
43. Generating a battery report
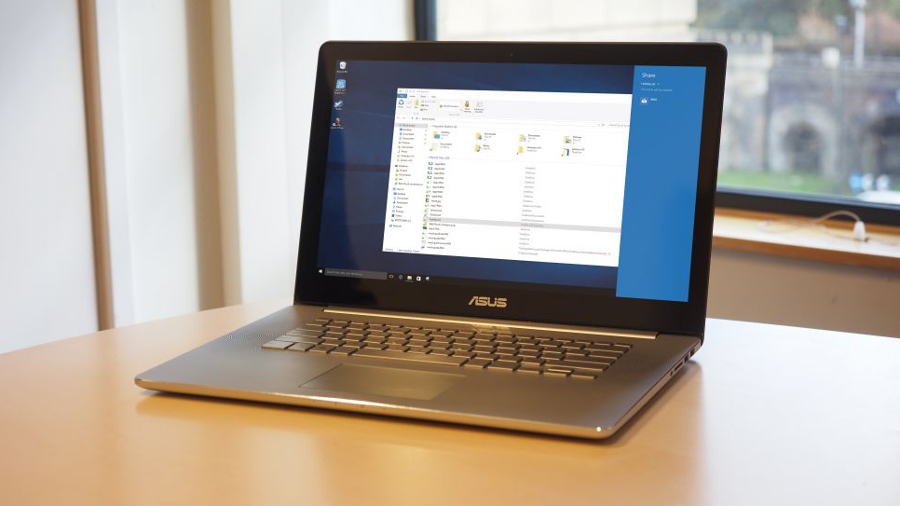
Continuing with the theme of avoiding excessive battery drain, if just fiddling with the settings isn't enough, Windows 10 can also generate a battery report. To do this, head to the Command Prompt Admin (which you get from right clicking on the Start menu), and type in:
powercfg /batteryreport /output "C:\battery_report.html"
This will save a file to any chosen folder – e.g. C:\ in this case, the root of your system drive – which gives you a hugely detailed look at battery quality, cycles, how much charge is left, and much more. The report is a little dense, so be warned on that front.
44. Changing default app choices
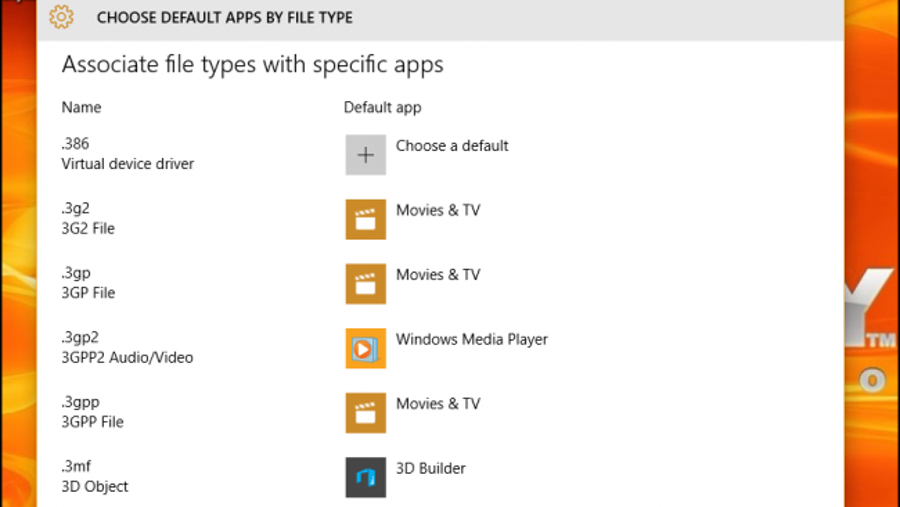
Another thing a lot of users have complained about is default app choices – i.e. browser, word processor, and so on – changing when updating Windows 10.
The easiest way to change them back is to head to Settings > System > Default Apps. From here, almost every major default app – music, email, maps, calendar and so on – can be chosen based on the ones you have downloaded.
45. Fixing the Start menu
The Start Menu can become cluttered, especially if you have a lot of apps and other bits and pieces that will automatically show up on it.
Microsoft lets you resize the menu as well as add and remove applications, shortcuts, and almost anything else. The easiest way to ditch things is by right clicking and then removing – click uninstall – or you can drag apps or folders directly onto the menu to add them.
46. Getting rid of Live Tiles

If you're using an older PC (or a tablet) then having vibrant Live Tiles may end up draining processing power that could be used elsewhere (not to mention battery life with a slate).
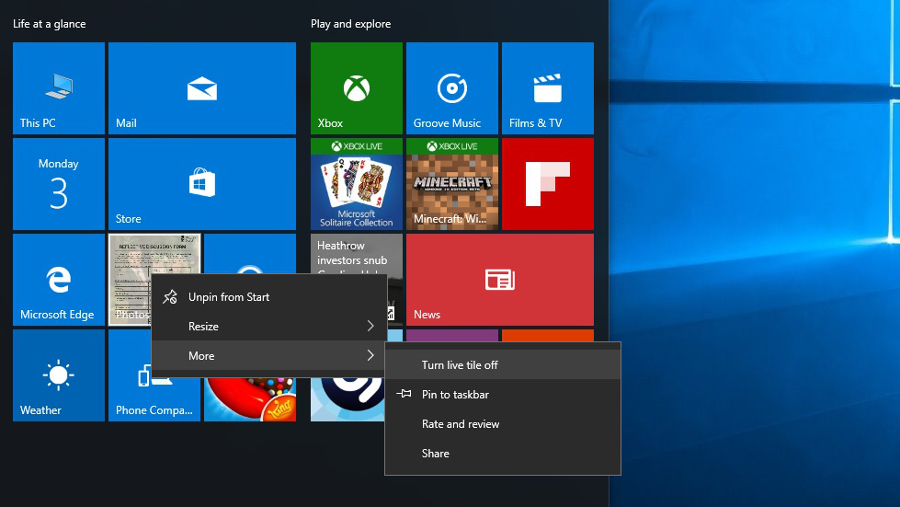
This is something Microsoft has considered, though, and Live Tiles, which are present on the Start menu, can be switched off. To turn off one specific tile, right-click it, then click More > Turn Live Tile off.
Alternatively, to switch off all Live Tiles, open the Start menu, and type the following, then hit enter:
gpedit.msc
Navigate to Local Computer Policy > User Configuration > Administrative Templates > Start Menu and Taskbar > Notifications. Double-click the 'Turn off tile notifications' entry on the right and select enabled in the window that opens.
47. Changing the default apps files open with
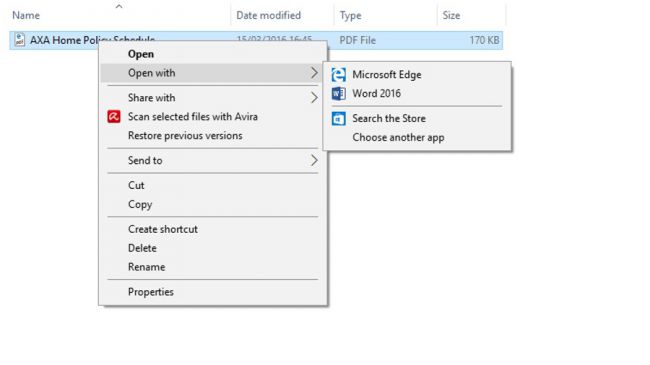
You double-click on a file, and a default app kicks in to open it. But what if the app which runs isn’t the one you want, and there’s a program you’d prefer to take over the duties of automatically opening said file format.
Fortunately, it’s easy to change this. Just right click on the file in question, then select ‘Open with’ and from the resulting fly-out menu you can choose the program you really want to open that particular format.
48. Getting help from accessibility tools
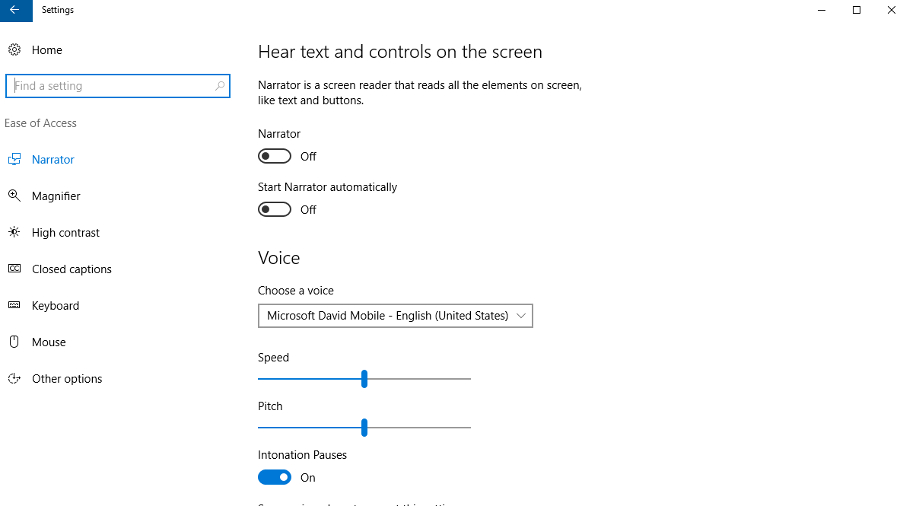
Microsoft included a wide range of accessibility tools with Windows 10, helping open up the operating system to users with different types of disability. If you’re having trouble using any aspect of Windows 10, just head to the Ease of Access hub.
You’ll find this under Start > Settings > Ease of Access. From here, it’s possible to toggle anything on or off that you want, including features such as audio descriptions, a magnifier, sticky keys, a high contrast option, and more. Simply select the features that will make your Windows life easier – with some settings, you may have to make further choices and then click the Apply button.
49. Getting community support to solve issues
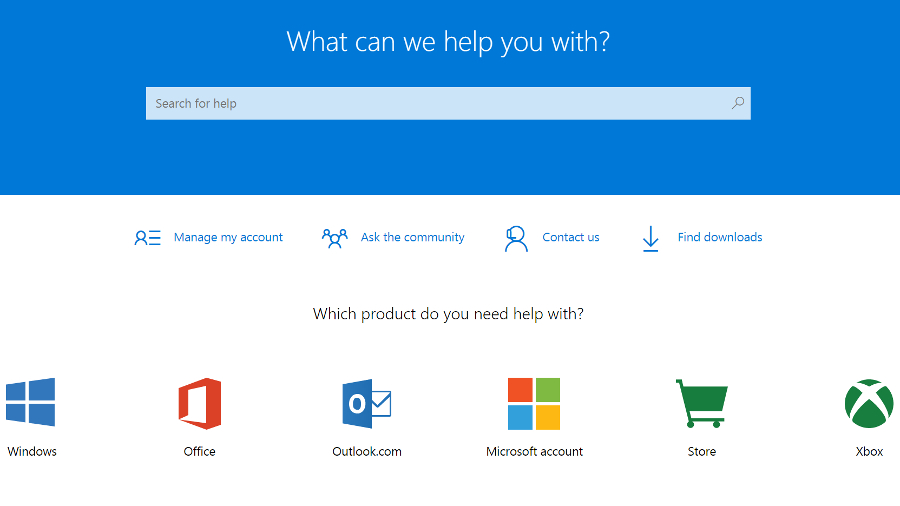
We can’t cover everything in this feature, and obviously enough there’s a good chance that at some point, you’ll stumble across Windows 10 problems you can’t find the solution for on TechRadar. Fortunately, Microsoft has support forums which offer solutions, help, and guidance for a lot of common (and uncommon) issues.
To access the forums, open your browser of choice and go to: support.microsoft.com/en-us. Topics are broken down into apps – like Office – and other categories, and obviously you’ll need to head to the Windows section. You can also contact Microsoft directly, via phone or instant message.
50. Having less storage space post-Windows 10 upgrade
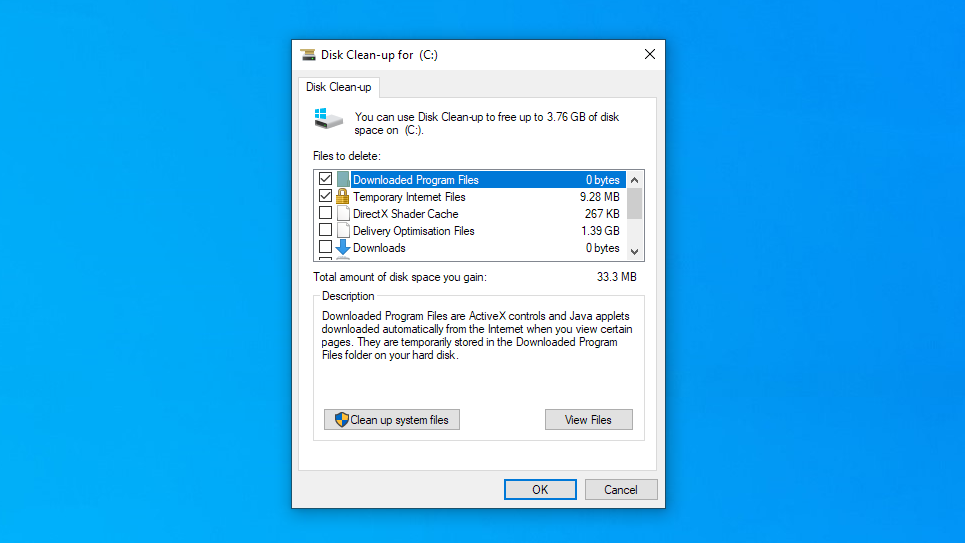
You may not be aware of the fact that whichever operating system you upgraded to Windows 10 from still sits dormant on your PC for a while (assuming you didn’t install the OS from scratch). This can obviously lead to a drop in the available storage space on your system drive.
To fix this, search for ‘cleanup’ in the Cortana/search box (next to the Start menu) and select the Disk Cleanup utility. When it eventually pops up – after scanning your drive – under the list of files you can tidy up, you should find one that says ‘Previous Windows Installation(s)’. Make sure this is ticked, and click OK – Windows 10 should then delete the older operating system’s leftover files, yielding a considerable 5-10GB boost in available space.
Note that if you have more than one drive on your PC, when you fire up Disk Cleanup, you’ll have to point Windows at your system drive where the previous OS was installed (usually C:).
51. Remove the big search box
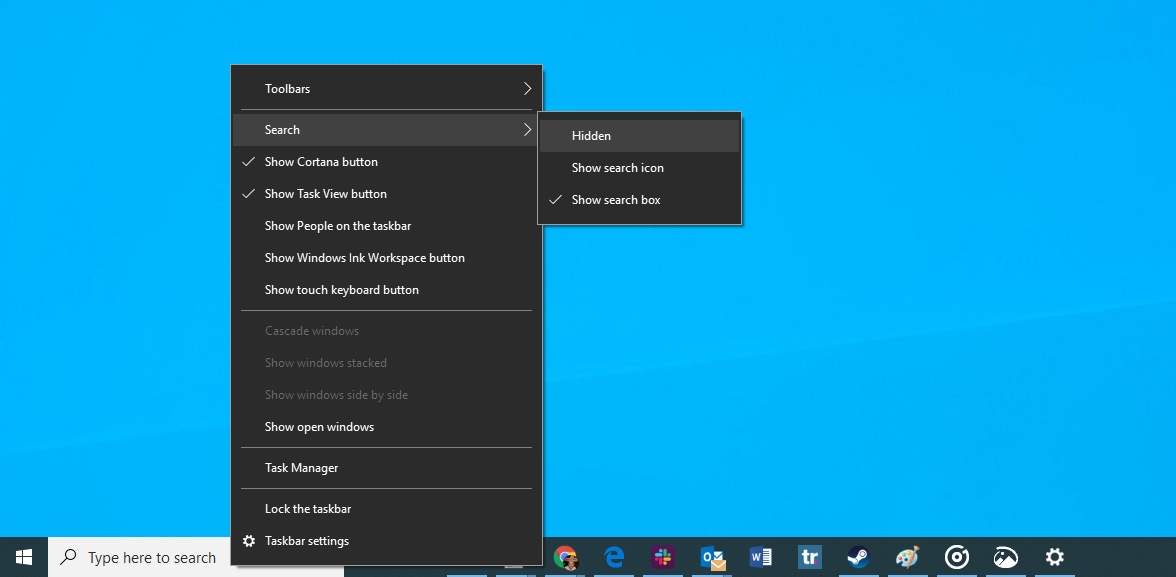
Cortana takes up a lot of display real-estate in the taskbar, but if your screen space is precious and limited, you can always ditch the virtual assistant’s search box.
To do this, right click on the empty search box, hover over ‘Cortana’, and choose ‘Hidden’ from the fly-out menu to change the assistant to a pop-up. Users can still keep Cortana in the taskbar as a (much smaller) standard icon by choosing the ‘Show Cortana icon’ option.
With the Windows 10 April 2019 Update, Microsoft has separated Cortana from the search box, placing its icon on the right of the box. However, you can still hide the search box by right-clicking it and selecting 'Search' then 'Hidden'.
52. Moving apps to a different drive
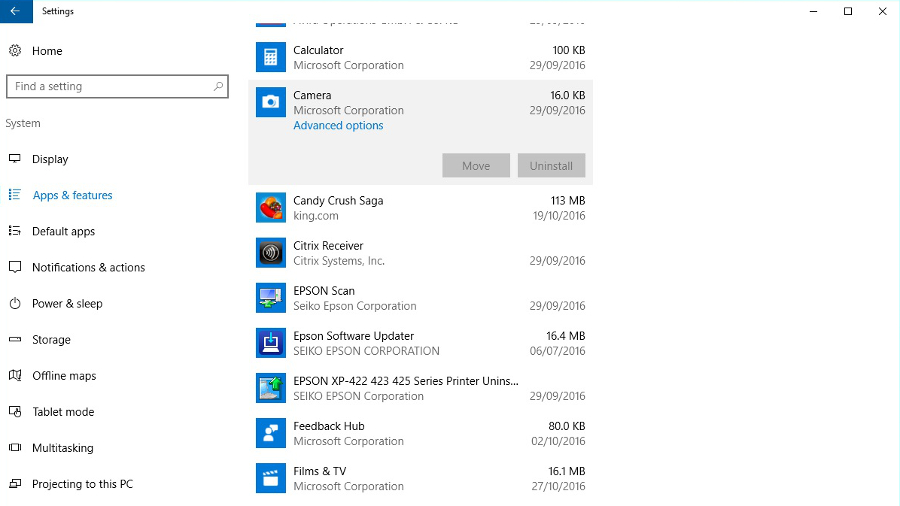
Running short of space on one of your disk drives? If you have multiple drives, one way it’s possible to free up space on, say, a cluttered system drive, is to shift apps over to another disk.
You can do this by heading to Start > Settings > System. Next, locate the Apps & Features section. In here, if you click on a program you’ll see a Move button for those apps which can be moved.
Select Move and Windows will produce a set of available locations you can shift the program to. Choose which one is best and select it; Windows will do the rest.
53. Restart Windows 10 for better performance
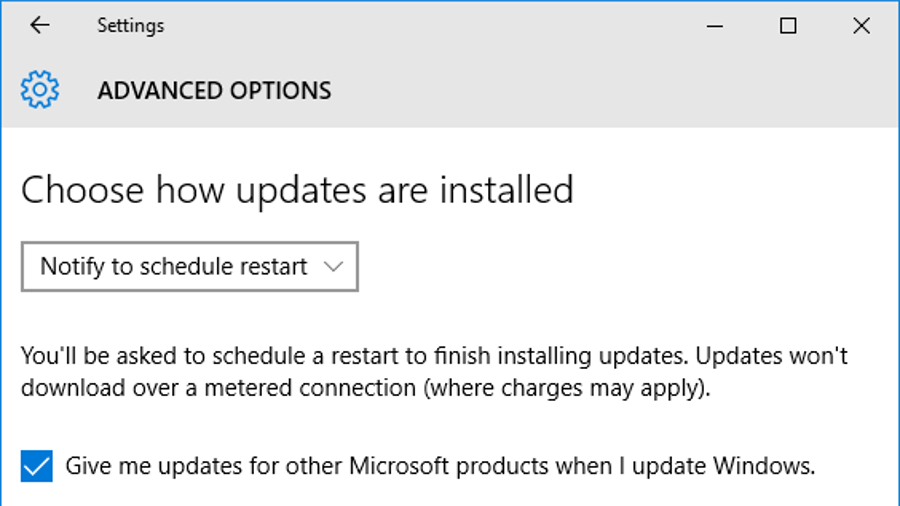
Another thing you can do to lessen the chance of a system falling over is to schedule regular restarts. Not restarting a PC for a few days is fine, but things can start to turn weird after weeks or months. These restarts can also be combined with system updates, which are obviously important to do.
Go to Settings > Update & Security and click on Advanced Options. From there, you can choose how updates are installed, with the default setting being Automatic.
Clicking on this shows another option: Notify to schedule a restart. This means that the PC will always ask you before doing an update and, from there, you can choose when it gets done.
54. Disable annoying system sounds
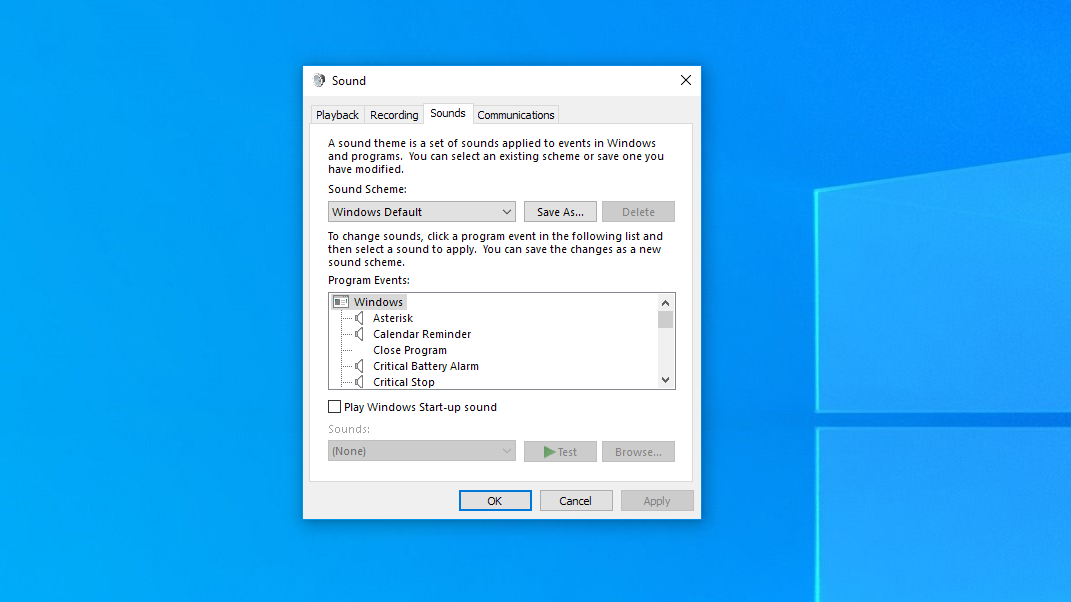
Windows 10 comes with a lot of system sounds, many of them useless or annoying. To change them, right click on the Start button, click on Control Panel, Hardware and Sound, and then click on Change system sounds (under the Sound heading).
Here, you can click on the various sounds in the Program Events window, then click the Test button below to hear the relevant noise being played. To get rid of a sound, click on the drop-down menu next to the Test button, scroll up to the top of the list, and select None.
It’s possible to save any changes you make as a new sound profile (separate to the Windows default one) – use the Save As button under Sound Scheme. You can also select No Sounds as a scheme here if you prefer Windows to never make any noises at all.
In newer versions of Windows 10 there is also an option for 'less sounds', which aims to strike a balance between offering system sounds but without annoying you.
55. Sync select folders with OneDrive to save space

OneDrive is the default option for cloud storage in Windows 10. Microsoft has worked hard to improve its cloud storage locker so that OneDrive caters to all needs, especially when you burrow down into the settings.
Unfortunately, OneDrive only comes with a few gigabytes of free space (unless you’re willing to pay). Luckily, Microsoft has built in an easy way to stop big files or folders taking up loads of space: selective folder sync.
To set this up, right click on the OneDrive icon in the bottom-right of the taskbar and select Settings. Then switch to the ‘Choose folders’ tab and click the ‘Choose folders’ icon to select the folders that you want – this will ensure that only those folders are synced, so all your space isn’t gobbled up.
56. Save to PDF so everyone can open files
Ever had the problem where you send a file to someone and they can’t open it? Or it comes out with the formatting and style messed up, or similar issues which are always a risk, particularly when sending something to a Mac or Linux PC user (or someone with a much older version of Windows).
Saving files as a PDF is one way to ensure a trouble-free experience for the recipient opening the file, and unlike the Windows of old, Microsoft has built this option right into Windows 10. Head to File > Save As, and PDF should be an option in almost every modern or traditional app available.
57. Save time in the Command Prompt
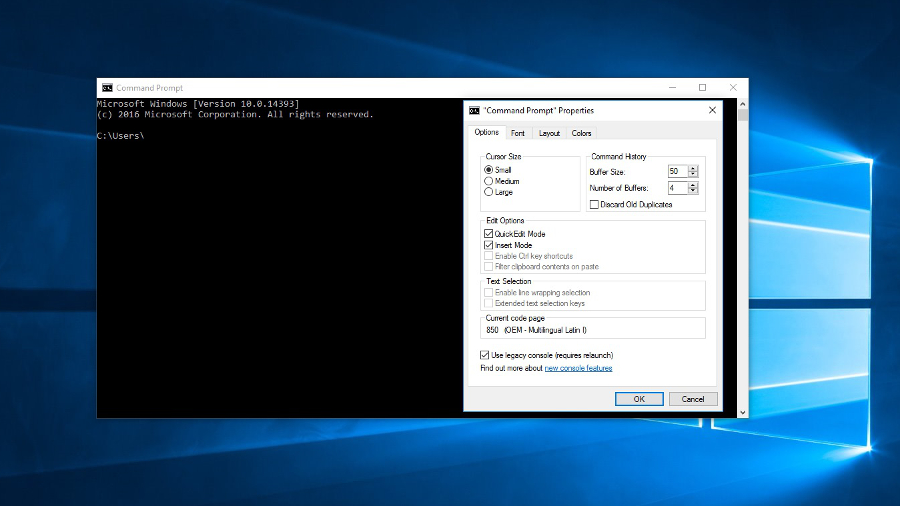
Typing out commands in the Command Prompt can get annoying and take a long time, especially if they’re complex. Luckily, Microsoft has updated the prompt to accept copy-and-pasted commands, making it far easier to input even long strings of text.
To do this, simply open Command Prompt, right click on the top bar and select Properties. Then select Use legacy console, and click OK – doing so requires a relaunch. Once Command Prompt has reappeared, go to Properties again and select Enable Ctrl key shortcuts.
Once you’ve done that, you can copy and paste by using the usual keys – Control + C to copy, and Control + V to paste.
58. Go easy on your eyes
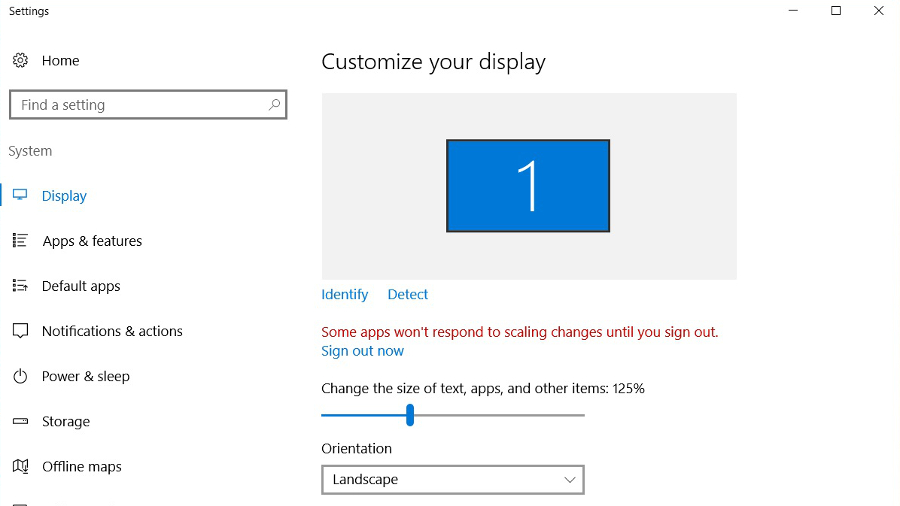
One issue you may find with some monitors, especially those with very high native resolutions, is that they can make text small and rather difficult to read (particularly if you don’t have great eyesight in the first place). To solve this problem, go to the Cortana/search box on the taskbar (next to the Start button) and search for ‘display settings’, and click on this.
A ‘customise your display’ section will appear, with a slider bar that allows you to change the size of text, apps and other items – simply slide this to the right to make your fonts bigger and more readable, then hit Apply.
59. Fix enlarged desktop icons
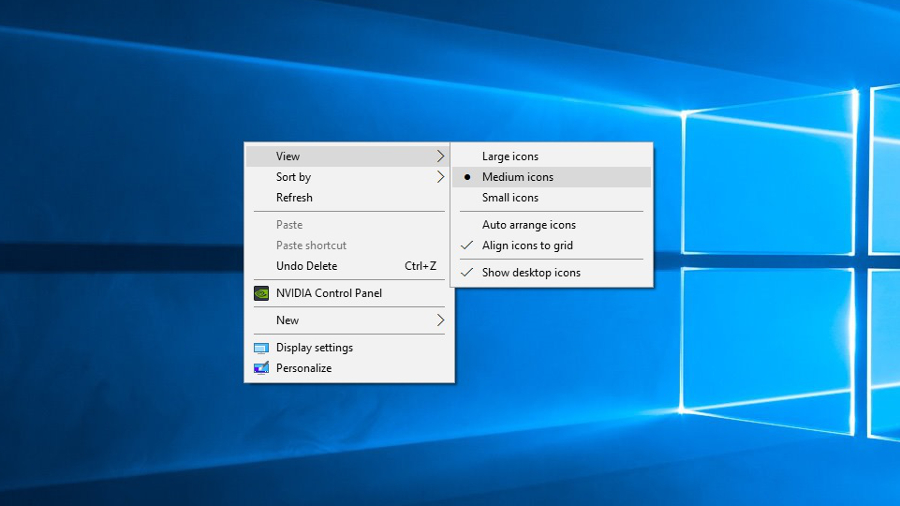
Some Windows 10 users have reported that icons are randomly making themselves bigger on the desktop, which can be rather annoying.
To fix this, right-click on the desktop and hover over View, which will produce a fly-out menu to the right containing a list of options pertaining to icon size. Just click on the size of the icon you want to change it back.
60. Decluttering the taskbar
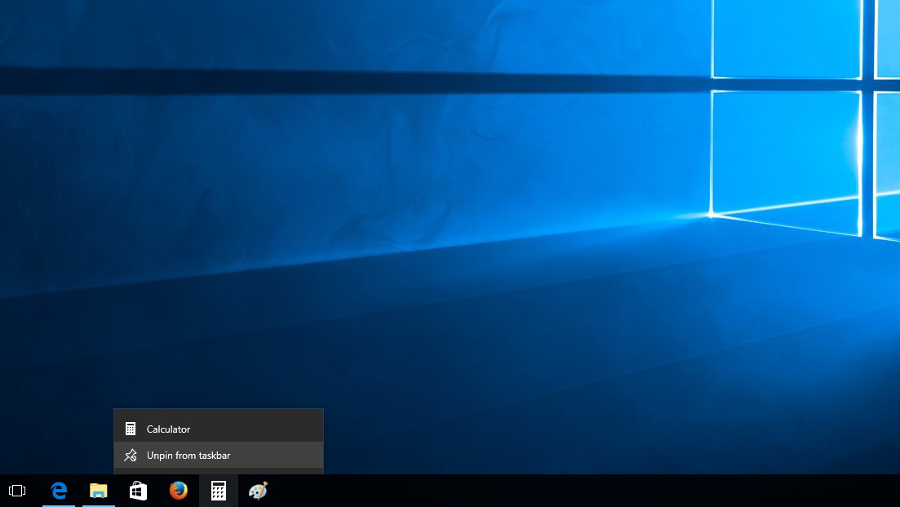
The Windows 10 taskbar can do many things, but that doesn’t necessarily mean you want it to. When there’s a hell of a lot in the taskbar, it can be difficult to pick out the icons you need to reach; but fortunately, it’s easy to fine-tune things.
To drop an icon from the taskbar, just right click on it and select ‘unpin’ – this removes things (and ‘pinning’ icons to the taskbar adds them).
Max Slater-Robins has been writing about technology for nearly a decade at various outlets, covering the rise of the technology giants, trends in enterprise and SaaS companies, and much more besides. Originally from Suffolk, he currently lives in London and likes a good night out and walks in the countryside.