52 photography projects: a great technique to try every week of the year
Our pick of the perfect weekend photography projects
Looking for photography projects to stimulate your creativity? Whether you’re a beginner who’s just learning the ropes or a seasoned snapper in need of inspiration, trying out a new technique can help you grow as a photographer. That’s why the list below features our pick of the best ideas to try with your camera.
From painting with light trails to capturing twilight landscapes, there are countless creative ways to use your camera and its lens. This round-up of our favorite weekend projects features suggestions to suit every skill level – whether you’re shooting with a smartphone or a ‘proper’ camera like a DSLR.
Some you can do from the comfort of you home, while others will have you heading out in search of specific scenes. Whether it’s a novel technique or an inventive suggestion for finding fresh subjects, every idea below has one thing in common: it should challenge you to try something different and find a fresh perspective.
Most of the projects can be attempted using the equipment you already own. Those that do require additional materials should all be achievable with pocket-money purchases – and if there’s any crafting involved, it should be well worth the effort when you see the results.
We’ve shared 52 of our favorite suggestions to do in 2022 below. Try them all and, in a year’s time, there’s a good chance you’ll be a better photographer, with a keener understanding of your camera and what it’s capable of. Plus you’ll be all set to attempt the final project: self-publishing a photo book.

The best home photography projects:
1. Water drop art
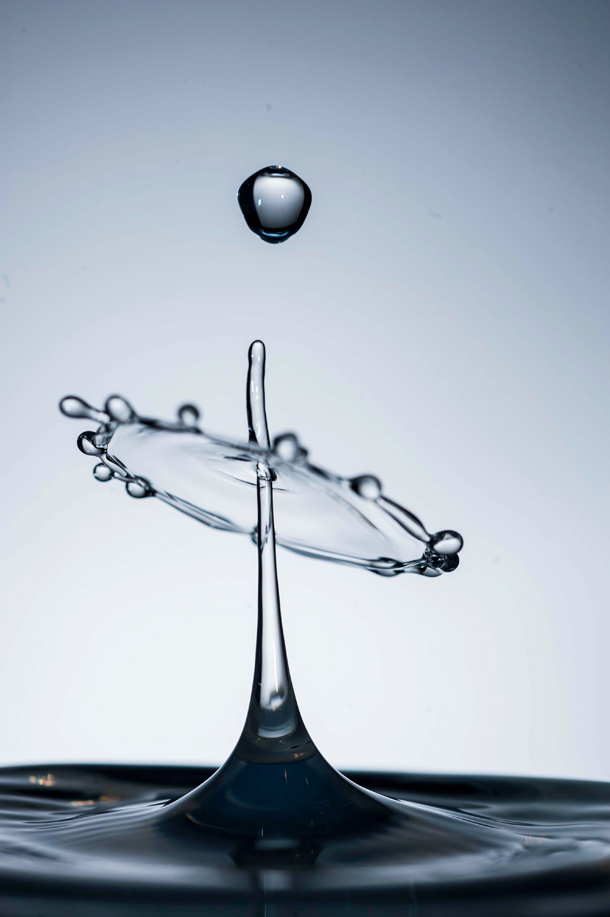
The basic idea with this project is to suspend a container of liquid and let drops fall through a small hole, then capture the resulting splash. Timing the shutter as the splash is created is everything. We achieved good results using two flashguns set to their lowest power (1/128th), an aperture of f/22 and water mixed with Xanthan gum to make a more viscous solution. We also used a SplashArt water drop kit from PhotoTrigger, which helped to regulate the size and frequency of the drops.

2. Indoor splash shots
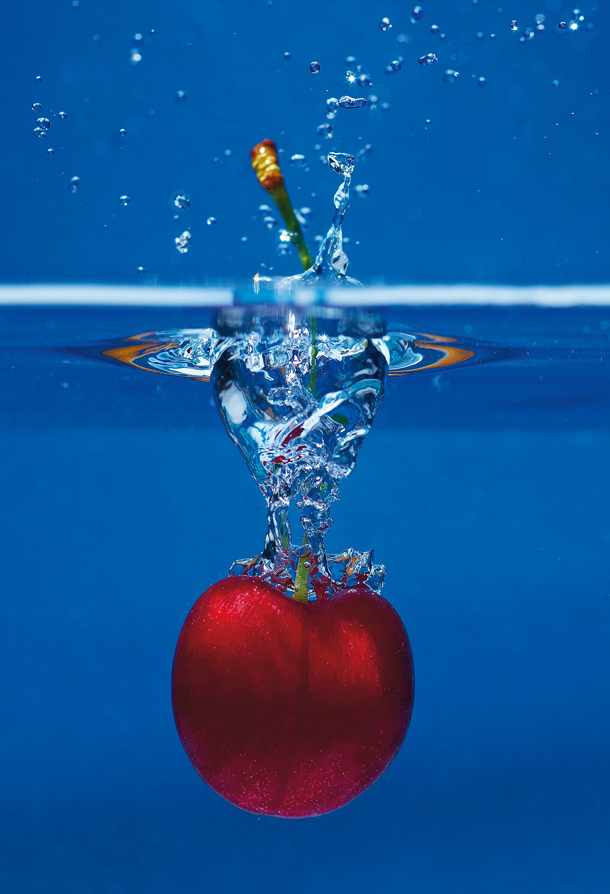
For this project you'll need a flashgun that you can fire remotely, a container with clear sides for your water, a coloured background and a tripod. Set up the container and backdrop, then position the flash over the container. With the camera on a tripod and set to manual focus and exposure - f/8, ISO200 and the fastest shutter speed that will work with your flash - drop the object into the water and fire the shutter as it hits.
Get daily insight, inspiration and deals in your inbox
Sign up for breaking news, reviews, opinion, top tech deals, and more.

3. Shapes of bokeh

Out-of-focus orbs of light can add magic to any image, but the bokeh effect needn’t be limited to standard circles. From love hearts to stars, a simple cutout filter can transform background sparkles into brilliant shapes.
Using your lens cap as a guide, draw a circle on a piece of card. Cut out the circle, score a small shape in the centre using scissors or a craft knife, then push the card onto the front of your lens (or attach it with an elastic band). When you next shoot a scene, any unfocused light will take the form of your shape.
Use a wide aperture to maximize the effect and remember that, as the filter restricts the amount of light entering your lens, you’ll want to set a longer exposure or higher ISO. Try simple shapes such as triangles to get started, before progressing to stars, hearts, crosses and more.

4. Create smoke art
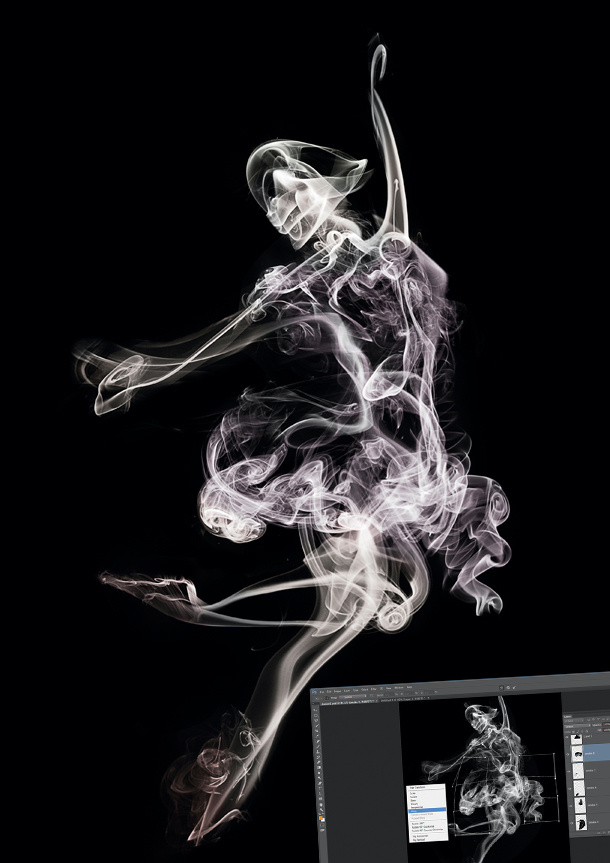
Smoke trails are a firm favourite among still-life photographers. But how about taking it to the next level and using the shapes in a creative Photoshop project. Once you've taken a few good smoke art photos, make a blank document in Photoshop, then copy and paste one of the smoke images into it. Set the blending mode to Screen and use Warp Transform to reshape it. Continue the process to combine a range of smoke shots into a new image.

5. DIY lightbox
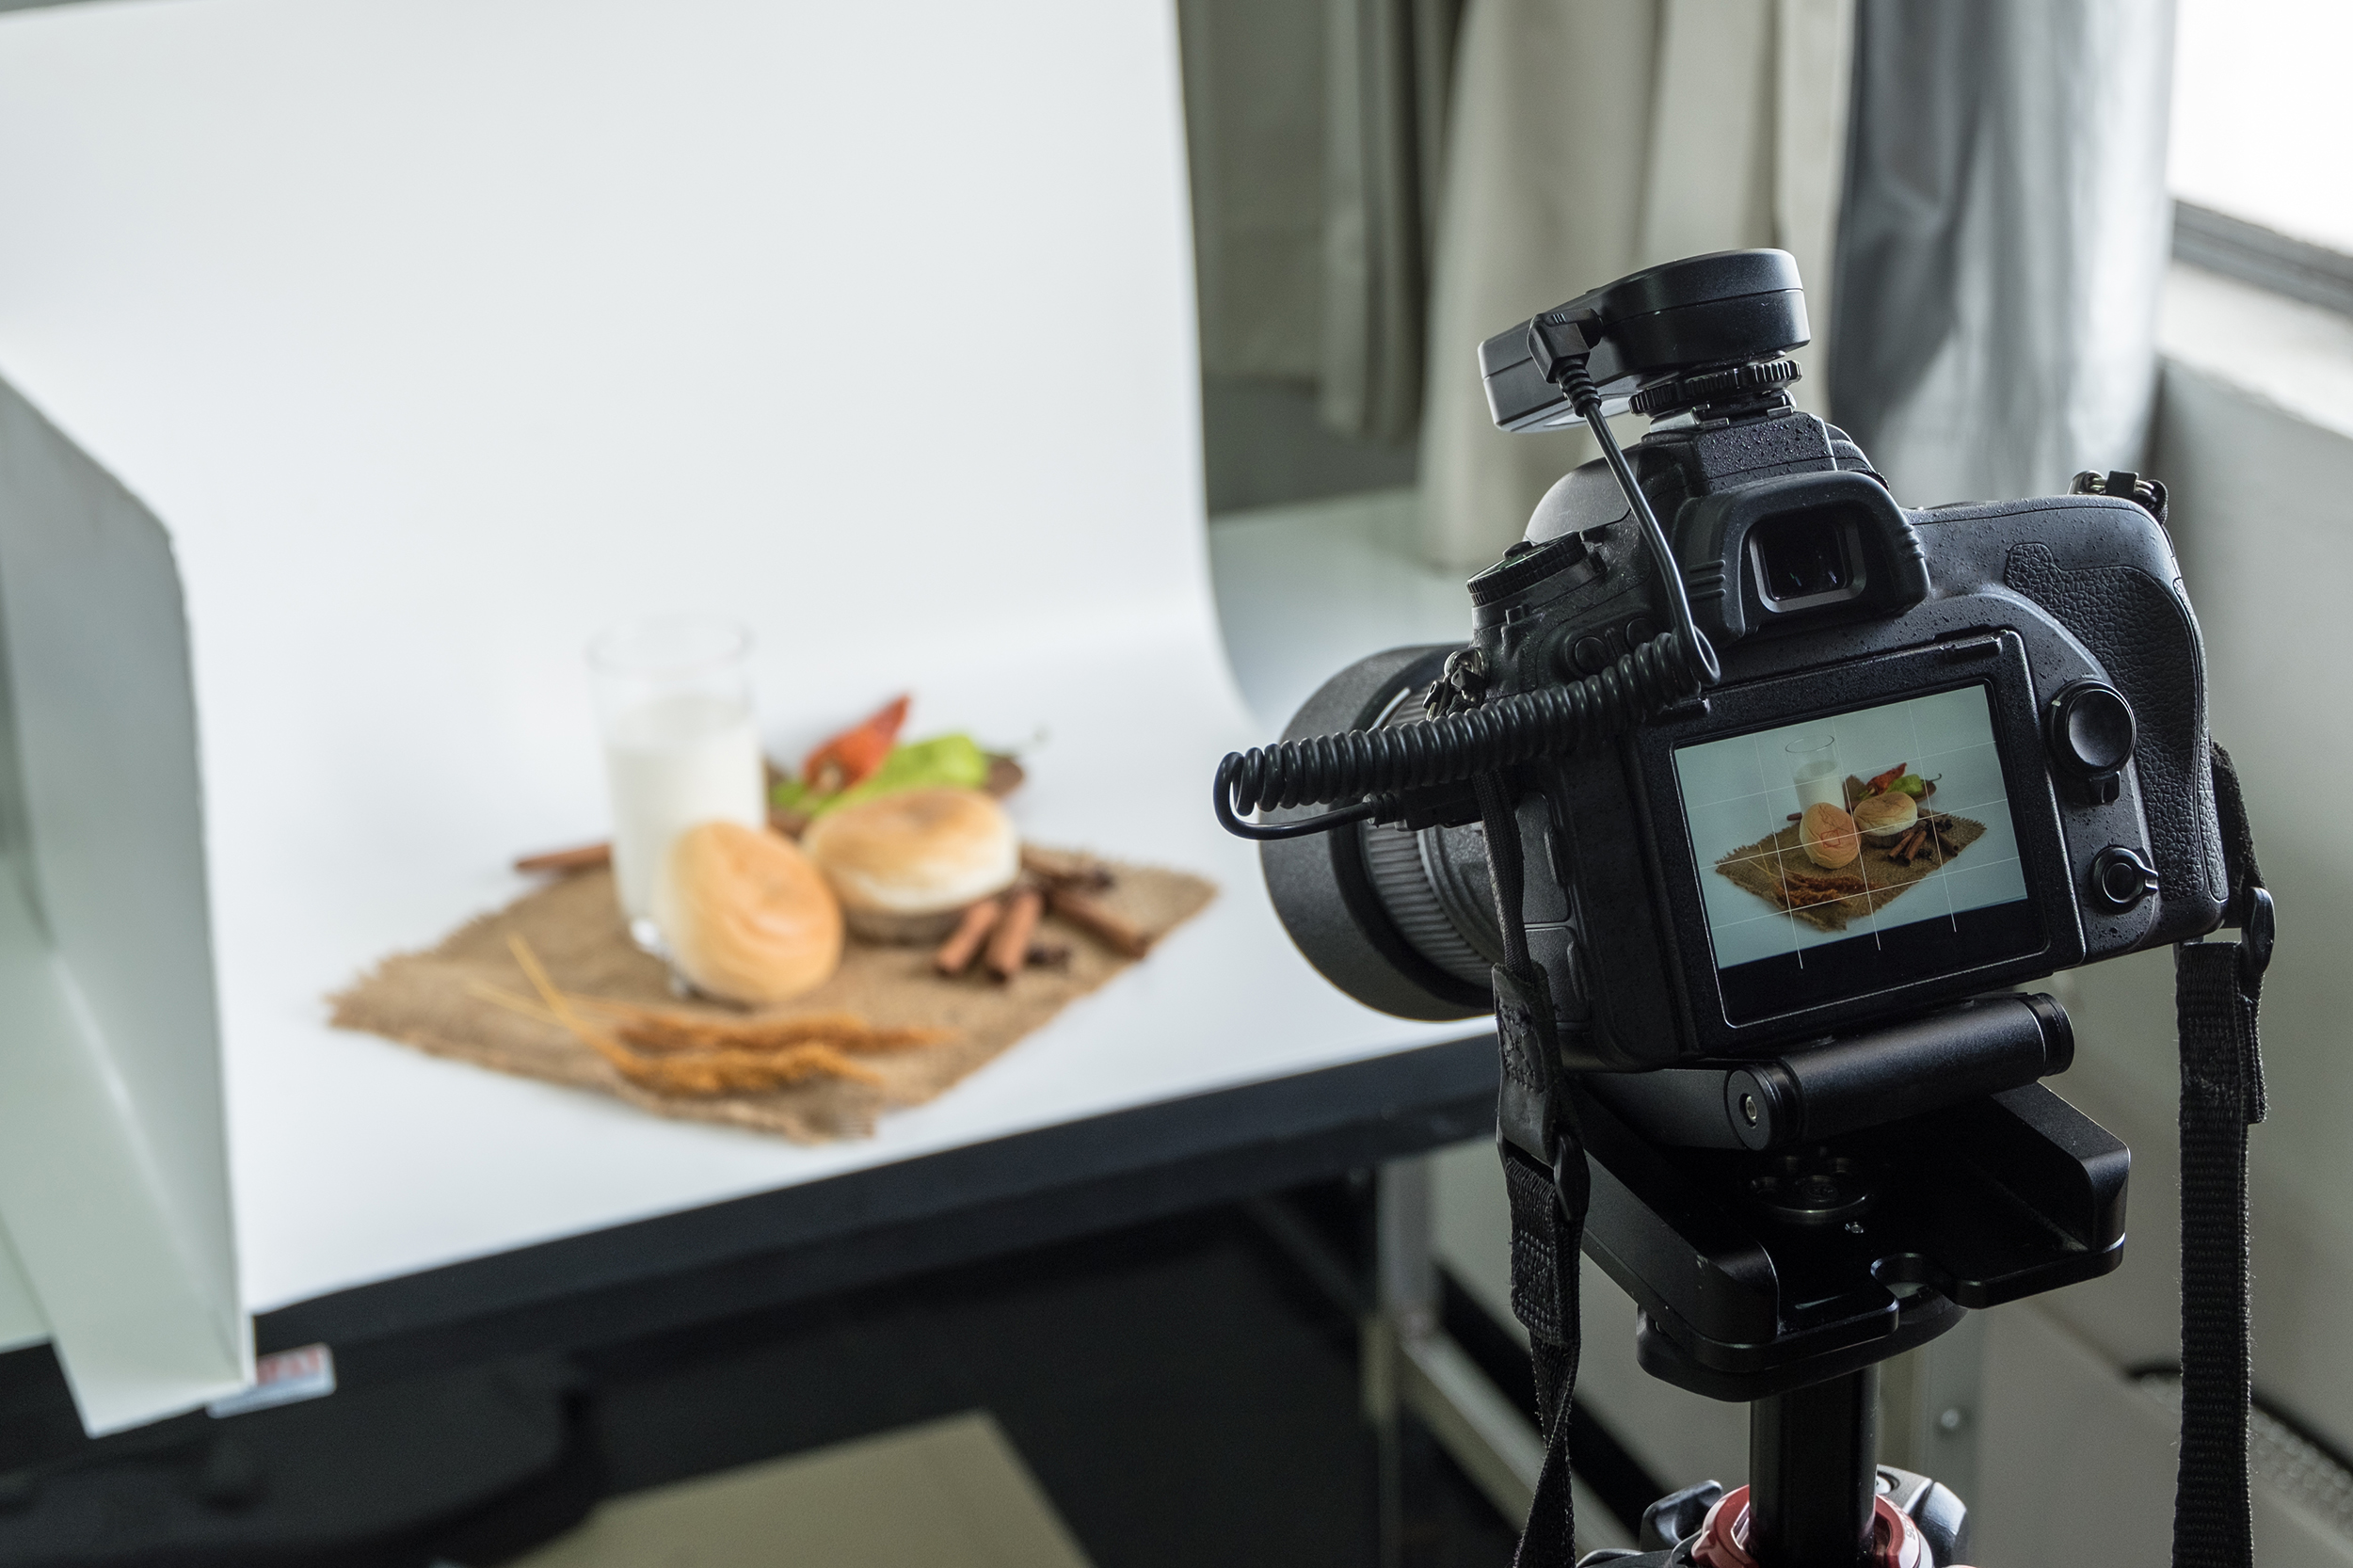
Lightboxes are used to illuminate objects evenly against a plain background, often for the purposes of product or food photography. Luckily, you don’t have to have a pro budget to make one at home. All you need is a cardboard box, some white paper and a table lamp.
Remove the top flaps, stand the box on one end and cut window holes in either side. Line the box with a single, seamless piece of white paper and cover the holes with thin paper or fabric, taped in place. Then it’s as simple as positioning a desk lamp on one or both sides: the paper will diffuse the light, evenly illuminating whatever object you put inside.
Or for an even simpler setup, use a single piece of paper as the backdrop, with one white wall made from card, and position near a window (as pictured). Experiment with aperture and shutter speed to shoot subjects with totally white backgrounds or some shadow for a sense of perspective. Then mix things up with color backgrounds. If the quality is high enough, you could list your images for sale on a stock photography website to earn some lockdown pocket money.

6. Lubricate your lens
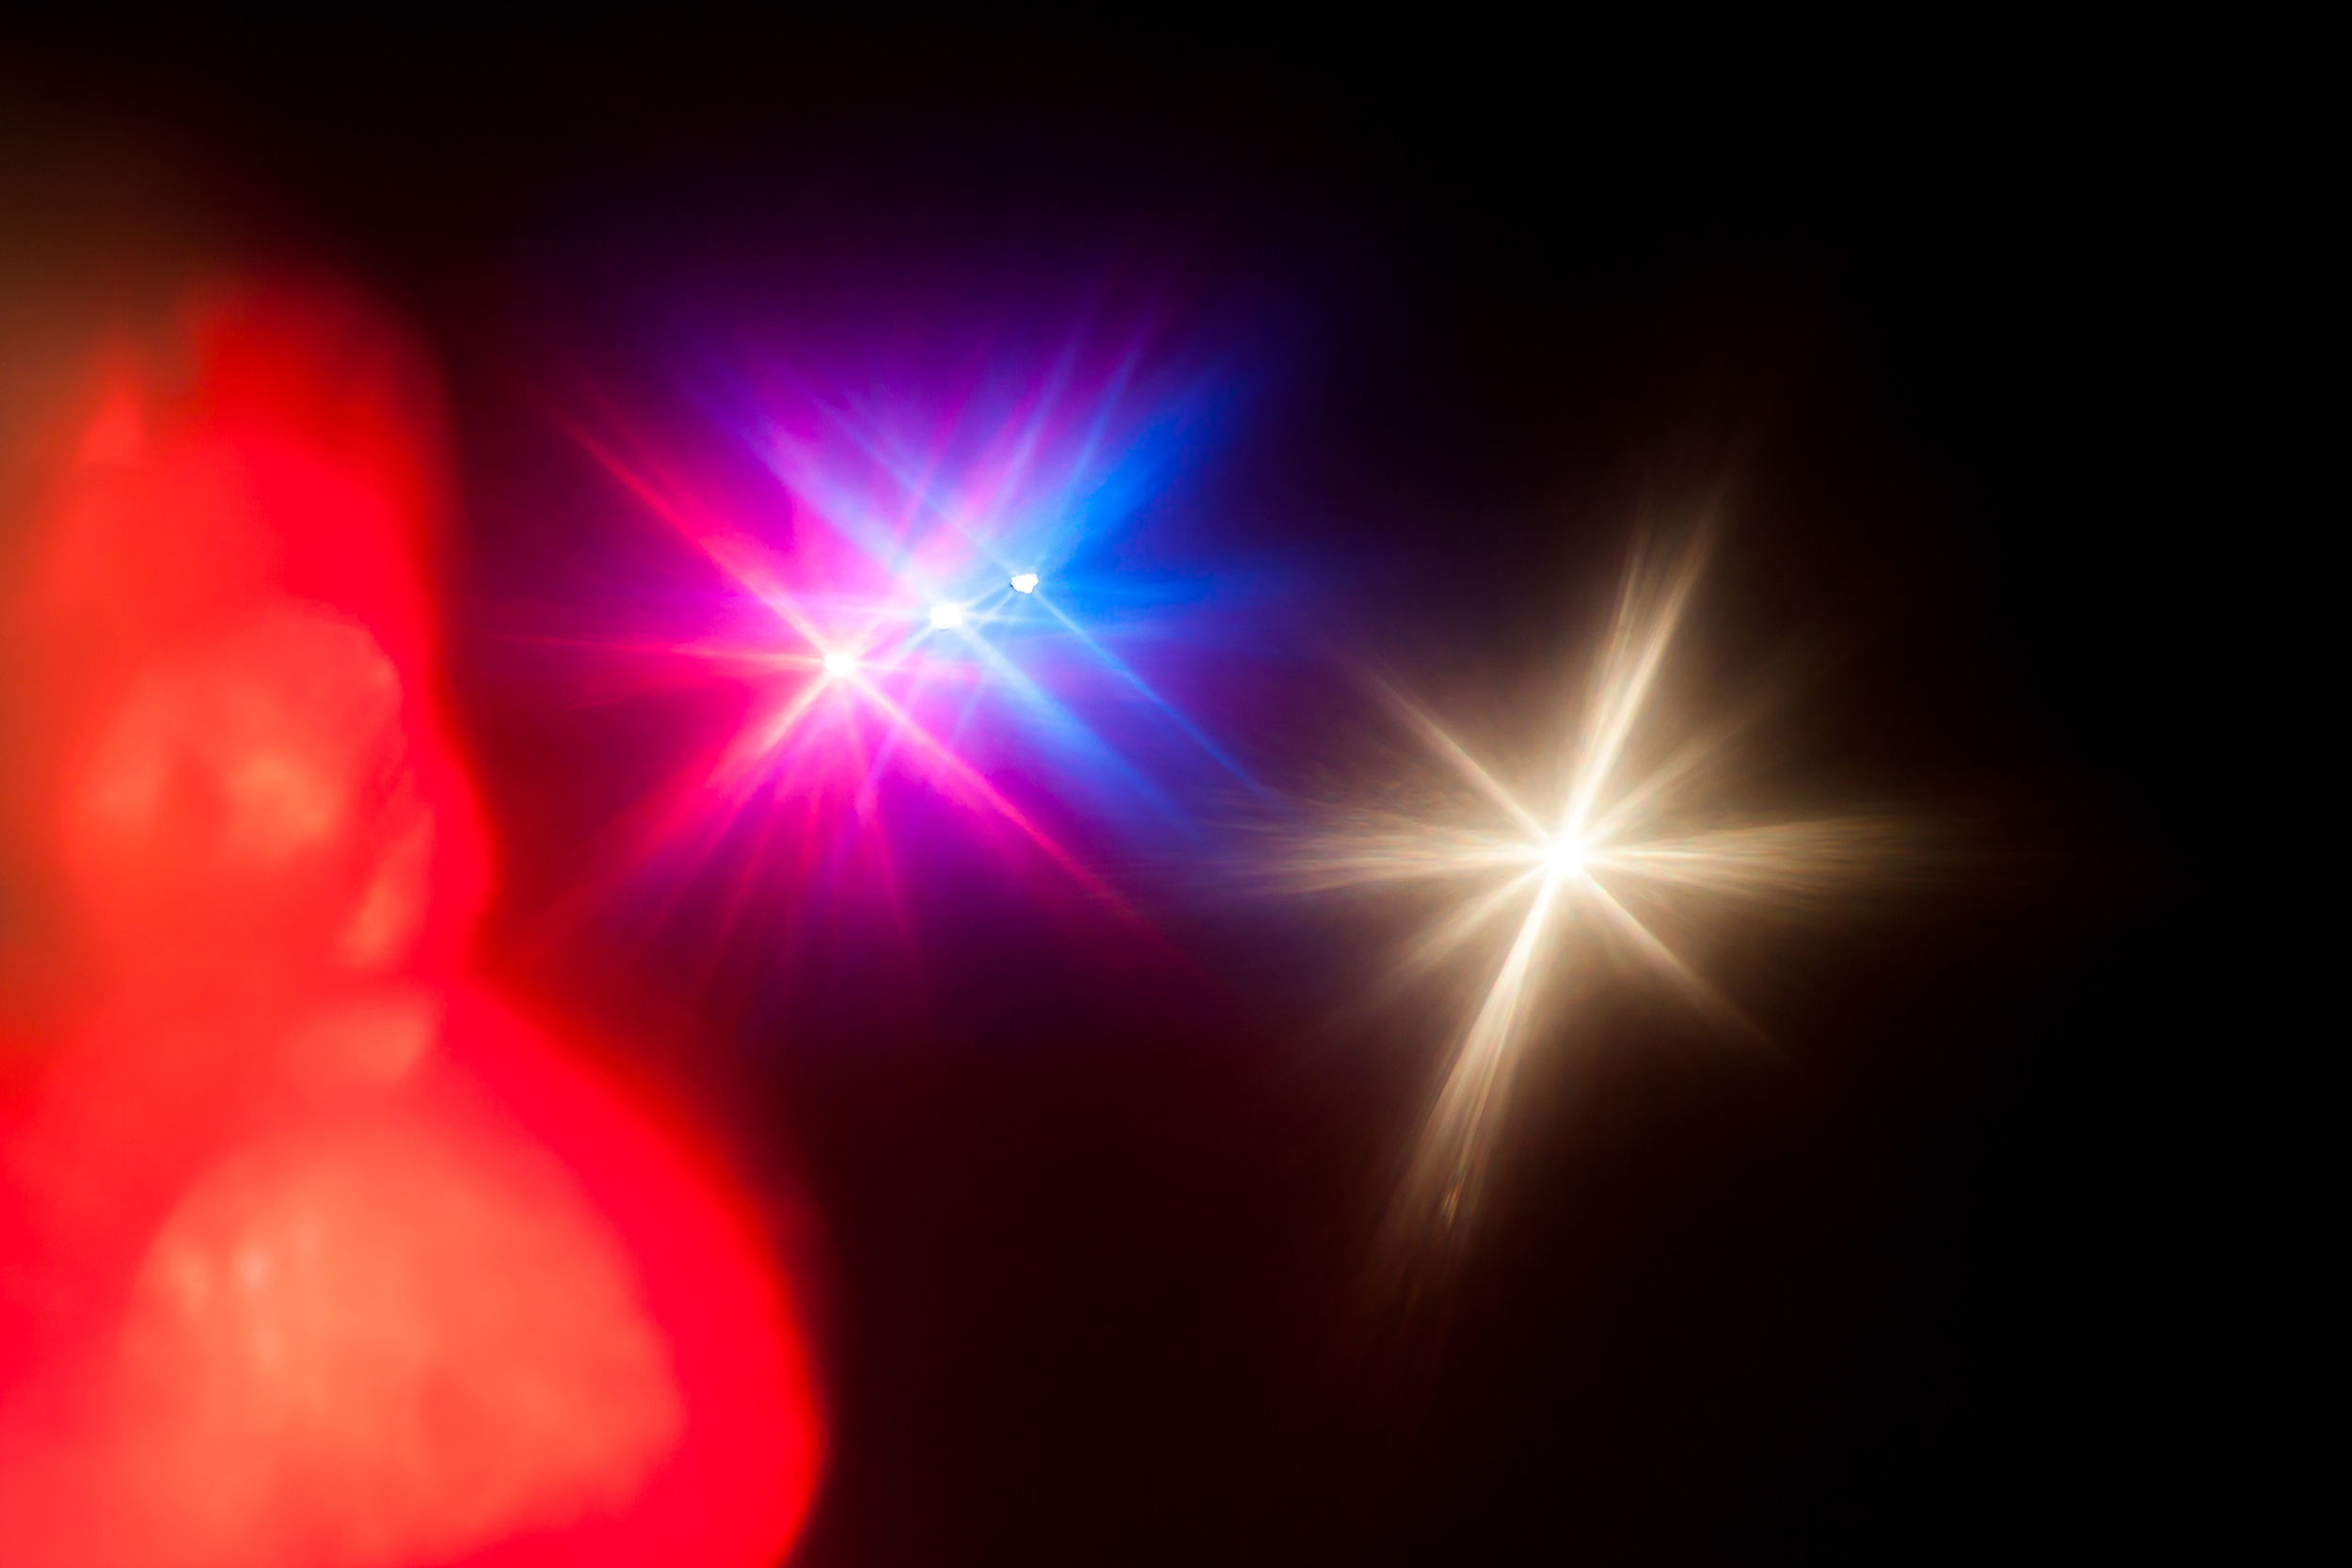
Want to give your housebound portraits added glow? If you have a spare lens filter lying around, try an old Hollywood trick: smear a layer of Vaseline on the glass to give your images a soft, dreamy look, keeping aperture wide to emphasize the ethereal effect with a shallow depth of field.
Get experimental by leaving the middle of the filter free from Vaseline to create a halo effect, with the centre in clear focus but the outer elements blurry and soft. Don’t want to sacrifice a filter? Stretch cling-film tight across the lens and keep it in place with an elastic band, before using the Vaseline in the same way. If you’re not into portraits, try the effect when shooting a light source for a unique style of diffusion.

7. Make your own filters
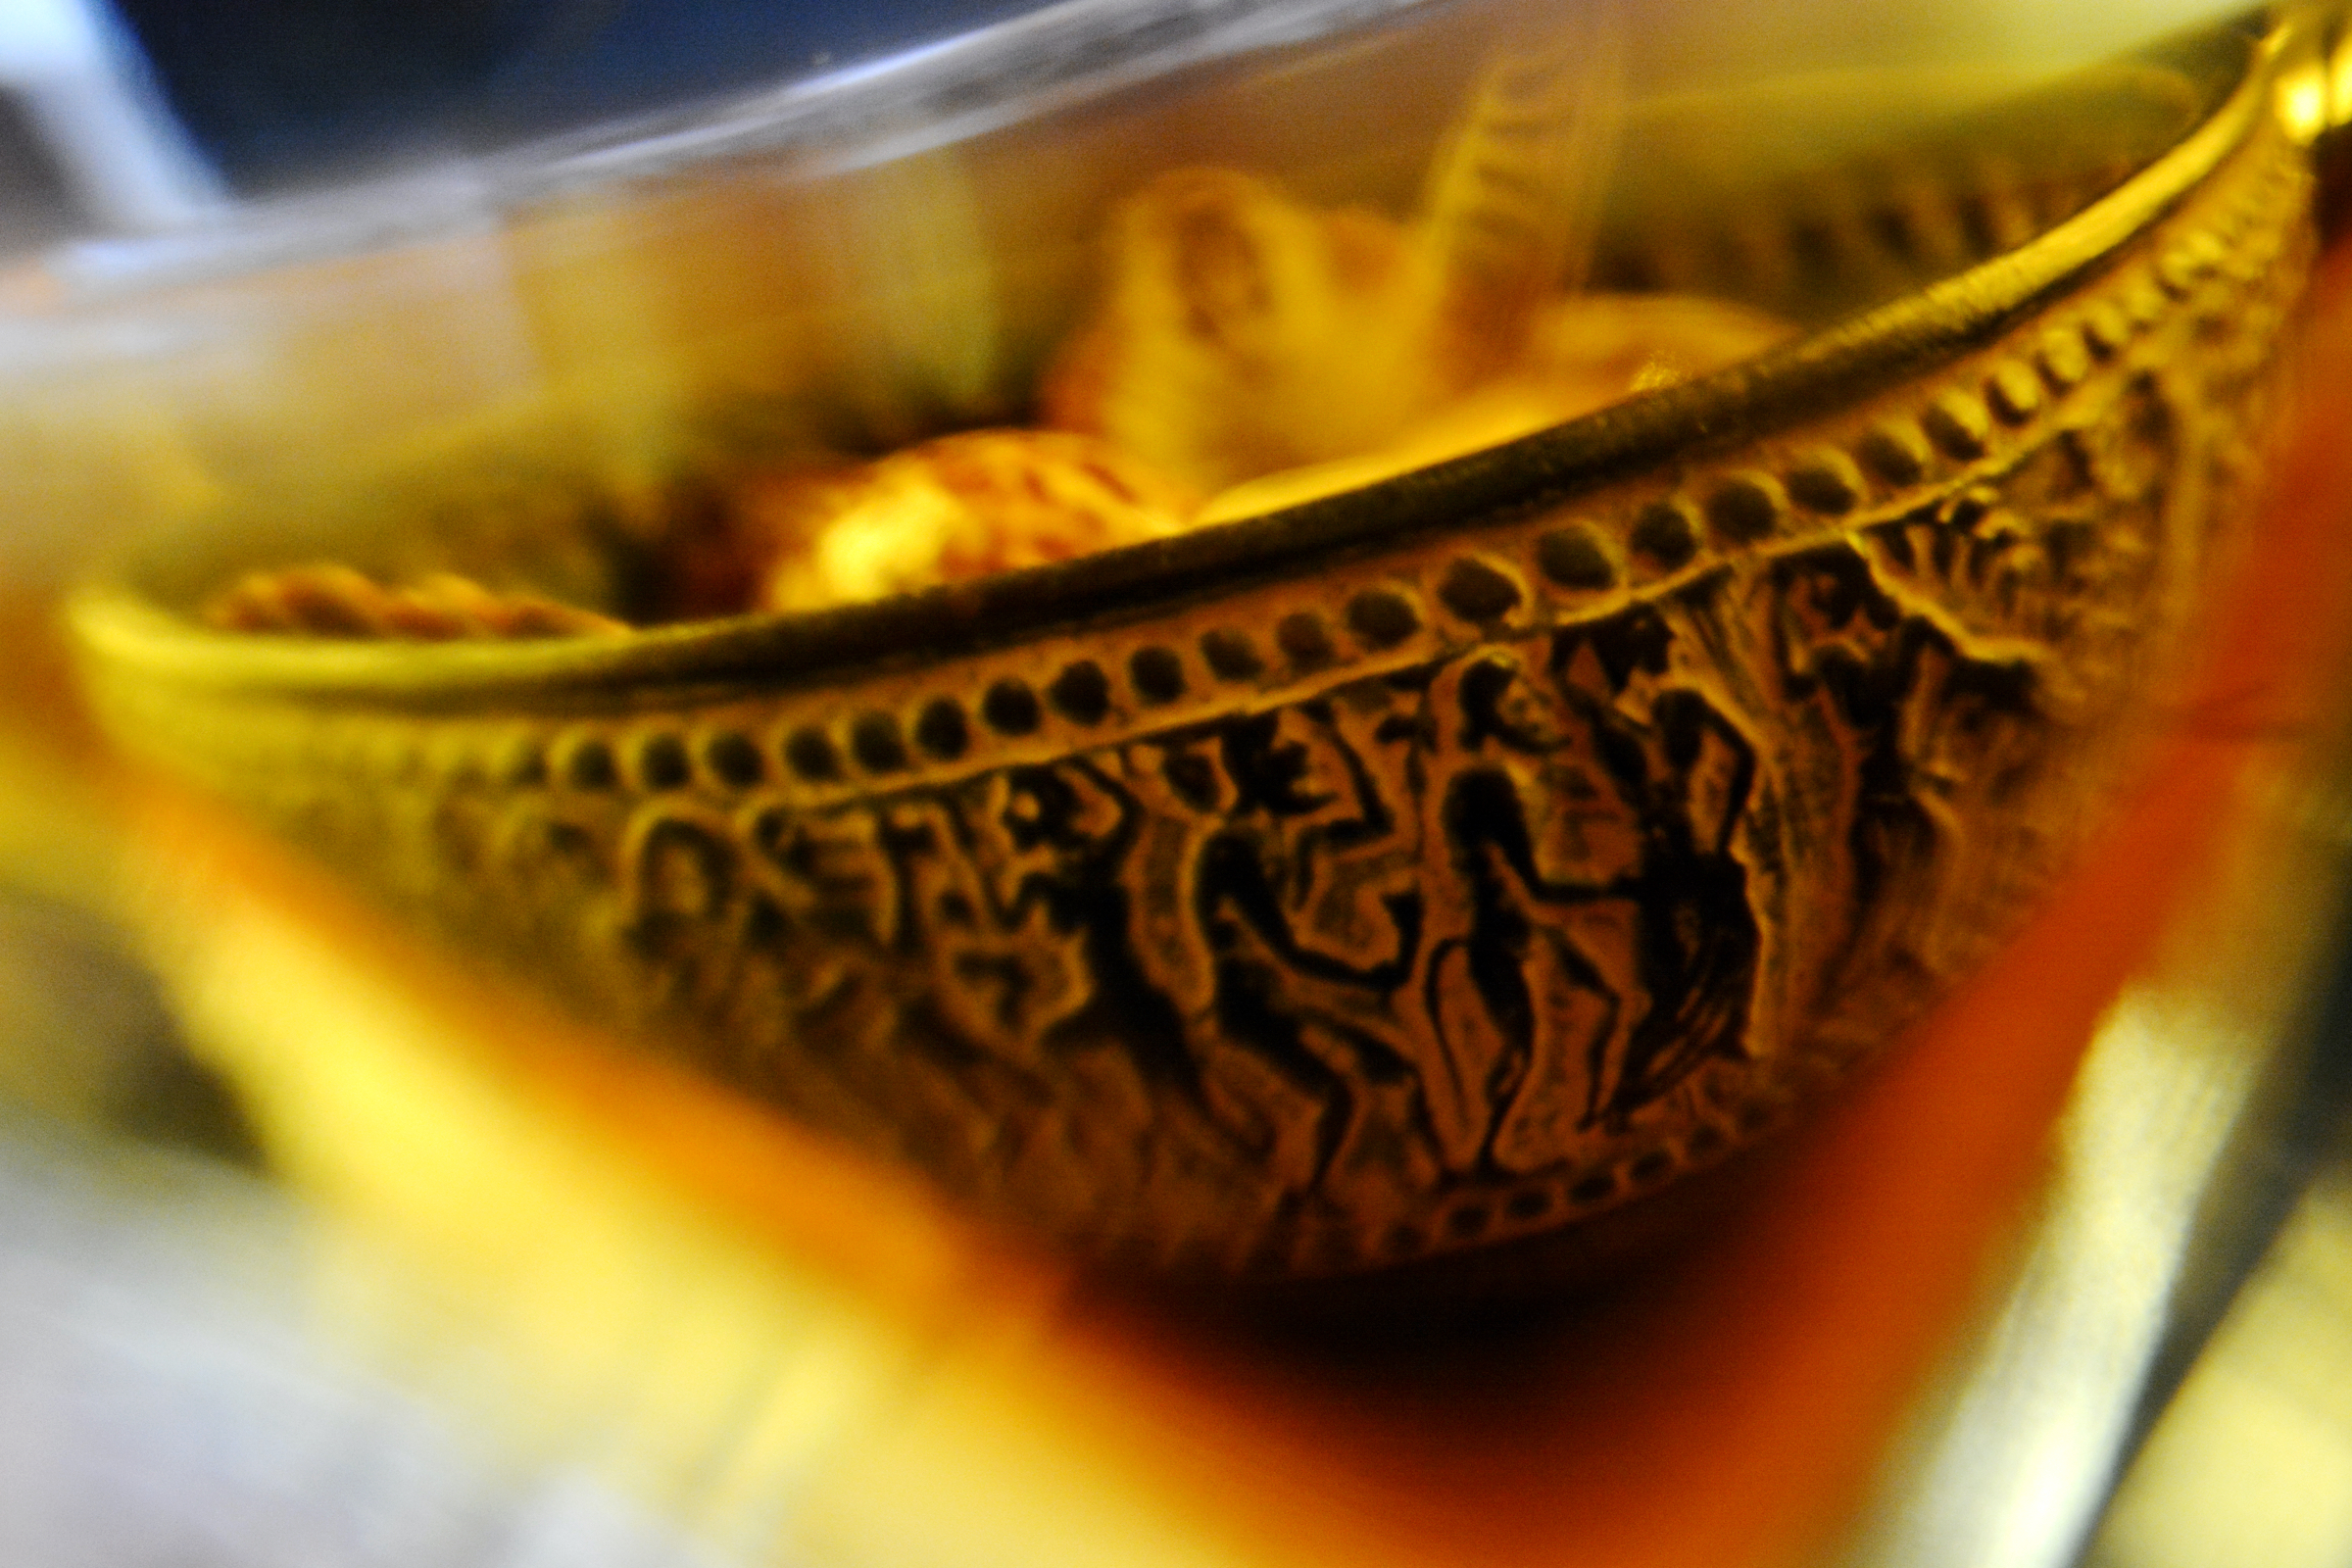
It’s no secret that color is a major element of any image, but you don’t need expensive filters or editing software to experiment with saturation. In fact, you don’t even need to leave your home: all manner of household objects can function as color filters to bring new hues to your photography – and to transform mundane moments into brighter snaps.
Attach tissue paper to your lens with an elastic band for an instant change of scene, or try shooting through thin fabric with a light source placed behind. Too easy? Take a snap through a laundry capsule for a liquid tone adjustment or use a whisky bottle for sepia shades with a hint of distortion. Petals are pretty effective, too, as are translucent sweet wrappers.

8. Try cross-polarization
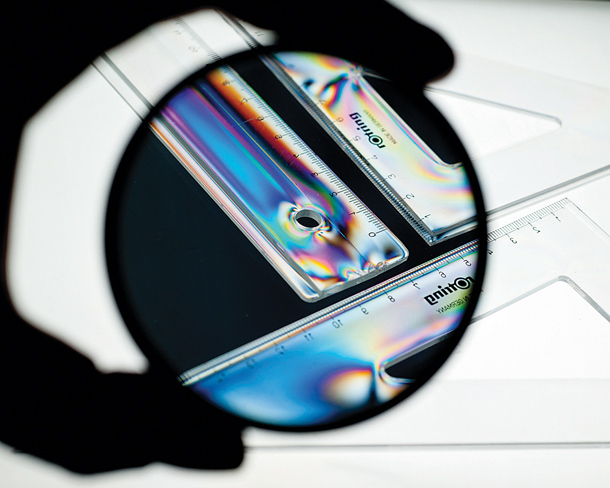
This fun project exploits the effect that polarised light has on some plastics. You'll need two polarising filters - ideally one of these should be a sheet of polarising film. You can pick up an A4 sheet of Lee 239 polarising film for £50 (try www.robertwhite.co.uk or www.pnta.com). The sheet of film should be placed on a lightbox or in front of the only light source. An iPad screen and most computer screens have a polarising filter built in, so if you don't have a sheet of polarising film you can always experiment by creating a white document to fill the screen. Simply attach the circular polariser to the camera lens and rotate it to make the colours appear in clear plastic items

9. Food landscapes
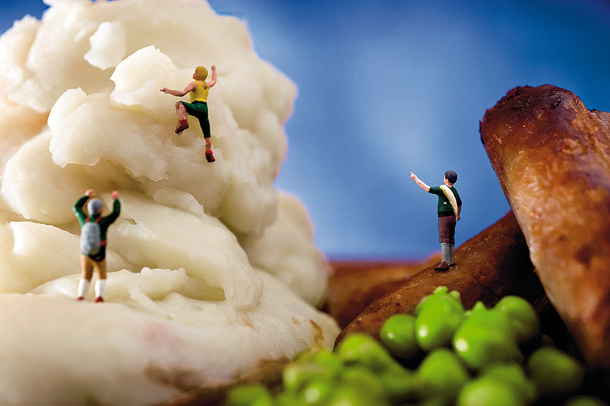
Spice up your food photography! All you need is a set of model figures - Hornby 00 gauge figures are perfect, as they're available in a wide range of poses. Preiser has a great range too. The most important aspect is to establish a sense of narrative. Here you can see that there's a conversation between the characters, with the mountaineer on the 'mash face' being helped by his colleagues on the ground.

10. Fine-art food
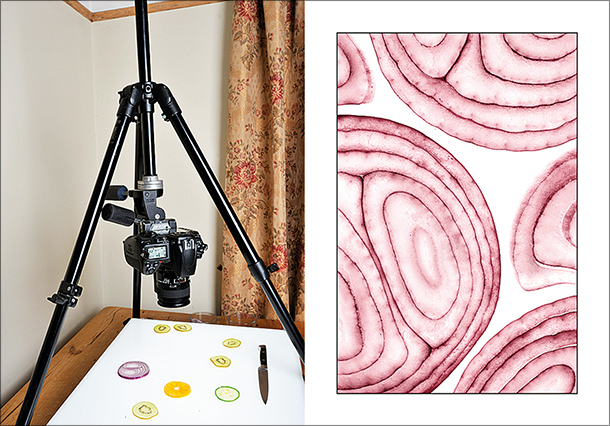
Try turning your dinner ingredients into photo art using just a lightbox and a very sharp knife. Slice fruit and vegetables as thinly and evenly as possible, then place them on the lightbox. With the camera positioned directly above, use Live View to focus manually on the details. Set an aperture of f/8 to give adequate depth of field, and dial in some exposure compensation of +1 to +3 stops as the bright light can fool the camera's meter into underexposure.

11. Flowers in ice
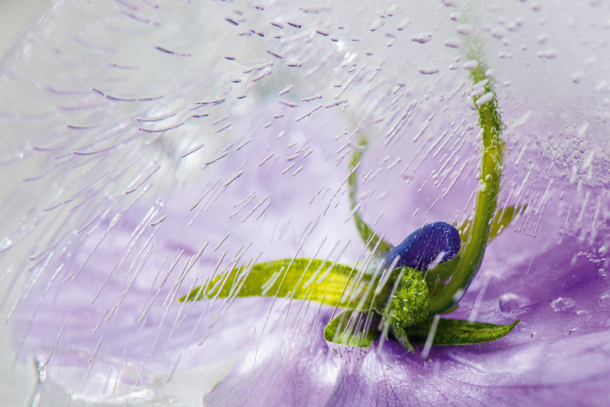
A relatively inexpensive way of taking 'kitchen sink' close-ups that look great blown up as wall art. Freeze flowers in plastic containers of distilled or de-ionised water (available through your local auto or hardware store). The flowers will float, so try to weigh them down or fasten them in place so that they freeze under the water. Place the block of ice on top of a clear bowl or glass in a white sink or plate, so that the light can bounce through from below. Position a flashgun off to one side, angled down towards it, and shoot from the opposite side.

12. Abstracts in oil
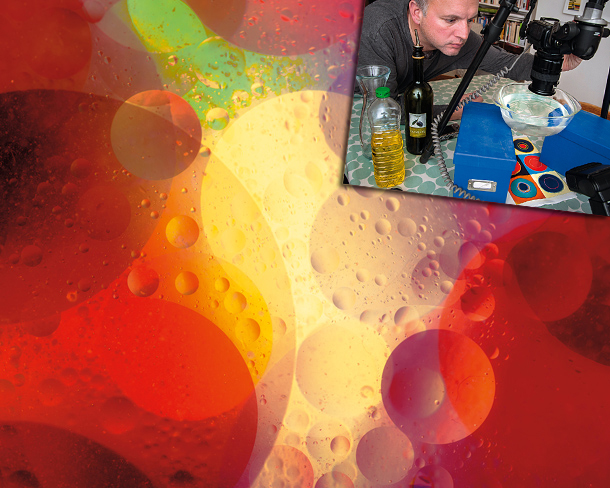
Oil floating on the surface of water is a great way to make striking abstracts. This table-top photo project exploits the refractive quality of oil and bubbles to accentuate and distort colours. All you need to do is place a few drops of cooking oil on the surface of water in a glass dish. Make sure the dish is supported about 25cm about the table top, then place coloured paper under it and use an anglepoise lamp or flashgun to light the paper.

13. Play with fire
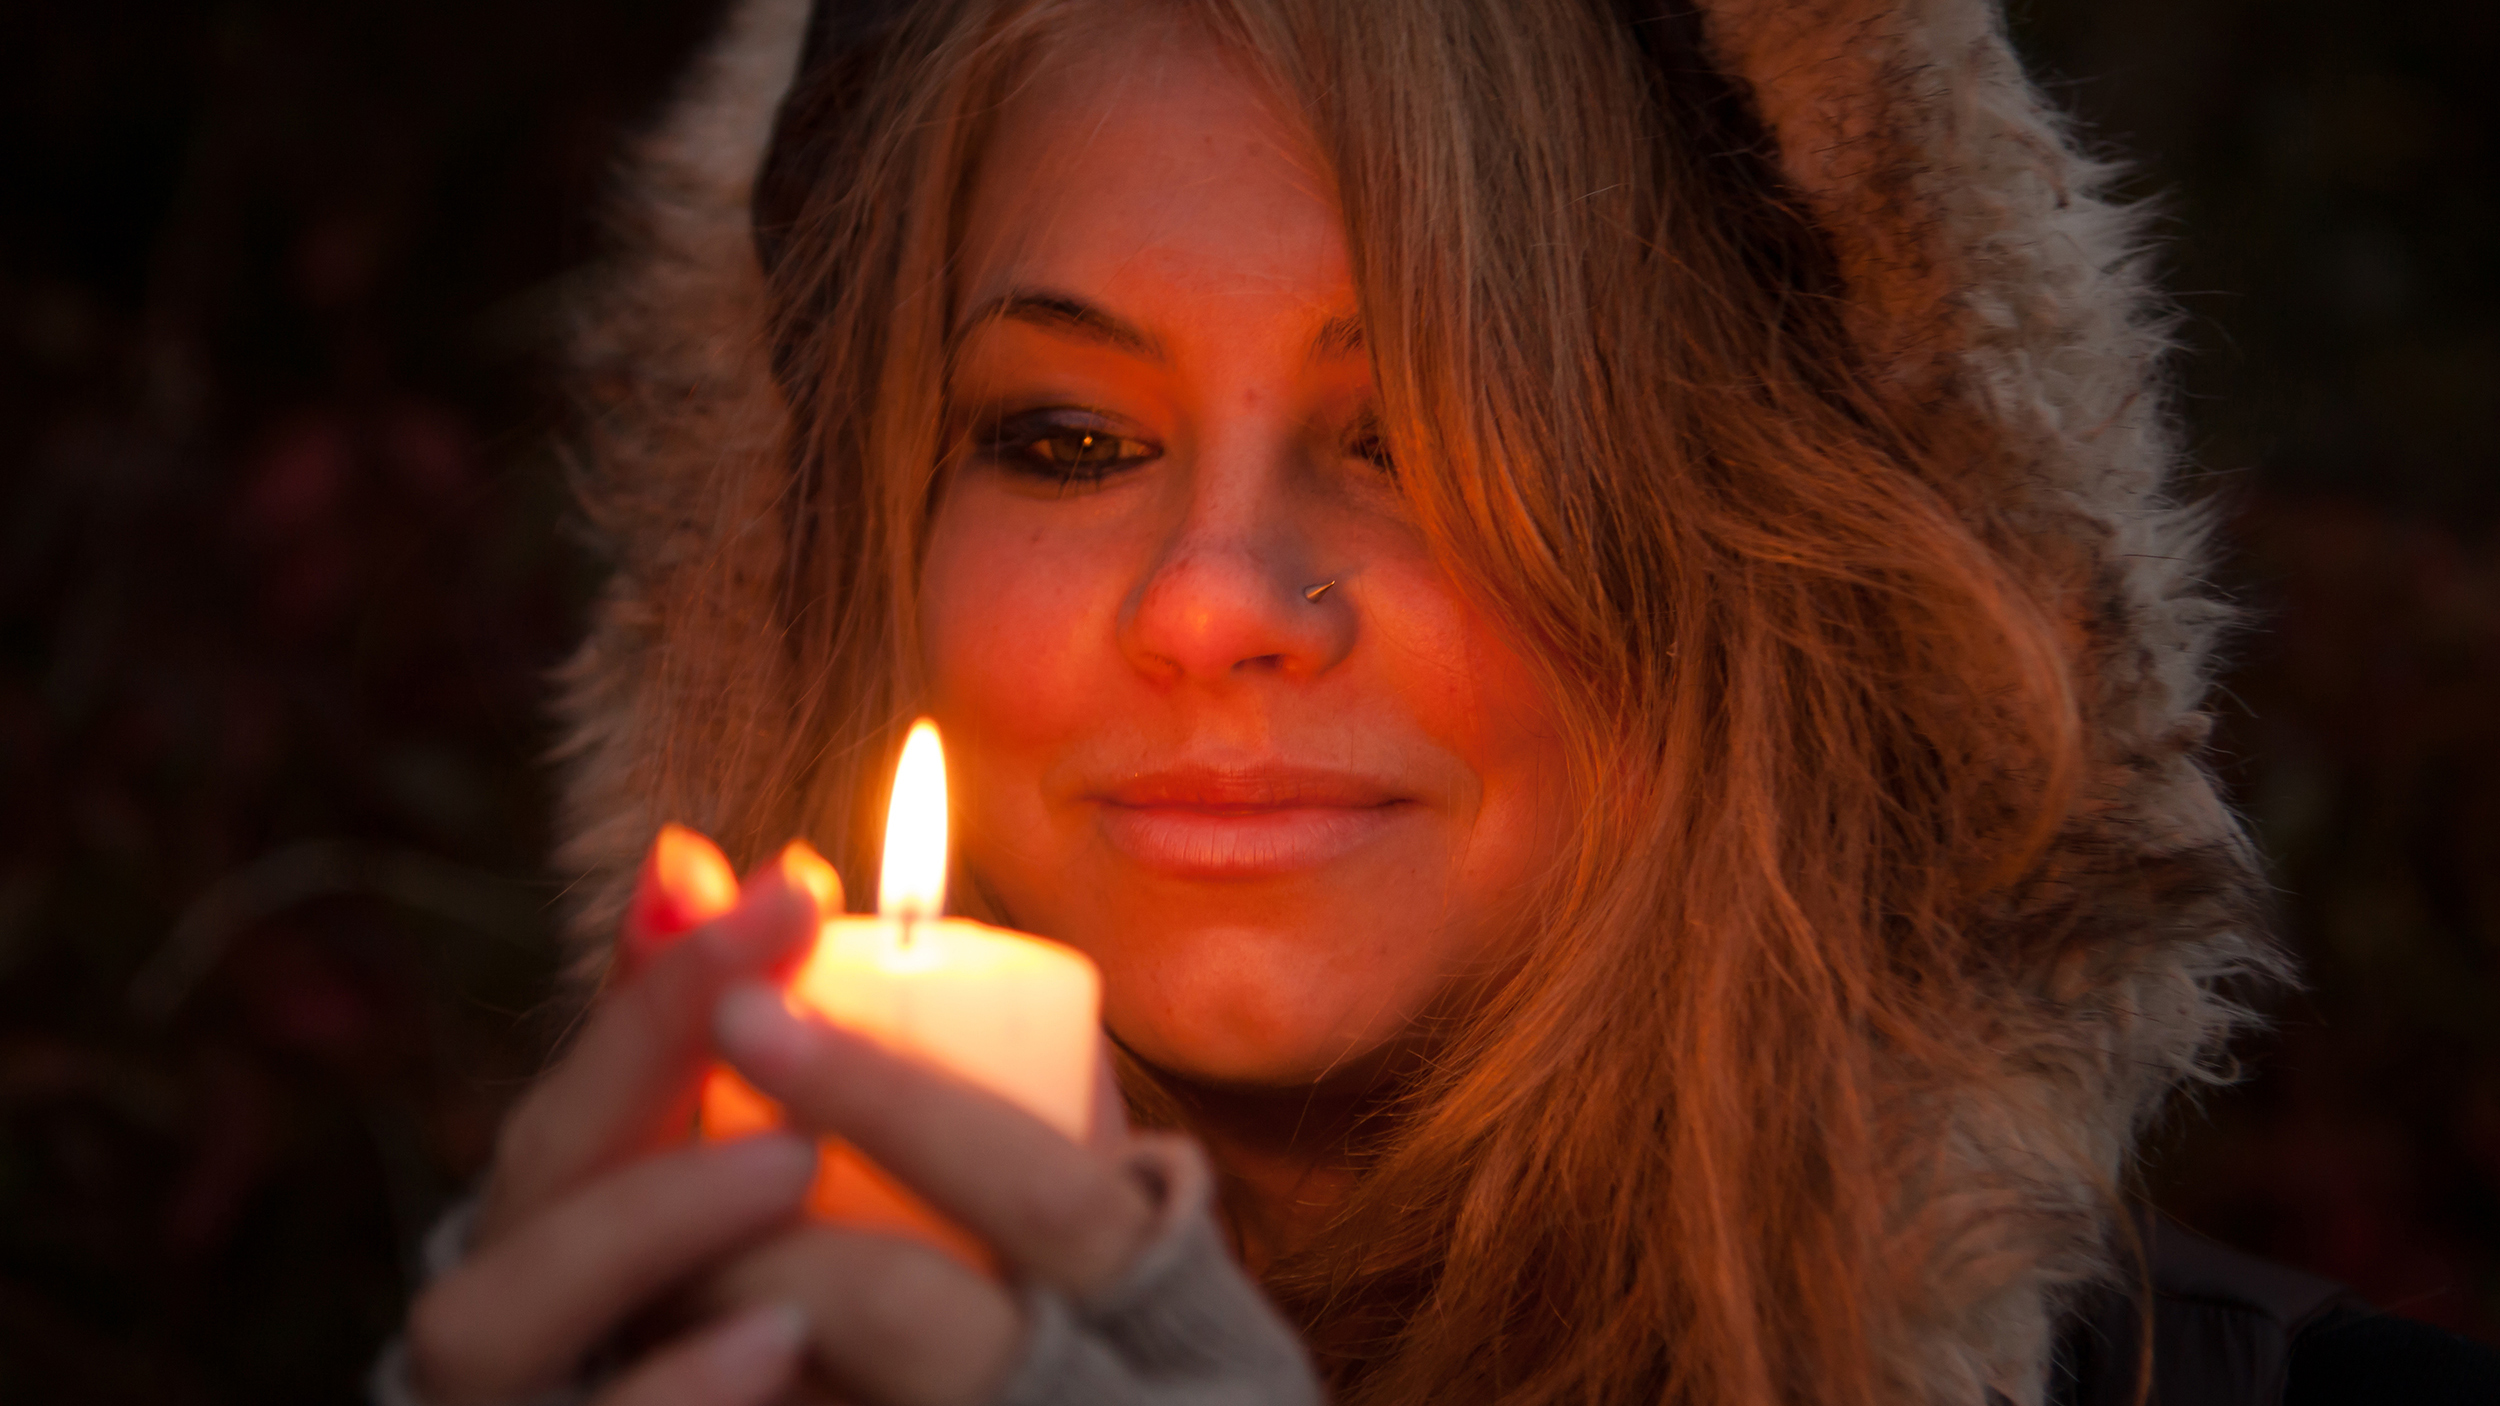
It doesn’t take a pyromaniac to see the photographic potential of fire, but it does take patience, skill and plenty of precautionary measures to capture a stunning action shot of a match igniting. If you’d rather not risk singeing your fingertips, try a different type of flame photography.
Shooting by candlelight alone can lead to magical results. As with any single source of light, it allows you to experiment extensively with shadows – especially if you’re capturing a portrait – while the soft, warm tone and flicker of the flame both contribute to an especially ethereal effect.
In a darkened room, try shooting with a medium-high ISO and a relatively slow shutter speed. Start with just a candle and your subject, before introducing additional elements and playing with positioning. A nearby wall, for example, will throw the candlelight back in different ways, while glass will add to the magic with fiery reflections
Tweak shutter speed to affect the strength of shadows or try adding further flames – though you might need to adjust the white balance if things look more yellow than mellow.

14. Repaint the walls with camera obscura
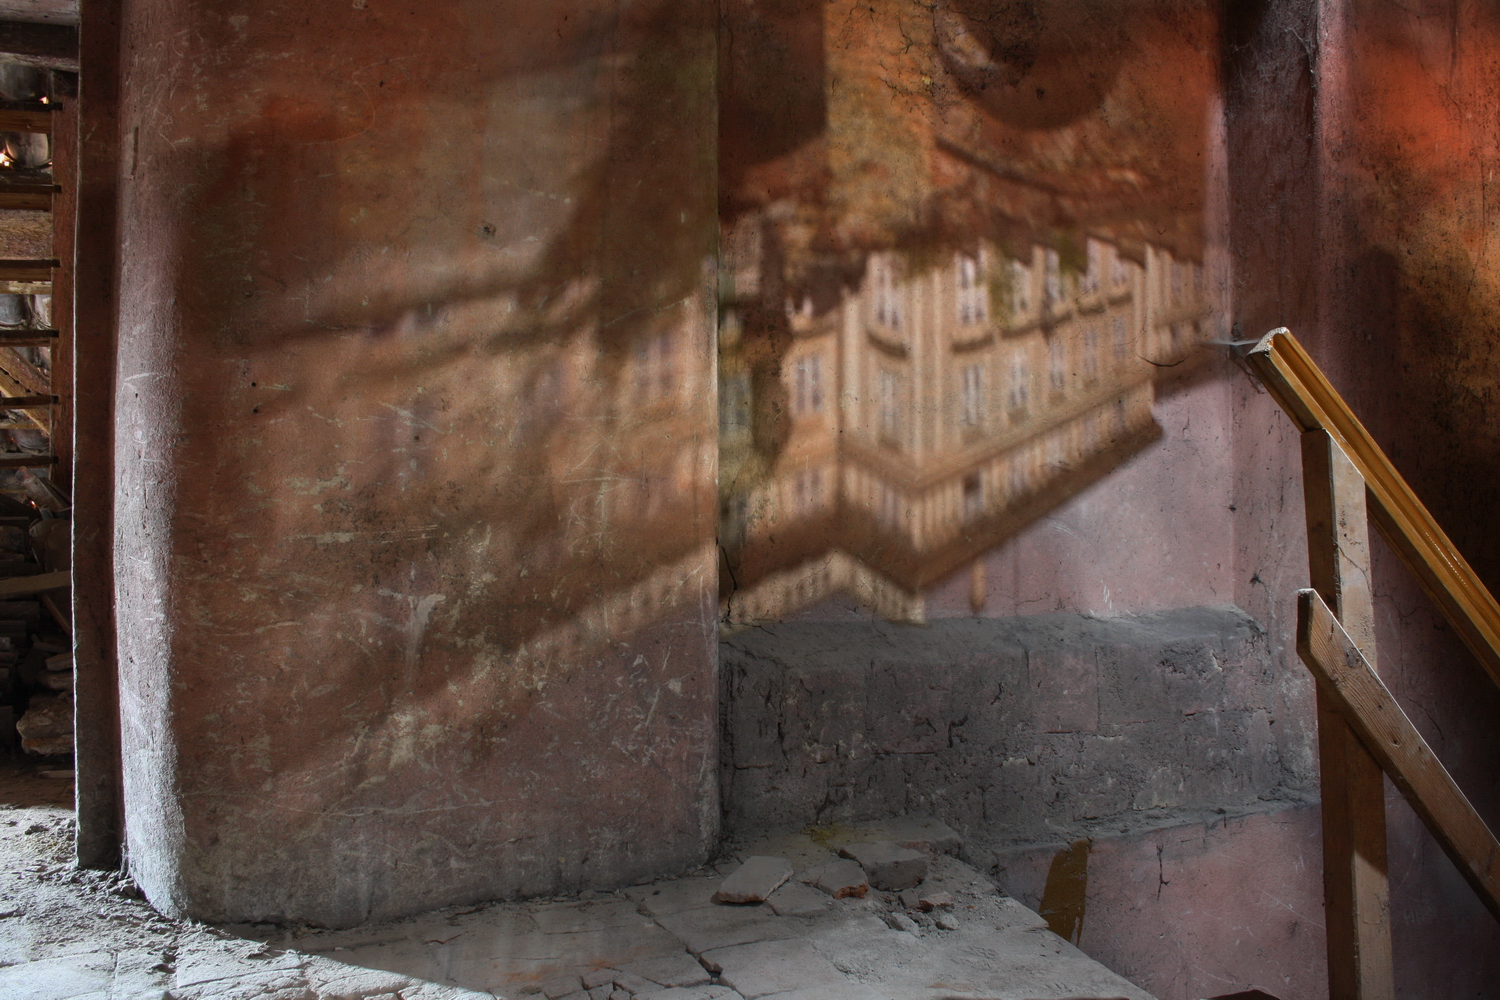
Familiar with pinhole photography? That technique relies on camera obscura – a natural optical effect that occurs when a small hole in an otherwise sealed space (such as a box) projects an inverted image of the world outside onto the opposite wall. You could make a pinhole camera as an at-home project, or you could go even bigger: with the right setup, you can create the camera obscura phenomenon in an entire room.
First, you’ll need to black out a room – for example, by taping opaque sheets over your windows. Then you’ll need to make an aperture through which light can enter; the smaller the hole, the sharper but dimmer the image. Camera obscura works best in small/medium rooms, with an aperture of around 10-15mm diameter. Allow your eyes to adjust and determine whether you need to brighten the image by making a larger hole, then marvel as an inverted version of the outside world appears on the wall.
Capture the entirety of this remarkable natural effect using a wide angle, a relatively long exposure and a tripod, or focus on specific elements of your room to emphasis the effect – such as houses appearing to float upside down on your mantelpiece.

15. Camera tossing

Chucking your precious photographic equipment into the air might sound like something designed to void the warranty, but – provided you’re not too clumsy – camera tossing can deliver some truly spectacular results. Try it in a dark room with a single light source. Set a shutter speed of around one second (roughly the length of time it’ll be in the air) and, as the timer hits zero, launch it upwards. Catching it is the important part, but once you’re comfortable with the technique you can experiment with multiple light sources, different colors and even spinning your camera as you release it.
16. Psychedelic soap film
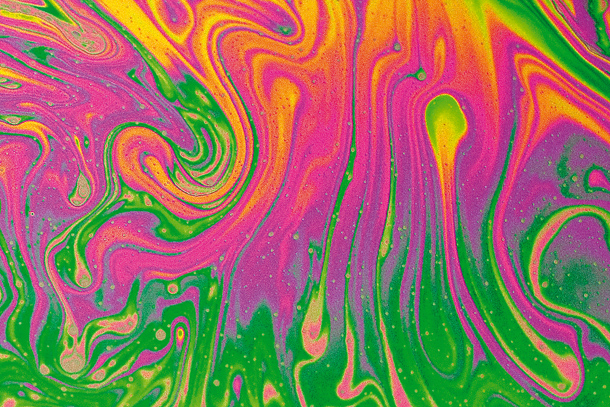
This is a wonderful project that makes for vibrant desktop wallpaper or abstract wall art. You'll need liquid soap mixed with glycerine for long-lasting soap film, plus a wire loop, a black cloth background and a macro lens of at least 100mm. The colours created by soap film only appear when hit by light from a certain angle, so set up near a north-facing window and shoot from around 45 degrees.

17. Refractive art
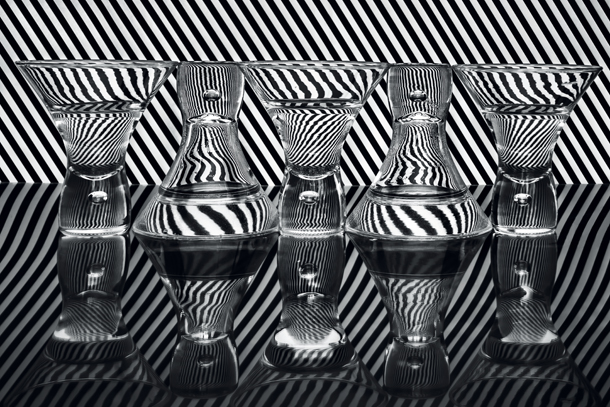
Light bends when it passes through water, causing the objects behind to change appearance. This is called refraction, and you'll make use of this phenomenon in this arty photo project. All you need is a few glasses, a flashgun, a tripod and a black-and-white pattern print. Simply place the pattern in the background with the glasses in front. Fill them with different levels of water and move the pattern backwards or forwards to fine-tune the effect.

18. Kitchen close-ups
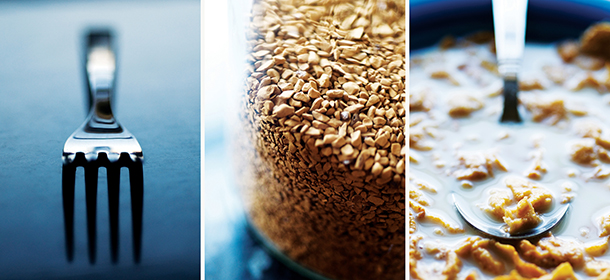
Your kitchen is an ideal location for shooting a macro project. Its reflective surfaces can be used to create interesting backgrounds for your shots, and a shallow depth of field can transform the most mundane of objects you'll find there. Creating a triptych of images can result in a piece of fantastic wall art for your kitchen too, although it's important to think about how they're going to work together before you start shooting. Here, 3 objects - a fork, a bowl of cereal and coffee granules - were all shot from a similar angle, with the impression of height linking the sequence.

19. Invert the world with a crystal ball
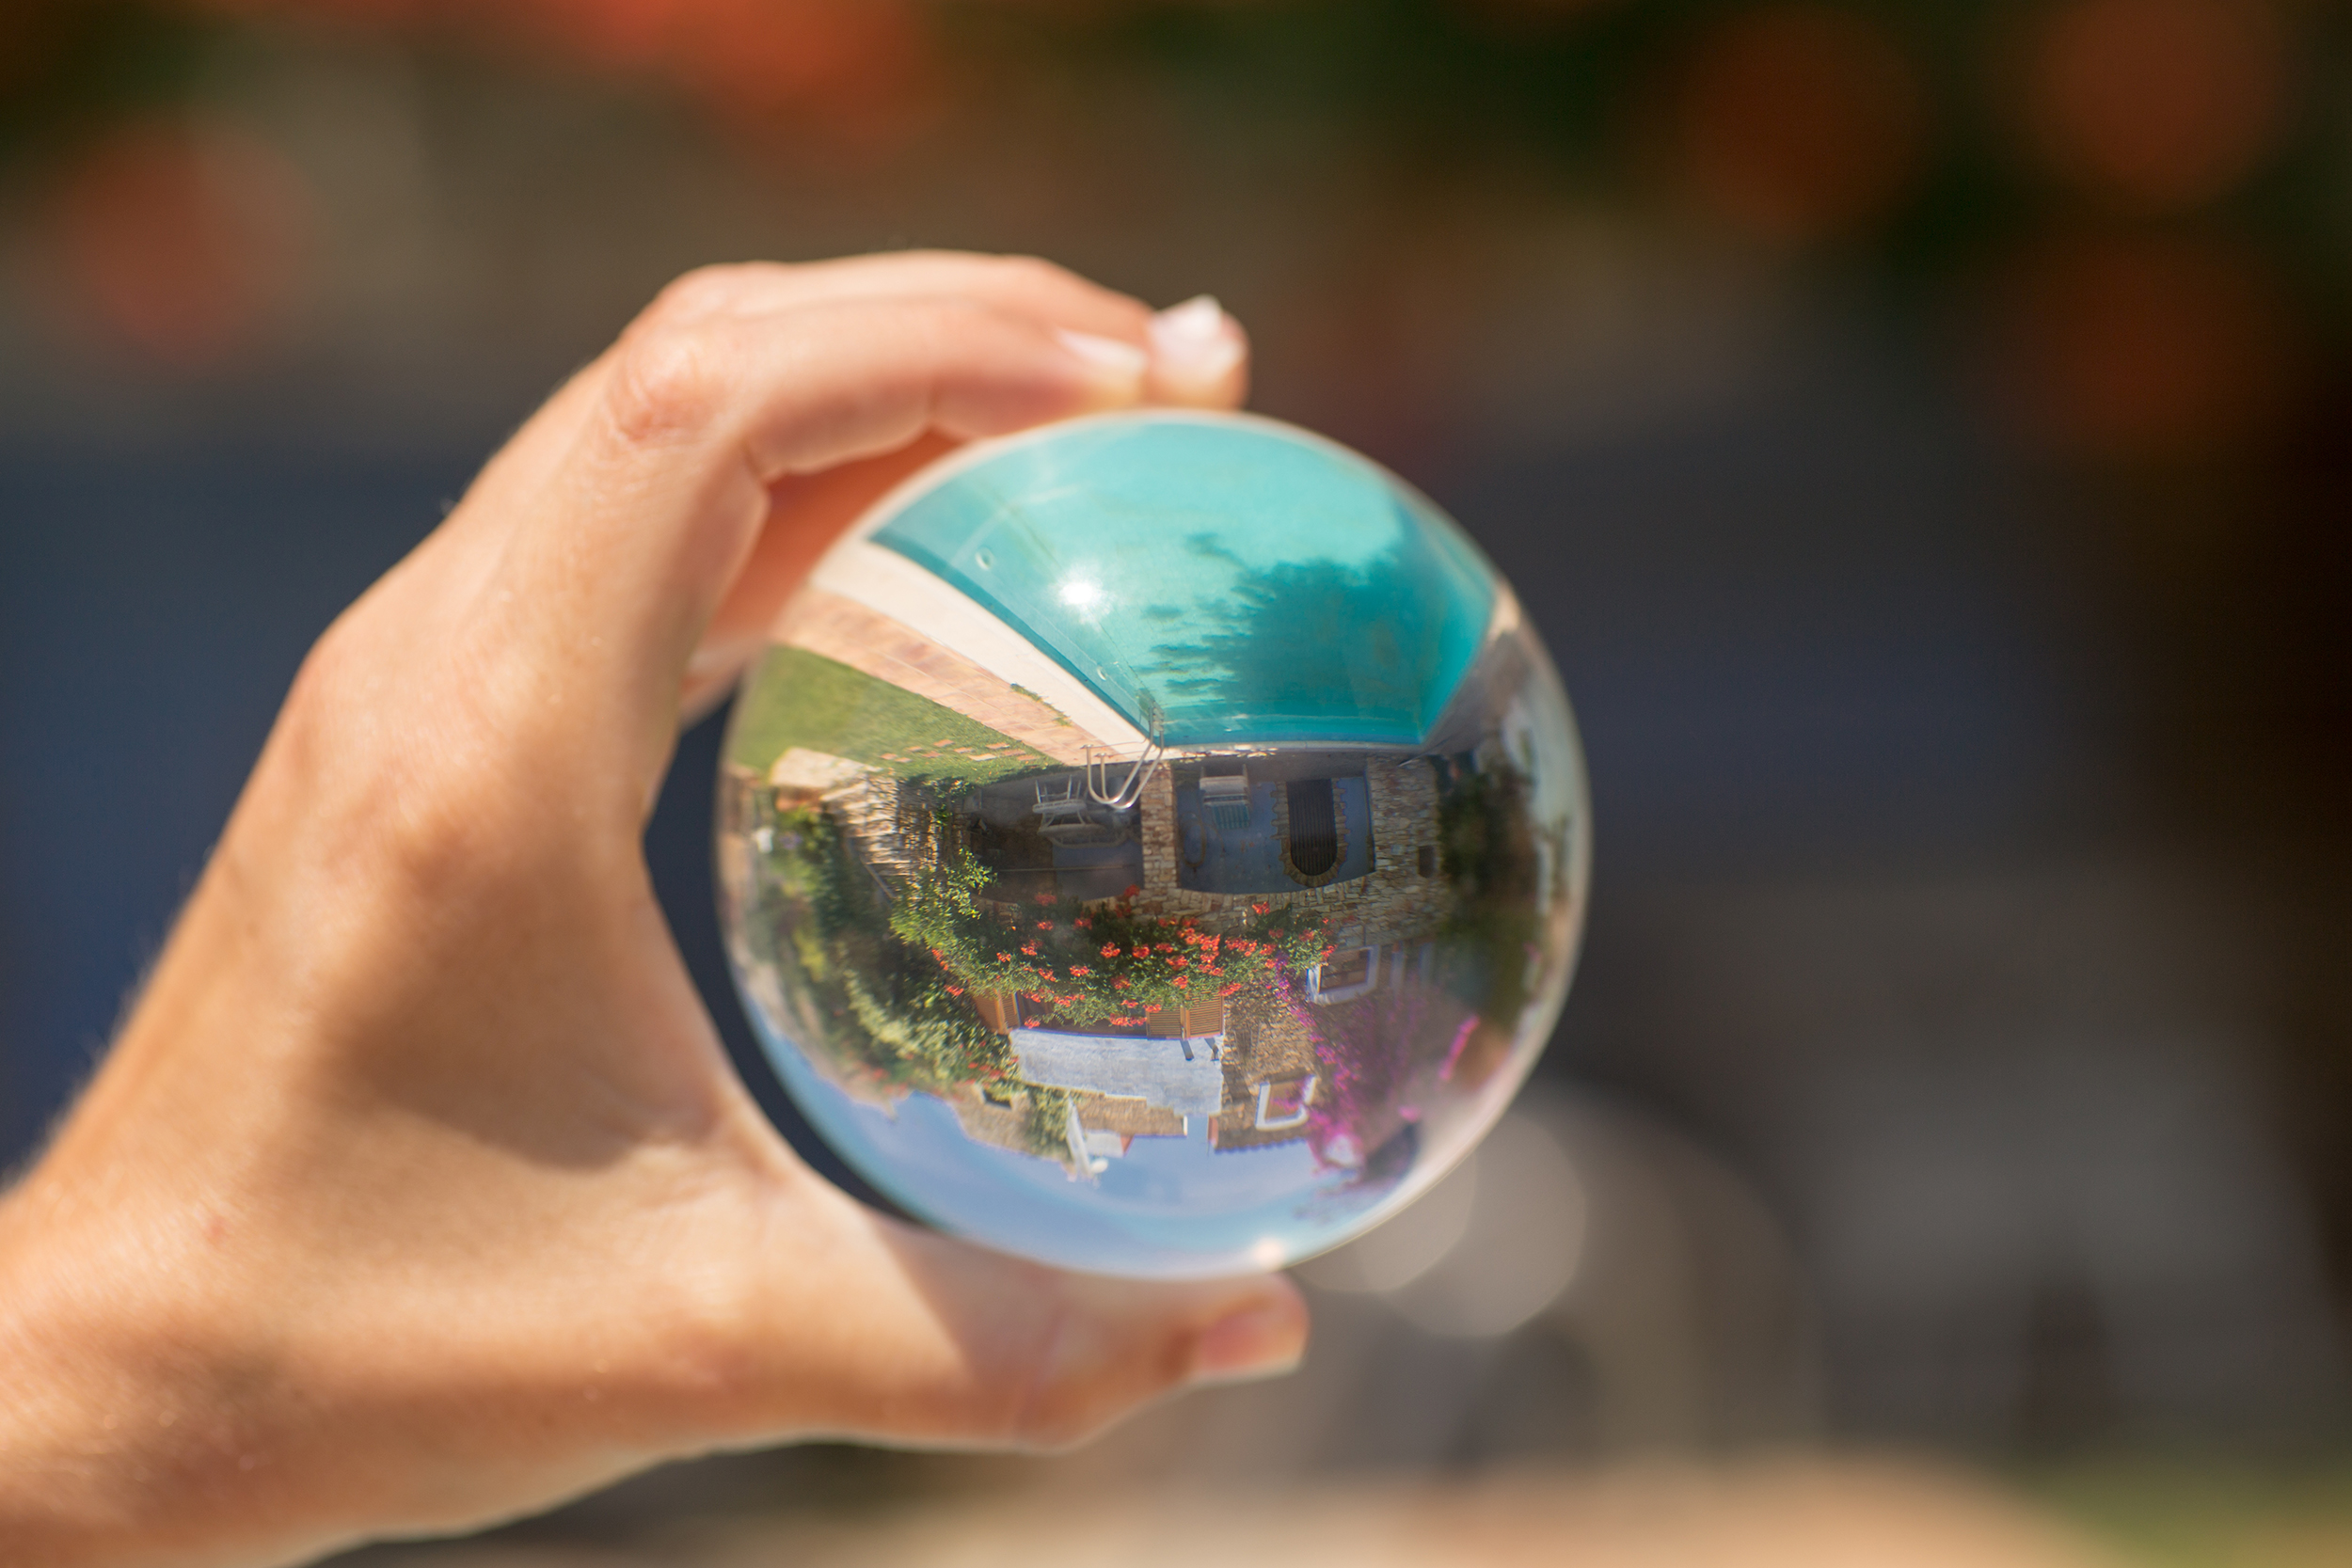
Shoot through a crystal ball and, while you won’t see into the future, you will capture an inverted version of the scene behind the orb. Just as light is refracted when it passes through the glass elements of a lens, the same thing happens with a glass sphere. There are dedicated photography balls on the market, but the effect can often be achieved using a clear marble or even a paperweight. Nothing suitable? A water-filled wine glass can also work.
All sorts of subjects look good through an orb, from sunsets and cityscapes to abstract items and even portraits. Try shooting with a macro lens to fill the frame with the sphere, or with a wider angle to include some of the scene behind. To really play with perspectives, rotate the image with editing software so that the background is inverted but the scene in the orb is the right way up. You can also incorporate elements that support the ball into the image, such as hands, bowls or miscellaneous objects.

20. Still-life bokeh
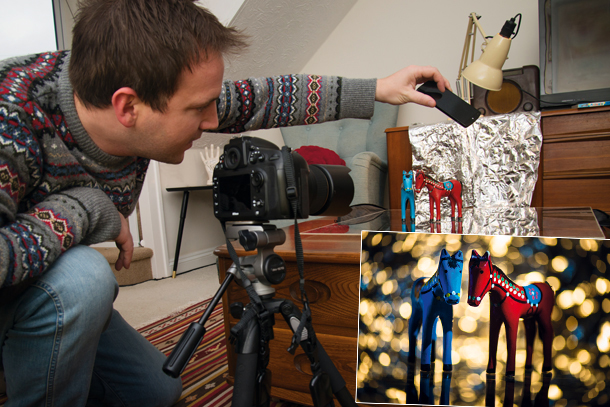
Something as simple as a crumpled piece of foil can be the basis for a creative photo project. Position a still-life subject on a sheet of glass with a piece of dark material underneath it. Scrunch up the kitchen foil then smooth it back out and place it in the background. Shine a table lamp or torch on the foil and, with a tripod mounted camera, dial in the lens's widest aperture to create some beautiful 'bokeh'. During the exposure, shine a flashlight onto the subject.

21. Play with shadows
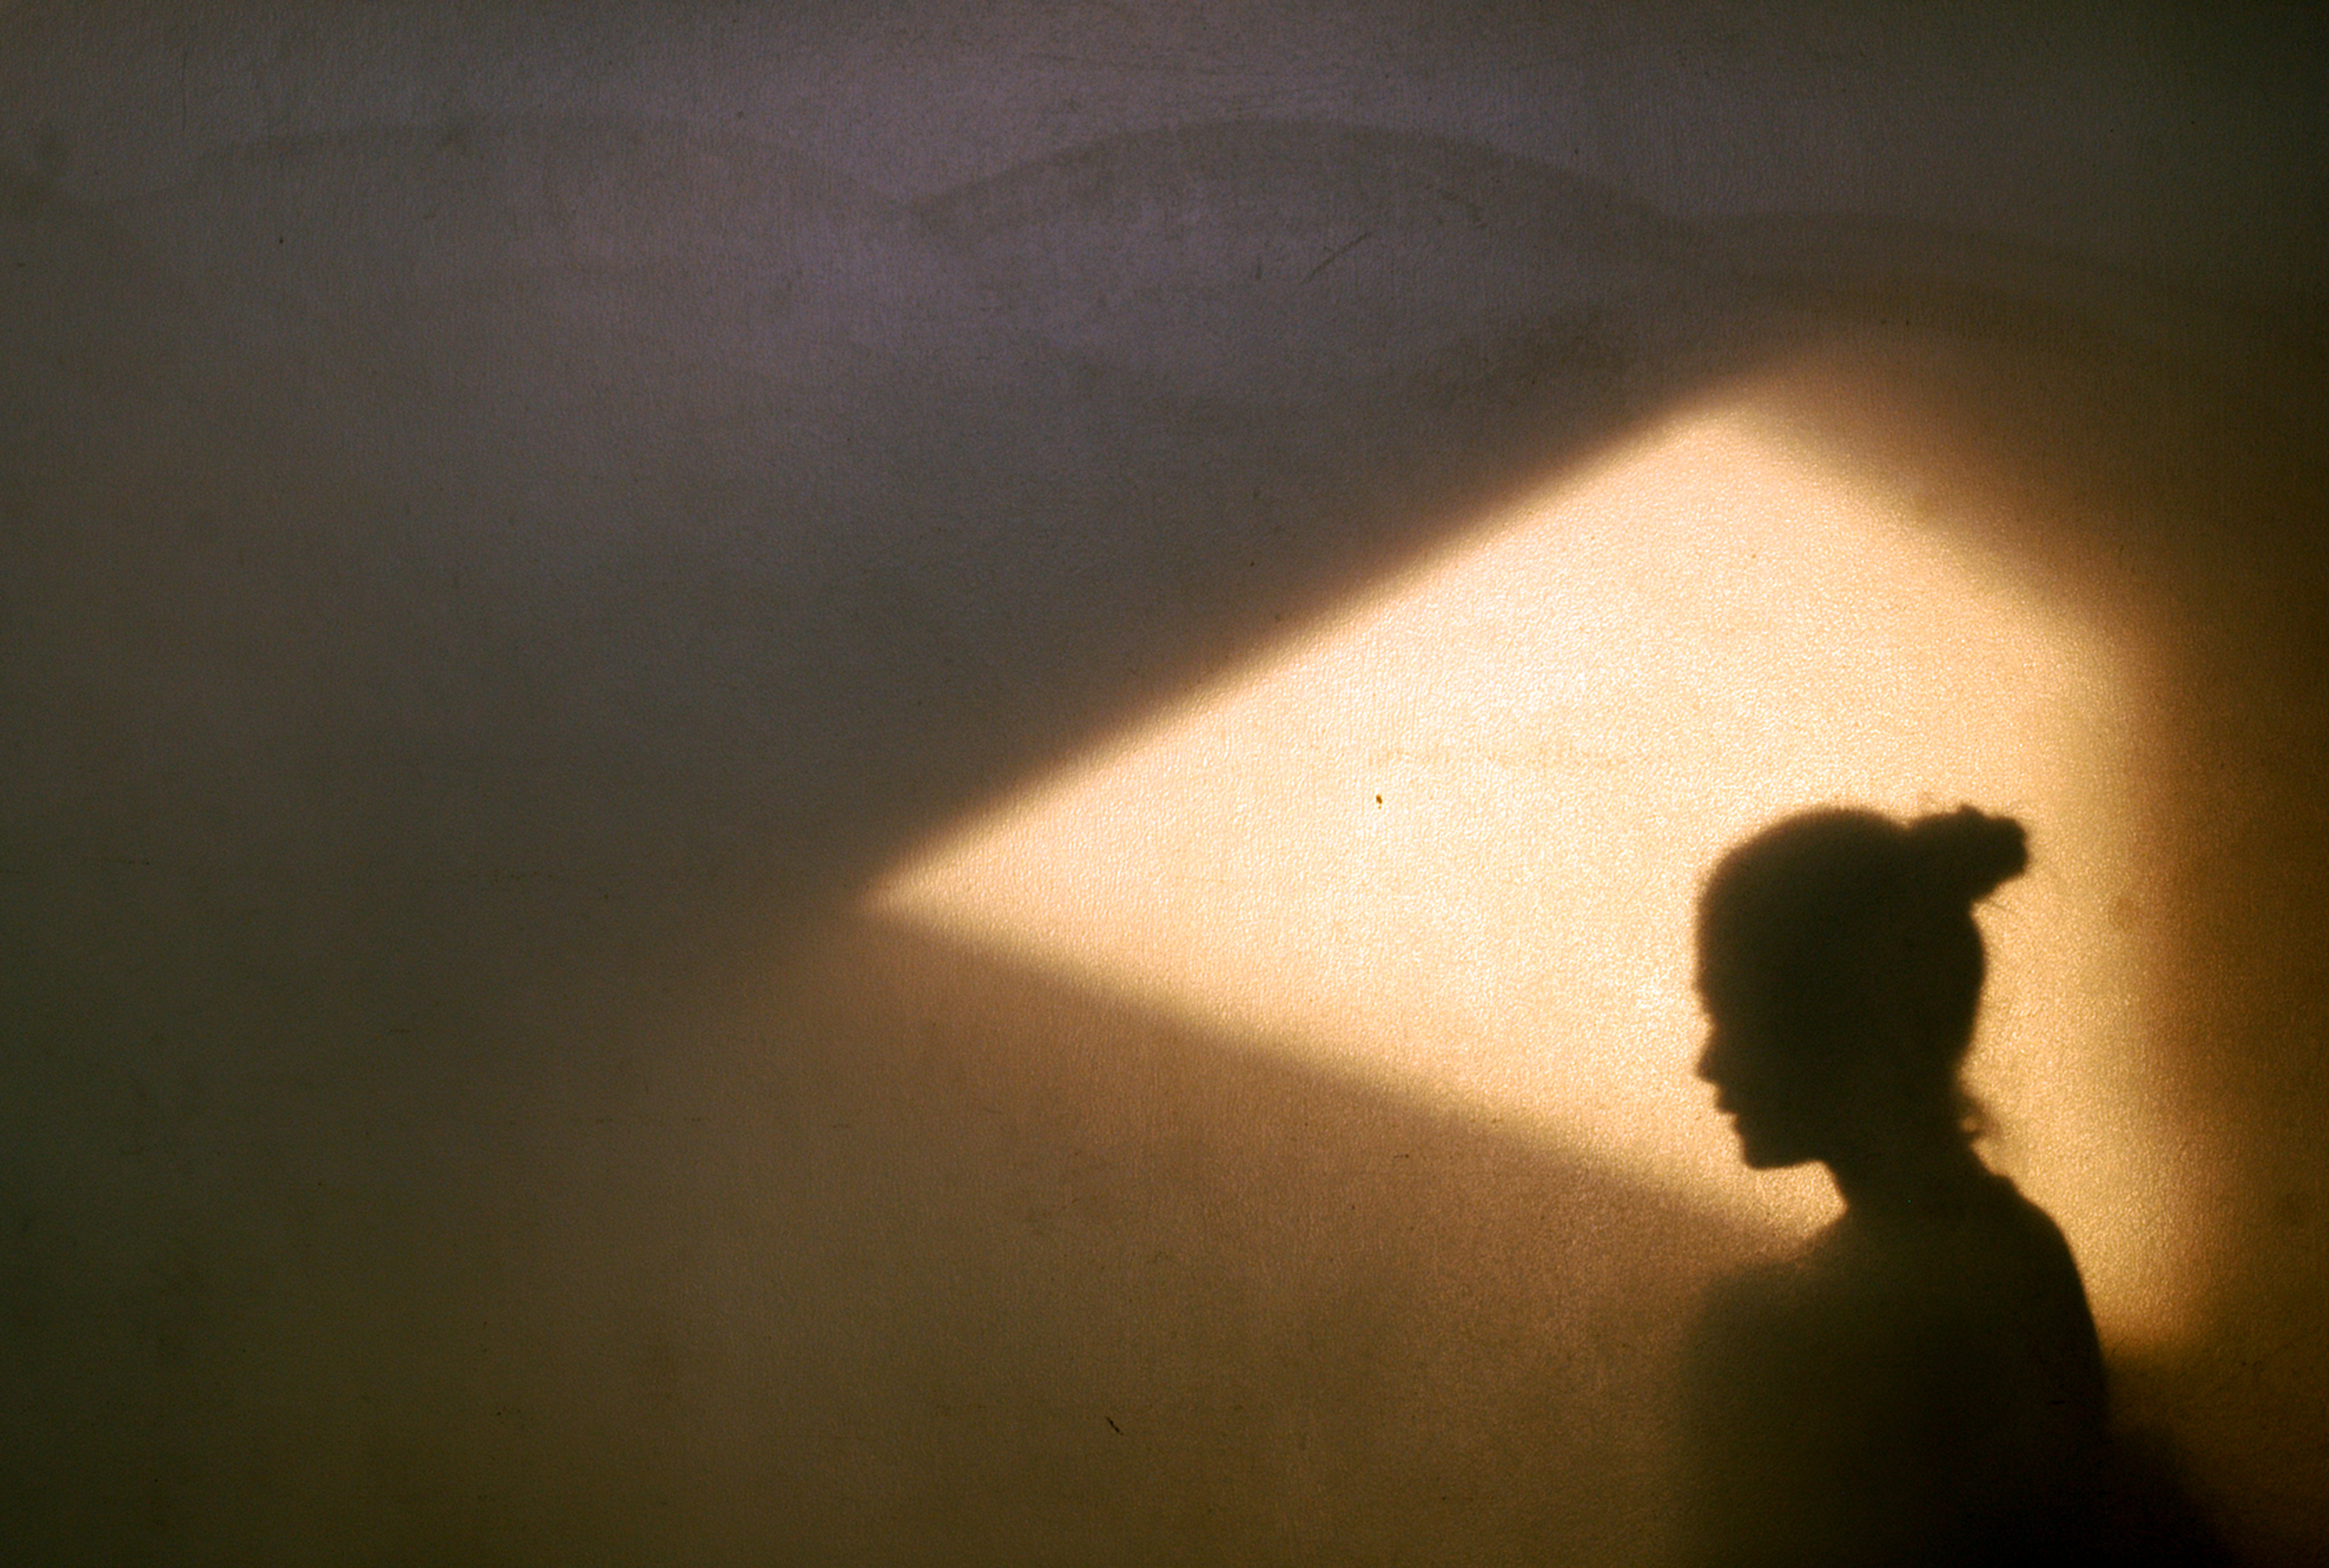
Photography is fundamentally about capturing light, which is exactly why shadows can be so powerful. They can create contrast with lighter parts of a composition or add texture to an otherwise plain subject. They can even be manipulated to tell a story. Incorporating shadows into your images will challenge you to think not just about the objects within a scene, but how things outside of the frame can affect the light that falls within it.
To play with shadows, all you need is a light source and a solid object to block it. This could be something natural, such as the shadow of a tree cast by sunlight. Equally, it could be something man-made, such as the outline of a street sign created by a car’s headlights. Or it could be something you create yourself: try playing puppet-master by shining a torch and dancing your hand in front of it.
You can also invert this idea by shooting a subject which is predominantly in shadow and experimenting with how splashes of light fall upon it.

22. Still life light trails
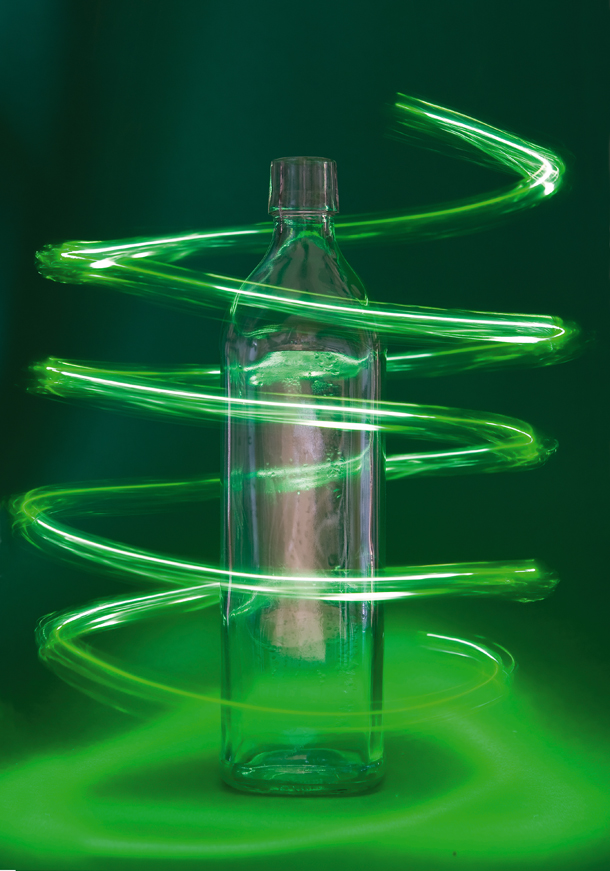
Light trails can be used in all kinds of photography, but they're perfect for a creative still life project. You can use a regular Maglite torch, but try removing the end to reveal the bulb and make the light more direct. Use some electrical tape to attach a coloured sweet wrapper, which you can use as a makeshift 'gel'. Set the canera's shutter speed to around 30 secs with an aperture of around f/8, then start moving the torch within the frame before pressing the shutter. Continue the movement throughout the exposure. Here, we suspended the torch from a piece of string and made a gentle circular movement to create a spiral around the bottle.

23. Light spirals
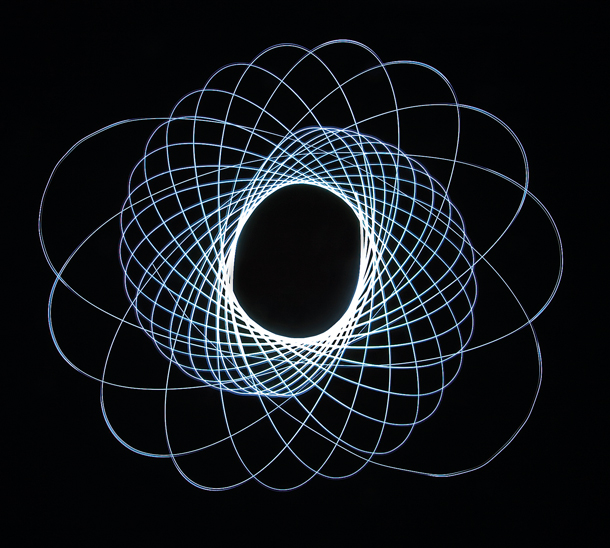
You'll need to attach a torch, suspended by string, to an open area of ceiling. Fit the widest lens you have on your camera, and mount it on a tripod pointing straight up. With the light turned on, autofocus on the tip of the torch and set the lens to manual focus to lock the setting in. With an aperture of f/11 or f/16 dialled in, use Bulb mode and a remote release to keep the shutter open for a minute or so as you send the torch spinning in the dark…

Formerly News Editor at Stuff, Chris now writes about tech from his tropical office. Sidetracked by sustainable stuff, he’s also keen on cameras, classic cars and any gear that gets better with age.
