Build your own calendar application with WebCalendar
Schedule and collaborate on events with this open-source calendar app

WebCalendar is an open-source application you can use to create a private online calendar, a multi-user calendar for collaboration, or a public event calendar that’s viewable by all. It supports email reminders, multiple calendar views, and 30 languages.
The latest stable version of WebCalendar, version 1.3.0, was released in 2019. It’s the predominant version of WebCalendar you’ll find on web hosting as of writing, but it does have a somewhat outdated user interface. A new version of WebCalendar with an updated user interface is currently in production.
In this guide, we’ll show you how to set up WebCalendar on website hosting from Hostinger.
WebCalendar "free web" hosting offer: $41.88 $0 TechRadar Pro exclusive: Get WebCalendar with Hostinger's web hosting package plus everything you need to build your website with a WordPress friendly hosting plan that comes with 30GB of storage and 100GB bandwidth. We partnered with Hostinger to deliver a free web hosting offer for TechRadar readers (T&C apply). Grab a full refund of $41.88/£41.88 in Amazon vouchers when you purchase Hostinger’s single shared hosting package. *Initial purchase required
Step 1: Install WebCalendar with Auto Installer
Hostinger includes an automated installation wizard for WebCalendar, which you’ll find in the Hostinger website administration panel. This saves you from having to download the software and upload it yourself to your hosting.
Choose Auto Installer, and click the button marked Select (below Other). From the dropdown box that appears, pick WebCalendar and press Select to begin the installation process.
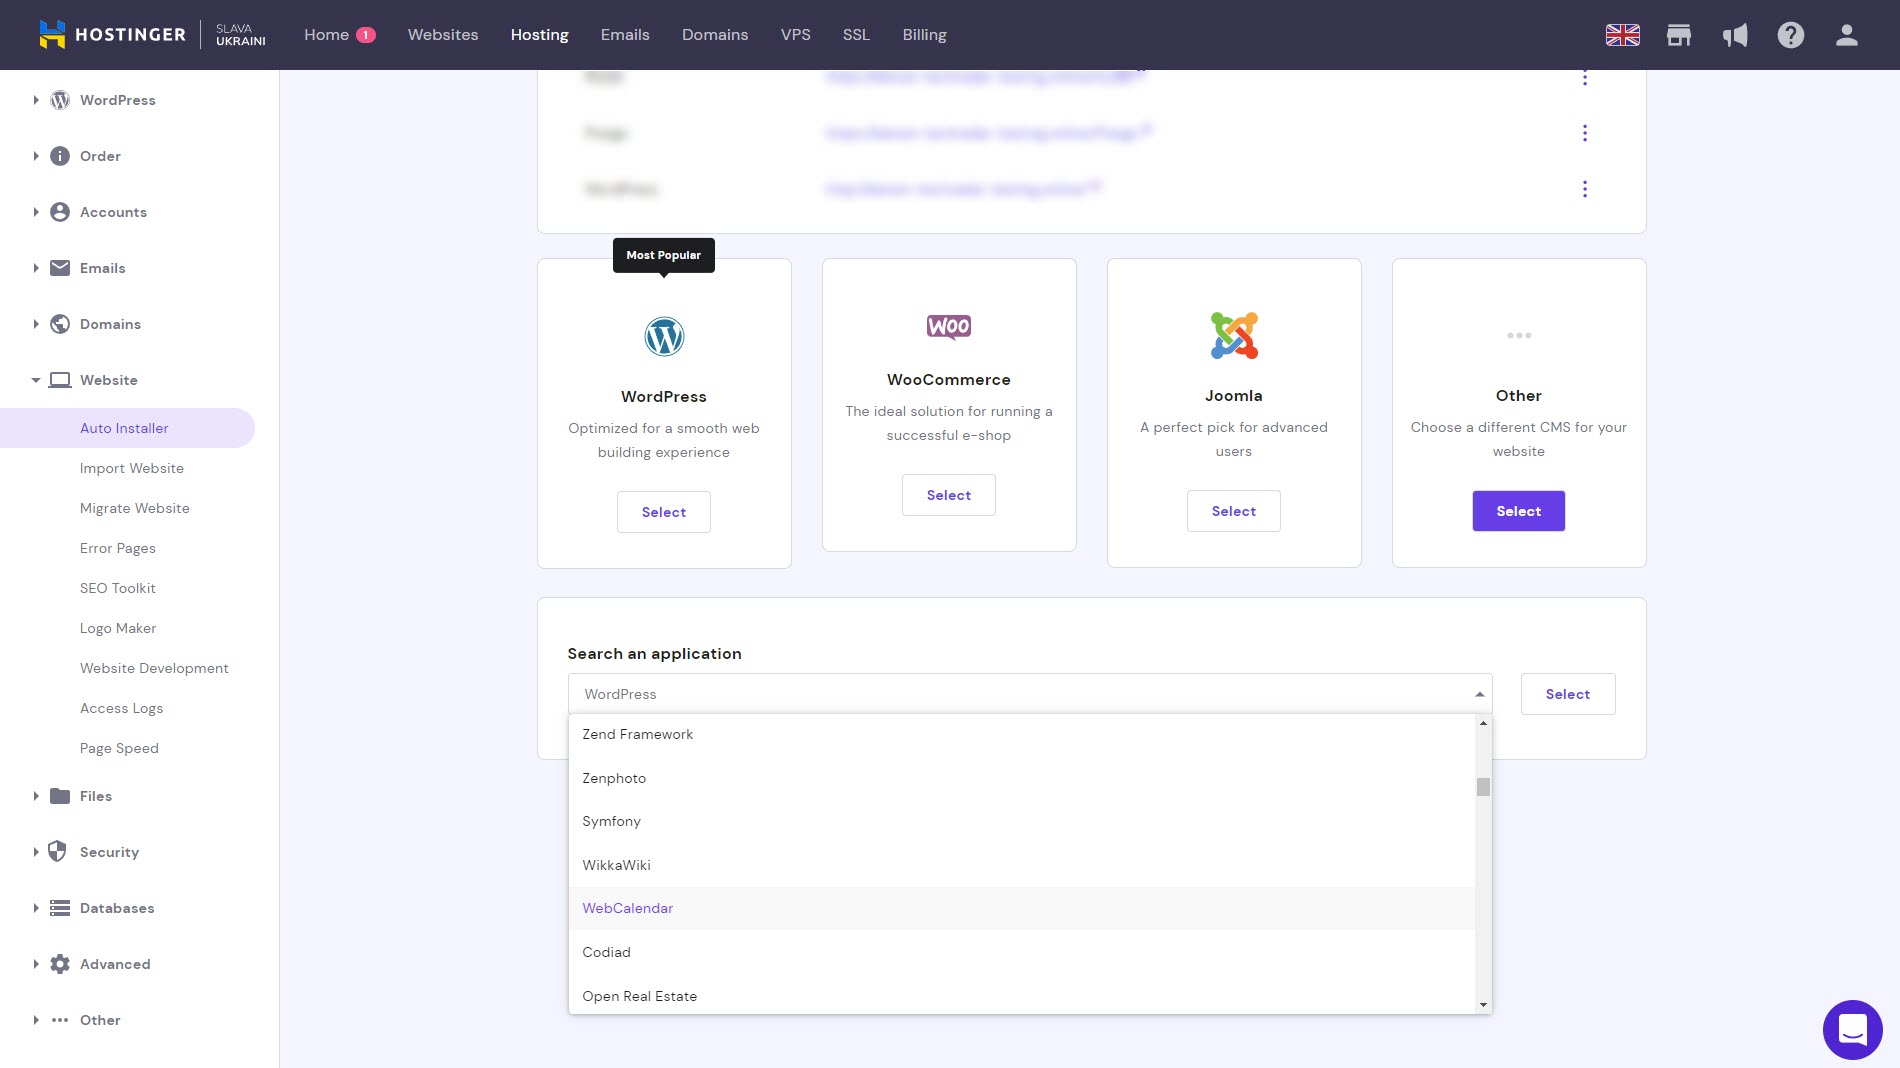
Step 2: Set admin credentials and installation path
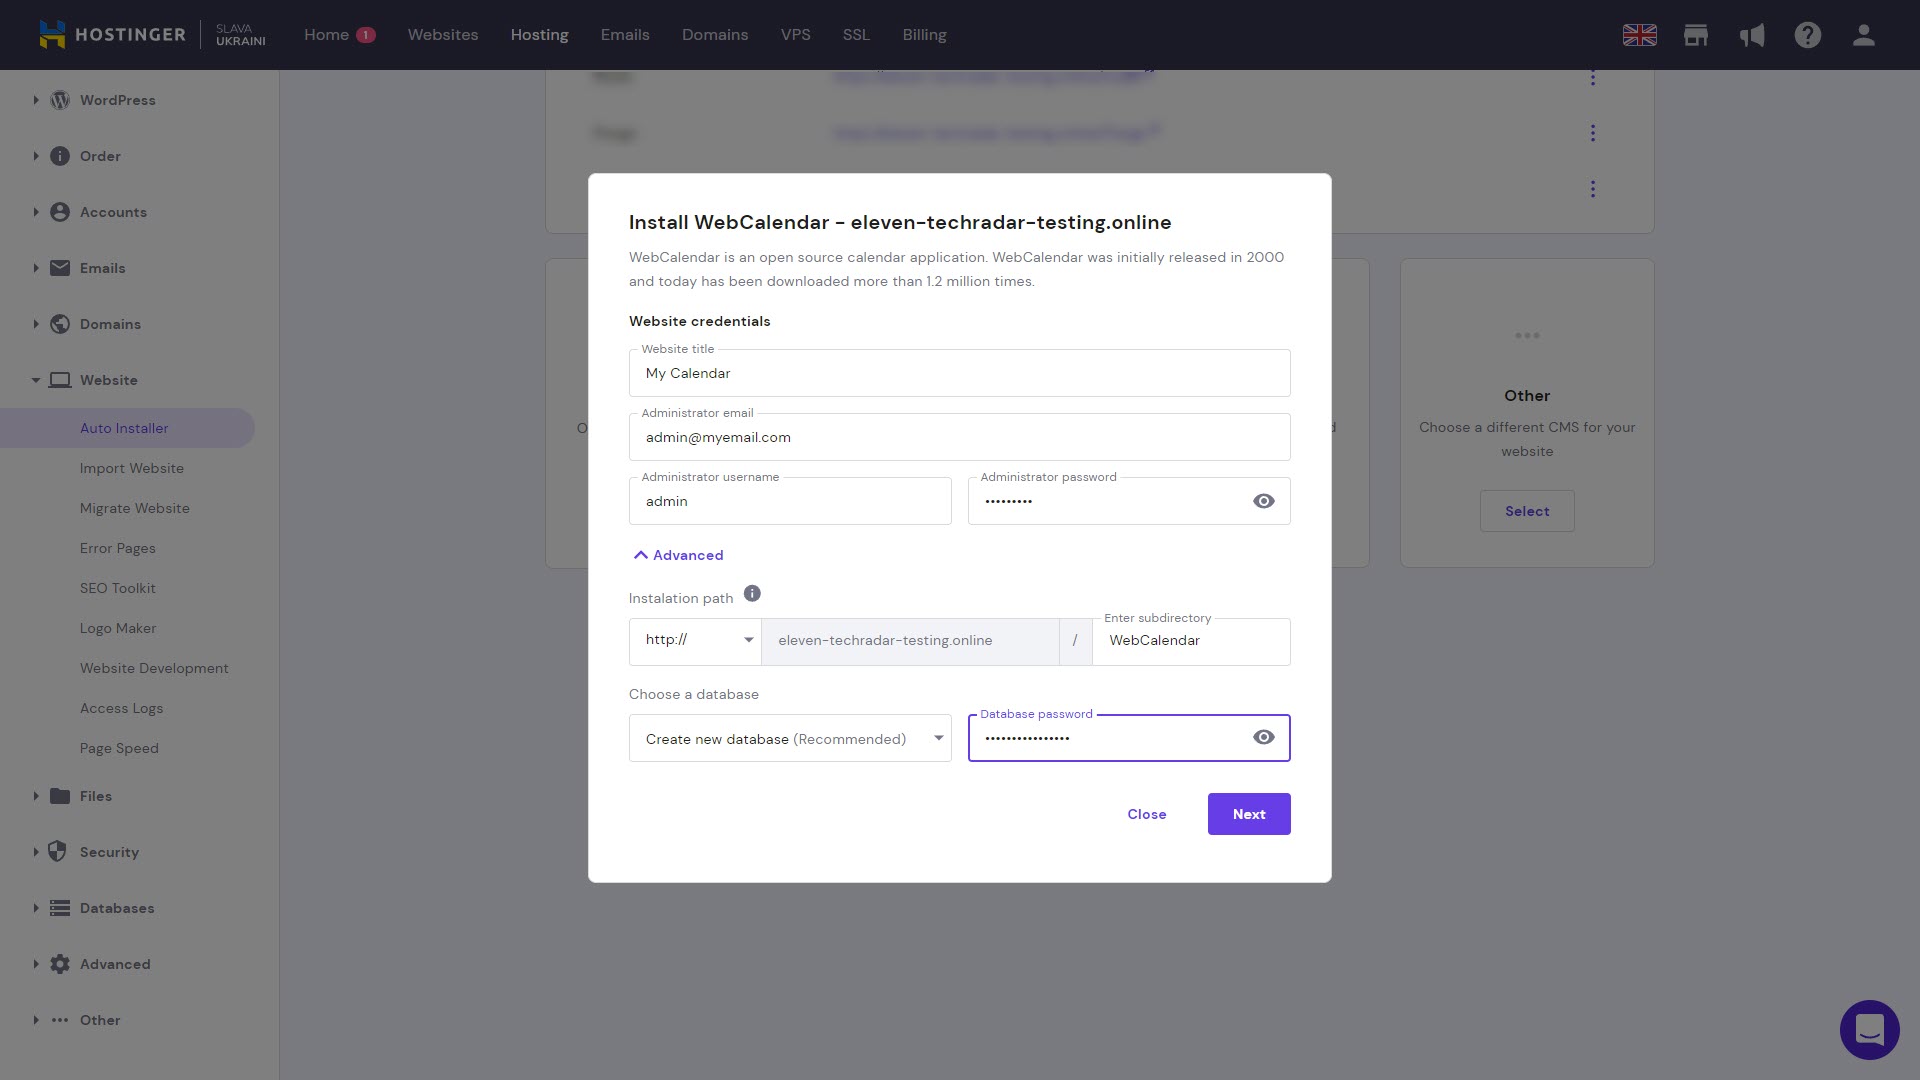
The first step of the wizard asks for a few basic details about your calendar. Set a title for the calendar, administrator email, and a username and password to log in.
Click on Advanced if you want to change the subdirectory the calendar will be installed to, which will affect the URL your calendar will be available at. You can also select an existing database to install WebCalendar to, or create a database for all WebCalendar’s data. If possible, choose a new database, as this will keep WebCalendar’s data separate from other applications.
Are you a pro? Subscribe to our newsletter
Sign up to the TechRadar Pro newsletter to get all the top news, opinion, features and guidance your business needs to succeed!
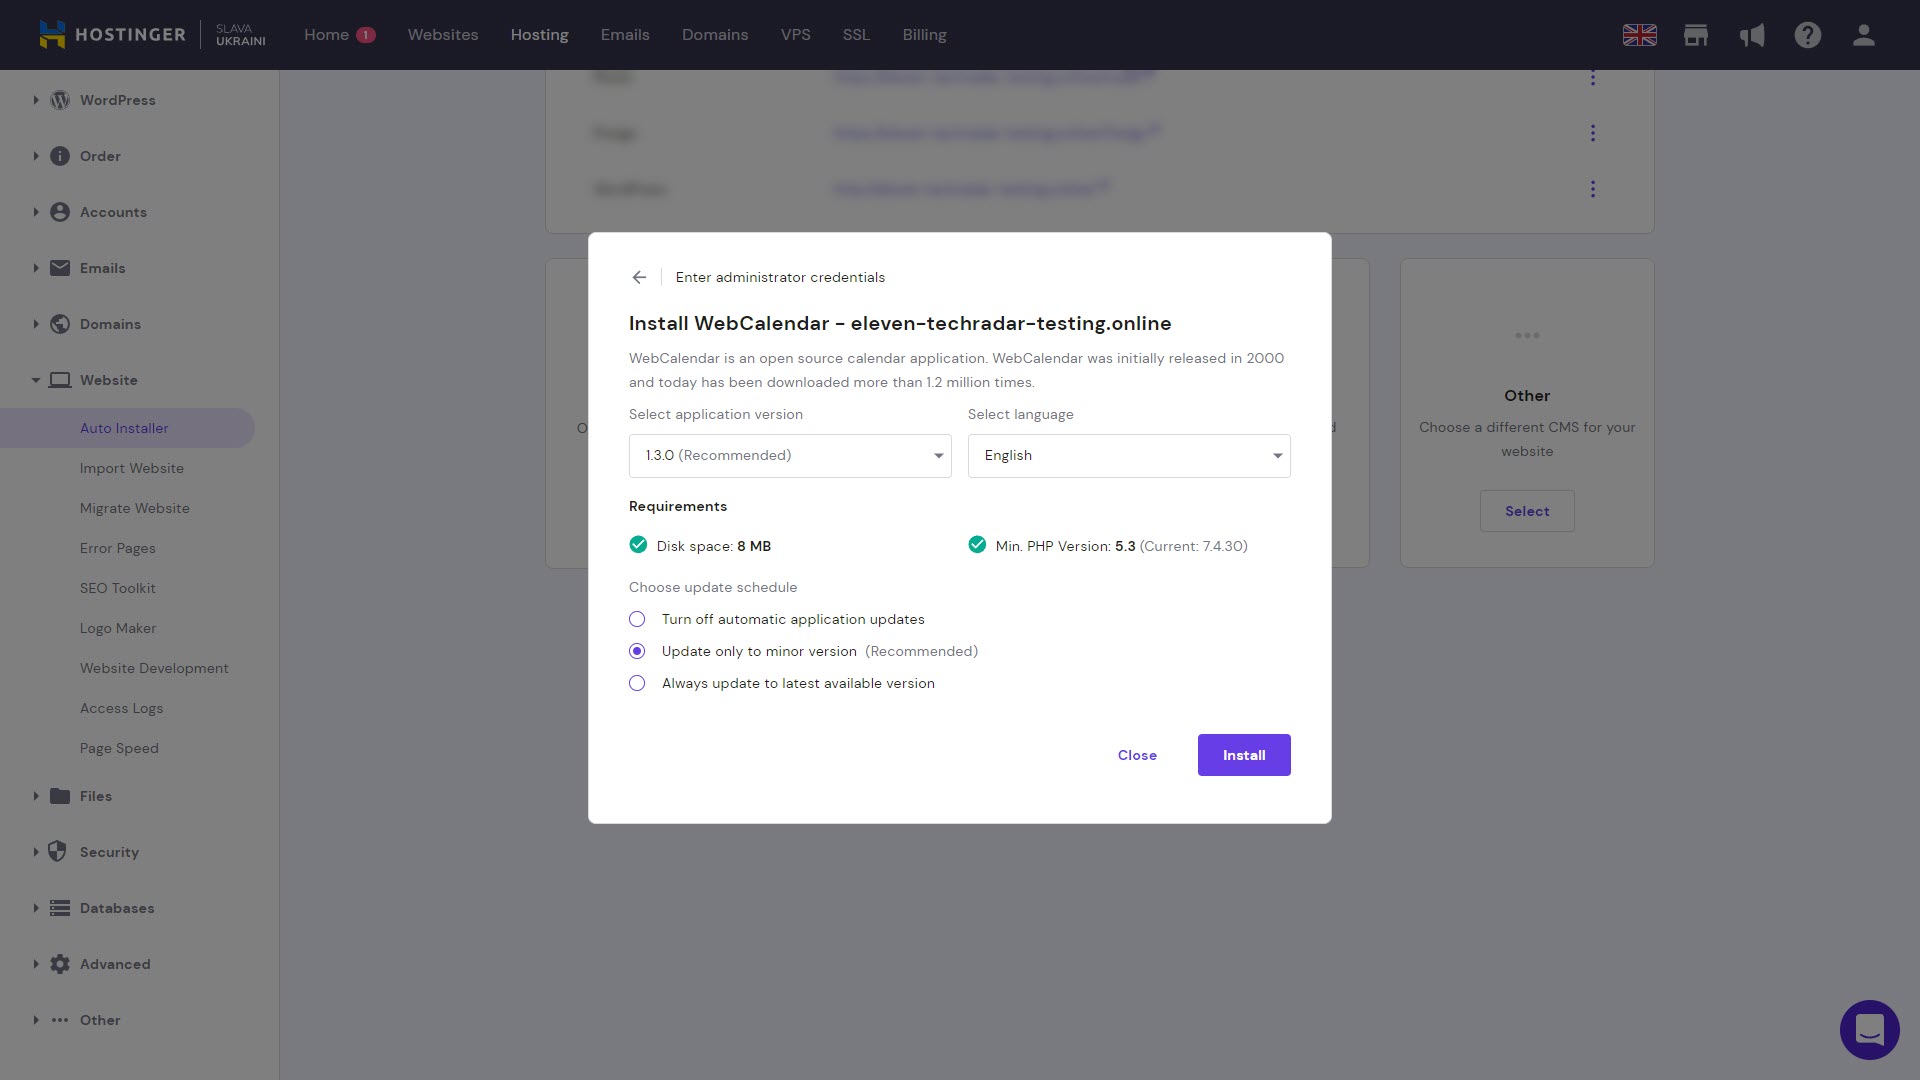
Step 3: Choose WebCalendar version and update schedule
The final step of the wizard is to choose the WebCalendar application version, and when updates should be automatically installed. Because you’ll likely want the latest minor version of WebCalendar but not experimental versions, you can leave these options set to the defaults, and hit Install.
Step 4: Log in to WebCalendar
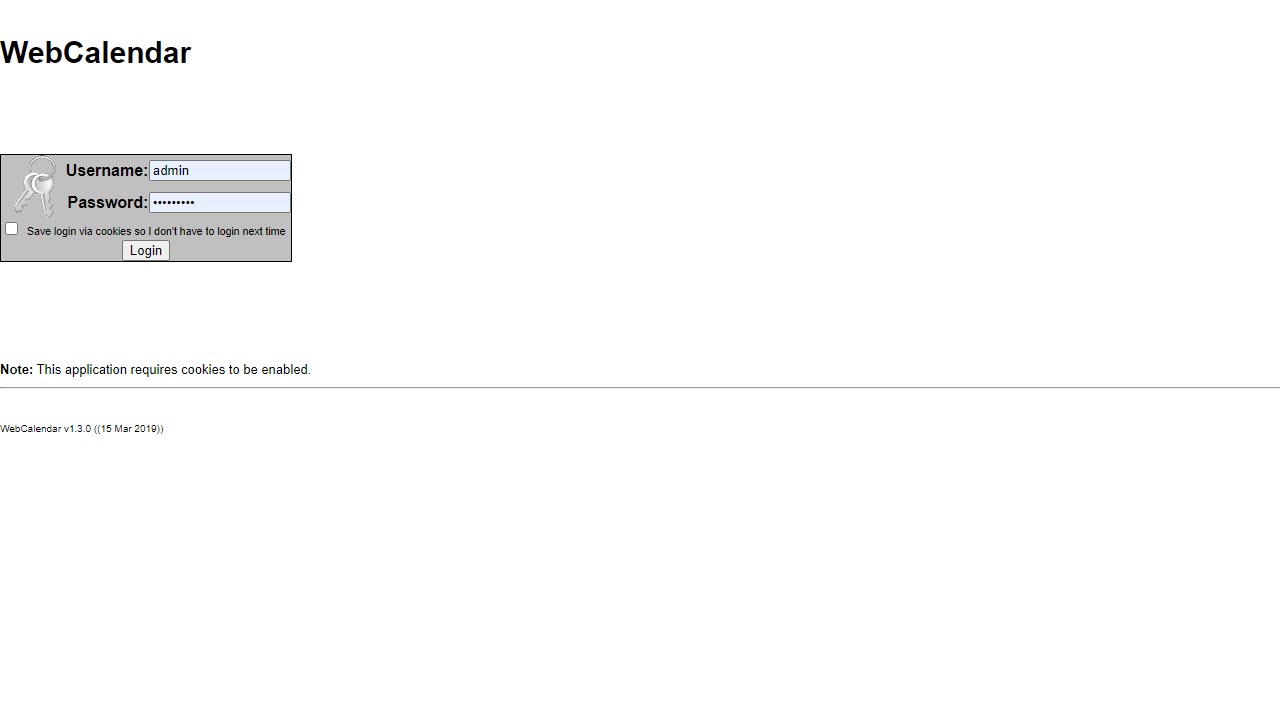
The installation process will take a few seconds, then you’ll be sent back to the Auto Installer page. Listed under Installed Applications, you’ll see the URL for your new WebCalendar site. Click on this and enter your administrator login details to log in to your calendar for the first time.
Step 5: Add categories
You may want your calendar events to fall into categories like work, study, and personal events. Categorizing your events enables you to filter them in your calendars, so you only see the events you’re interested in right now.
To add a new category for your events, click on Settings and choose Categories. Choose Make New Category to give your category a name. You can also select a color for each category, and apply icons.
You can choose to make the category global. If your category is global, it will be available not only on your private calendar, but also on your publicly accessible calendars, plus other users’ calendars.

Step 6: Add new users
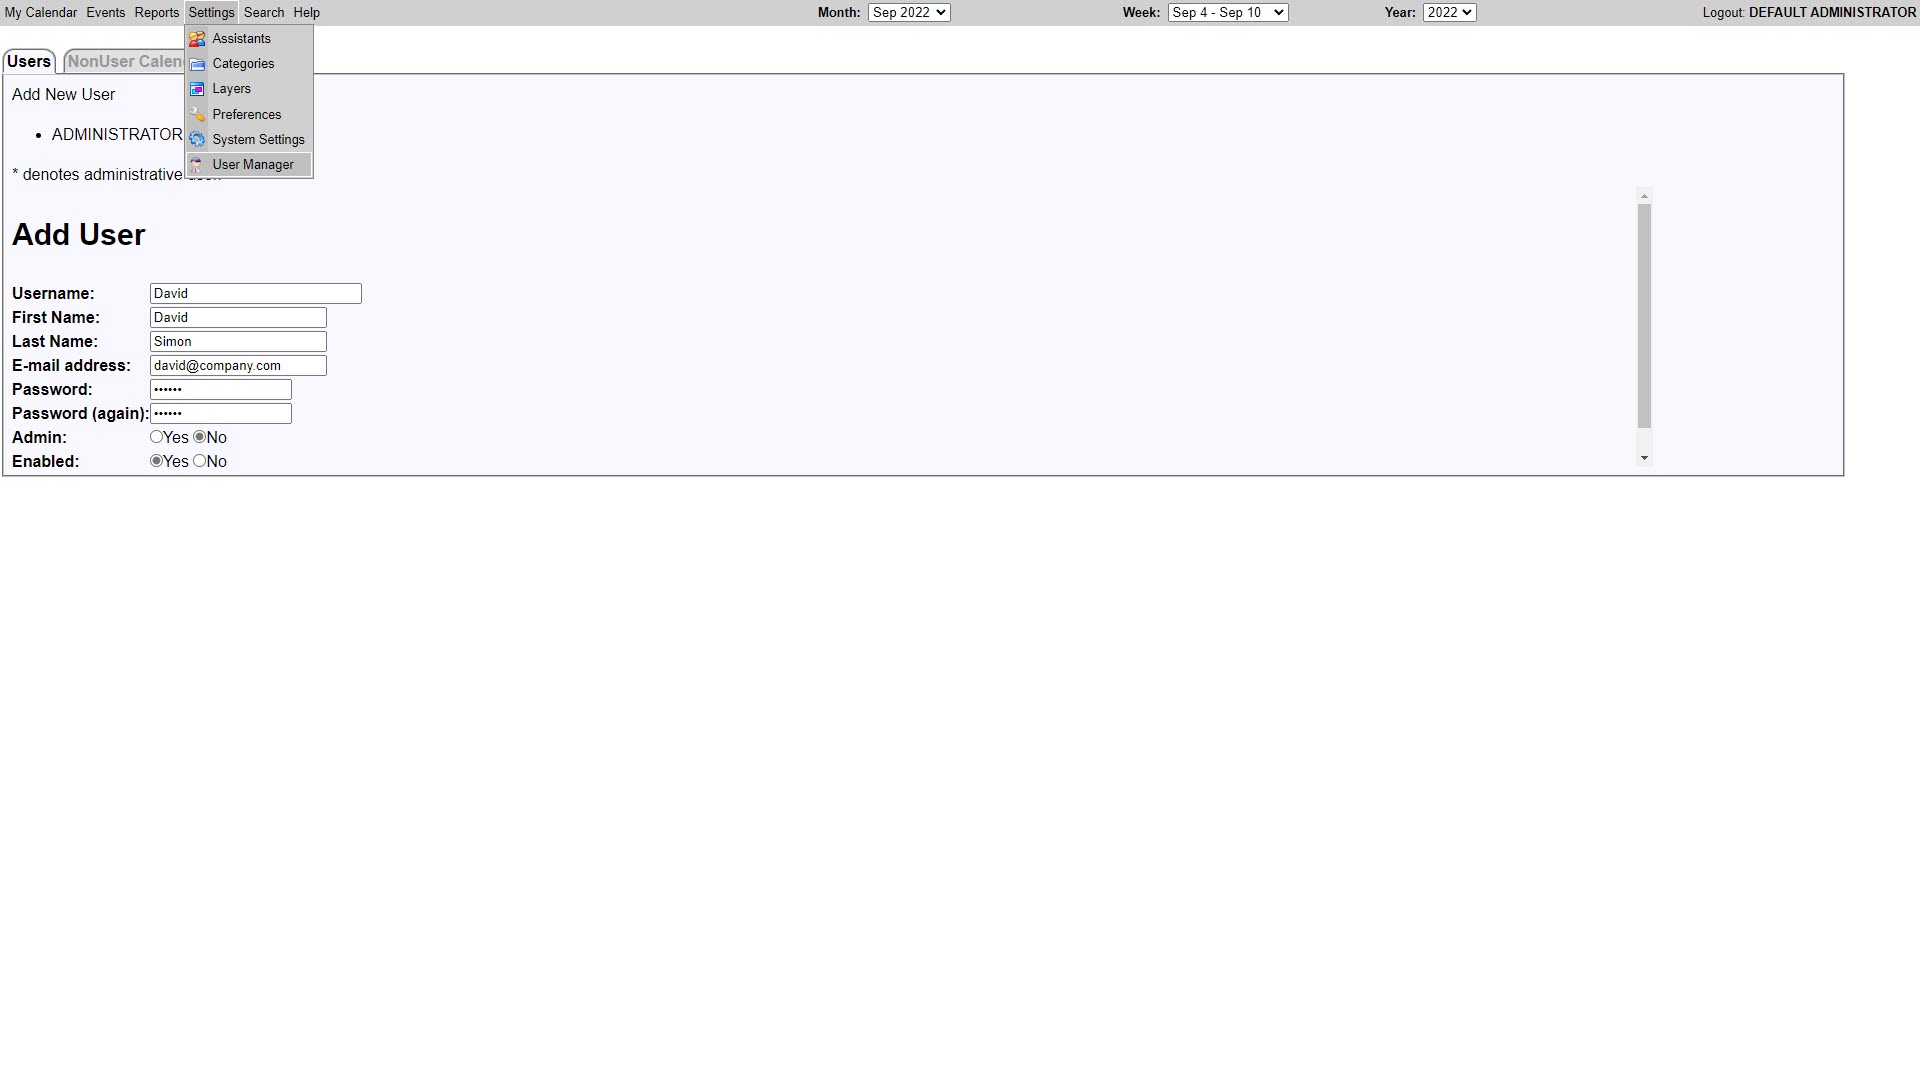
If your calendar is for collaboration between several team members, set each of them up with a username and password in WebCalendar. Choose Settings from the main menu and select User Manager.
Every user you add will get their own calendar by default. Add a username, email address, and password for each team member, and set whether they will have administrative access to all WebCalendar settings.
Step 7: Add events
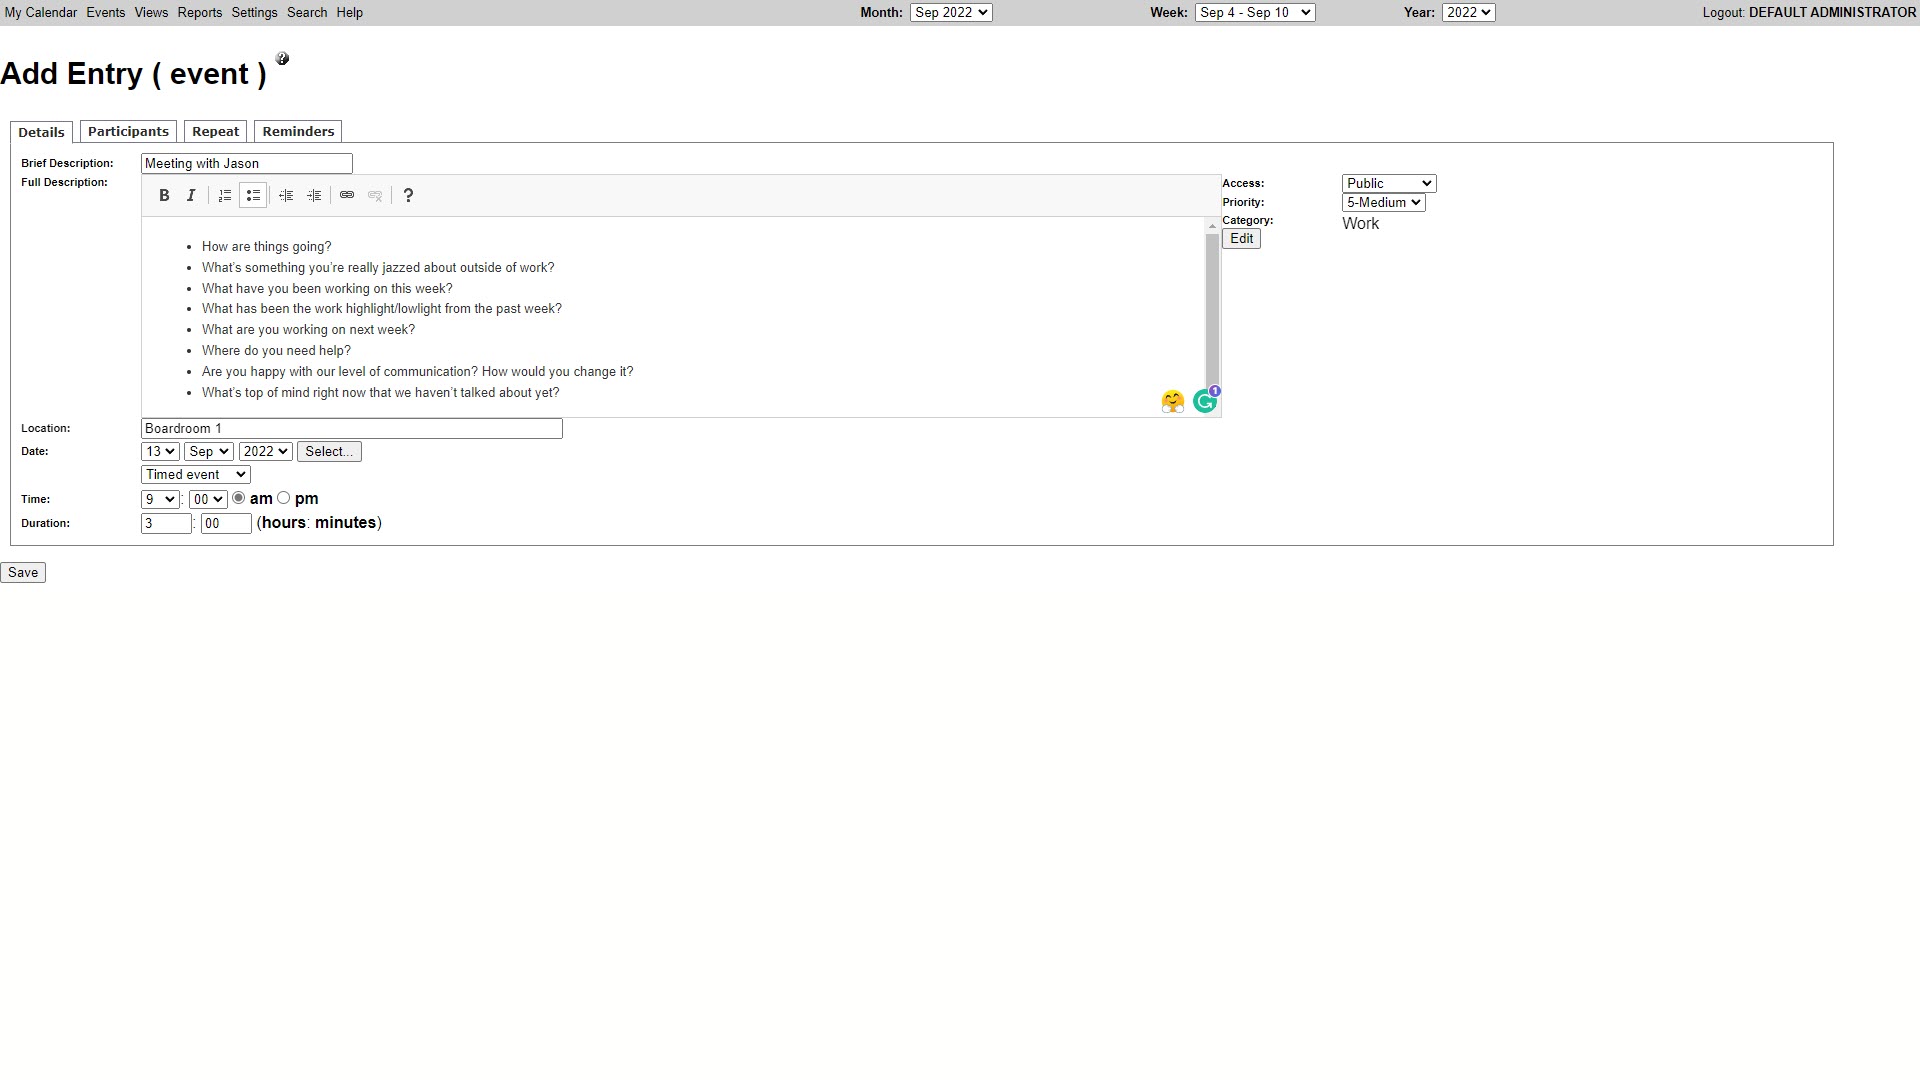
Add events to WebCalendar by clicking on Events and choosing Add New Events. Most details are optional, and you can include things like event description, location, time and data, and priority.
You can set the participants of each event, and whether the events should repeat periodically. Finally, you can choose to have an email reminder sent to you at a specific date or time before each event you add.
Step 7: Add layers
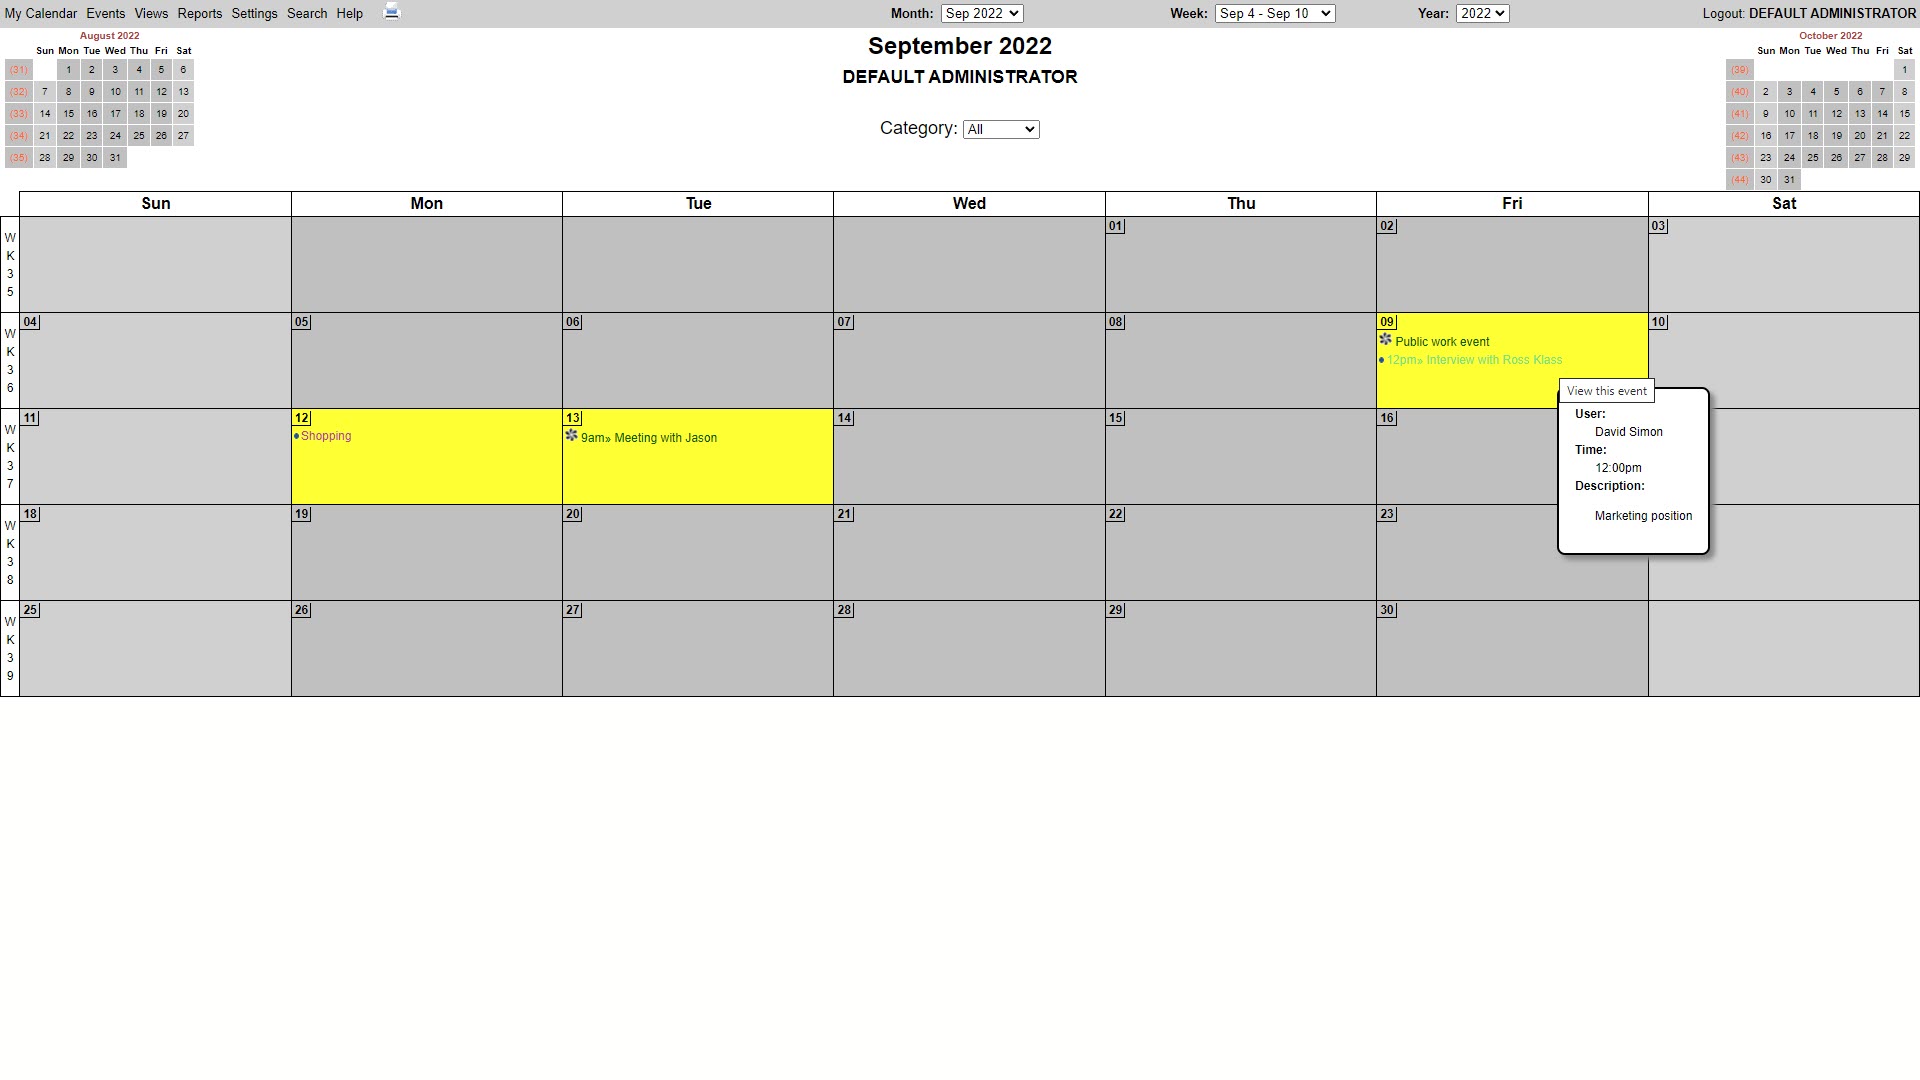
With the layers feature, you can view the events of several users in one calendar. You could use it as a team monitoring solution, or as a tool for user collaboration.
To use layers, click on Settings, choose Layers, and select Enable. Click Add Layer, and choose all the calendars you want to appear together in a single calendar. Each layer can be assigned a color to make it stand out.
Summary
In this guide, you’ve learned how to set up WebCalendar on Hostinger web hosting. The app has many other options for tailoring calendars to your needs. WebCalendar has a particularly simple interface and uses very few server resources, so may be the best option for your basic calendar needs.
For other ways to manage your calendar, we’ve rounded up the best calendar apps. If you plan to use WebCalendar as a team, there are many other useful team collaboration tools to get the most out of remote working.
Read more in this series:
- How to start a blog with Joomla
- Build your own CRM using SugarCRM
- How to host your files online using Nextcloud Hub
- How to start your own help desk with Hesk
- How to build an HR System using OrangeHRM
- How to generate your own invoices using Invoice Ninja
- How to install live chat software with Sales Syntax
- Run your own ecommerce platform with PrestaShop
- How to create your own website with Soholaunch
- How to launch your own website with WebsiteBaker
- How to learn search engine optimization with SEO Panel
- How to kickstart your own Ancestry.com alternative with webtrees
- How to install a free ERP software called Dolibarr
- Demand gen vs lead gen: What's the difference?
- Host your own private forum with MyBB
- Set up your own groupware service with Tiki Wiki CMS
- How to build your own email marketing service with phpList
- A Google Photos alternative: Store your photos online with Piwigo
- How to start with project management using The Bug Genie
- Make your own poll platform with LimeSurvey
- Roll out your own Wikipedia clone with MediaWiki
- How to host your own learning management software with Moodle LMS
- Set up an accounting system with FrontAccounting
- Produce your own bills with BoxBilling
Richard brings over 20 years of website development, SEO, and marketing to the table. A graduate in Computer Science, Richard has lectured in Java programming and has built software for companies including Samsung and ASDA. Now, he writes for TechRadar, Tom's Guide, PC Gamer, and Creative Bloq.

