Build your own CRM using SugarCRM
A free, open-source CRM solution

SugarCRM is a capable and free-to-use CRM solution for sales, marketing, and service teams. It lets you log interactions with a common list of customers, conduct automated campaigns, and manage your pipeline.
It is worth noting that support for the open-source edition of SugarCRM was discontinued in 2018. However, it remains a simple and robust platform that is completely free to use and has most of the same functions that many paid CRM platforms have. In this guide, we provide step-by-step instructions for getting started with SugarCRM.
How to build your own CRM using SugarCRM: Preparation
Before you can get started with the free, open-source edition of SugarCRM, you will need web hosting. We used Hostinger, a leading provider which usually offers prices as low as $1.99 per month. However, we’ve managed to get an exclusive deal for our readers and bag Hostinger web hosting for free!
Manually installing a self-hosted program like SugarCRM is a complex process that requires some technical skill. Fortunately, Hostinger’s Auto Installer enables you to install it on your server in just a few minutes.
Once you’ve purchased hosting, simply log in to your Hostinger account and navigate to Hosting > Manage > Website > Auto Installer. Follow the prompts to install SugarCRM. Full instructions can be found here.
Many hosts offer some sort of one-click installer, while others require you to install SugarCRM manually. This can be a difficult process, and you should reach out to your host’s support team if you have trouble.
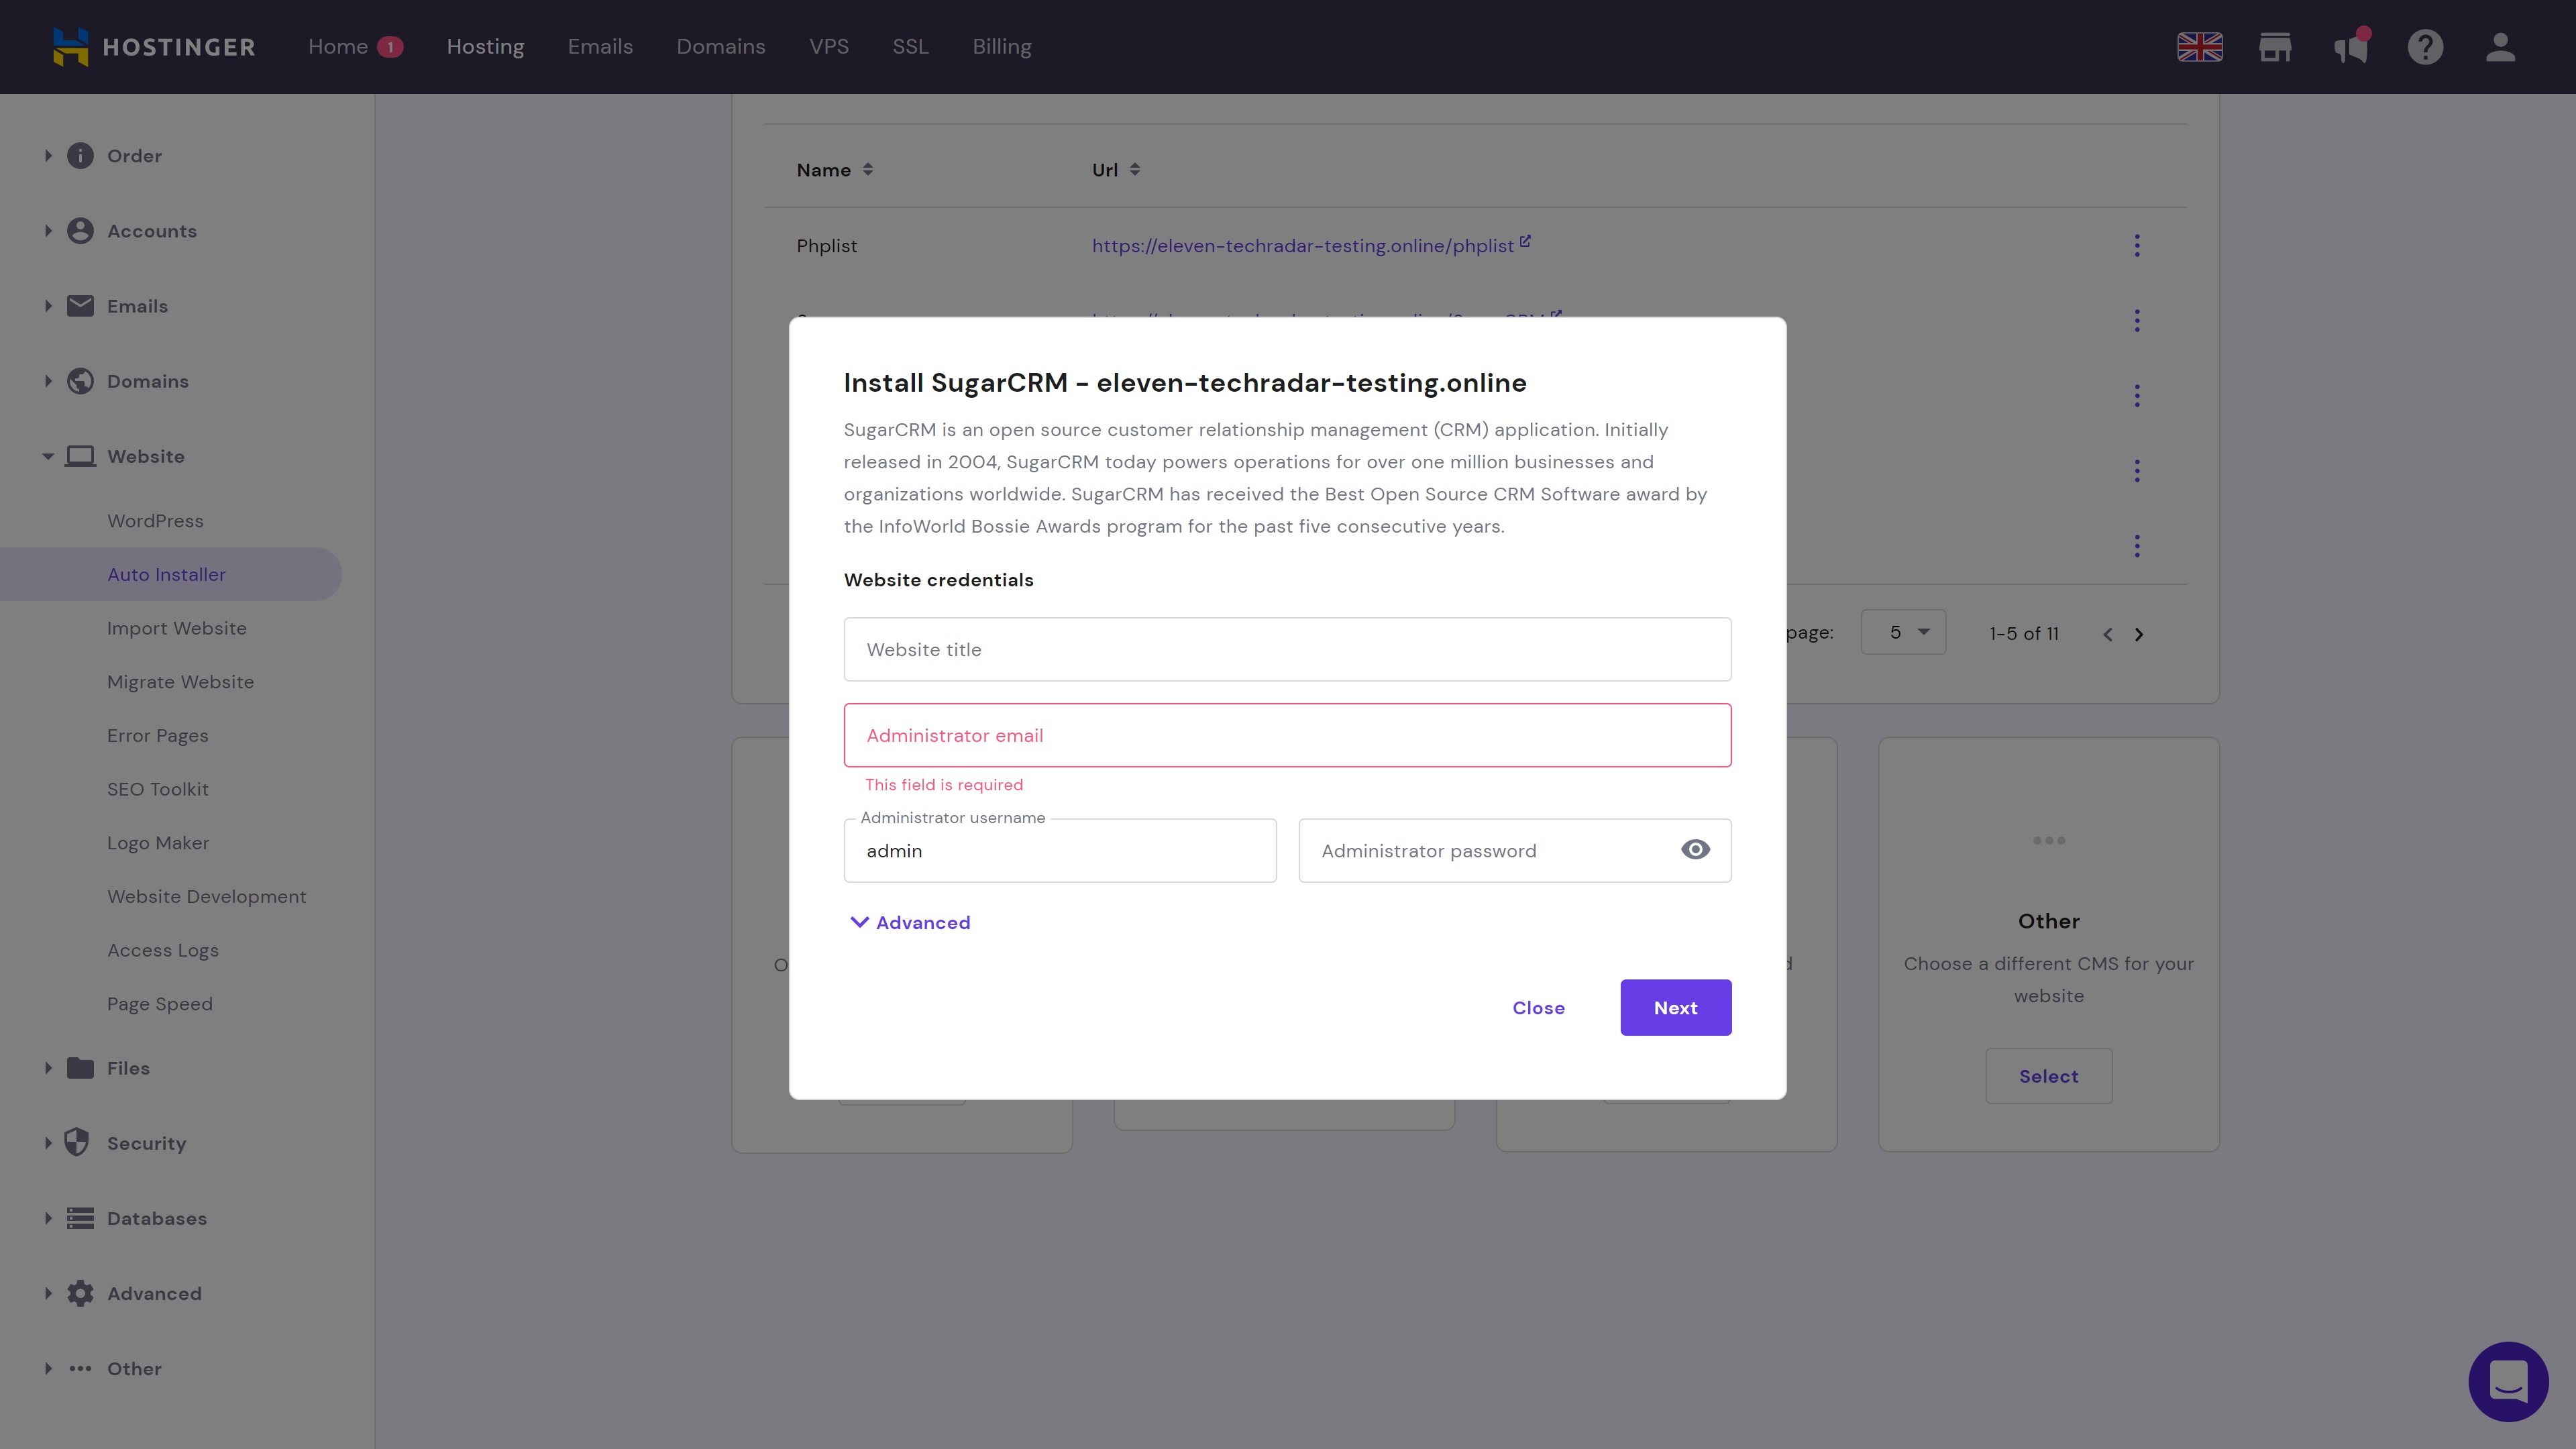
Step 1: Initial setup
Follow the link from Hostinger’s Auto Installer to begin using SugarCRM. This will take you to Sugar’s initial login screen. Input your username and password to begin the initial setup.
Are you a pro? Subscribe to our newsletter
Sign up to the TechRadar Pro newsletter to get all the top news, opinion, features and guidance your business needs to succeed!
Next, Sugar will give you a series of prompts to name your company, upload your logo, choose your base currency, set up your email server for automated email, set your date format, time zone, and more. Simply follow the prompts and fill in all the relevant information to conclude the initial setup.
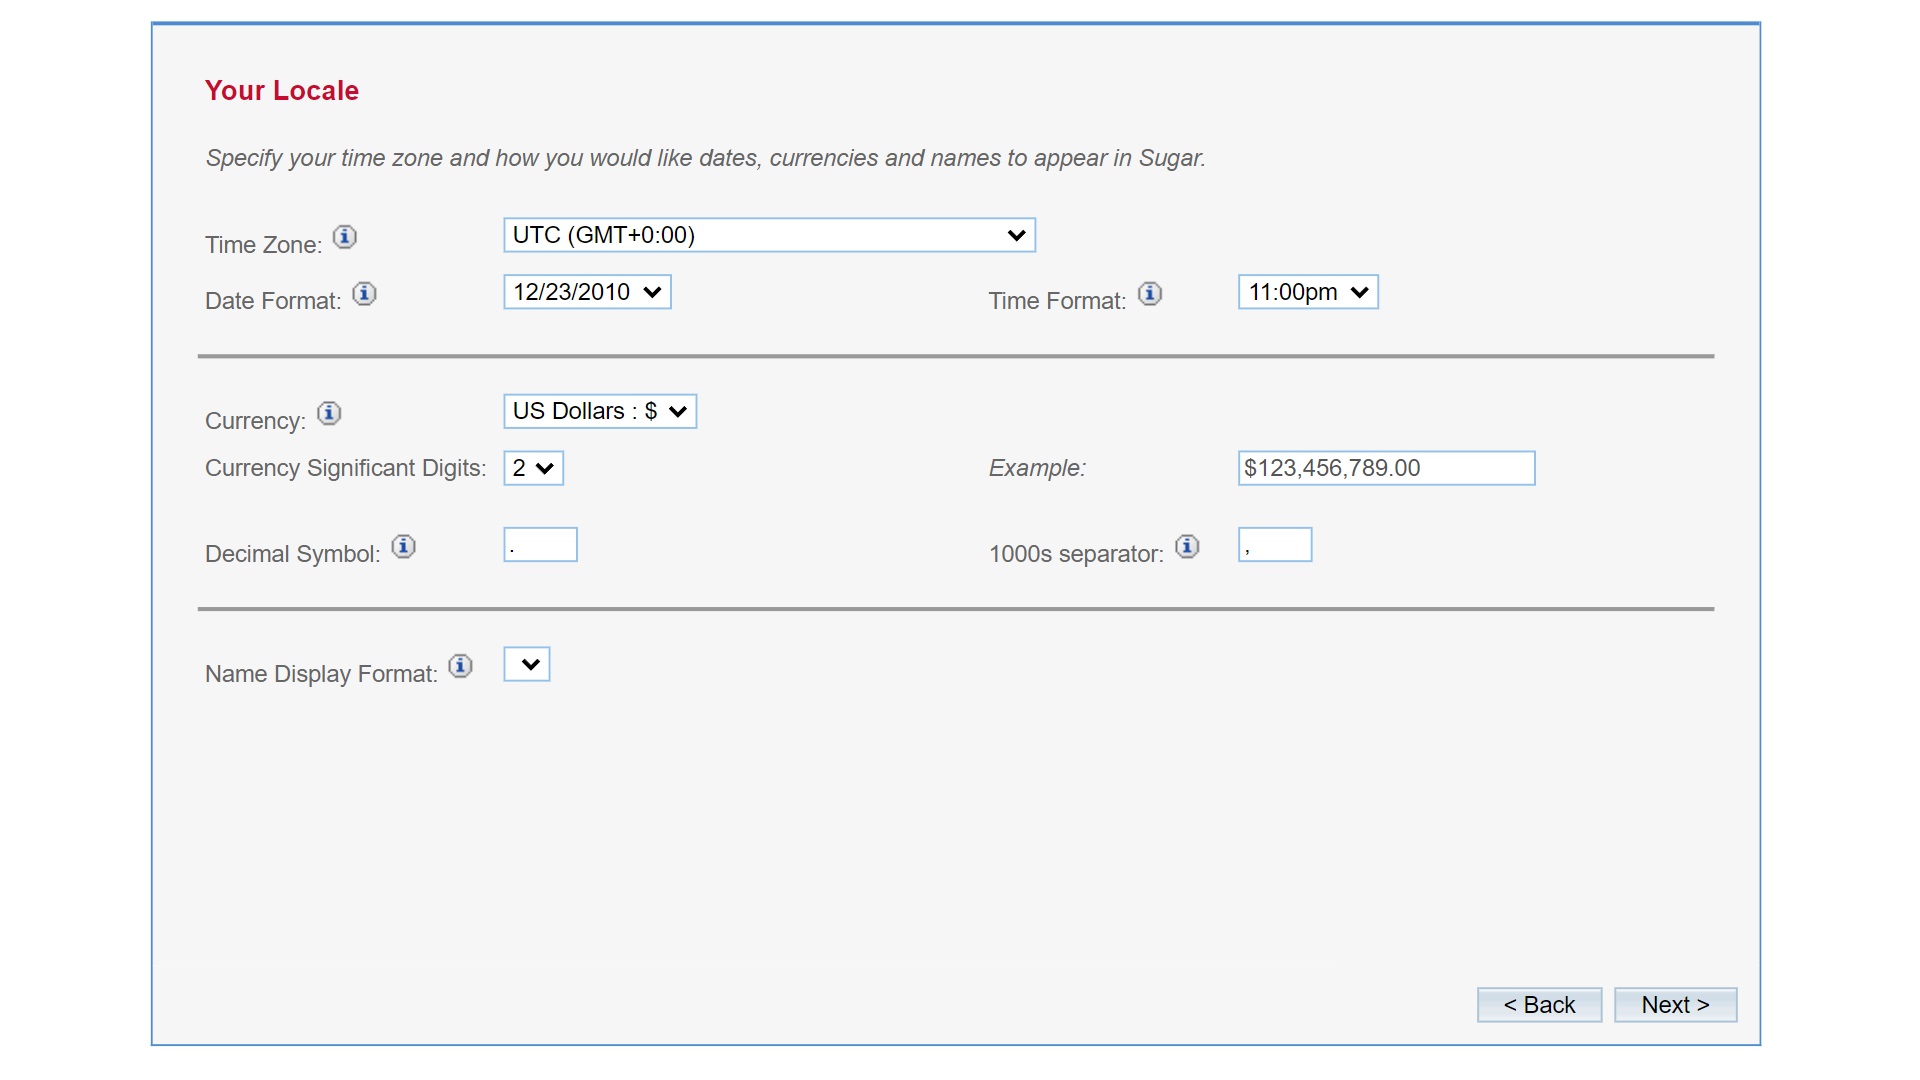
Step 2: Import data
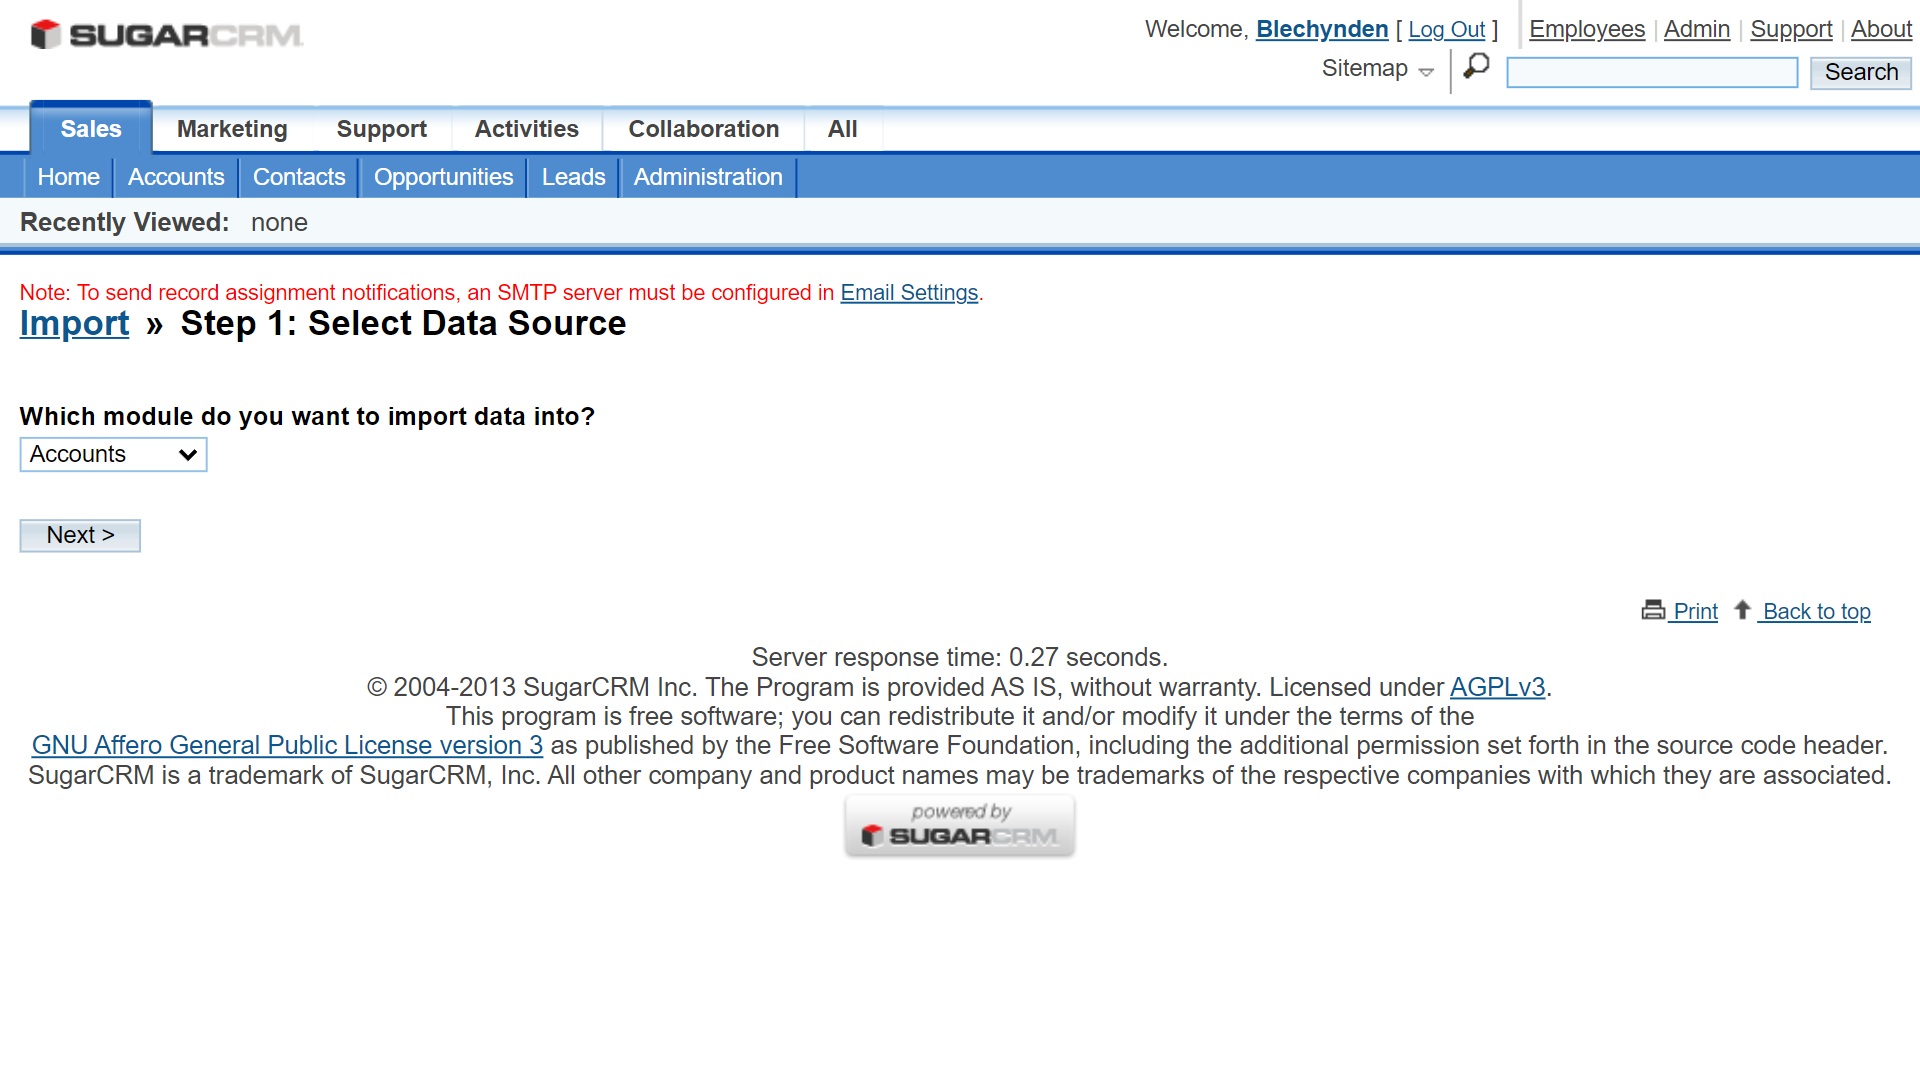
On the next screen, you will see several options for other initial tasks, such as adding clients and importing existing data.
Unless your business is brand new, you probably have existing customer data that you will need to import to SugarCRM from another source. For many small businesses, this data source is a spreadsheet. But if you are transferring from another CRM, you may need to export this data to a spreadsheet first.
Before uploading your spreadsheet, click to import existing data, then follow the prompts until you get to a link to SugarCRM’s template. Download the template and re-format your spreadsheet to match it, then import that template into SugarCRM.
If you need additional guidance on this step, be sure to check out our guide on how to migrate your CRM spreadsheet to CRM software.
Step 3: Update your general settings
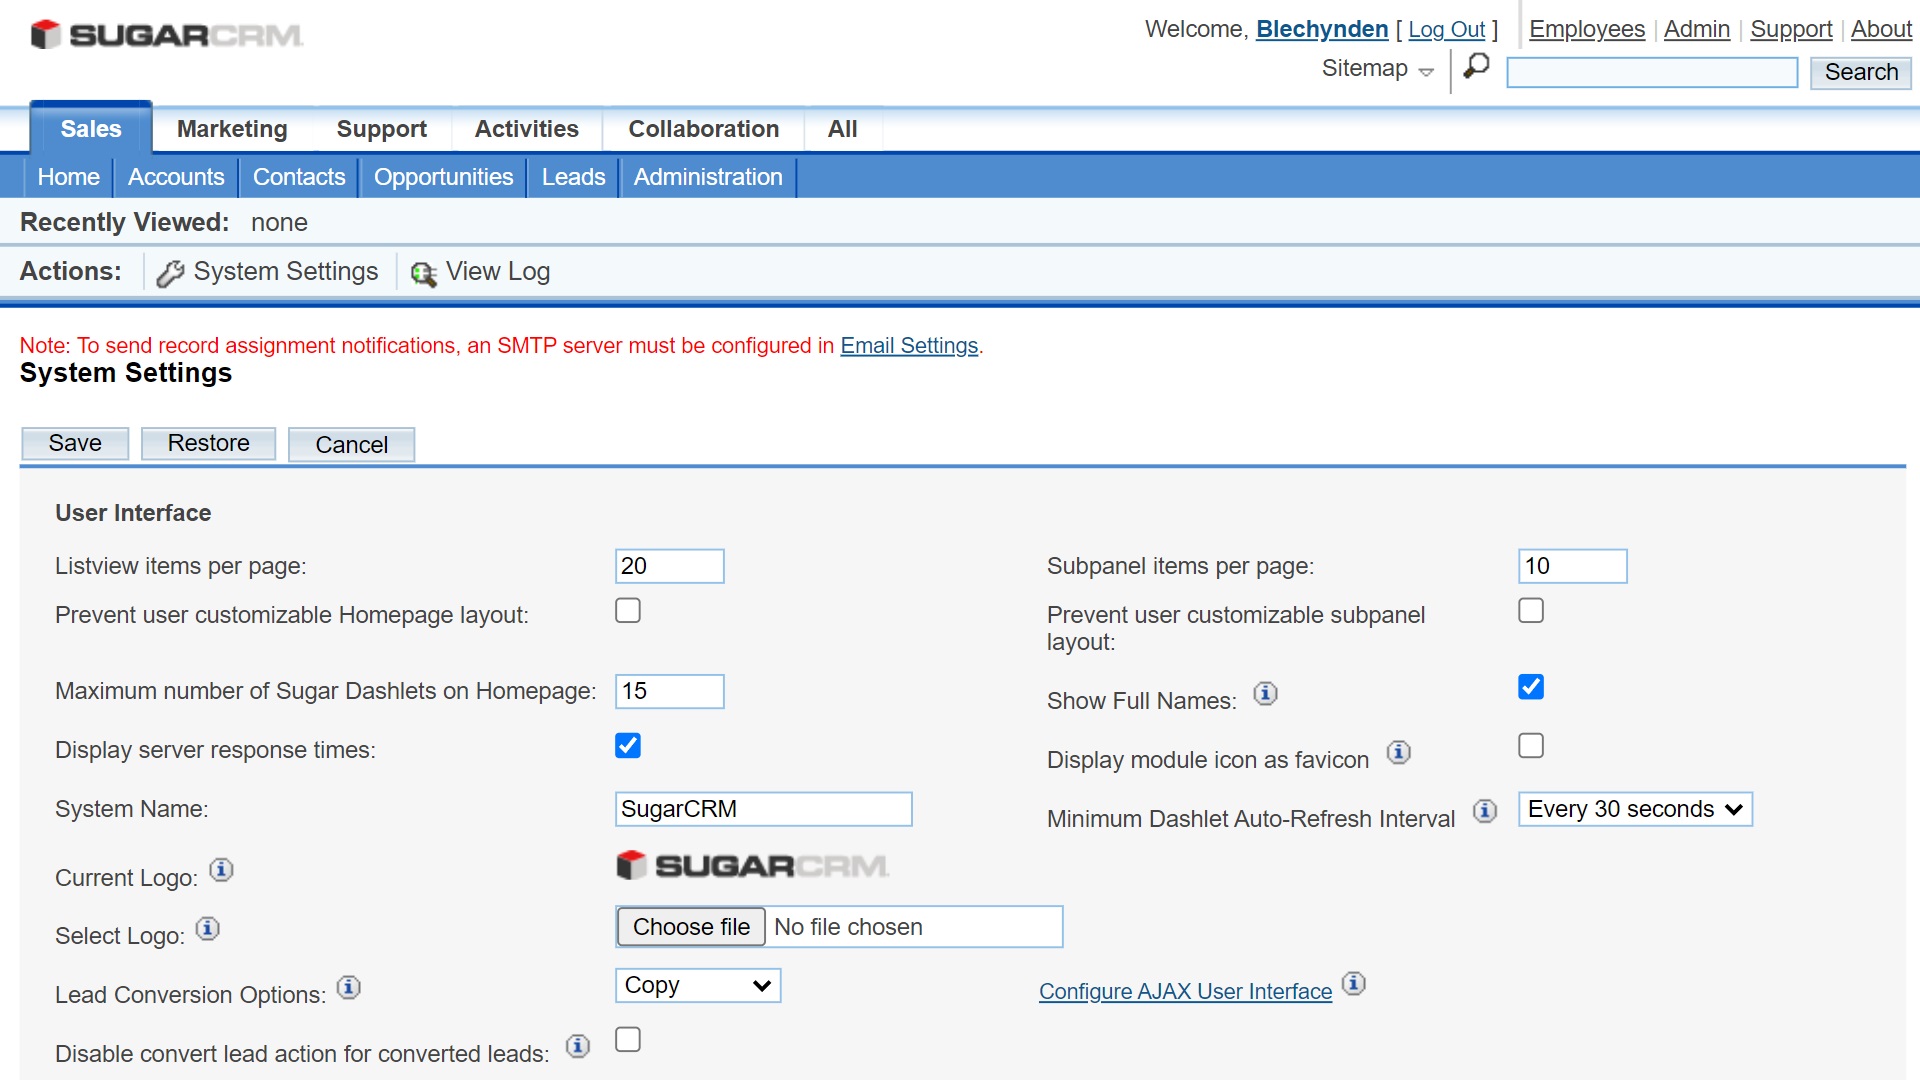
Once you’ve imported data and reached your main SugarCRM dashboard, we’d recommend updating your general settings. Head to the Admin menu on the top right of the main dashboard and scroll down until you see the System menu.
Under the System Settings option, you will find numerous customizable settings regarding the user interface, proxy settings, and more.
You will find various other settings menus on the Admin page, and we’d suggest exploring these to configure SugarCRM in the best way for your business. For example, the Email Settings menu enables you to customize the way that the system uses email.
Step 4: Create users
On the Admin panel, you will also find a User Management menu. This enables you to create new users, manage existing users, and update personal information.
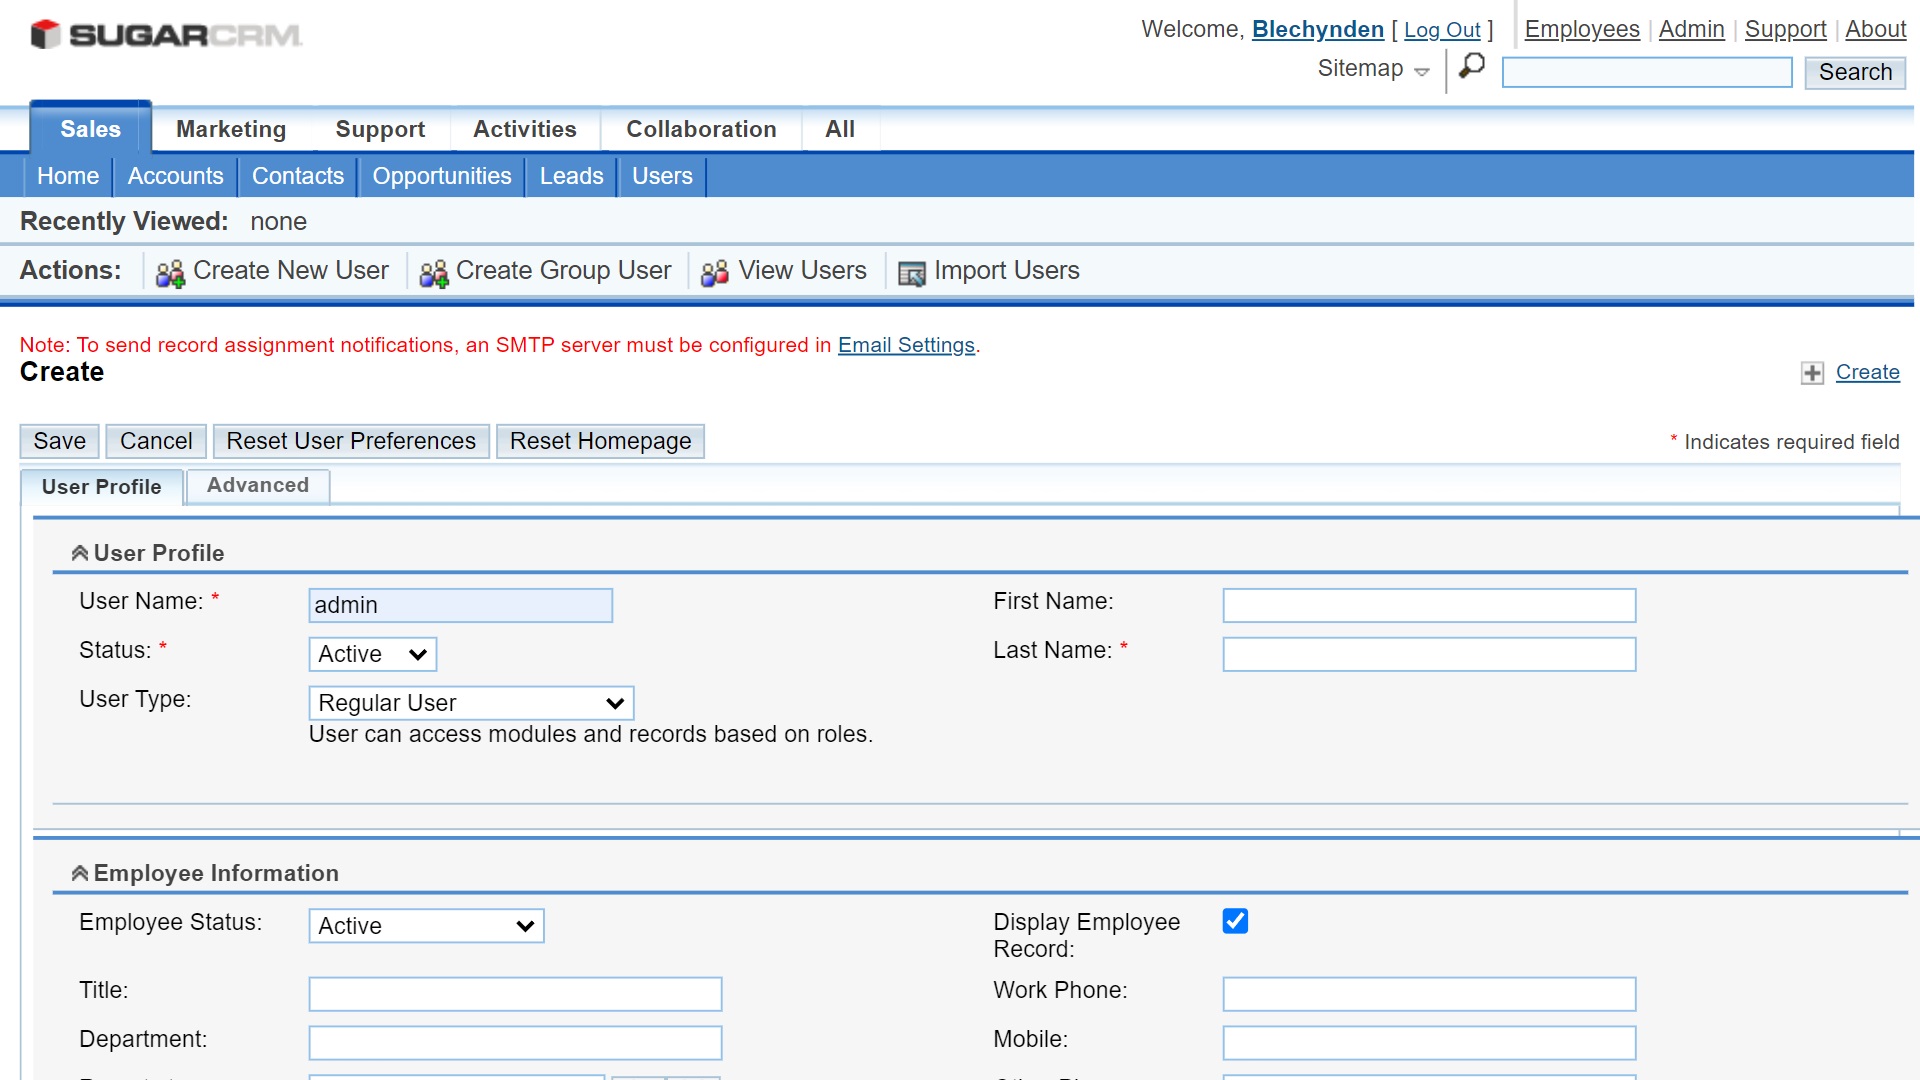
To create a new user, head to User Management > Create New User. Fill in the required information to complete each profile, and hit the Save button. You can define user settings under the Advanced tab on the Create New User page.
You only have to add a user name, status, and last name to create a user profile, but we’d suggest adding as much detailed information as possible. You can also assign user roles under Admin > Role Management.
Step 5: Familiarize yourself with the Studio
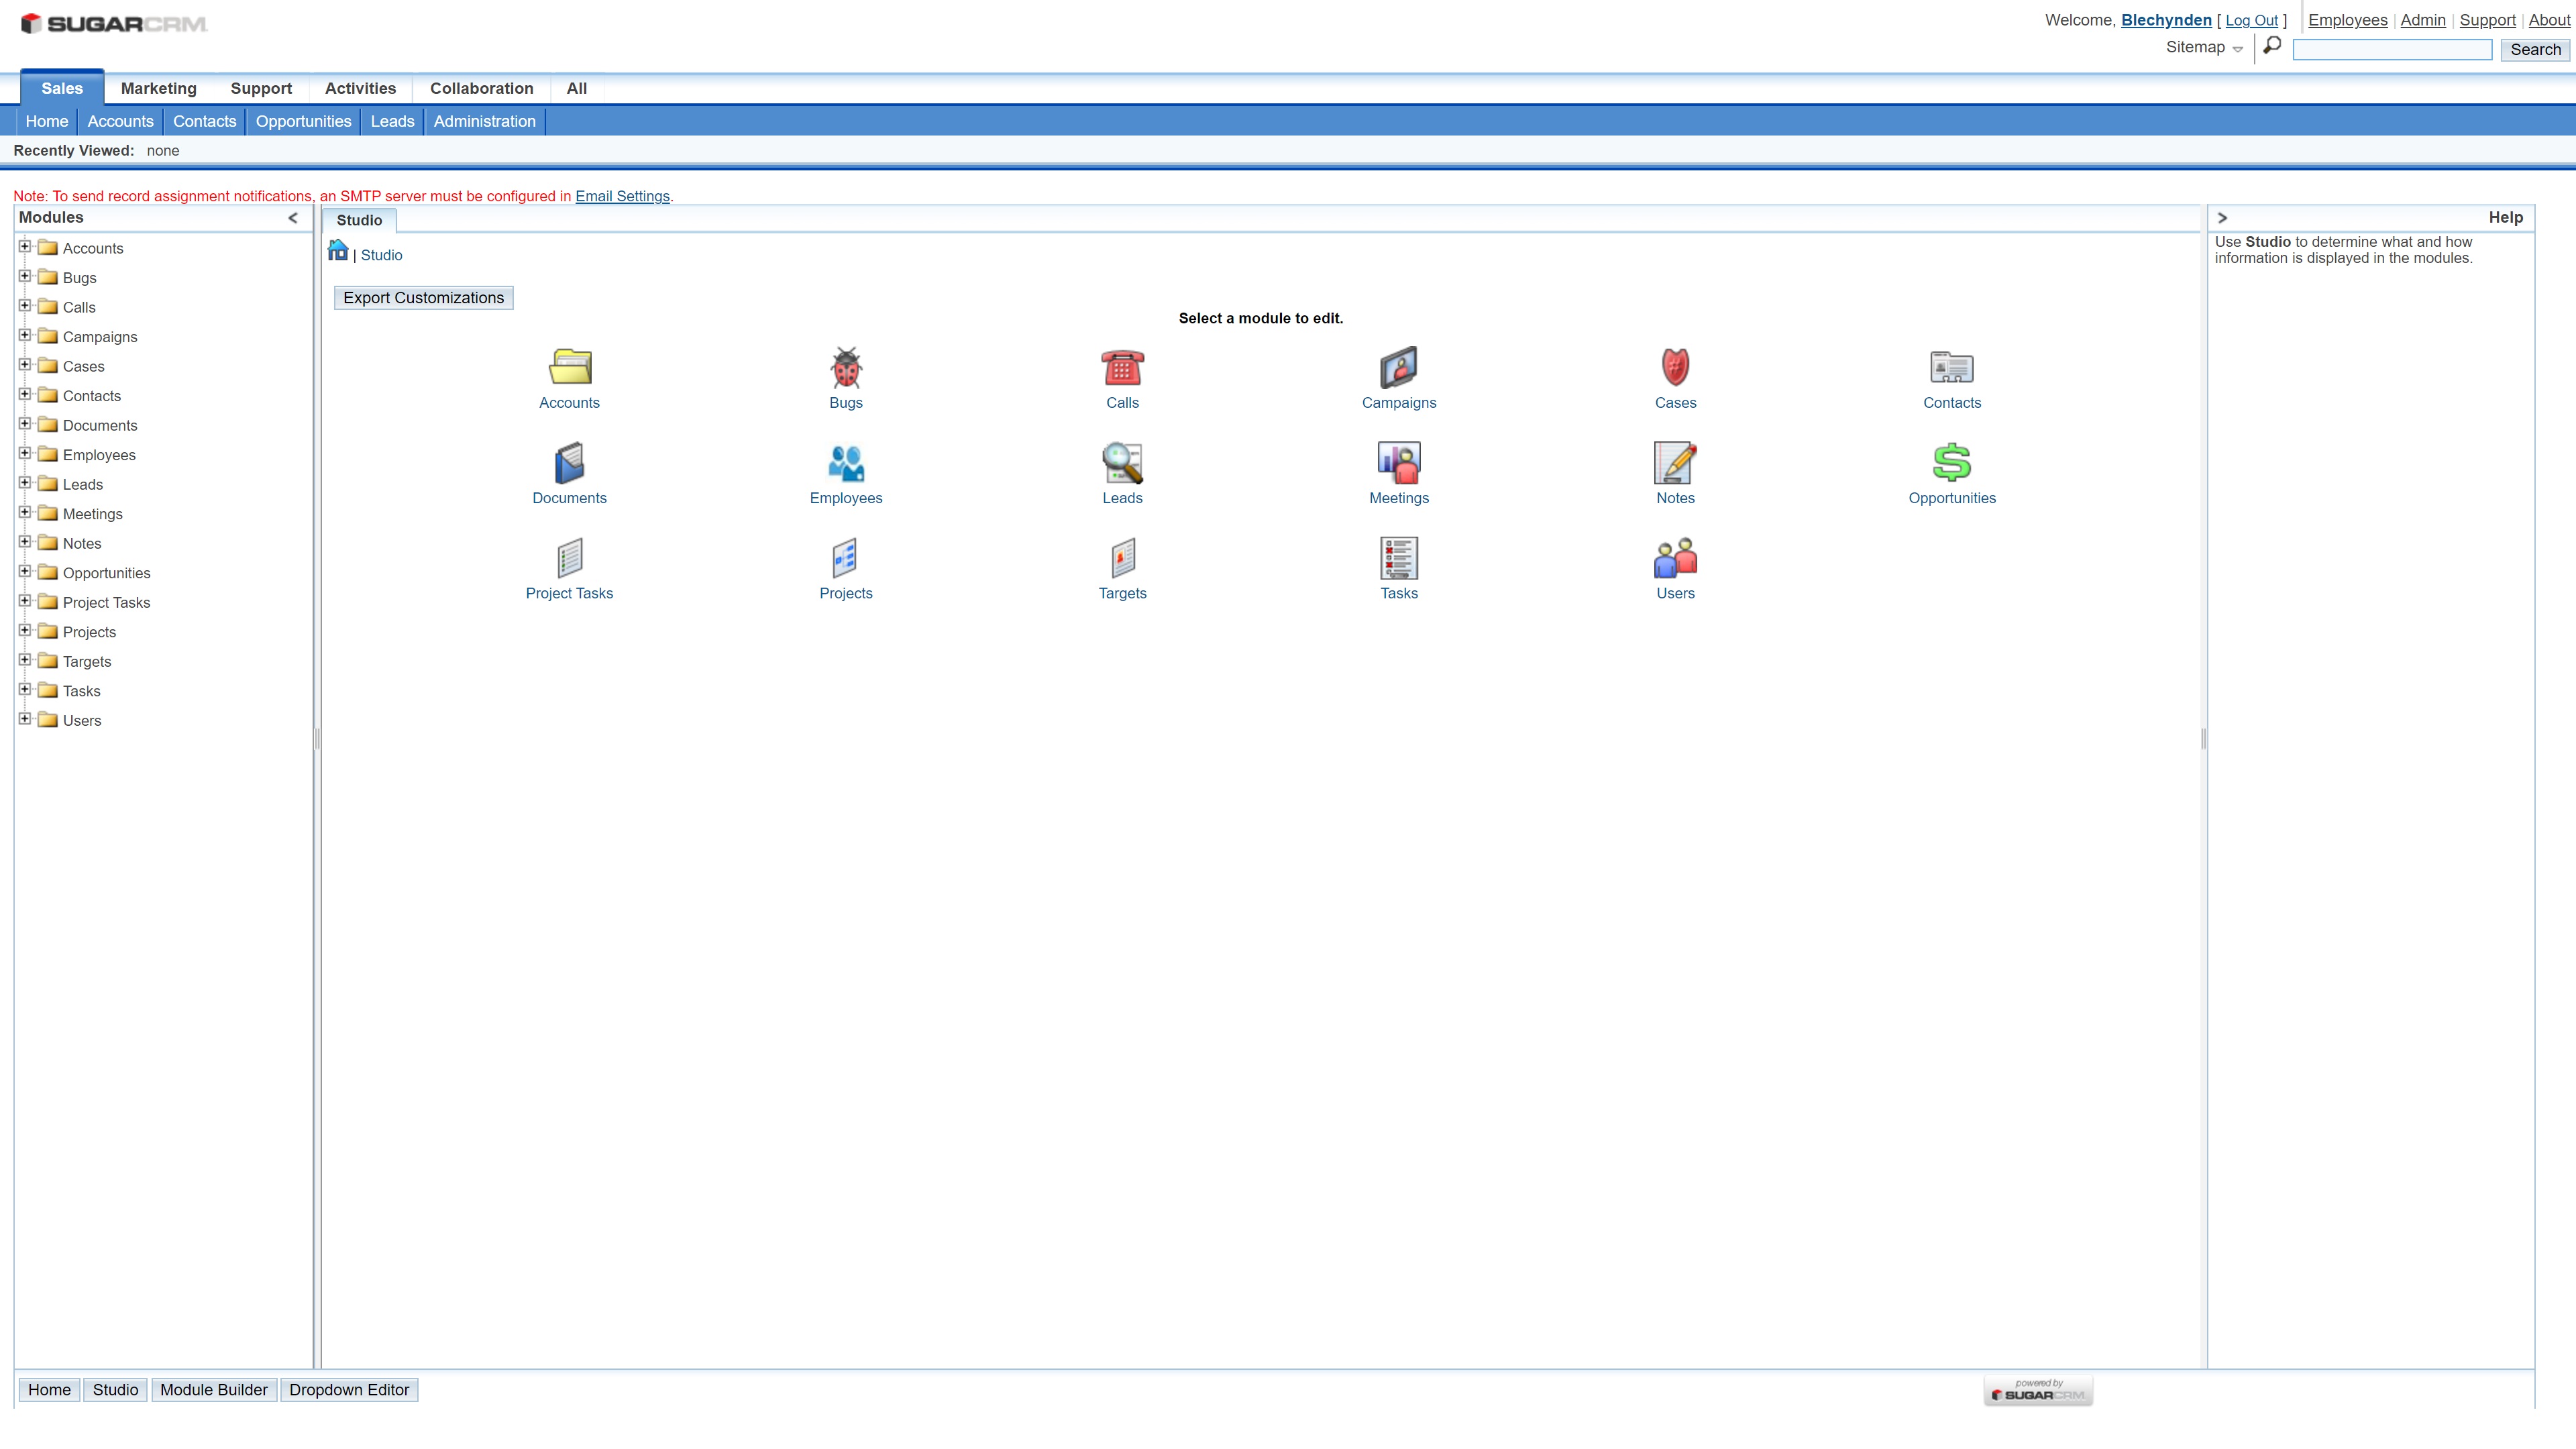
Finally, we’d suggest heading to Admin > Studio and familiarizing yourself with some of the design tools on offer. Here, you can customize the layout of your CRM platform, customize the way different modules perform, and even create new modules if you want to.
Summary
At this stage, your CRM platform should be pretty well set up. You will need to continue working on it to ensure it’s fine-tuned to your business, but we’ve covered the basics of installing and setting up SugarCRM.
If you don’t want to work through the process of setting up a self-hosted CRM platform, we’d suggest taking a look at our guide to the best CRM software. Also, check out our guide to the best CRM for startups, and our article about why you need CRM software.
Read more in this series:
- How to start a blog with Joomla
- How to host your files online using Nextcloud Hub
- How to start your own help desk with Hesk
- How to build an HR System using OrangeHRM
- How to generate your own invoices using Invoice Ninja
- How to install live chat software with Sales Syntax
- Run your own ecommerce platform with PrestaShop
- How to create your own website with Soholaunch
- How to launch your own website with WebsiteBaker
- How to learn search engine optimization with SEO Panel
- How to kickstart your own Ancestry.com alternative with webtrees
- How to install a free ERP software called Dolibarr
- Demand gen vs lead gen: What's the difference?
- Host your own private forum with MyBB
- Build your own calendar application with WebCalendar
- Set up your own groupware service with Tiki Wiki CMS
- How to build your own email marketing service with phpList
- A Google Photos alternative: Store your photos online with Piwigo
- How to start with project management using The Bug Genie
- Make your own poll platform with LimeSurvey
- Roll out your own Wikipedia clone with MediaWiki
- How to host your own learning management software with Moodle LMS
- Set up an accounting system with FrontAccounting
- Produce your own bills with BoxBilling
Daniel is a freelance copywriter with over six years experience writing for publications such as TechRadar, Tom’s Guide, and Hosting Review. He specializes in B2B and B2C tech and finance, with a particular focus on VoIP, website building, web hosting, and other related fields.
