
How to Use Recovery's Options
Recovery is a set of tools you can depend on in a rare emergency — typically when something drastic stops you getting into OS X. It looks a lot like OS X proper, but its capabilities are limited to essential maintenance tools that help you get up and running after a critical problem. It's even possible to download and reinstall the whole operating system.
If the prospect of fixing something you don't understand is daunting, there's one feature you'll find invaluable: its the web browser. Using it, you can go online to book a Genius Bar appointment at one of Apple's retail stores, or look up the contact details of an authorized repair center if there are no stores close to you.
Recovery offers other features we'll walk you through, including the ability to reset any user account's password. While this is undoubtedly useful, it also poses a security risk to the files stored on your Mac if someone accesses it.
Quick look at Recovery Mode
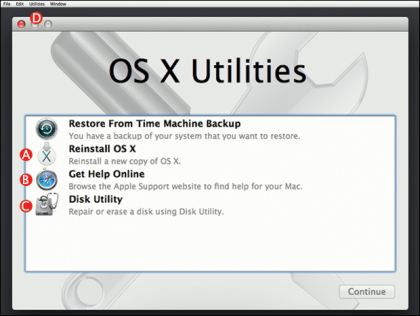
A. Reinstall OS X
Recovery provides three ways to reinstall OS X: rolling back to an earlier state using Time Machine; installing OS X over itself to fix some problems; and erasing the internal storage first for a completely clean start.
B. Research a Problem
The Safari web browser is available in Recovery to research common problems.
C. Disk Utility
You can run diagnostic scans of your Mac's storage, or erase it altogether.
D. Additional Utilities
Firmware Password Utility increases security; Network Utility tests connectivity; and Terminal is a text-driven way to perform a detailed diagnosis.
For more tips on fixing Mac boot-up problems, check out our guide on how to fix a Mac that won't start.
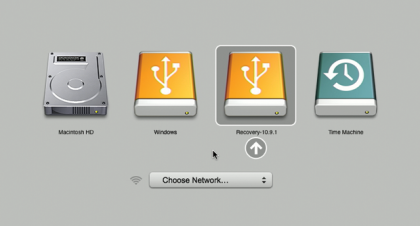
1. Start Recovery Mode
To start Recovery from your Mac's internal storage, hold down Command + R at the startup chime. To start it from an external drive, hold Option instead, and when a list of available startup volumes appears, choose the one with an external drive icon and "Recovery" in its label.

2. Internet Recovery
If a Recovery partition isn't available, holding Command + R starts Internet Recovery (on models released since OS X Lion, and some earlier models — see Apple's Support webpage for more information). This shows a globe and a progress bar while your version of OS X is downloaded.
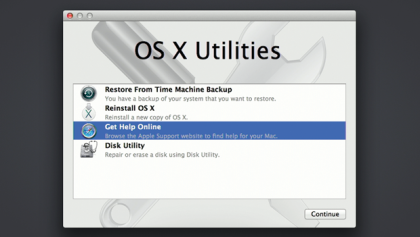
3. OS X Utilities
When Recovery finishes loading, it displays a list of four commonly needed tasks. "Get Help Online" opens the Safari web browser. However, if your Mac uses Wi-Fi to get online, use the Wi-Fi icon at the top right to ensure that it's connected to your usual network.
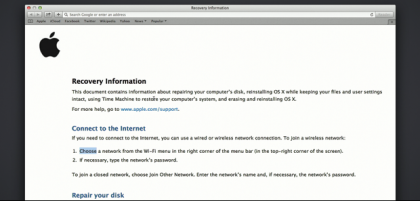
4. Get Help Online
You can use this version of Safari to browse and research your problem by visiting the Apple Support website, to look more broadly with a search engine, and to browse to www.apple.com/retail/geniusbar to book a Genius Bar appointment for professional help at an Apple retail store.
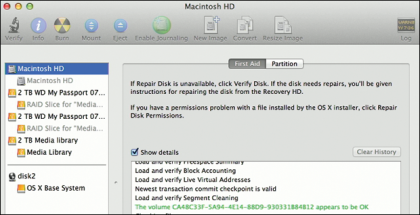
5. Disk Problems
If OS X won't start, choose Disk Utility before resorting to more drastic options and check your Mac's drive is shown in the app's left pane. Select the row that shows disk capacity for options to verify data and attempt to repair structural problems.
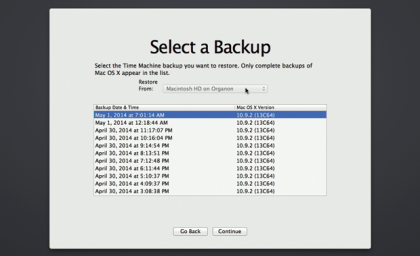
6. Restore Backups
If you haven't excluded system folders from your backups, your Mac can be restored to an earlier state. Choose this option, identify your backup disk, pick an earlier state from the list, and follow the prompts to restore it from your startup disk. Note: this can take a while.
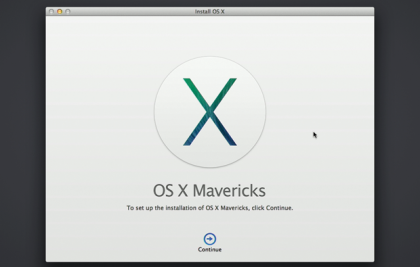
7. Reinstall OS X
This option downloads your current version of OS X and installs it over any existing copy, retaining your files and settings. This can fix damage to the system. The download is several gigabytes, so it can take quite a while over slower internet connections.
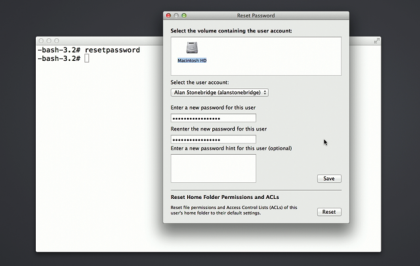
8. Reset a Password
If someone forgets their account password, choose Utilities > Terminal. Type resetpassword into that app and press Return. In the next window, select your startup disk, select the account from the list, type a new password into the boxes and press Save.