AirPlay is a technology created by Apple that lets you stream the display signal from your Mac to your second- or third-generation Apple TV. As well as beaming movies and music from iTunes, more recent Macs let you use AirPlay mirroring to extend or duplicate your Mac’s desktop to your TV. Mirroring can be really useful, letting you show presentations, slideshows, or movies on a big screen without the need for wires; or you can use your HDTV as a second computer monitor, again without wiring. Older Macs, however, can’t stream AirPlay video out of the box, because Apple restricts mirroring to newer models, citing hardware requirements.
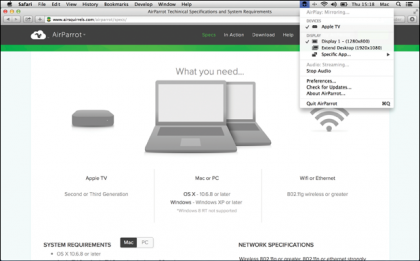
AirParrot is an inexpensive app ($9.99) that unlocks the ability to mirror audio and video over AirPlay on a wide range of older machines (see below), and it even offers features that Apple does not. It lets you, for example, mirror a specific app to the TV while still using your Mac desktop as normal, and also lets you set variable video quality and framerates so you can tailor the connection. On older, less powerful Macs, this means you should still get good results by dropping the data rate down a little. There’s nothing to stop you using AirParrot even on a newer AirPlay-compatible Mac, of course. You can purchase AirParrot here.
Note: AirParrot will run on any Core 2 Duo or higher Mac with OS X 10.6.8 or later. If you have one of the following Macs or newer, you can do AirPlay mirroring natively in OS X: iMac (Mid 2011), Mac mini (Mid 2011), MacBook Air (Mid 2011), MacBook Pro (Early 2011), Mac Pro (Late 2013).
1. Connect to the Apple TV
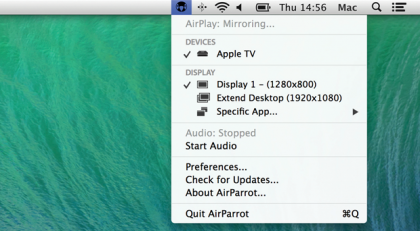
After installing the app, its icon will appear in the menu bar. If you have an Apple TV device on your wireless network, it should appear under the Devices section in the menu. Click on the Apple TV device and your Mac should begin mirroring the desktop.
2. Extend Your Desktop
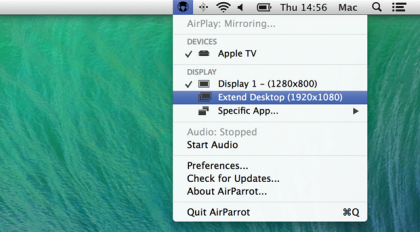
The Display section shows information about connected displays and built-in screens. If you choose Extend Desktop, your TV will become part of the desktop, at a higher resolution in our case, above. You should be able to move the cursor from Mac to TV.
Get daily insight, inspiration and deals in your inbox
Sign up for breaking news, reviews, opinion, top tech deals, and more.
3. Extend Just One App
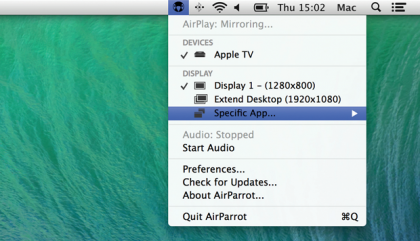
Using the Specific App option, you can send an app’s window to the Apple TV and thus to your television, and leave your Mac’s desktop working as normal. This is ideal for sending a presentation or slideshows to a screen while still working on your Mac.
4. Choose a Document to Mirror
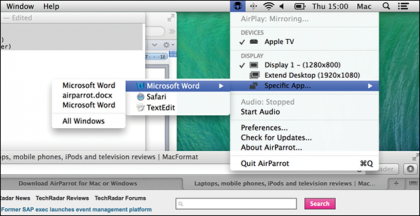
AirParrot will only send an app to your TV when that app has a window open on the screen. If the app is hidden or has no open windows, it won’t appear. With some apps onscreen, click on the Specific App option and you’ll see you can choose specific open documents.
5. Install the Audio Driver
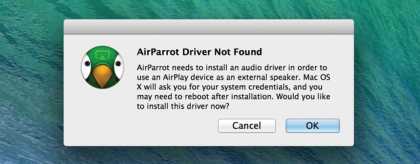
Any sound you play will come out of your Mac and not the connected TV. To change this, go to Enable Audio. The first time you do this, you will be prompted to install the driver and restart your Mac. Clicking Enable Audio will then stream both sound and video.
6. Tweak the Quality/Data Rate
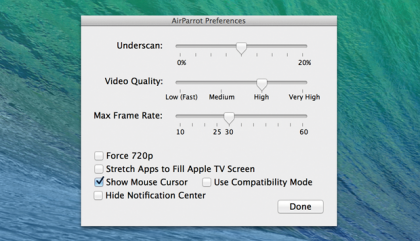
In the AirParrot menu, go to the Preferences option to open the preferences window. If you get choppy streaming, experiment with lowering the video quality and framerates. Bear in mind that dropping the framerate too far makes viewing video more difficult.
7. Stretch Apps to Fill the TV
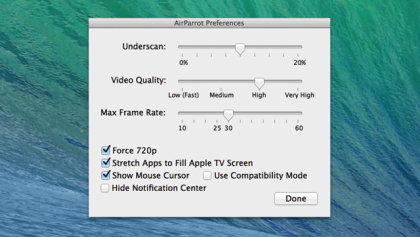
In the Preferences menu is an option to force the streamed output to 720p resolution if streaming to a third-generation Apple TV at 1080p is slow. You can also stretch apps during streaming to fill the Apple TV screen, if the aspect ratio of the screens mismatch.
8. Tweak for Presentation Mode
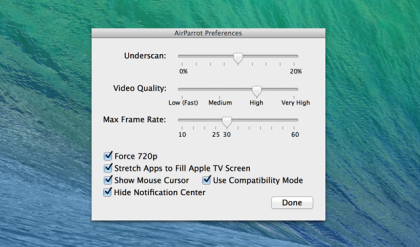
The final options are Compatibility Mode, which helps fix glitches on some OS X 10.6-based systems, and the option to hide the Notification Center in the streamed signal. This is important if you’re giving a presentation. You can also hide the mouse cursor here.
- Keep your Mac secure online with our choice of the best Mac VPN