It’s all too easy to say “oh, I’ll just delete some stuff” and then never do it. Take action today and cut the flab from your file system by locating the major space-sucking culprits.
1. Balancing the Blocks
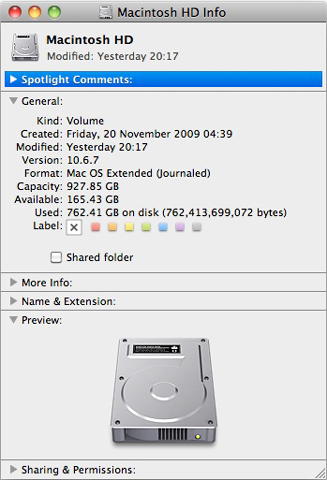
The first step isn’t always the easiest, but this time it is: determine just how much space you have remaining on your Mac’s main disk. If you’ve read this far, chances are it’s not much. To get the complete picture, click on the Macintosh HD icon (or whatever you call your main drive) in the Finder, then type Command-I to bring up its Info window. From here, you can see the capacity of your drive as well as the amount of space available.

Aim to have a third of your drive free.
If the available storage is less than one-third of the total capacity of the drive, it’s worth freeing up more. The benefits of a healthy hard drive are far greater than just having more room to play with. With around one-third of your drive’s capacity available, you should see slight improvements in drive access as well as application speed. Mac OS X will also be able to use some of that storage as virtual memory to help it perform tasks without using your RAM, a great help to those using older Macs.
2. Find and Delete Huge Unwanted Files
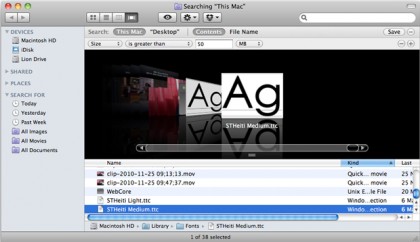
Next, with the Finder selected, press Command-F to bring up a search window. Click on the first drop-down menu and select Other and then Size. From the second drop-down menu, select “is greater than” and then enter an amount in the field to the right of it. A good place to start is 50MB.

Next up: find those big files.
The files and folders that now appear in the Finder window all fit the criteria you entered—if you looked for files bigger than 50MB, these are all the files of that size or larger on your Mac. But wait! Before you start blindly erasing some of them, check out what they actually do on your system. Mac OS X includes some rather hefty system files that are necessary to keep things running smoothly. If you’re absolutely certain that you know what a file is, then chuck it, but it’s worth checking if in doubt. An easy way to find out more is to select a file, right-click on it, and select Open Enclosing Folder for more details on its origin.
Get daily insight, inspiration and deals in your inbox
Sign up for breaking news, reviews, opinion, top tech deals, and more.
3. Printer Pruning
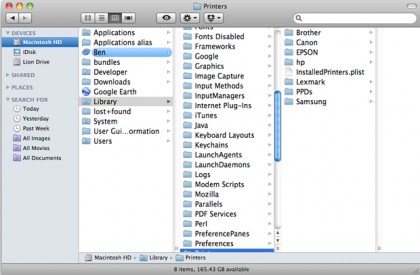
It’s unlikely—unless you’re some kind of ink-on-paper connoisseur—that you have a printer for each of the hundreds of printer drivers stored on your Mac. If you head to Library > Printers, you’ll find a host of folders named after popular printer brands that weigh in at around 2GB in total. Wipe out all brands you don’t use, and don’t worry—if you buy a new printer, the Mac drivers will be included on the disc that comes with it or will be available online.

Drivers for printers you don’t own can take up surprising amounts of space.
4. Trash Apps
It doesn’t take long for your Applications folder to fill up with all sorts of junk you don’t need. All those 30-day trials, any apps you’ve replaced for alternative options, and outdated software you don’t use anymore can all take their toll. Fortunately, uninstalling begins with simply dragging an application’s icon to the Trash. Next, perform a quick Spotlight search for the app’s name to track down any related files, then also check your Documents folder. Better yet, if an app has an uninstall option, use that. The same applies to iOS apps—if there are any you don’t use anymore, delete them from within iTunes. You can always reinstall them at a later date using the same iTunes account you purchased them with.
5. Compress or Burn
If you’re an avid iLife user, you probably have a bunch of iMovie, GarageBand, and even iDVD projects that you’ve either published or shared already. They’re not doing any good just sitting on your drive—and the same’s true for projects and documents from other apps. So gather them all together, label them up into folders, and then compress them by right-clicking on them and selecting Compress from the menu. That reduces the file size a bit, but for even more space reduction, consider shifting these compressed folders to an external drive or burn them to a DVD, then delete the originals.