If you've ever used a large file discovery tool like Daisy Disk, you may have stumbled upon a peculiarly large filed dubbed sleepimage. This file is a by-product of Safe Sleep and it's basically a saved state of your Mac's memory when it goes to sleep. MacBooks especially use this file to save your contents before the battery completely loses its charge. When you start up your system, the Mac will restore this data from the sleepimage file.
Regardless of how important this file may sound, it's actually completely unneccessary. So why not free up some hard disk space by eliminating it? Read on to find out how.
The file may be unecessary for some (and this feature certaintly wasn't included on Macs made before 2005), but if you are constantly in a situation where you lose juice and your MacBook has to hibernate, you may not want to disable the Safe Sleep feature. Disabling the Safe Sleep feature means that contents in RAM will not be backed up to the drive should your Mac need to hibernate. When you start your machine back up, your Mac will perform a normal reboot without restoring windows, and opened files.
Removing the File

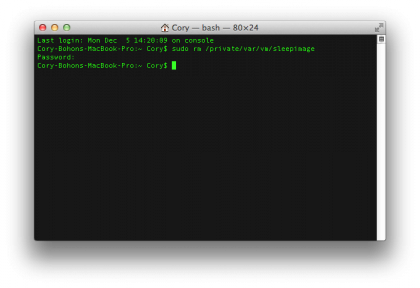
Luckily, the sleepimage file can be removed without any injury. The file will simply be rebuilt whenever your Mac needs to use Safe Sleep again. To save some space on your Mac, open Terminal (located in /Applications/Utilities), and type in the following command, followed by the enter key:
sudo rm /private/var/vm/sleepimage
After you press enter, you will be asked to type your administrator password. Type it and press enter, and the file will vanish from your Mac, leaving you with extra disk space.
Prevent the File from Being Rebuilt
You can remove the sleepimage file all you want; however, your Mac will automatically rebuild it when needed. By disabling Safe Sleep, this file will never be created by your Mac again, saving this space indefinitely.
Get daily insight, inspiration and deals in your inbox
Sign up for breaking news, reviews, opinion, top tech deals, and more.

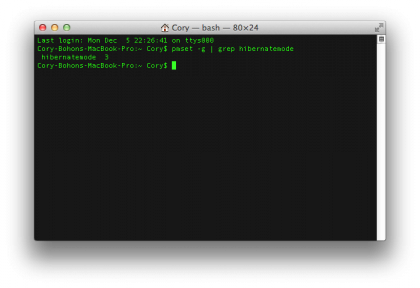
You can disable safe sleep with many applications, but we prefer using the Terminal. To begin, fire up Terminal and type in the following command followed by the enter key:
pmset -g | grep hibernatemode
This will print out (to the screen) the current hibernatemode setting. By default, this is “hibernatemode 3”, which means that RAM contents are written to the disk upon sleeping. Be sure to take note of what number your current machine is set to so that you can return to this mode should anything go horribly wrong.
sudo pmset -a hibernatemode 0
You will be required to type your password, after which, the new hibernatemode setting will be saved. You can check that the setting has been changed by typing:
pmset -g | grep hibernatemode
Should any problems arise, you can simply replace “hibernatemode 0” with “hibernatemode 3” (or whatever your Mac was previously set to) in the pmset -a statement above, entering the command into Terminal and pressing the enter key.
Follow this article’s author, Cory Bohon on Twitter.