Access any Mac you need, no matter where you are.
With Back to My Mac, you can access your Mac’s hard drive and swap files from any Internet-connected Mac running OS X Lion (10.7.5) or later. You can also use Screen Sharing to open applications and edit files on another Mac, to access other machines on your home network, or even to upload important files to iCloud.com.

iCloud almost sets everything up for you, but not quite.
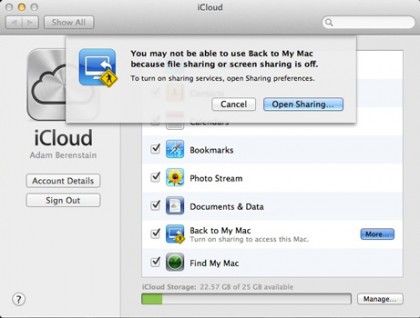
To get started, enter your iCloud account information on each Mac you want to “get back to” in System Preferences > iCloud, then check Back to My Mac to turn on the feature. If you need to activate built-in OS X services like Wake For Network Access, File Sharing, or Screen Sharing, you’ll be prompted to do so in the Sharing preference pane. You’ll also need a router that supports NAT-PMP (NAT Port-Mapping Protocol) or UPnP (Universal Plug and Play) to share services. Most routers do support this, and if you’re using any modern AirPort or Time Capsule base station, you’re all set.
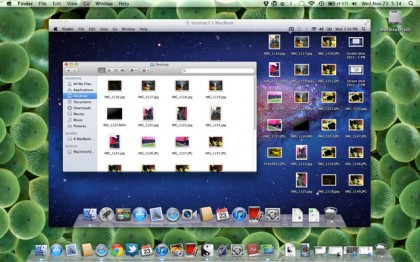
Once your Macs are set up, turned on, and connected to the Internet, you’ll see each of them in the Shared section of the Finder sidebar. From there you can connect to their drives just as if they were on your local network. How cool is that?

Apple heard you like Macs, so they put a Mac in your Mac.
What’s not cool is the possibility of creeps getting access to your Macs while they’re available to log in to online. Apple uses IPSec (Internet Protocol Security) and SSL (Secure Sockets Layer) to encrypt traffic between your Macs and iCloud, but there’s a lot you can do to keep you and your data safe when you head back to your Mac. Choose strong passwords — over eight characters long with upper- and lowercase letters, numbers, and symbols — for your iCloud account and the user accounts on your computers. In System Preferences > Security & Privacy, click General, then enable the Require Password After Sleep option and choose Immediately as its timeframe. While you’re in System Preferences, click the Users & Groups pane, Login Options, and then turn off automatic logins to help keep the bad guys at bay.
Get daily insight, inspiration and deals in your inbox
Sign up for breaking news, reviews, opinion, top tech deals, and more.