How to build an AirPlay receiver with Raspberry Pi Zero
Pi in the Wi-Fi
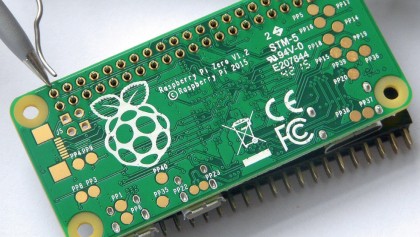
The biggest task you'll face with the Raspberry Pi Zero is having to solder on a GPIO header, which is required to connect the DAC. If this is your first project of this kind, check your local hardware store for a soldering iron, a stand, suitable solder and a tub of flux.
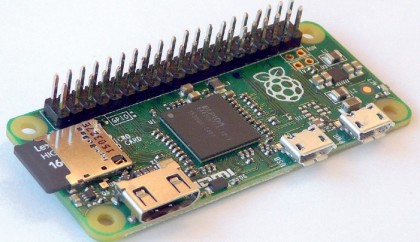
Make sure the Raspberry Pi Zero is the right way up and insert the male header into the correct holes at the back of the board, with the shortest pins facing down. If you turn the Raspberry Pi Zero over, you should see the pins protrude just above the board, which is where you'll solder them into place.
Use a suitable object – such as the female GPIO header – to prop up the circuit board while you apply the solder. If you've never done anything like this before, check out this video of someone soldering a GPIO header onto a Raspberry Pi Zero, which we strongly recommend you watch.

Place the soldering iron in the stand, dampen the little cloth on the stand, then switch on the iron and wait for it to heat up. While waiting, dip the end of the solder wire into the flux to help prevent it sticking. When the iron is hot enough, dip its tip into the flux.
Now place the tip against one of the corner pins. Introduce the solder to it and wait for a bit to melt off and fix the pin in place. Repeat for the pin in the opposite corner. At this point, switch off the iron and wait a few seconds for the Raspberry Pi Zero to cool down.

Pick it up and turn it over to verify the solder has taken and the pins remain straight. Flip the Raspberry Pi Zero over again, and solder the other 38 pins. As you gain confidence, you'll find you can quickly move from one pin to the next. Remember to clean the soldering iron tip on the damp pad every now and then, and keep adding flux to prevent sticking.
Final steps
One of the frustrating things about the Pibow case we've used is that it seals off the MicroSD card slot, so the storage card needs to be inserted before you can put it in the case.
Get daily insight, inspiration and deals in your inbox
Sign up for breaking news, reviews, opinion, top tech deals, and more.
Follow the first three steps of the walkthrough on the next page to prepare your MicroSD card with Pi MusicBox, the software we're using here. At the time of writing, the latest version (0.6) is incompatible with the Raspberry Pi Zero, but we found a specially modified build that works perfectly, which is the version you'll download in step one – or you can visit Pi MusicBox's site to see if a newer official version that works with the Raspberry Pi Zero is ready.
Once your MicroSD card is ready, insert it into the Raspberry Pi Zero, attach the Wi-Fi adaptor and switch on the Pi Zero. You'll notice you don't need a keyboard or monitor – Pi MusicBox is designed to work headless, allowing you to access and administer it remotely using any web browser.
Direct your Mac or PC's web browser to musicbox.local to do that. After verifying that everything's working correctly, click System and choose Shutdown to power off the Raspberry Pi Zero. Disconnect all cables, leave the MicroSD card in place, and then assemble the Pibow case.

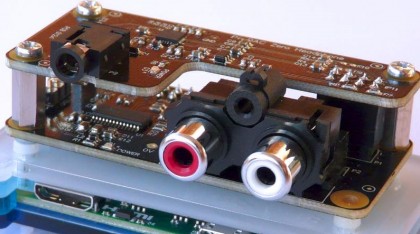
Once that's done, plug the Pi-DAC Zero into the Pi Zero's GPIO header. It should fit snugly and securely. You can now power the Raspberry Pi Zero back on and follow the final two walkthrough steps to finish basic configuration. Connect the Pi-DAC Zero to your stereo, set the correct input, then test the connection using your Mac, iPhone or iPad.
When selecting an AirPlay device, you should see MusicBox is listed as an available target on your network. Select it and enjoy your music full blast through your stereo.
Current page: Physical construction
Prev Page AirPlay Raspberry Pi receiver Next Page How to set up Pi MusicBox