How to build your own R2-D2 with the Raspberry Pi Zero
Hack a toy

Build your own R2-D2 using Raspberry Pi
What Star Wars fan hasn't dreamed of owning their own droid? The droids C-3PO and R2-D2 serve as the narrators to an epic story encompassing good versus evil.
With the upcoming release of the latest film in the series, The Last Jedi, now is an excellent time to try your hand at building your very own R2-D2.
C-3PO is a protocol droid who lives to serve his master, while R2-D2 was first seen (chronologically) in Episode 1: The Phantom Menace, and saved Queen Amidala and her party as they left the planet of Naboo. R2-D2 is an Astromech droid, a robotic engineer that can fix any problem.
In this tutorial we'll construct our own R2-D2 robot by hacking a store-bought toy with the latest Raspberry Pi, the Raspberry Pi Zero.
The Raspberry Pi Zero is an ultra-low-cost Raspberry Pi, and retailing at $5 (£4, around AU$7) this board provides a full computer experience for very little money. Coming with 512MB of RAM, 1GHz ARM CPU and able to output 1080p video, it's been flying off the shelves, and the Raspberry Pi Foundation is working to restock.
We'll also be using the latest Explorer pHAT board from Pimoroni. This board is a cheap and easy to use motor controller and experiment board, and will provide the functionality for our R2 unit.
For this project you will need:
- A Raspberry Pi Zero, or another Raspberry Pi (A+,B+ or Pi 2)
- The latest version of the Raspbian operating system
- Wi-Fi connection for your Raspberry Pi
- 2x Micro gear metal motors
- Wheels for R2
- Explorer pHAT board
- An LED
- A 220 Ohm resistor (RED-RED-BROWN)
- Male-to-female jumper cables
- Male-to-males jumper cables
- 2x Terminal block with screw terminals
- Hot glue gun
- Soldering Equipment
The majority of these components can be found at Pimoroni and The Pi Hut.
You can also download all of the code for this project.
Don't fancy building your own R2-D2? You can cheat and buy your own robotic R2-D2 with the Sphero R2-D2.
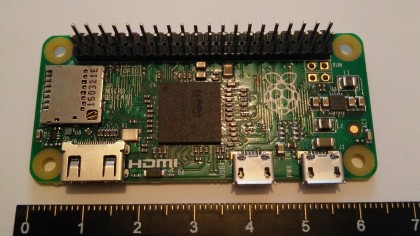
1. Solder the GPIO
Before we can use the Raspberry Pi Zero, we will need to solder the GPIO, a series of 40 pins, onto the board.
These pins enable our Explorer pHAT add-on board to interact with the Raspberry Pi. For the best results use a blob of modelling clay to support the board while you solder. If you can't solder, ask a local hackspace, DIY expert or friends for help. You will also need to solder the header pins for the Explorer pHAT board.
If you're using another type of Raspberry Pi then you can skip this step, as the GPIO comes pre-soldered.

2. Hack the R2-D2 toy
We chose a small R2-D2 toy costing around £20 (around $30, AU$42). We started by removing all of the internal components, to see what room we had to hack. It was quite tight even for the Raspberry Pi Zero, so we chose to house the major components on the rear of R2-D2.
We removed R2-D2's legs and measured the size of our motors on the feet. Using a Dremel tool we carefully cut and shaped a space for the motors on each foot.
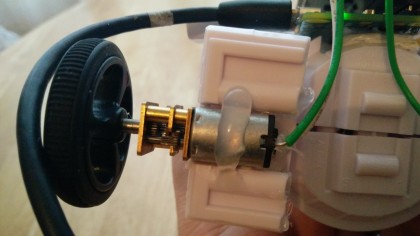
Before attaching the motors we soldered wires to the terminals for later use, so give yourself plenty of spare wire, and attach the wires for each motor to the Motor 1 and 2 header on Explorer pHAT. Use hot glue to secure the motors in place on the feet.

3. Let there be LED
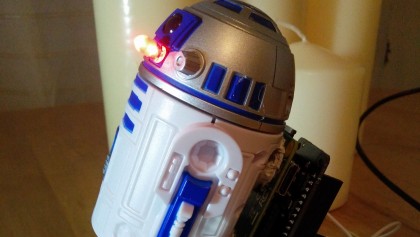
For added authenticity we drilled a hole in R2-D2's red eye socket, and replaced the plastic with an actual working red LED.
Inside R2-D2's head we used a terminal block, commonly used in electrics to secure wires without soldering, and secured the legs of the LED into each hole.
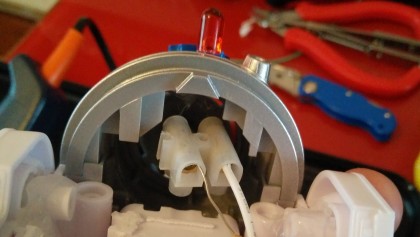
The long leg of the LED will receive 5V power from the Explorer pHAT via a 220-ohm resistor screwed into the other end of the block and linked to the Explorer pHat via a female to male jumper cable. The short leg will connect to Output 1 of the Explorer pHAT.
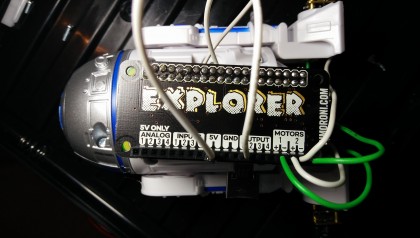
4. Power R2-D2 up
Attach the Explorer pHAT to the Raspberry Pi, then connect your peripherals before powering up the Raspberry Pi.
Once the Raspberry Pi has booted you'll need to have an Internet connection before proceeding. Open a terminal (its icon is a dark screen in the top left of your desktop), and type the following to install the Explorer pHAT software:
curl get.pimoroni.com/i2c | bash
You'll be asked a series of questions, to which you can answer yes, as it's quite safe in this instance. After a few moments the software will be installed, and to ensure that it has been done correctly now is a good time to reboot your Raspberry Pi. When done, return to the desktop.
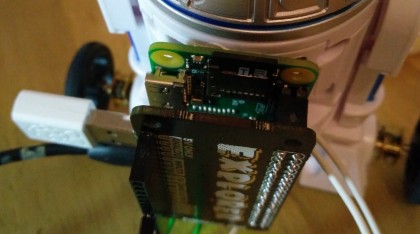
5. Coding R2-D2
To code our R2 unit we'll be using Python, a really easy to use language that is well suited to the Pi, and which the majority of the Raspberry Pi community uses as their primary language. To code in Python we need to open the Python3 application, which you can find in the Programming menu.
When Python3 is open, click on File > New Window to open a new blank document. Now save the project as R2P10.py before proceeding. Remember to regularly save your work – this is a good habit to get into, as it will limit any accidental deletions.
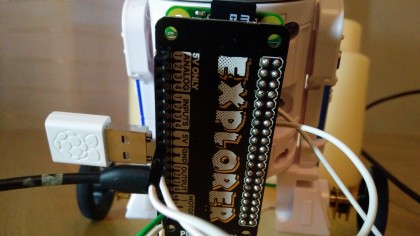
6. Import code
Our first three lines of Python code are imports – these bring in external libraries of code for our project to use.
import explorerhat
from time import sleep
from random import randint
Firstly we import the library for Explorer pHAT – this will enable our project to interface and use the board.
The next two imports are used to import one aspect of each library. From the time library we import the sleep function, used to control the pace of our code. From random we import a random integer generator, used later in the project.
7. More coding
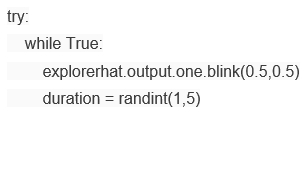
We now move to the main body of code (shown above).
Here we create a method to test our code, and inside it we use a loop that will run forever, while True; this loop will run the code to set output 1 of our Explorer pHAT so it blinks every half a second. We now create a variable, a container that can store any type of data – in this case we're using it to store a random number, an integer, between 1 and 5.
The indentation of code is important, and Python 3 will help you as you type.

8. Moving R2-D2
For our next section of code, we will turn on the motors and control R2-D2.
We start by turning both of our motors on and forward at 20% power, a nice glide for R2-D2 to move along on. If your motor is running in the wrong direction, swap the wires for that motor so that they're reversed in the Explorer pHAT.
With the motors on we use a delay, sleep, to prevent the motors stopping. We use the random number stored in the variable, duration, to control how long R2 will run for. Next we run one motor backwards to enable R2 to turn on the spot; this is also controlled for a set duration.

9. Testing your code
This next section of code exists outside of the while True loop.
We started the code by using a test, try, now we need to add an exception – in this case when we press CTRL+C to stop the code running. When this occurs we tell the motors to turn stop, and for the output to turn off, stopping R2-D2's eye blinking.
Save your code and prepare to test your R2 unit! For the best results hold on to the R2-D2 unit, otherwise it will run away.
10. Control R2-D2
With our code complete you can now run the code by clicking on Run > Run Module in the menu. R2-D2 should move forward for a few seconds, then turn left.
This code will then repeat until you press CTRL+C. For a truly portable solution you can use a USB battery pack, such as those used to charge your mobile devices, to power the Raspberry Pi. You can also control R2 over a Wi-Fi connection using technologies such as SSH and VNC.
And there you have it – your very own R2-D2 unit, ready to respond to your commands!
- Find out what else you can do with the tiny PC with our collection of Raspberry Pi Projects
Sign up for breaking news, reviews, opinion, top tech deals, and more.
You are now subscribed
Your newsletter sign-up was successful