How to build your own Raspberry Pi NAS
Network attached Pi
You can flesh out OpenMediaVault and add a bunch of features to make it more usable. The distribution supports quite a handful of official and third-party plugins, which you can install and enable according to your needs and requirements.
To browse a list of all the officially supported plugins, head to System > Plugins. The page lists over 40 plugins, which are divided into categories such as Administration, Backup, Downloaders, Filesystems, Network and so on. One useful option is the downloader plugin, which can download files into the NAS, and includes several downloaders such as Aria2 and Youtube-DL.
This plugin is well complemented by the transmission plugin, which downloads torrents via the Transmission app. You should also enable the clamav plugin, which gives you the ability to scan your NAS for viruses.
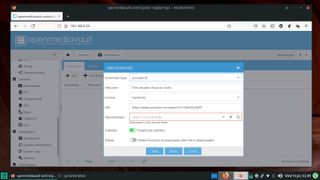
To enable a plugin, simply click on the corresponding checkbox. You can even toggle multiple plugins in one go. After selecting the plugins you wish to enable, click the Install button. OpenMediaVault then downloads the plugins from the Raspbian repositories via the APT package management system and enables you to track its progress.
Depending on the number of plugins you're installing and their size, this process could take some time to complete.
Once the plugins have been downloaded and installed, they append the OpenMediaVault administration interface and create an entry for themselves.
For example, the downloader plugin installs itself under Services > Downloader. Switch to the new section when you want to configure different aspects of the plugin. Each plugin has its own configurable elements.
Are you a pro? Subscribe to our newsletter
Sign up to the TechRadar Pro newsletter to get all the top news, opinion, features and guidance your business needs to succeed!
Stream music
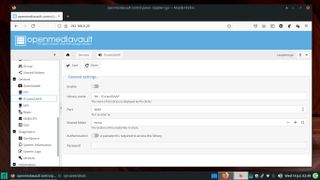
If you've stored music on the NAS, wouldn't it be really cool if you could stream it across the network straight from the NAS itself? Using the forked-daapd plugin, you can do just that. To use the plugin, just install it like any other; this adds a new entry under the Services section, labelled iTunes/DAAP.
Before you can stream music, you need to configure the plugin by pointing it to the shared folder on the NAS that contains the music files. Head to the plugin's page and use the Shared Folder drop-down menu to select the folder that houses the music.
Once you've saved the changes, use a player such as Rhythmbox, Amarok, Banshee and so on, which will automatically pick up the DAAP server running on your NAS and enable you to listen to the tracks on the NAS.
Use the DAAP Media Player app to listen to the music on an Android device. In addition, you can also install the MiniDLNA plugin to connect to your NAS from DLNA clients. Just as with DAAP, after installing the MiniDLNA plugin, you have to head to Services > DLNA > Shares, and click on Add to point to the shared folder that contains the music.
You can then use the BubbleUPnP app to convert your Android phone into a DLNA compatible device, so that it can browse the library and stream music to and from your now-DLNA-compatible NAS.
Set up a RAID
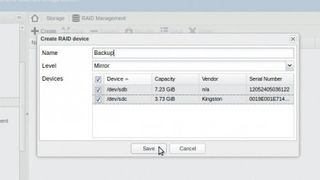
1. Select RAID Level
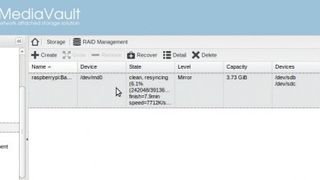
If you wish to arrange the disks into a RAID device, head to Storage > RAID Management and click the 'Create' button. In the dialog box that pops up, select the devices you want to use in the RAID, as well as the RAID level. Then enter the name you wish to use for the RAID device in the space provided, and click the 'Save' button.
2. Initialise the RAID
After you've created a RAID, OMV asks you to wait until the RAID has been initialised before you proceed to the next step and create a filesystem. You also get a notification to save the changes in order for them to take effect. The RAID Management page now lists the newly created RAID device.
3. Create a filesystem
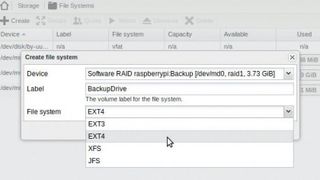
To use the RAID array, you need to create a filesystem. Head to Storage > Filesystems and click the 'Create' button. In the dialog box that pops up, select the device you want to format using the pull-down menu, which will have the RAID device you've just created in the list. Then label it and select one of the supported filesystems.
4. Mount the device
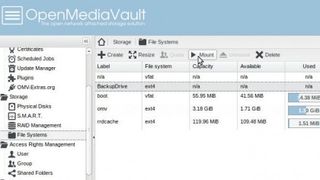
After the filesystem has been created and the disk has been initialised, the RAID device will be listed with other devices in the Storage > Filesystems page. To use the drive, select it, then click the 'Mount' button to bring the disk online. You can add new disks to a RAID device by selecting the Storage > RAID Management > Grow option.
Enable shares
1. Enable Samba
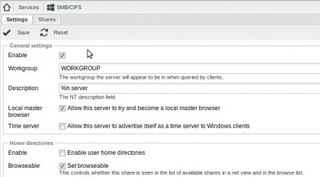
OpenMediaVault supports several sharing protocols but we'll use the popular SMB protocol commonly known as Samba, which works across devices. To activate the service, head to Services > SMB/CIFS and click the 'Enable'. The other settings mentioned on the page are optional, so leave them for now. When you're done, click the 'Save' button.
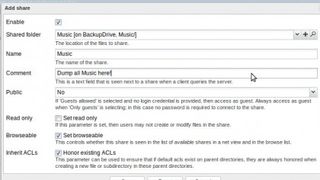
2. Add folders
Next, you have to add the shared folders as Samba shares. To do this, switch to the Shares tab and click the 'Add' button. In the window that pops up, select a shared folder from the pull-down list or click on the '+' button to create a new one. You also have to give the folder a name, which identifies the folder on the network.
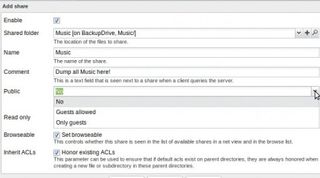
3. Define permissions
When adding a Samba folder, OpenMediaVault makes sure it follows the permissions defined when you created the shared folder. Select the Guests Allowed option from the Public pull-down menu to make the folders public. Also, if you click the 'Set Read Only' checkbox, OpenMediaVault ensures that no user can modify the contents of the folder.
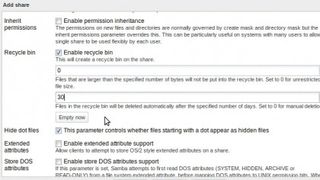
4. Other settings
Take some time to review the other settings on the page. One useful option that isn't enabled by default is the Recycle Bin. When this is enabled, any file that's deleted from the NAS is moved into a virtual Recycle Bin inside the shared folder. Save the configuration when you've added them all to restart the Samba service.
- Enjoyed this article? Expand your knowledge of Linux, get more from your code, and discover the latest open source developments inside Linux Format. Read our sampler today and take advantage of the offer inside.

