How to set up a Raspberry Pi-powered cloud service
Your very own cloud

Do you want the convenience of an omnipresent Dropbox-like storage service without doling out wads of cash and your data to a third party? OwnCloud is one of the best pieces of opensource software to help you create your own private and protected cloud-sharing service.
Using OwnCloud, you can sync and share your private data, and access it from any device connected to the internet. For added security, OwnCloud can also encrypt your files. The software can handle files in a variety of formats and you can extend its usability by adding a number of other apps.
As with other online cloud storage services, you can sync files on OwnCloud either using the web browser or a desktop client on Windows, Mac and Linux, as well as mobile clients for Android and iOS devices. Furthermore, your OwnCloud server keeps older versions of all changed files and enables you to revert to an older version without much effort.

1. Lay the groundwork
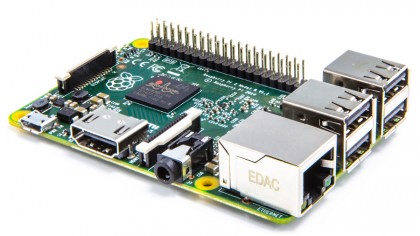
In this tutorial, we're setting up the OwnCloud server on top of the Raspbian distribution for the Raspberry Pi. The server software has modest requirements and it performs well, even on the Raspberry Pi Model B, in certain small and controlled environments, such as your house.
You also need a USB portable disk for storing the data. For maximum reliability and performance, it's best to use a self-powered disk that doesn't draw power from the Raspberry Pi. Before you begin setting up the server, make sure the Raspberry Pi has a static IP address.
The easiest way to do this is to tie an IP address to your Raspberry Pi's unique MAC address in your router's admin page. Here, we're assuming the Raspberry Pi is at 192.168.3.111 – change as appropriate.
2. Install OwnCloud
Raspbian is based on the Debian OS, so we can pull in packages from OwnCloud's Debian repository. Fire up a terminal and add the OwnCloud repositories with:
Get daily insight, inspiration and deals in your inbox
Sign up for breaking news, reviews, opinion, top tech deals, and more.
$ wget http://download.opensuse.org/repositories/
isv:OwnCloud:community/Debian_7.0/Release.key
$ sudo apt-key add - Release.key
You can now refresh the repositories with:
$ sudo apt-get update
Now install the OwnCloud server and all its required dependencies as follows:
$ sudo apt-get install owncloud.
This also pulls in and sets up the MySQL database, and you're asked to set up a root password.
In addition to installing the required components, the above command automatically confi gures the Apache web server to talk to the OwnCloud installation. You need to enable certain Apache modules. In a terminal, enter:
$ sudo a2enmod headers rewrite env
Then restart Apache using:
$ sudo apachectl restart.
You have to tweak the configuration file of PHP if you wish to upload fi les that are greater than 2MB in size. To do that, open the PHP configuration file, 'php.ini', housed under '/etc/php5/apache2', in a text editor. Look for the 'upload_max_fi lesize' and 'post_max_size variables' and change their value from '2M' to something like '1024M' or even '2G'.
Optionally, on larger installations, you can also install the APC PHP accelerator to make the OwnCloud installation snappier. Pull in the components with "sudo apt-get install php-apc" and then open APC's configuration file and add:
$ sudo nano /etc/php5/conf.d/20-apc.ini
extension=apc.so apc.enabled=1 apc.shm_size=12M
Then bring the cache online by restarting Apache with:
$ sudo apachectl restart
3. Mount the drive
Now that the server is set up and configured, it's time to prepare the storage medium. Plug the USB disk into the Raspberry Pi and enter "sudo blkid" in a terminal. The USB disk is probably mounted as '/dev/sda1' if you don't have any other USB disks attached.
Make a note of the corresponding UUID, which looks something like '6154-F660'. Now create a directory to mount this drive using:
$ sudo mkdir /media/owncloud
Then mount the drive with:
$ sudo mount -t vfat -o umask=007,auto,uid=33,gid=33 /
dev/sda1 /media/owncloud
The above command assumes your drive has a FAT32 filesystem and is mounted at '/dev/sda1'. Once the drive is mounted correctly, you can edit the 'fstab' file to make sure it's automatically mounted:
$ sudo nano /etc/fstab
UUID=6154-F660 /media/owncloud/ vfat
rw,umask=007,auto,uid=33,gid=33 0 0
4. Configure the cloud
That's all there is to installing the server components. You're now all set to configure your cloud. Launch a web browser and navigate to the OwnCloud installation instance at '192.168.3.111/owncloud'. Because this is a brand new installation, you're asked to create a new user account for the OwnCloud administrator.
Next, we need to ask OwnCloud to use the MySQL database and store files under the mounted USB drive. For this, click the 'Storage & Database' pull-down menu. Then enter "/media/ owncloud/data" in the text box corresponding to the 'Data Folder' entry and select the 'MySQL/MariaDB' option in the 'Database' section.
You're asked to enter the connection details of the database server, so just enter "localhost" as the host and "root" as the username, along with the password you configured when the database was pulled in along with OwnCloud.
That's it – you've set up OwnCloud. You can now log into your cloud server as the administrator using the credentials you've just created.

5. Change settings
While you can start using the server to upload and download files straight away, let's take a moment to get your house in order. For starters, when you log into the OwnCloud server, click the pull-down menu next to your username and click 'Personal'.
Here you can change the settings for your account, such as the login password and display name. You can also add a profile picture and configure how you'd like to be notified about certain actions.
Also, if your cloud is going to be used by multiple people, it's advisable to add users and organise them into different groups. To do this, select the 'Users' option from the pull-down menu. While adding users, you can restrict their storage space and even share your admin responsibilities with other users, and mark certain users as admins for a particular group.
With almost two decades of writing and reporting on Linux, Mayank Sharma would like everyone to think he’s TechRadar Pro’s expert on the topic. Of course, he’s just as interested in other computing topics, particularly cybersecurity, cloud, containers, and coding.
