How to set up iCloud Family Sharing on a Mac
We are family

iCloud Family Sharing
Remember when you were the only person in your family who had Apple hardware? Those days, we're sure, are a distant memory now: your partner's been iPhoned up for years, and between the various members of your household you've probably amassed everything from iPods to iMacs or MacBook Pros for work, study or play.
It's great that everybody's got the Apple bug, of course, but how do you ensure that stuff bought on Apple thing X can be shared on Apple thing Y, or that everybody is kept in the loop when it comes to family photos?
The short answer is Family Sharing (for the iCloud), and the long answer is Family Sharing too. What this does is link everybody else's Apple ID to yours, so when they buy an app or something from iTunes it's your card, as the family organiser, that takes the hit.
- Check out our Mac help and support guides for more Mac tips and tricks
Family Sharing enables you to approve or deny your kids' requests for in-app purchases; to watch or listen to purchased content from your iOS devices or Macs on Apple TV and vice versa; to share the same Mac and iOS apps among multiple devices; and to have a single photo album that's shared by everybody.
You can also hide content from family members, which is handy if you want to share your videos of Peppa Pig but not the Kill Bill movies.
As you'll see, Family Sharing is simple to set up; usually it's just a matter of providing the appropriate Apple IDs for the people you want to share with. You can also create accounts for under-13s, who aren't allowed iTunes accounts, but there are two caveats: you need a credit card (not a debit card) to prove that you're a grown-up, and those accounts can't be removed from Family Sharing without a phone call to Apple Support.
Share (almost) everything
We think Family Sharing is great, but it does have limits. Extra iCloud storage you've paid for can't be divvied up between your loved ones as it's tied to your account. You can't share a personal Apple Music subscription either: you'll need a family sub to play it on more than one device at a time (to get one, open iTunes and go to Store > View Account, then click Manage next to Subscriptions).
Family Sharing doesn't work across regions, so if your kids are in the US, say, they can't access your purchases from Apple's UK stores, and it only supports devices that run OS X 10.10 Yosemite or iOS 8 or later versions.
- Check out our range of guides on how to use iOS 9
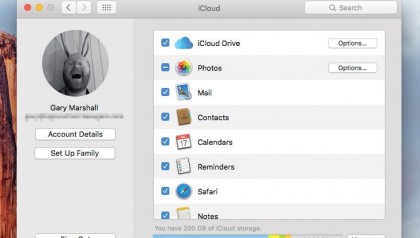
1. Sign in to iCloud
Family Sharing links the Apple ID of each family member with the iCloud account of your chosen family organiser, so check you're signed in as that person in System Preferences' iCloud pane. Family Sharing can also be set up in iOS.
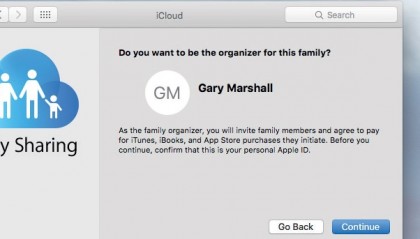
2. Say bye to your salary
The family organiser is in charge of managing Family Sharing.
Click Set Up Family on the left-hand side of the iCloud preferences pane. By proceeding, you agree to pay for your family's purchases from the iTunes, iBooks or App Stores.
3. See what you can share
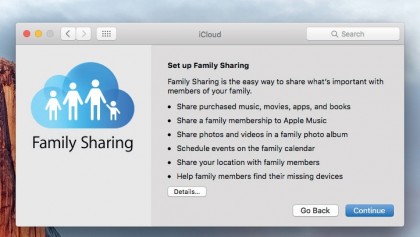
Some things can't be shared – iCloud storage is tied to individual accounts, for example – but Family Sharing covers the essentials: music, movies, iBooks, apps, shared photo albums, and a calendar and a reminders list for the group.
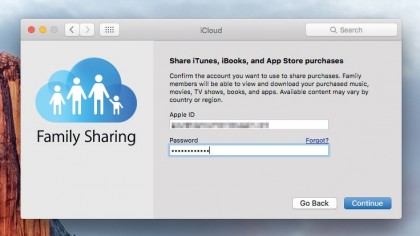
4. Confirm your identity
Apple plays it safe: even though you're already signed in to iCloud, you'll need to confirm your identity by entering your Apple ID and its password – a good thing given we're talking about using your payment card.
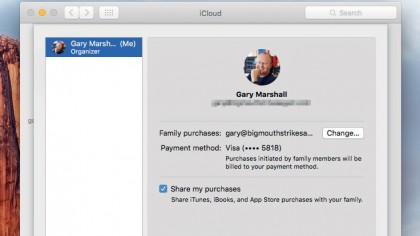
5. Check your settings
By default, Family Sharing will bill your family's purchases to whatever payment card it has on file for you as the family organiser. You can change that here.
To make an Apple ID for an under-13 you'll need a credit card, not a debit card.
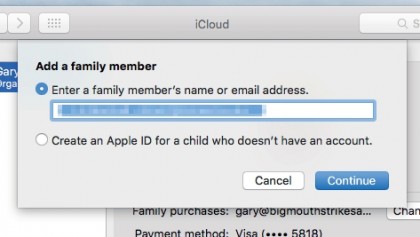
6. Add the first member
Click the + button and you can either enter the details of a family member – their name or email address associated with their Apple ID – or you can create an ID for a child.
Here we're adding our spouse by giving their email address.
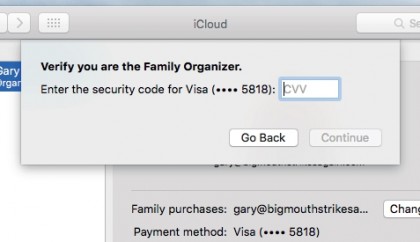
7. Play your cards right
Once you've chosen to add a new family member, Apple asks for yet more proof of identity: this time in the form of the CVV code, which is the last three digits on the back of your payment card.
You can't proceed without entering this.
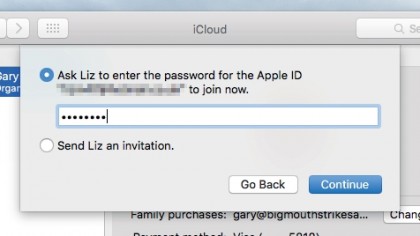
8. Reply to the invitation
Your nominated family member can either enter their iCloud password in person, as we're doing here, or you can opt to send an invitation, which appears on their device.
They'll only be added to the family if they accept the invitation.
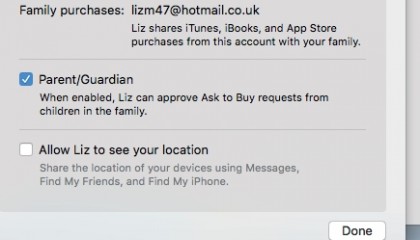
9. Set a person's abilities
After adding someone, you can specify additional options for them. Put a check mark next to 'parent/guardian' to give them the ability to approve children's Ask to Buy requests.
You can also share your location with them.
- Enjoyed this article? Get more tutorials, guides, and tips on how to get the most from your Apple devices inside MacFormat. Take advantage of an exclusive offer in our sampler today.

Writer, broadcaster, musician and kitchen gadget obsessive Carrie Marshall has been writing about tech since 1998, contributing sage advice and odd opinions to all kinds of magazines and websites as well as writing more than a dozen books. Her memoir, Carrie Kills A Man, is on sale now and her next book, about pop music, is out in 2025. She is the singer in Glaswegian rock band Unquiet Mind.