How to set up your Raspberry Pi in Windows
Use Windows to install Raspbian
It's now time to launch the executable we unzipped from the download. Windows will probably warn you that there's a risk to running something downloaded from the internet. If you want to be certain your files aren't infected with some kind of virus, you ought to scan it with your virus checker.
Make the most of this, because after you've got used to Linux, you won't have to worry about your files getting infected again.
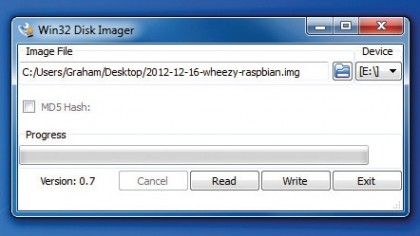
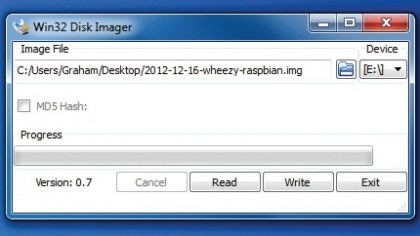
When the main application window opens, you'll notice a very sparse interface that isn't that clear. There are two buttons, one for locating the image file and another – just to the right of this – is for selecting the device where you're going to write code from the image file.

Click on the small folder icon and use the file requester that appears to locate your Raspbian image – the requester is already configured to show only files with an IMG file type, so if you can't find it, this will be the problem.
Secondly, use the tiny 'Device' button to select the destination. As all data on the destination is going to be overwritten, it's important to get this right, and it's the reason why we checked for the drive letter in the previous step. You need to make sure it's the same. Win32 Disk Imager normally guesses this correctly, but it's worth checking.
Write the data
When you've double-checked everything is configured correctly, click on the 'Write' button. A warning will pop up to say that writing to a physical device can corrupt the device, but you can safely ignore this.
Your external storage is going to be written to at its lowest level, changing the partition table and some of the formatting, which is why this warning appears. But this low-level is also necessary to get the RPi booting.
Get daily insight, inspiration and deals in your inbox
Sign up for breaking news, reviews, opinion, top tech deals, and more.

After saying 'Yes', the first thing you should check for is any access LED on your USB device. If this starts flickering, you've got the correct device and you can go and make yourself a drink while the data is written.
If not, you need to make triple sure you've got the correct device because this kind of low-level copy on an external hard drive could make it unusable. If you need to stop to check, hit the 'Cancel' button before the process gets any further.
Writing the image can take around 20 minutes, depending on your hardware, and you'll see the progress indicator in Win32 Disk Imager update as well as a small text field showing you how many megabytes of data are being written per second.
Current page: 2. Launch Win32 Disk Imager and write the data
Prev Page 1. Download the tools Next Page 3. Checking the installation and backing up