Speed up your internet connection
One of the main benefits of Windows 10 is that the operating system takes care of any housekeeping by default, constantly scanning the internet for the latest updates and drivers for your software.
This means you will get the most stable, safest and up-to-date experience possible. But if your internet connection isn't the fastest, all that behind-the-scenes churning can disrupt your web browsing experience.
Fortunately, with a little know-how it's possible to lighten your connection's load and free it up to concentrate on the task at hand. But before you begin tinkering in the settings menu, the first thing you should do is test the speed of your connection, to ensure it really is your network at fault, rather than, say, the servers carrying the video you're trying to stream.
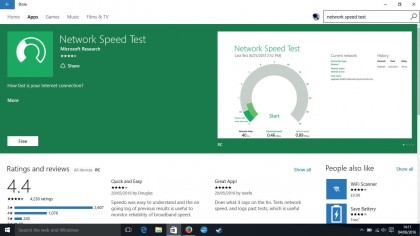
1. Download the app
There are many speed-testing apps out there – they work by connecting your device to servers across the globe, and measuring how long it takes to send and receive a response.
Microsoft recommends their own Network Speed Test app, which is free from the Windows Store. There are flashier ones out there, but this one is clear and tells you everything you need to know.
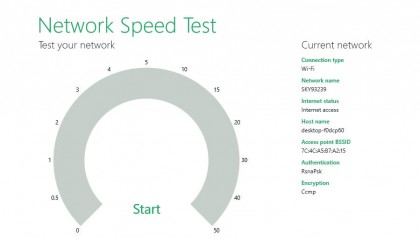
2. Checking your speed
Click 'Start' and the app will test your connection's download speed, upload speed and its reaction times. The latter two are important if you play a lot of online games or share large files, but typically internet connections are set up to be much faster at downloading than uploading.
It's rare to get the advertised 'best case' speeds, but you can hope for over 50%.
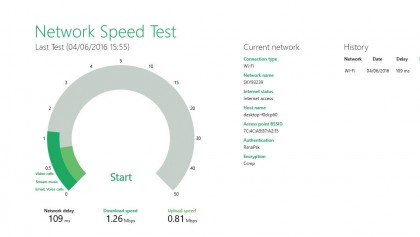
3. Analysing the results
Our recorded download speed (the dark green bar) is a paltry 1.26MBps – well below our advertised 6MB speed. As the guide explains, we can stream music or moan about it over Skype, but high-definition video is out of the question.
The simpliest fix is to switch to a wired connection or move your PC closer to the router. But if neither is an option...
4. Close unnecessary programs
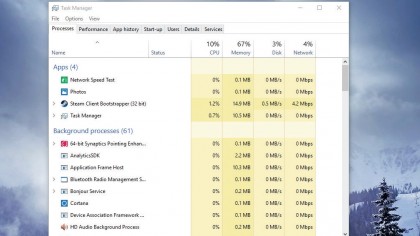
…it's time to get creative. Your first port of call should be the Task Master, accessed by pressing Ctrl + Alt + Del. Here we can see if there are any unnecessary programs hogging bandwidth.
The column to look at is 'Network' – we can see Steam is busy downloading a hefty update. Close it, or wait until it finishes. Also check other devices connected to the WiFi network.
5. Turn off peer-to-peer updates
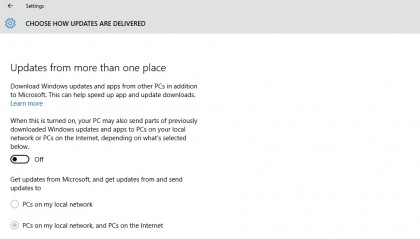
To speed up the rate at which users get updates, Windows 10 uses peer-to-peer technology. This means instead of downloading everything from a central server, your PC sends and receives updates from other users' devices.
If you can't spare the bandwidth, switch it off – 'Settings > Update & Security > Advanced Options > Choose how updates are delivered'.
6. Switch off updates
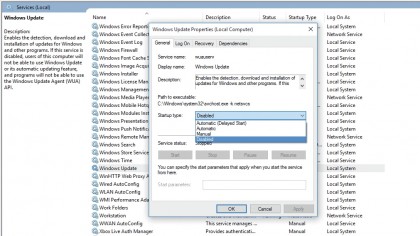
Switching off automatic updates isn't recommended, but if you need the extra zip, you can do so by typing Services into the search bar, which will bring up this screen.
Scroll down to Windows Update, double-click it and change 'Startup type' from 'automatic' to 'disabled' and then press stop. When you're finished, you can reinstate updates by selecting 'start'.
7. Set troublesome connections to 'metered'
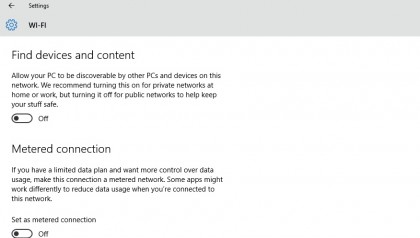
Here's a sneaky trick if there's just one WiFi connection (e.g. a workplace) in your life giving you trouble. Go to 'Settings > Network & Internet > WiFi > Advanced options' and activate the 'Set as metered connection' option.
Until you say otherwise, this will flag the connection up as a pay-as-you-go connection. It isn't, but it'll treat it like one – which means no automatic updates.
8. Success!
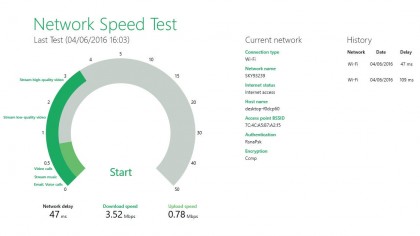
If you've followed all these steps, you should find your internet connection is in much better health – we're up to 3.52MBPs (megabytes per second) now.
Note that the Network Speed Test App also keeps a record of your past speed tests down the right hand side of the screen. You can clear this by clicking on the menu icon, where the option will become available.