How to turn the Raspberry Pi into a wireless printer server
Use CUPS
The CUPS printing server installs a bunch of command-line tools (see Administering CUPS later in this guide) for interacting with the server and any connected printers.
You can send files to the printer using the lp command, such as: $ lp /docs/a_text_file.txt
If you have multiple printers, you can print to a specific printer by specifying its name, such as:
$ lp /docs/another-text.txt -d EPSON_LX-300
When you use the commands with a PDF or image file, CUPS converts the files using the printer drivers. You can also use Python to generate printer-friendly content.
This is best done by using the PyCups library, which provides Python bindings for the CUPS server. Install the library with:
$ sudo apt-get install python-cups
Sign up to the TechRadar Pro newsletter to get all the top news, opinion, features and guidance your business needs to succeed!
Then create an example.py Python script with:
import cups
conn = cups.Connection()
printers = conn.getPrinters ()
for printer in printers:
print printer, printers[printer]["device-uri"]
The script fetches details about all the printers managed by CUPS and prints their name and device address to the screen. When you execute the script, it produces an output similar to the following:
EPSON_LX-300 usb://EPSON/LX-300+?serial=L010209081
RICOH_Aficio_SP_100 usb://RICOH/
Aficio?serial=T382M977983
You can also print files from the Python script using the printFile function, by specifying them in the format:
$ printFile (name of the printer, filename to print, job title,
options)
Open the previous example.py script and add the following lines to it:
file = "/home/pi/testfile.txt"
printer_name=printers.keys()[0]
conn.printFile (printer_name, file, "Project Report", {})
The first line saves the name of the file you wish to print inside a variable named file. The second line fetches the list of printers and saves the first name, which is the default printer inside a variable named printer_name. The third line then uses the first two variables and prints the file in the specified format.

Converting from HTML to PDF
A more interesting way to convert HTML pages into PDF file is to use the wkHTMLtoPDF toolkit, which passes on the PDF to the printer from within a Python script.
Before you can install the toolkit, first install the required components and a set of fonts to process the web pages:
$ sudo apt-get install xvfb xfonts-100dpi xfonts-75dpi xfonts
scalable xfonts-cyrillic
Then install the tool with
sudo apt-get install wkhtmltopdf
before installing the Python wrapper with:
$ sudo pip install git+https://github.com/qoda/pythonwkhtmltopdf.git
You can now use the following to convert a web page into a PDF file:
from wkhtmltopdf import WKHtmlToPdf
wkhtmltopdf = WKHtmlToPdf (
url='http://www.techradar.com',
output_file='/home/pi/docs/lxf.pdf',
)
wkhtmltopdf.render()
When executed, the above code saves the main techradar into a PDF file under the /home/pi/docs directory.
Refer to the listing below to see how all the pieces fit together – wkHTMLtoPDF converts a page into a PDF and prints it out.
#!/usr/bin/env python
import cups
from wkhtmltopdf import WKHtmlToPdf
wkhtmltopdf = WKHtmlToPdf(
url='http://www.techradar.com',
output_file='/home/pi/techradar.pdf',
)
wkhtmltopdf.render()
conn = cups.Connection()
printers = conn.getPrinters()
for printer in printers:
print printer, printers[printer]["device-uri"]
file="/home/pi/techradar.pdf"
printer_name=printers.keys()[0]
conn.printFile (printer_name, file, "PDF Print", {})
The script first converts the techradar home page into a PDF. It then connects to CUPS, prints a list of attached and configured printers on the screen, and uses the default printer to print the PDF. The PyCups library is chockfull of methods (https://pythonhosted.org/pycups) that you can use to control all aspects of the CUPS print server.

Administering CUPS
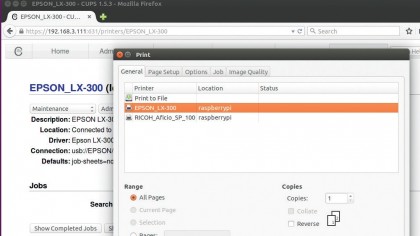
In addition to adding printers, the CUPS web interface provides access to various other useful settings. You can administer most of the printing tasks from the Administration tab, which houses settings under various different categories.
Under the Server section, for instance, you can find options to tweak the configuration of the server as well as view various types of access and error logs.
Using the 'Manage Printers' button under the Printer section, you can control the settings for individual printers. Every printer's page has options rolled under two pull-down menus labelled Maintenance and Administration. From under the Maintenance menu, you can print a test page, a self-test page, clean print heads and manage print jobs.
To customise the behaviour of the printer, use the Administration menu to tweak its default options, set it as the default printer, restrict user access, modify its settings or delete it from the CUPS server altogether. Besides the Administration tab, there are a couple of other important tabs we should mention as well.
For starters, you need to switch to the Classes tab for printer class management. A class is a collection of several printers. When you send print job to a class, CUPS automatically assigns the job to the next available printer, instead of waiting for a specific printer. Then there's the Jobs tab, which enables you to view and manage all print jobs that are currently in the print queue.
Current page: Print from Python
Prev Page Turn the Raspberry Pi into a printer server Next Page How to add a printerWith almost two decades of writing and reporting on Linux, Mayank Sharma would like everyone to think he’s TechRadar Pro’s expert on the topic. Of course, he’s just as interested in other computing topics, particularly cybersecurity, cloud, containers, and coding.
