How to unlock hidden OS X features
Hack your Mac

Delve into System Preferences or the preferences of many Mac apps and you'll find a lot you can customise. Curiously, though, many commands and features are hidden from you, especially when it comes to Apple's own apps. Outside of Apple, no one knows why.
Perhaps these things aren't considered fully baked, or Apple believes they would negatively impact the user experience. We disagree — many of these hidden features are so good we actually feel a bit lost on a Mac that doesn't have them activated.
Mostly, the commands in this walkthrough require using Terminal, found in /Applications/ Utilities. You'll need to be careful when typing them because even a missing character may result in an error message. Note that if you want to reverse one of these commands you can; in some cases, do so by entering the same command again, but with capitalised values reversed (so YES becomes NO, and TRUE becomes FALSE).
Also, if you want to run a command multiple times, such as the one in the first step, you can go back through your previous entries by pressing Up key on your keyboard.
Additionally, rather than typing a path to a folder, such as in step 5, just drag the folder from Finder onto Terminal's window to have the full path to that folder added at the insertion point.
Deeper secrets
There are many other hidden features for the Dock. Single app mode, in which clicking an app's icon hides other apps, can be activated with defaults write com.apple.dock single-app -bool TRUE; killall Dock.
You can have the Dock only show apps that are open with defaults write com.apple.dock static-only -bool TRUE; killall Dock, and remove all apps that normally stick around in the Dock by entering defaults delete com.apple.dock persistent-apps. (Only do that when sure!)
Are you a pro? Subscribe to our newsletter
Sign up to the TechRadar Pro newsletter to get all the top news, opinion, features and guidance your business needs to succeed!
Using defaults write com.apple.dock scroll-to-open -bool TRUE; killall Dock, you can use scroll gestures on top of icons, for example to activate Exposé for an app, or to open a stack. If you find the auto-hidden Dock slides back into view too slowly, enter defaults write com.apple.Dock autohidedelay -float 0; killall Dock.
Entering defaults delete com.apple.dock; killall Dock restores app icons that were in the Dock when your Mac was new.

1. Add spacers to the Dock
Enter defaults write com.apple.dock persistent-apps -array-add '{"tile-type"="spacer-tile";}'; killall Dock to add a blank tile to the Dock.
Drag it to organise Dock icons in groups. Drag it out of the Dock to delete it.
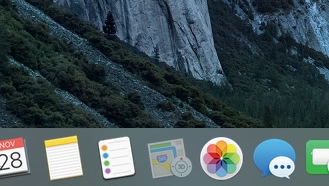
2. Distinguish hidden apps
Enter defaults write com.apple.Dock showhidden -bool YES; killall Dock and icons of apps you hide (using Command+H) will be semi-transparent – useful, not least because hidden apps don't appear in Mission Control.
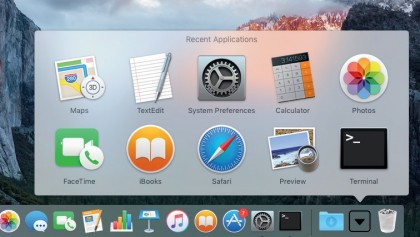
3. Create a 'recents' stack
Enter defaults write com.apple.dock persistent-others -array-add '{"tile-data" ={"list-type"=1;}; "tile-type"="recents-tile ";}'; killall Dock to add a stack that contains recently used apps to the Dock.
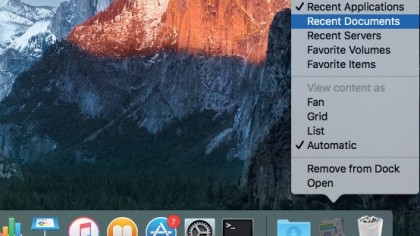
4. Customise the stack
Hold Ctrl and click your stack to choose whether it displays recent apps, documents, servers, favourite volumes, or favourite items, and to adjust its presentation. Enter step 3's command to have more than one of these.
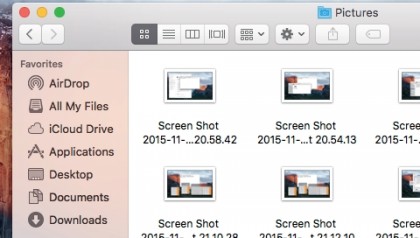
5. Move your screenshots
Screenshots are saved to your desktop by default. Change this with defaults write com.apple.screencapture location path; killall SystemUIServer. Replace 'path' with your preferred location, such as /Pictures.
6. Normalise Help Viewer
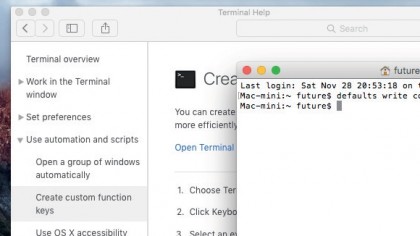
The Help window sits above every other window, which is irksome if you have limited screen space. Make it act like a standard OS X window by entering defaults write com.apple.helpviewer DevMode -bool TRUE.
7. Make paths prominent
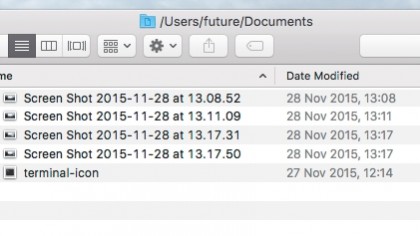
If you want a folder's path to be more prominent than with View > Show Path Bar, enter defaults write com.apple.finder _FXShowPosixPathInTitle -bool YES. Paths are then be displayed in Finder title bars.
8. Expand Save dialogs
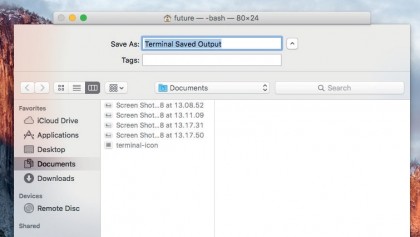
If you dislike Save dialogs defaulting to the collapsed view, force them to be expanded with defaults write -g NSNavPanelExpand edStateForSaveMode -bool TRUE'. This takes effect in each app when you next save.
- Enjoyed this article? Get more tutorials, guides, and tips on how to get the most from your Apple devices inside MacFormat. Take advantage of an exclusive offer in our sampler today.