How to use Macrium Reflect Free to back up your PC
Make a drive image
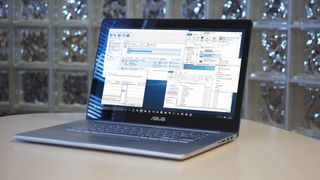
How to use Macrium Reflect Free
Drive images are an essential part of your backup plan because they take an exact copy of your entire hard drive – the problem with the Windows Backup tool is that each drive image it takes is a completely new copy of your drive, taking time to complete and eating up precious hard-drive space in the process.
Macrium Reflect Free offers a number of advantages over Windows Backup, most notably support for differential backups. These only record the changes made since the last full backup was taken, which not only speeds up the backup process, but also leaves more free space on your backup drive too.
In this tutorial we'll show you how to set up Reflect Free to back up your drive, then – if the worst happens – restore the latest backup so you can quickly recover from a crash or simply undo your most recent changes.
Check out our review for the non-free version of Macrium Reflect.
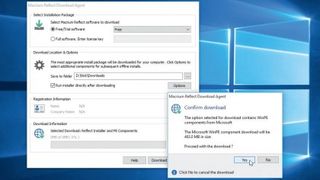
1. Download Macrium Reflect
Download the program installer (ReflectDL.exe) from the Macrium Reflect website by clicking the green 'Download Now' link. Once saved, double-click the file to open the Download Agent.
Make sure 'Free' is selected, and that the 'Selected Download' reads 'Reflect Installer and PE Components' – if not, click 'Options' to select it. Click 'Download' followed by 'Yes'.
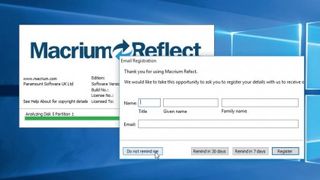
2. Complete installation
Once the files have downloaded, click 'Next' and follow the setup wizard. If you don't want to, you don't need to register to use the product.
After, click 'Finish launch Reflect' from the Start menu by typing reflect into the search box. When prompted again to register, simply click 'Do not remind me' to go to the main screen.
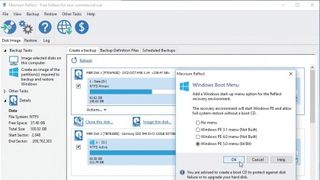
3. Set up rescue options
The first step is to provide recovery options allowing you to restore your backup should Windows fail to load. Open the 'Other Tasks' menu. To add an option to launch 'Reflect' when your PC starts, choose 'Add Recovery Boot Menu Option…' and follow the prompts.
Select ' Windows PE 5.0' if you're running Windows 8 or later; 'Windows PE 3.1' for Windows 7 or earlier. Click 'OK'.
4. Prepare boot media
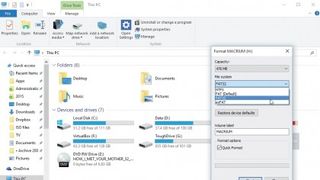
You should also create a rescue disc for added insurance against hard drive failure. You'll need a blank CD or DVD, or a small (512MB or larger) USB flash drive. The flash drive needs to be blank and formatted correctly.
Plug it in, open File Explorer, right-click the drive and choose Format. Select 'FAT32' under 'File System' and click 'Start'.
5. Create rescue disc
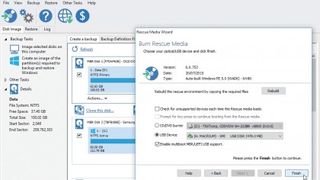
Now select 'Other Tasks > Create Rescue Media' in 'Reflect'. Verify the PE version is correct (see step three) and click 'Change PE Version' if necessary. Click 'OK' followed by 'Next', verify core drivers (network and disk primarily) are selected and click 'Next'.
Choose your media (CD or USB), tick 'Enable multiboot…' if using USB and click 'Finish'.
6. Take first backup
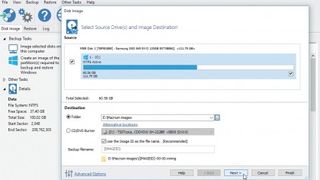
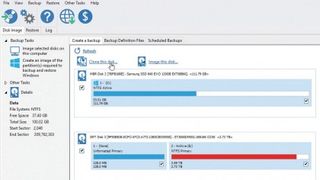
Next, click 'Create an image of the partition(s) required to backup and restore Windows' under 'Backup Tasks'. Click the '…' button to select a dedicated folder on your backup drive.
Click 'Advanced Options', select 'Auto Verify Image' and tick the 'Verify image…' box. Use 'Comments' to help identify the backup. Click 'OK' followed by 'Next' .
7. Choose backup type
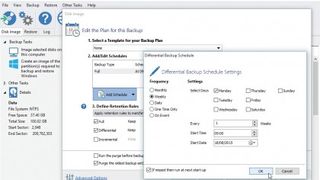
The default backup settings will use a mixture of full and differential backups to give you a choice of restore options going forward. Click 'Add Schedule > Full' – by default, a monthly schedule is set, so click 'OK' (or tweak if necessary).
Now click 'Add Schedule > Differential' to create a weekly schedule. Click 'Next', review your settings and click 'Finish'.
8. Run backup
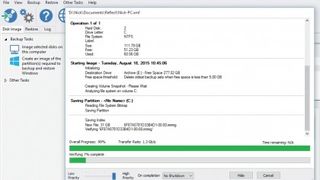
Give your backup a suitable name, make sure both boxes are ticked and click 'OK'. You'll be prompted to enter your account password to allow the schedule to be set, so Reflect can back up automatically in the background.
Do so, then click 'OK' and wait while the first backup is taken. Once complete, it will verify the image isn't corrupt – your PC is now protected!
9. Update your backup
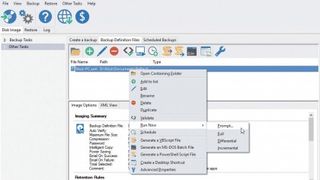
Reflect will now update your backup to the schedule you chose earlier, but you can also create backups manually whenever you want – just before installing a major update, for example.
To do so, switch to the 'Backup Definition Files' tab, right-click your backup XML file and choose 'Run Now > Prompt'. Choose 'Full' or 'Differential,' add a comment, then click 'Finish'.
10. Restore options
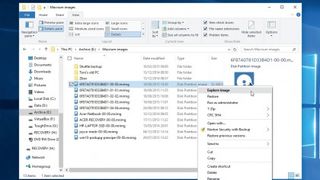
There are two basic options when it comes to restoring data. To recover individual files from your backup, mount the image file as a virtual drive in Windows following the annotation on the previous page, then simply copy the files you want from here back to your hard drive. If you need to roll back your entire Windows system, however, read on.
11. Restore your backup
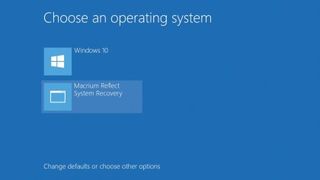
While it's possible to start the restore process from within Windows (switch to the Restore tab), it's better to restore a system image from outside of Windows in the recovery environment.
If you added the recovery boot menu option in step three, restart your PC – when the boot menu appears, choose 'Macrium Reflect System Recovery' and jump to step 13.
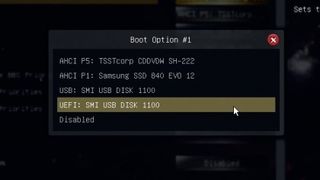
12. Use the boot media
If you can't boot to the recovery environment, then use your rescue disc or USB drive. Insert it prior to starting up your PC then look for a message that prompts you to access the boot menu – typically it's pressing a key like [F11]. Use the cursor keys to select your drive from the list of available options and hit [Enter] to load from it.
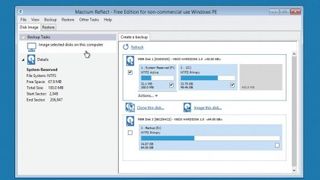
13. Image current state
Restoring a drive image basically wipes out everything that was on the drive before – if there's data you need to protect, take a fresh drive image. Switch to the 'Disk Image' tab, then untick everything except the drive you plan to restore (typically C).
Click 'Image selected disks on this computer' and follow the prompts to back up to your backup drive.
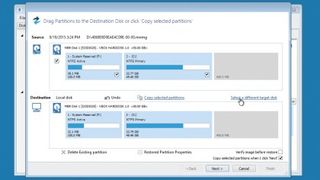
14. Select backup to restore
Once done, switch back to the 'Restore' tab. If your list of images isn't present, click 'Browse for an image file…' to locate it manually on your backup drive.
Click 'Restore Image' and Reflect should attempt to automatically select the correct disk; if not, click 'Select a different target disk' to manually choose it.
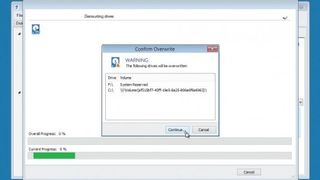
15. Review and restore
Click Next to review your proposed changes. Click 'Advanced Options' for additional options such as verifying the image prior to restoring it – note that the 'Rapid Delta Restore' option isn't available in the free edition.
Once done, click 'Finish', review the warning and click 'Continue…' Your backup will be restored – choose 'File > Exit' to reboot when done.
16. Your PC, protected
You'll now have a fail-safe – and automatically updated – backup that will help minimise data loss and disruption going forward.
No more hours lost to reinstalling Windows from scratch and setting up your PC again after a crash; now the most you'll lose is a week's work – or even less if you pair Reflect with Windows' File History tool.
- Enjoyed this article? Discover how to get the most from your PC and new things to do in Windows Help & Advice. Take advantage of an exclusive offer in our sampler today.
