How to use Windows 10's Control Panel
Old faithful
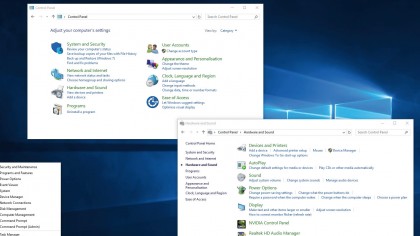
Rediscover the Control Panel
Despite first appearances, Windows 10 hasn't killed off the Control Panel. Although you're strongly pushed towards the new – and admittedly improved – Settings dialogue first seen in Windows 8, the old Control Panel still lurks behind the scenes, giving you access to just about every system setting imaginable.
And while a fair bit of its functionality has now been incorporated into Settings, there are still plenty of times when you'll need to access the Control Panel to tweak certain parts of your PC.
In some cases, direct links to some Control Panel applets can be found in Settings itself – look for references to 'advanced settings' to access them. However, in this tutorial we'll focus on revealing key settings that are hidden behind the scenes – read on to find out more about them, plus gain that all-important access.
1. Open Control Panel
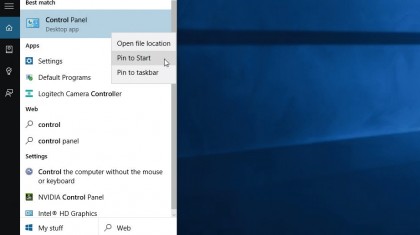
The quickest way to open the Control Panel is to right-click the Start button and select 'Control Panel' from the Quick Access menu, or make it even more accessible by typing 'control' into the Search box, then right-clicking 'Control Panel' and choosing 'Pin to Start' or 'Pin to Taskbar'.
Use the annotation above to help navigate it and find the setting you're looking for.
2. Get system info
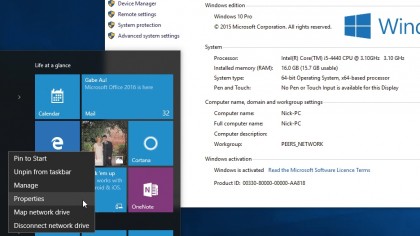
The System Control Panel reveals key information about your version of Windows and its system type (32-bit or 64-bit). It can be accessed by right-clicking the Start button and choosing 'System' or by clicking Start, right-clicking File Explorer and choosing Properties.
You can also review your current network name and workgroup – click 'Change settings' to edit these.
3. Access System Restore
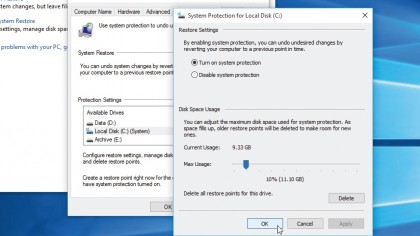
System Restore is switched off by default in Windows 10 – access its settings by clicking 'System Protection' on the System Control Panel or by typing 'recovery' into the Search box and clicking the 'Recovery' entry followed by 'Configure System Restore'.
Select your system drive, then click 'Configure'. Switch it on and allocate 5-10% of drive space before clicking OK.
4. Create recovery drive
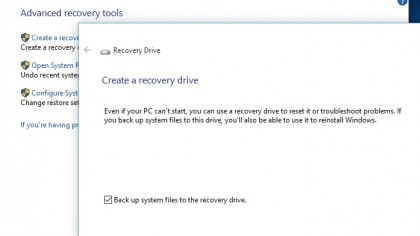
The Recovery applet also allows you to create a recovery drive to help troubleshoot problems when Windows won't boot – leaving 'Back up system files to the recovery drive' ticked means you'll need a larger USB drive, but will be able to reinstall Windows from the drive.
However, it won't always work. Leave it unticked to create a basic drive with troubleshooting tools only.
5. Restore PC
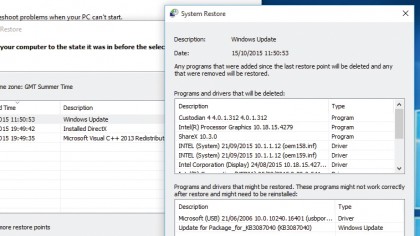
System Restore can be opened via the Recovery applet too, which you can use to roll your misbehaving PC back to an earlier point in time. Pick a point, click 'Scan for affected programs' to see what'll be affected, then restore your PC.
If it fails, try an earlier Restore point – click the 'Show more Restore Points' to reveal all supported points – or undo the change to try a different tack.
6. Advanced system settings
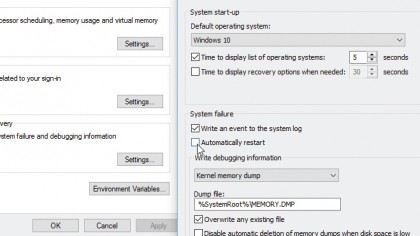
Access additional system tweaks via the 'Advanced system settings' button under System, or by typing 'advanced' into the Search box. Click 'Settings…' under Performance if your PC is struggling with graphics effects, plus tweak virtual memory settings.
Click Settings… under 'Start-up and Recovery' to stop Windows automatically restarting after a blue screen of death.
7. Where's the Action Centre?
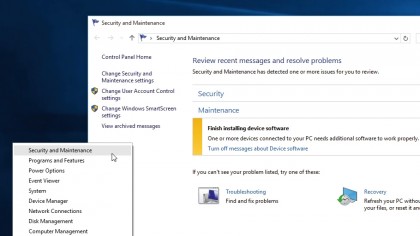
The Notification Center appears – on the surface – to have superseded the old Action Centre, but in actual fact it's simply been renamed 'Security and Maintenance', and the quickest way to get to it is via the Quick Access menu (right-click the Start button).
You'll find it's still the go-to place for security and maintenance messages, as well as accessing troubleshooters.
8. Get backed up
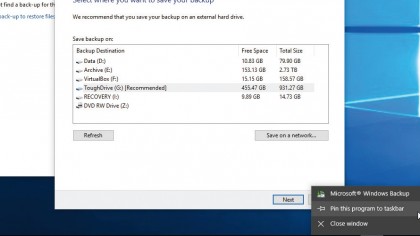
While Windows 10 supports Windows 7's Backup feature, it favours File History via the Search box and Settings. If you prefer the older backup tool, type 'Windows 7' into the Search box to access it.
Once you've clicked 'Set up back-up' to start it, right-click the Taskbar shortcut and choose 'Pin this program to Taskbar' to give you easy one-click access in future to the tool.
9. Bring drives together
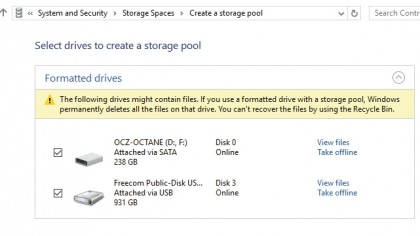
Storage Spaces lets you combine two or more smaller drives into one large virtual drive (or provide protection against data loss without having to set up a RAID array).
Type 'storage' into the Search box and click 'Storage Spaces'. Click 'Create a new pool and storage space', select the drives you want to join (read the warning about deleting data), and let Windows do the rest.
10. Default apps
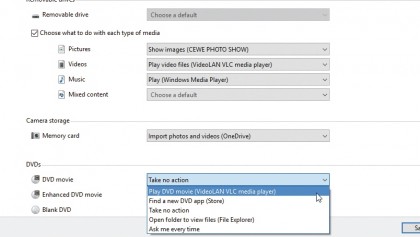
Type 'default' into the Search box and click the Default Programs shortcut to manage your apps and autoplay settings.
Click 'Set Default Programs' to select an app, review what defaults it has and – if necessary – assign it all available defaults to ensure it works correctly. Choose 'Change AutoPlay Settings' to decide what happens when you insert CDs or other media.
11. Programs and Features
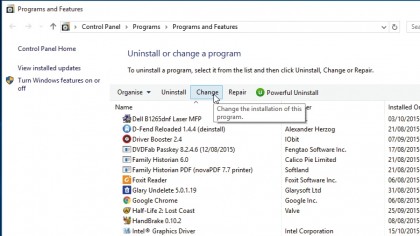
Need to repair or make changes to a program rather than simply uninstall it? The Settings app doesn't cut it. Instead, right-click the Start button and choose 'Programs and Features' to access the more powerful Control Panel – you can also manage (and remove) Windows Updates from here, plus switch on (and off ) Windows features such as the XPS viewer and services.
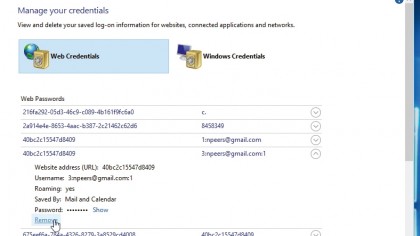
12. Manage credentials
Wonder where Windows stores all those passwords it saves automatically? Type 'cred' into the Search box and click 'Credential Manager' to find out.
Expand Web Credentials to see which passwords have been saved by Edge, Internet Explorer and other apps (as well as Windows) – expand one to view or remove it, if your user account password as collateral when requested.
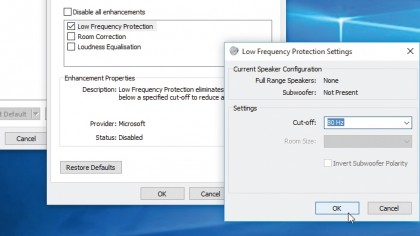
13. Edit audio settings
There's no dedicated Sound section in Settings, but the old Control Panel is easily accessible from the Taskbar Notification area – right-click the volume icon and choose Playback to manage default playback (and recording) devices.
Select an entry to make it the default, configure speaker settings and tweak advanced properties, such as adjusting sound level and quality.
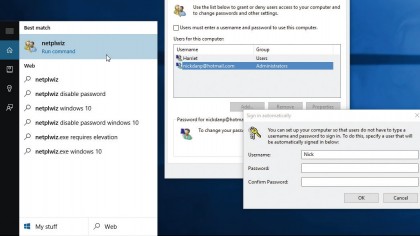
14. Bypass login screen
Type 'netplwiz' into the Search box and click the entry that appears to access a hidden User Accounts Control Panel.
If you're the only user of your PC, you can configure Windows to bypass the lock and login screen by selecting your username, then unticking 'Users must enter a username and password to use this computer'. Click Apply, enter password (carefully!) and click OK.
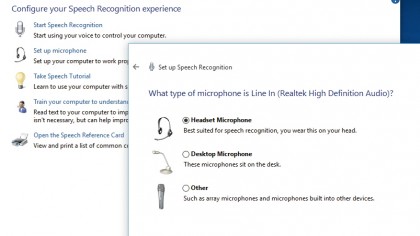
15. Set up speech
Type 'speech' into the Search box and click 'Speech Recognition' under Settings – you'll need to provide a headset or mic, then click 'Start Speech Recognition', which will step you through setting up your computer and training Windows to recognise spoken commands.
Other options include a training programme to help Windows learn how you speak.
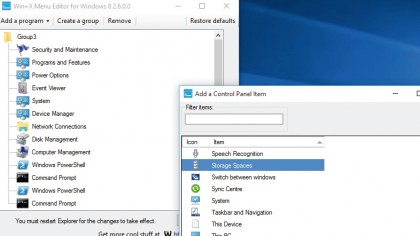
16. Add permanent shortcuts
Finally, add your favourite Control Panel items to the Quick Access menu for quick and easy access. Download Win+X Menu Editor, extract the program files and run the x64 (64-bit) or x86 (32-bit) version depending on your Windows system.
Choose 'Add a program > Add a Control Panel item' to add any Control Panel applet to the menu.
- Enjoyed this article? Discover how to get the most from from your PC and new things to do in Windows Help & Advice. Take advantage of an exclusive offer in our sampler today.