11. Remove a memory
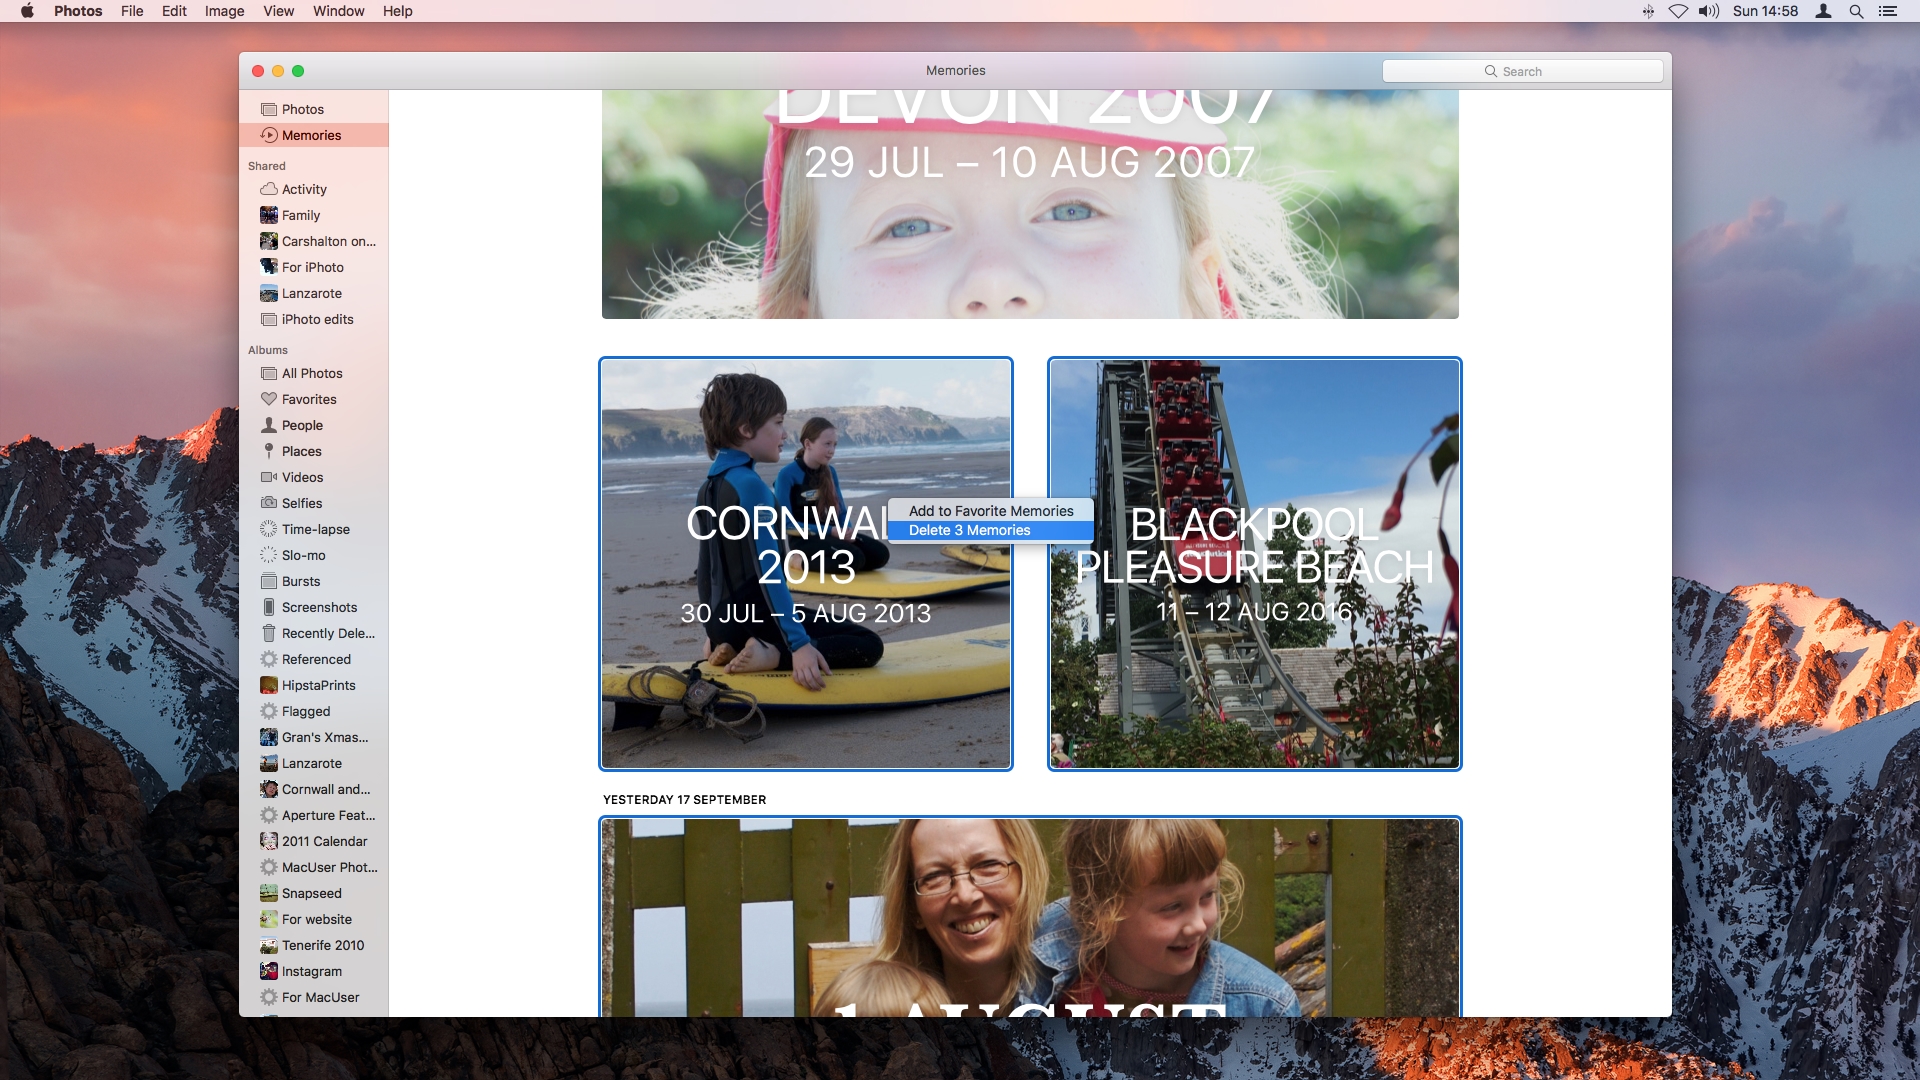
To remove a memory from Memories, click on Memories and then Command-click on all the memories you want to remove. Right click and choose 'Remove Memory' from the menu. The slideshows you clicked will be removed from the Memories view.
12. Train memories
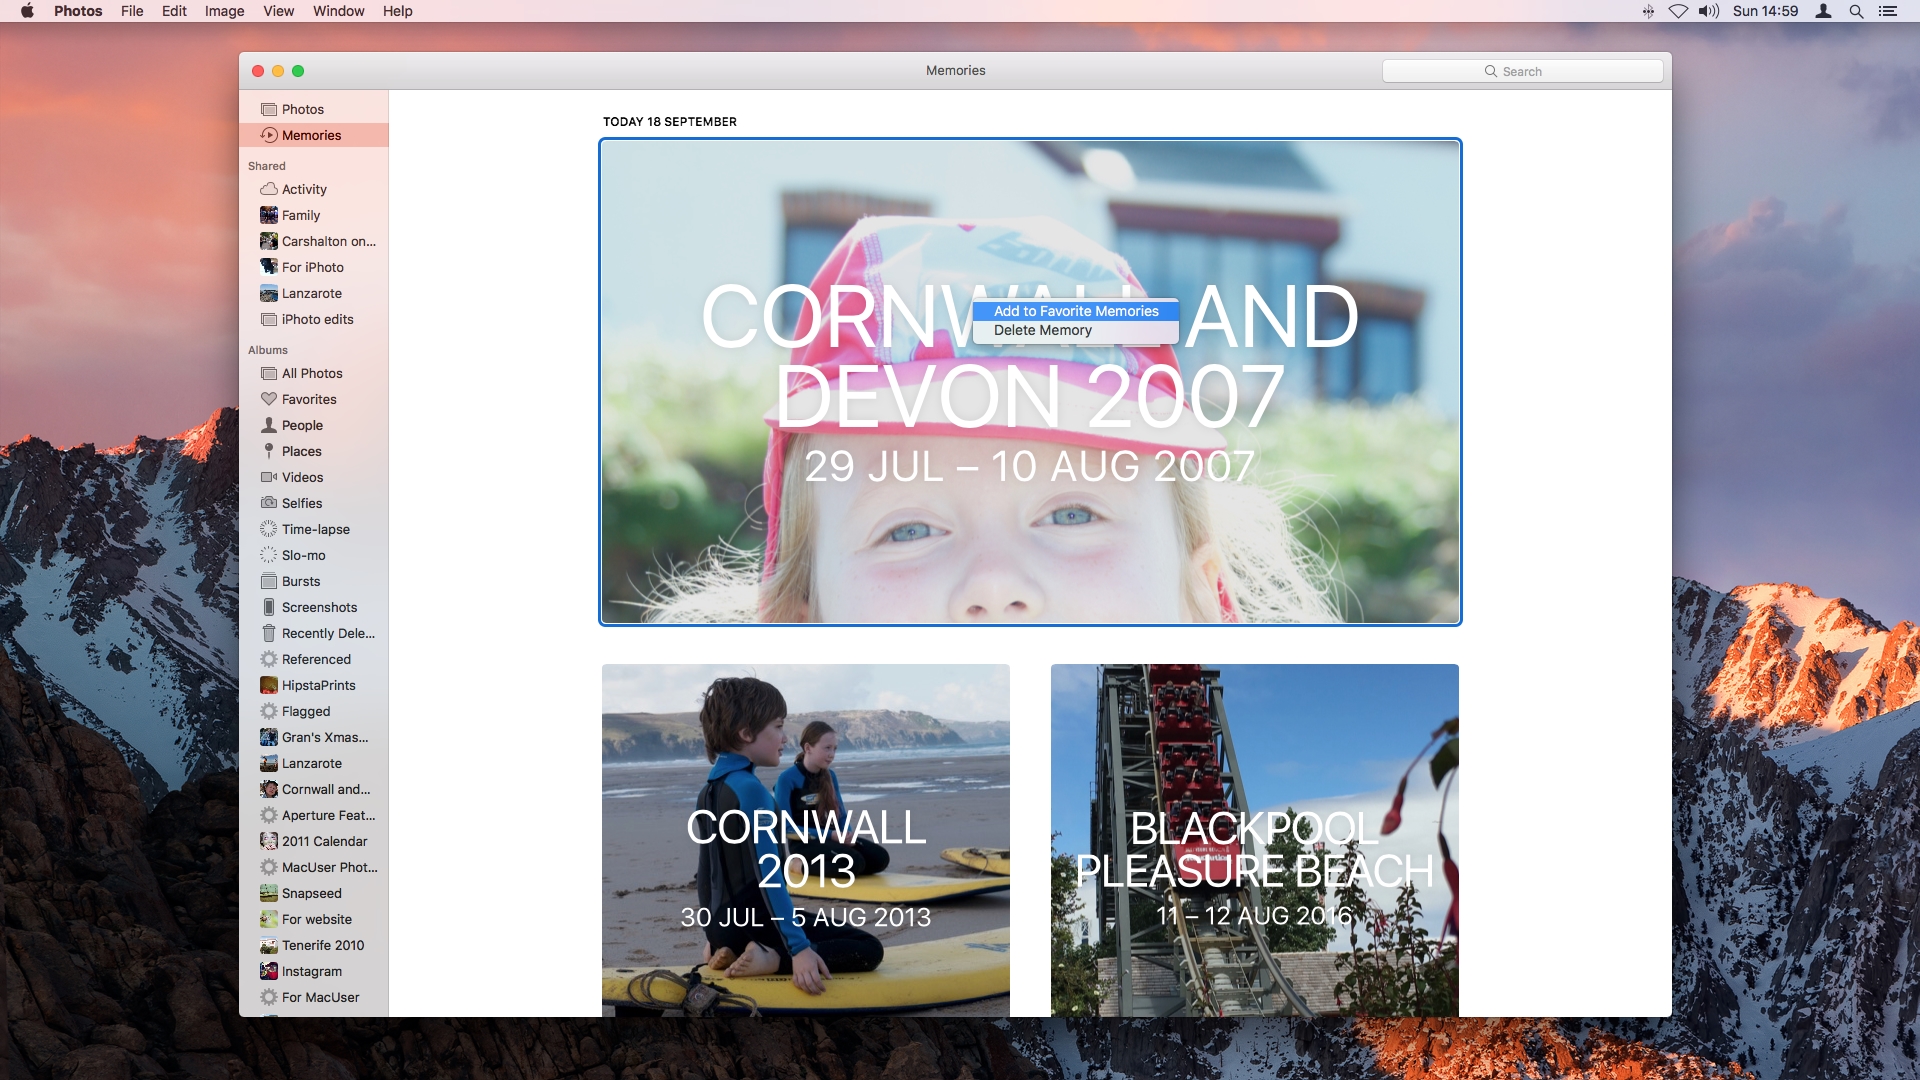
Each time you add a new memory or remove one, you are 'telling' Photos about the Memories you're interested in. This trains Memories so it makes better decisions.
The final way in which you can train the Memories feature is to tell it which are your favourite slideshows of the ones it's created, thus guiding Photos when it creates new ones automatically. Repeat the steps to remove a memory, but this time, click Add to Favorite Memories.
13. Give the slideshow a theme
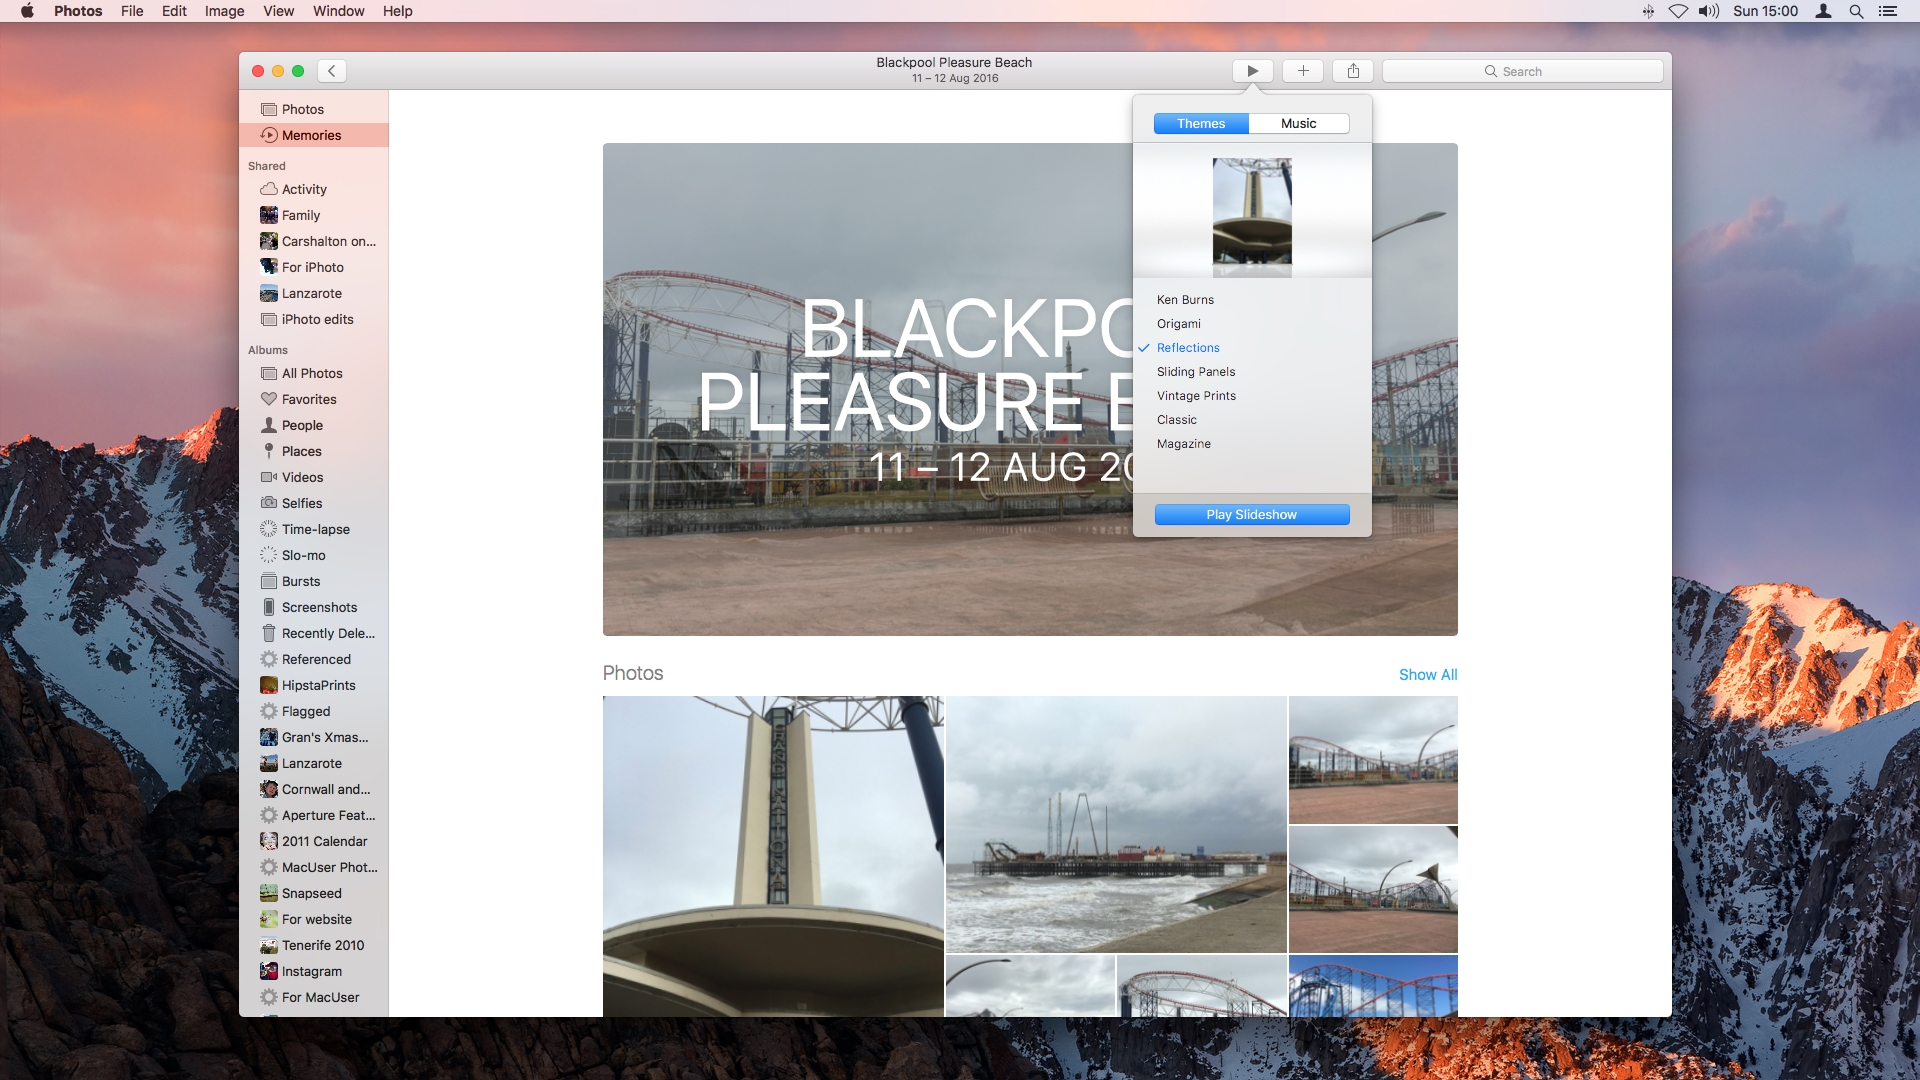
To choose a new theme for a Memory, click the play button while viewing the Memory view and click the Themes tab. Choose a theme. The slideshow will preview in the window in the drop down menu. Click Play Slideshow to view it full screen.
14. Add some music
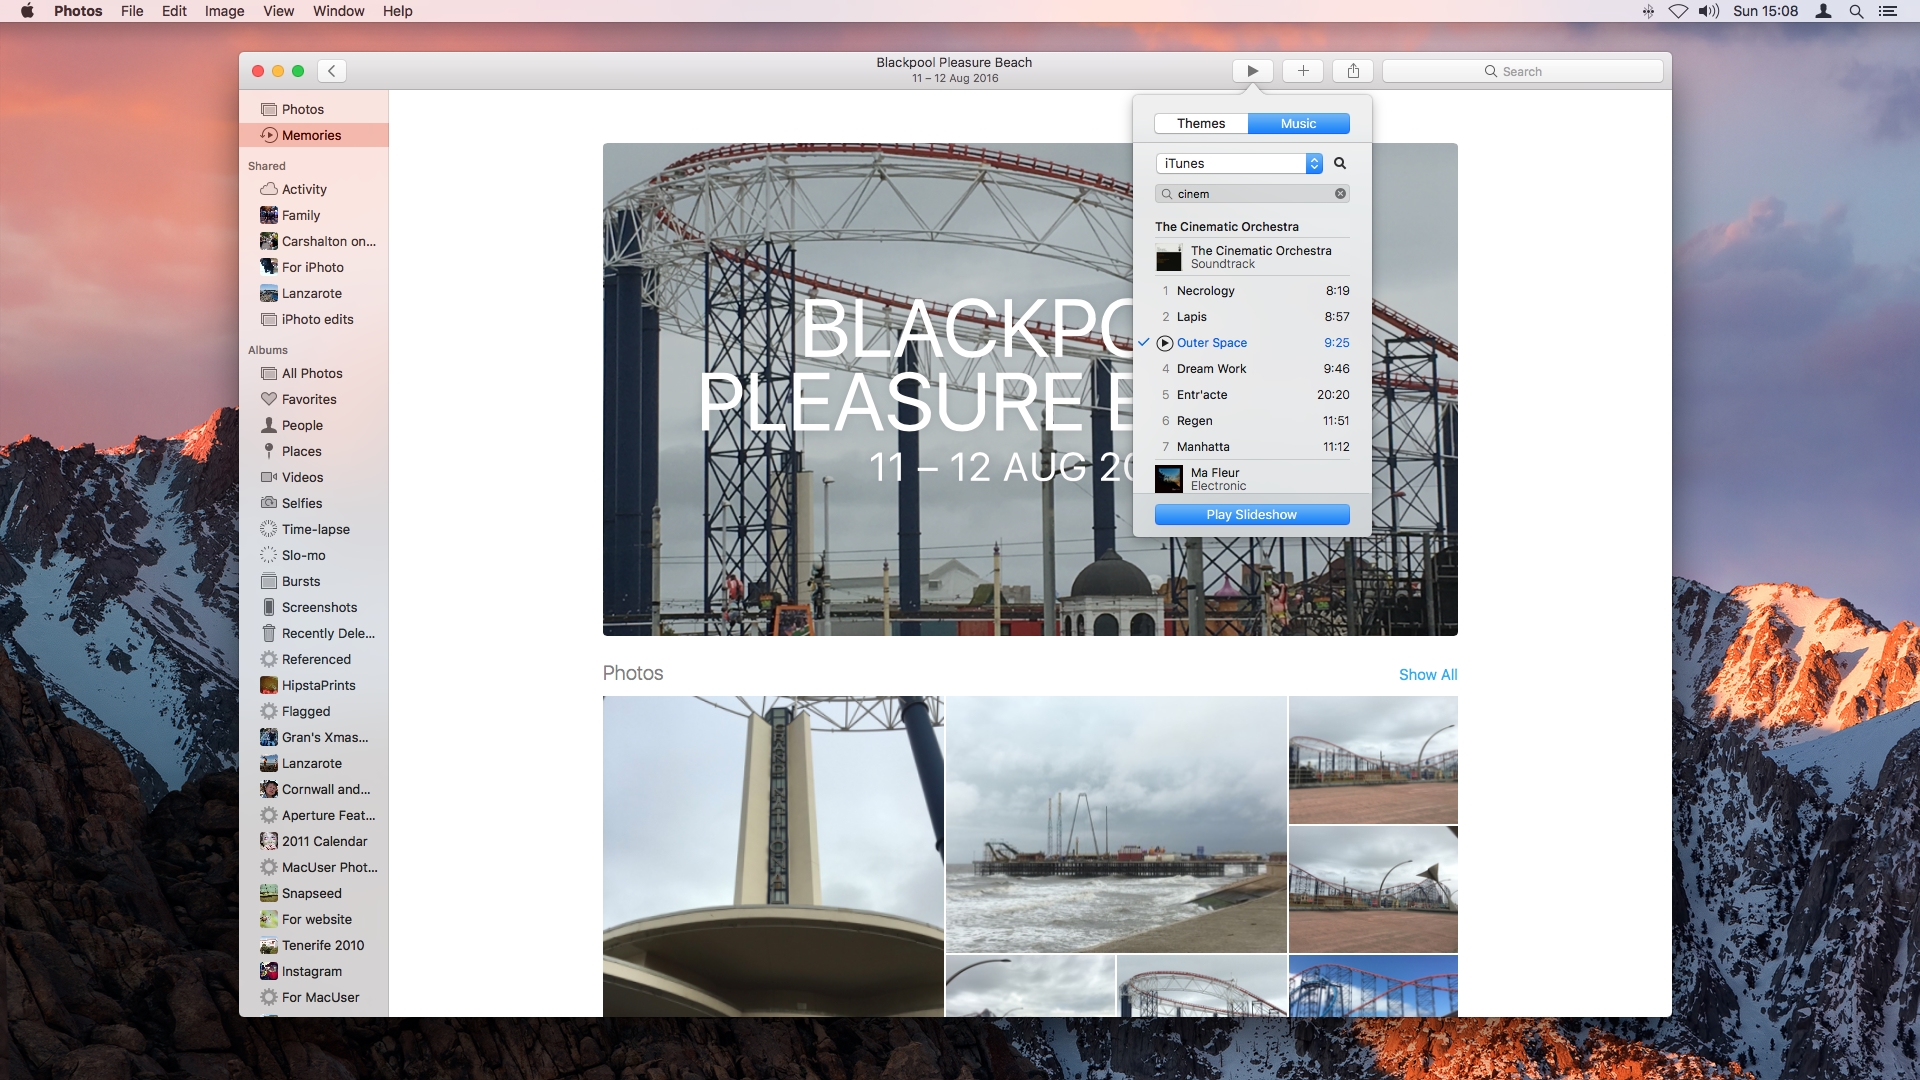
To add your own music to a Memories slideshow, first make sure its in your iTunes library and downloaded on your Mac. Click the play button, then the Music tab and either navigate to the track you want or search for it. Click on it and click Play Slideshow.
15. Removing images
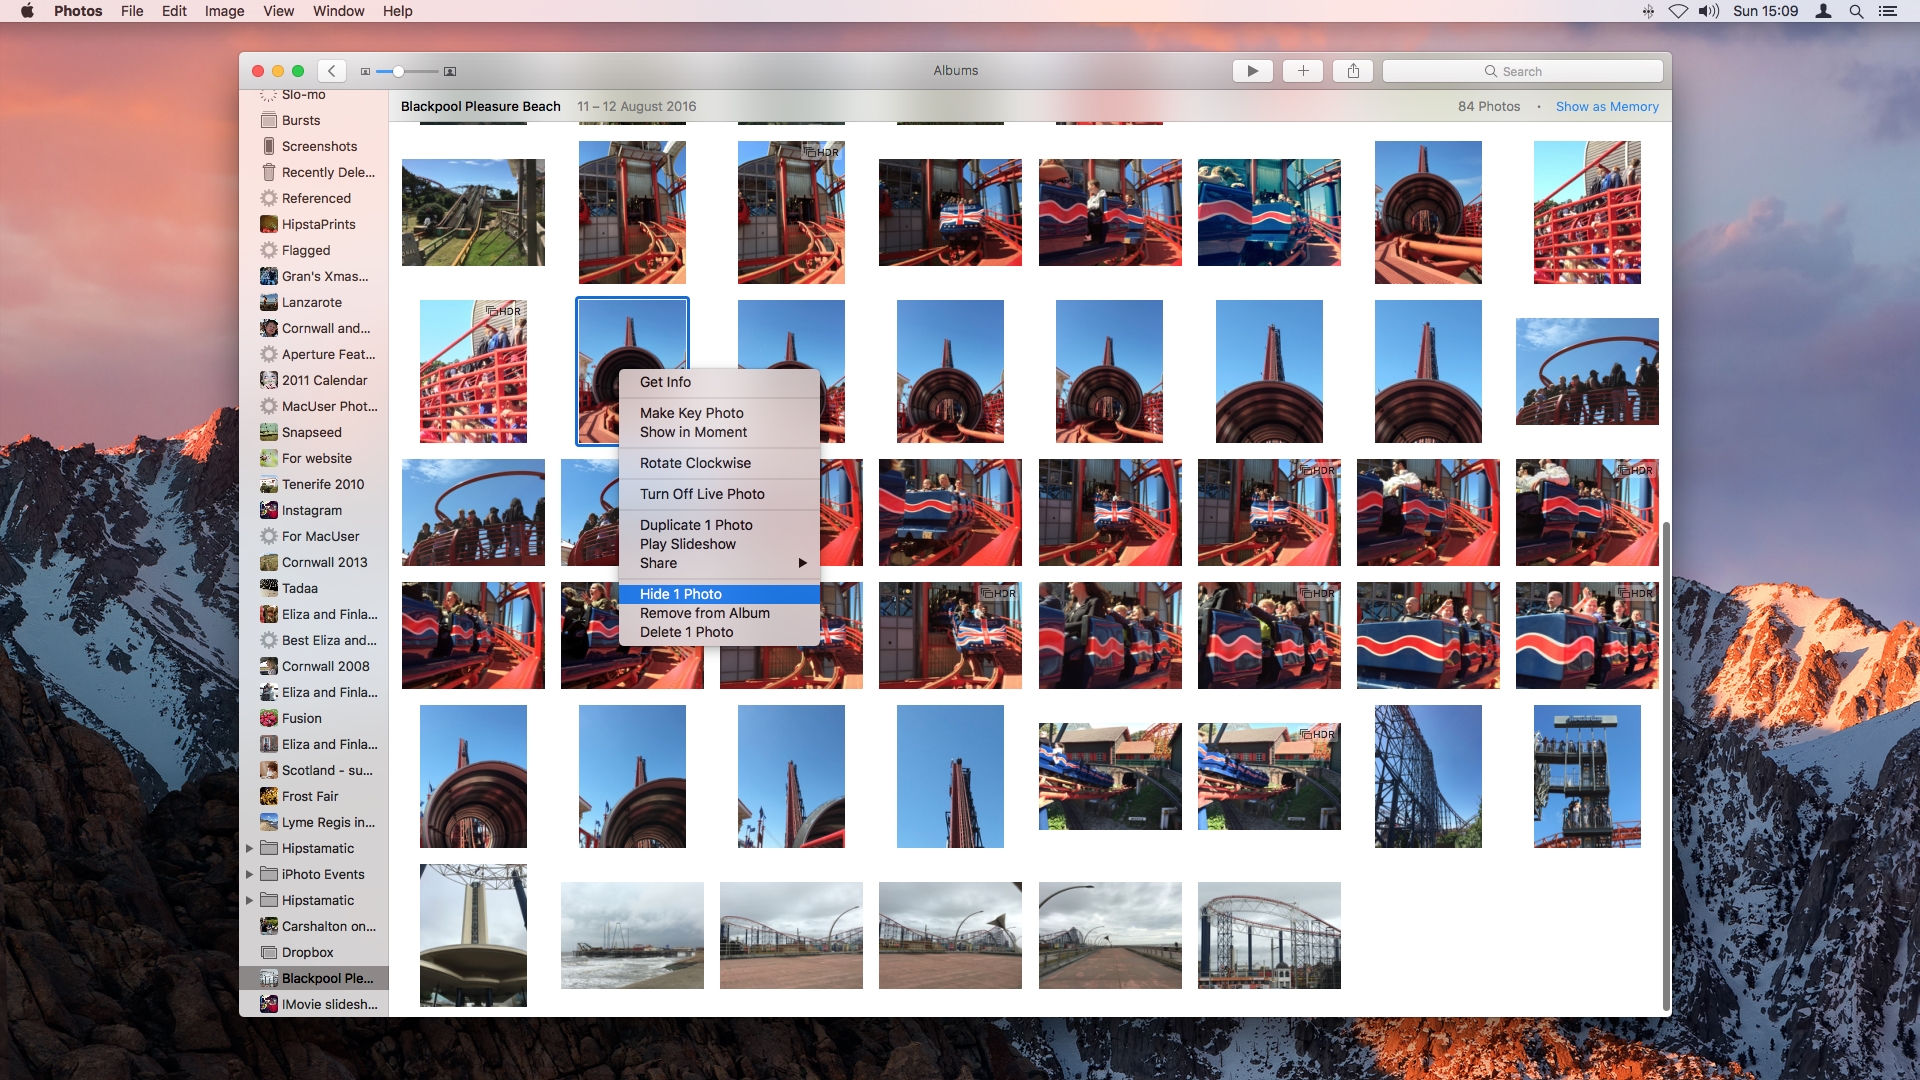
To remove an image from a Memory, you have to either hide or delete it completely. This can be done in the Album view or in the main Photos view, by right-clicking on the photo and selecting 'Hide Photo'. You can unhide it by doing the reverse.
16. Identify the content
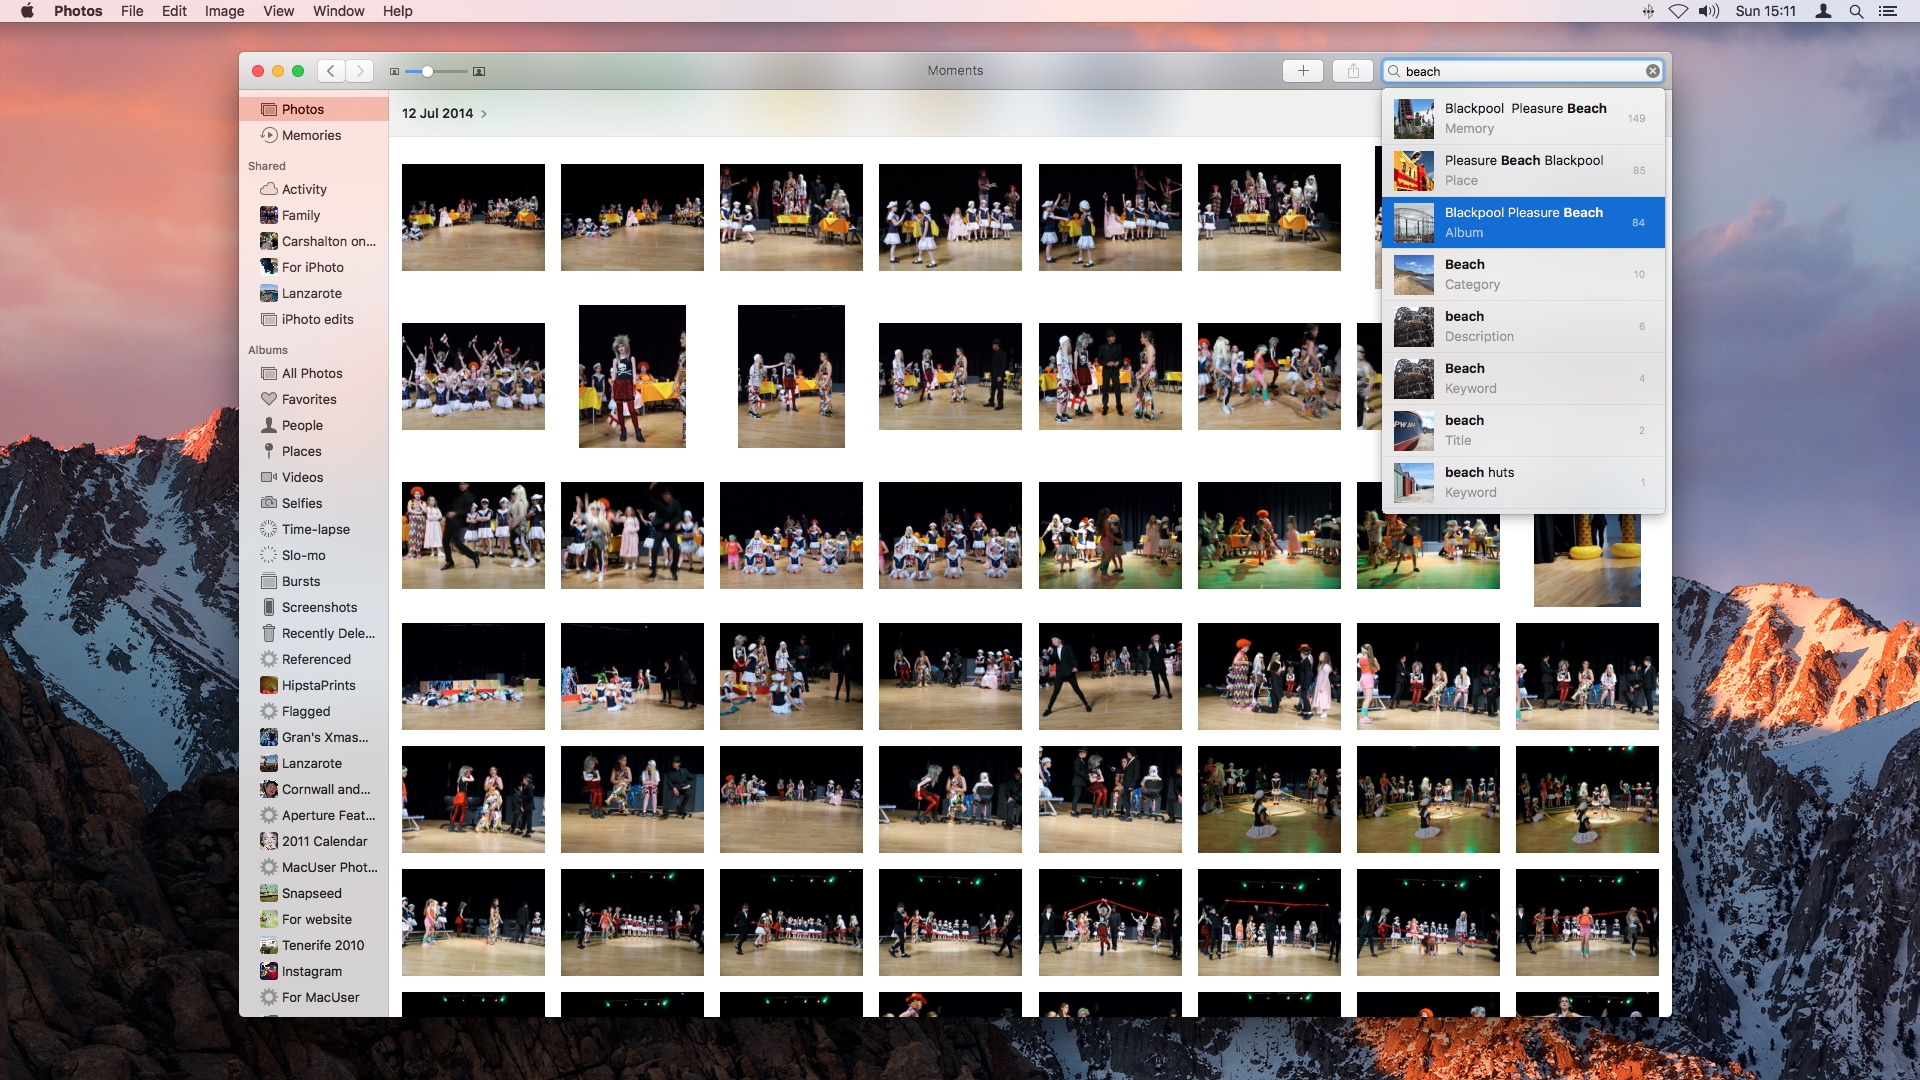
Photos is now much smarter at identifying the content of photos. It scans all the photos in your library and analyses them. It does this on your Mac, rather than a remote server, but doesn't seem to hog resources unduly.
Get daily insight, inspiration and deals in your inbox
Sign up for breaking news, reviews, opinion, top tech deals, and more.
Start typing 'beach ball' into the the search bar at the top right of the main window and you'll see it list photos which relate to the word 'beach' initially and then narrow that down to those with a beach ball in them.
17. Voice search
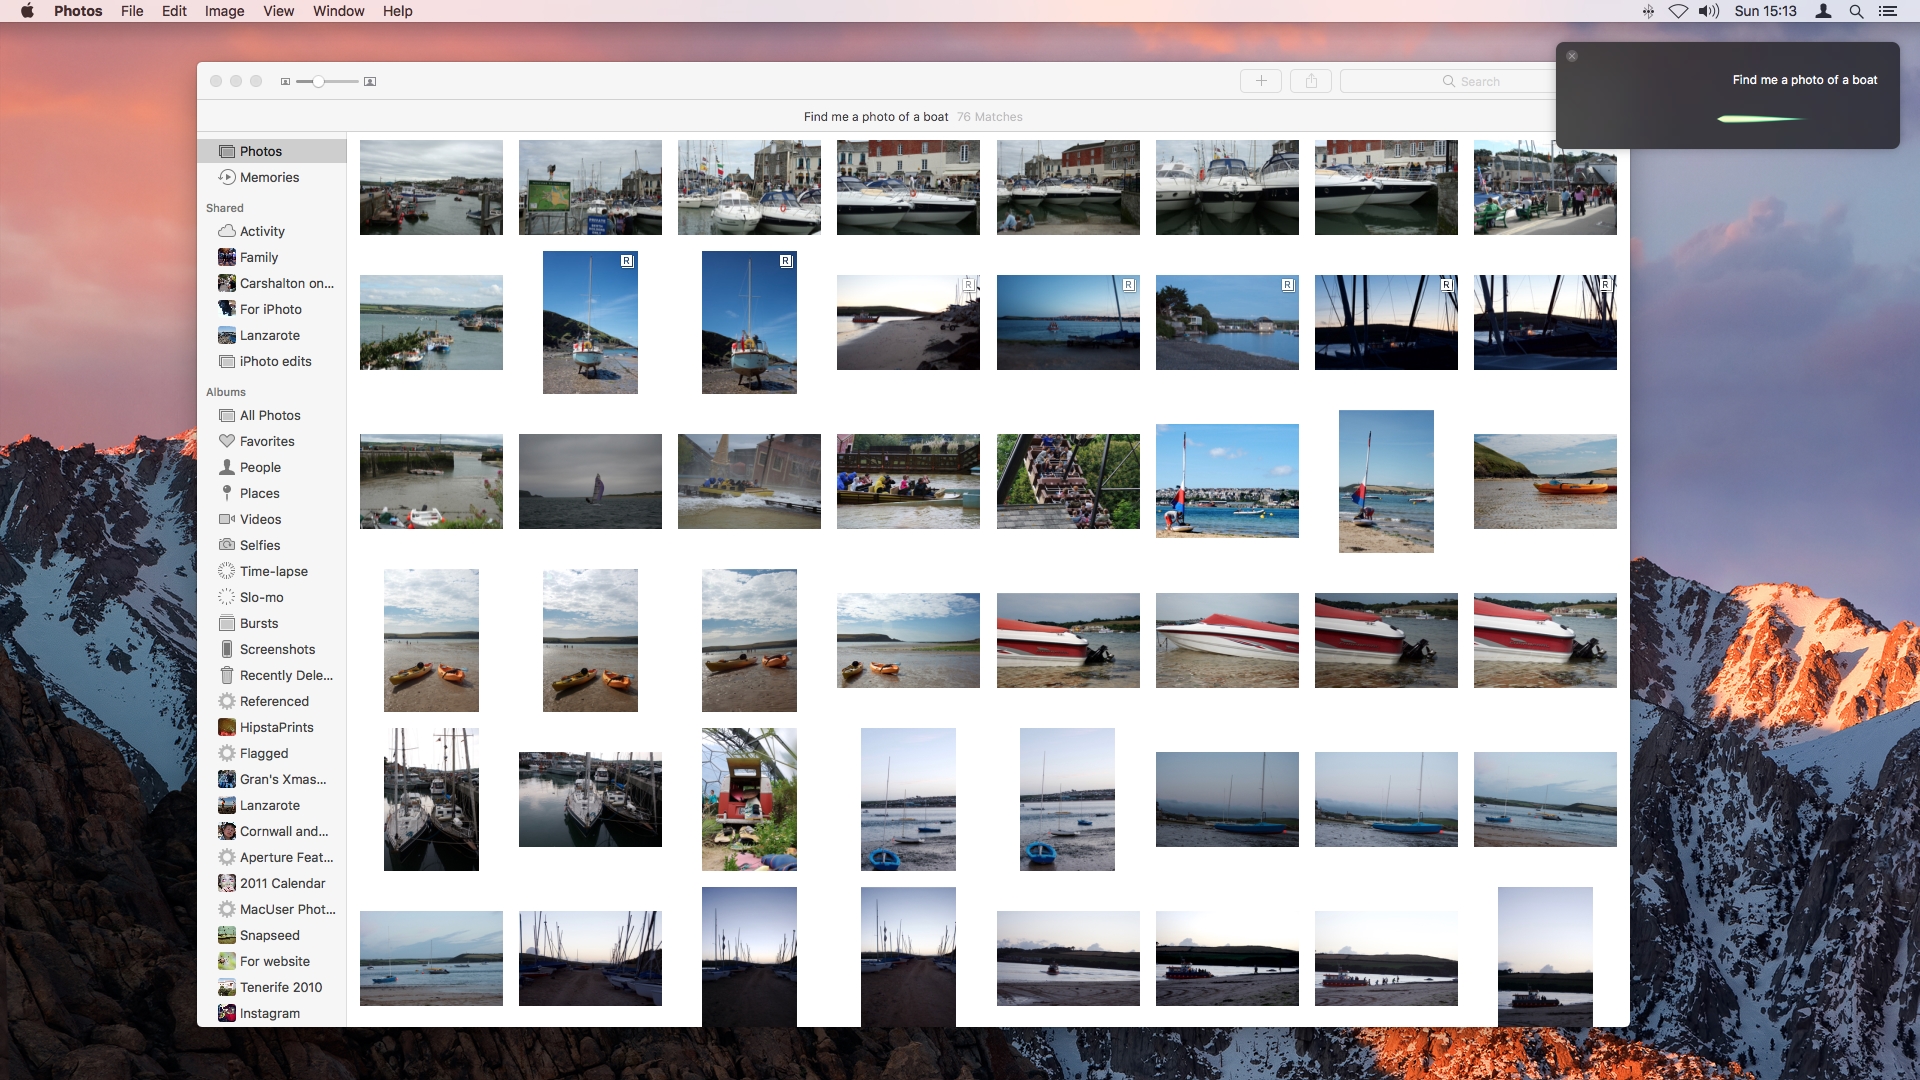
If you prefer voice control to typing, launch Siri from the Dock and tell it to search Photos for whatever you're looking for instead. It will search Photos and display images it thinks matches your request, and the request will be displayed above the images.
18. Markup photos
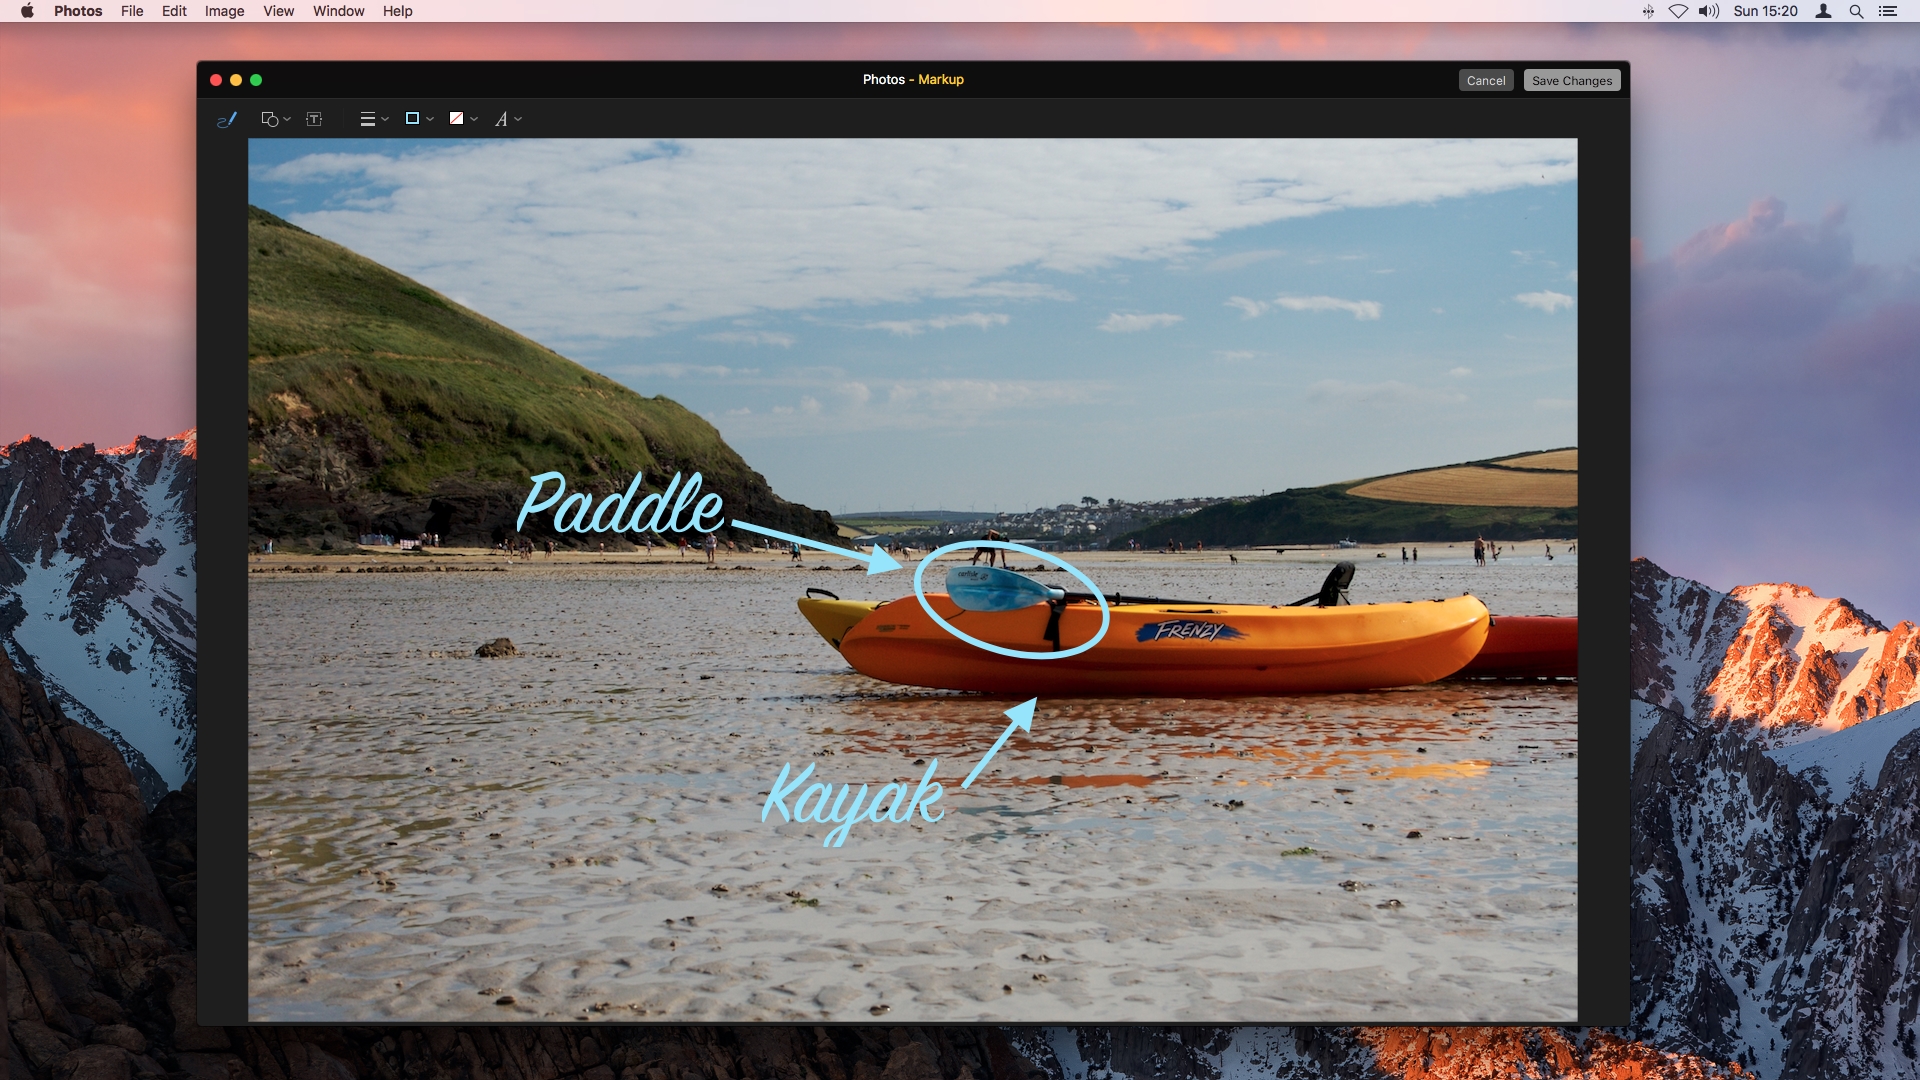
Double-click a photo then click the Edit button at the top of the screen. Click on the Extensions button (at the bottom of the list) and click Markup. You can now write text, add shapes or symbols, or draw freehand on the photo. Click Save Changes when you're done.
19. Make your photos brilliant
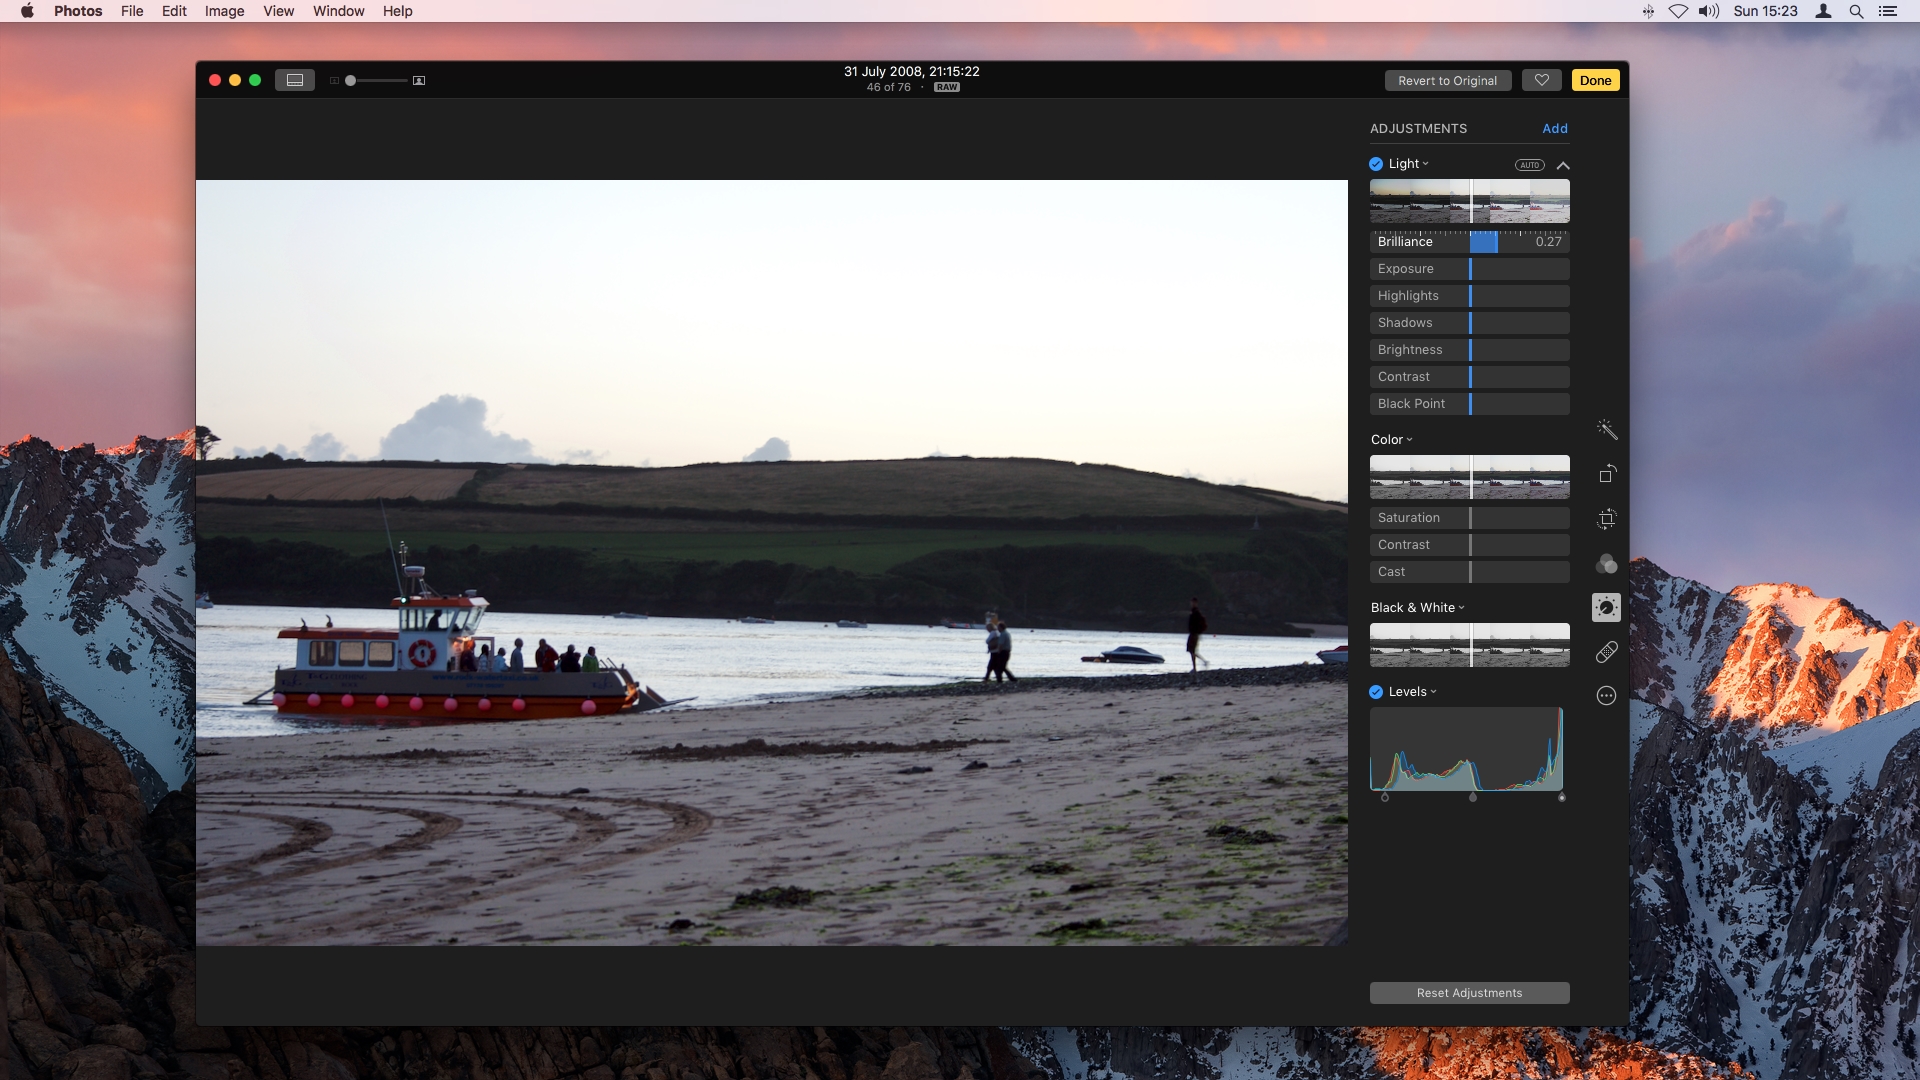
Brilliance is a new tool that lightens shadows and recovers blown out highlights. To use it, double-click on an image, click the Edit button (the one with sliders on it), then click on the Adjust control. Click the down arrow opposite the Light heading. You'll see the Brilliance slider under Light. Drag the blue line horizontally to see how it changes the photo.
20. Edit Live Photos
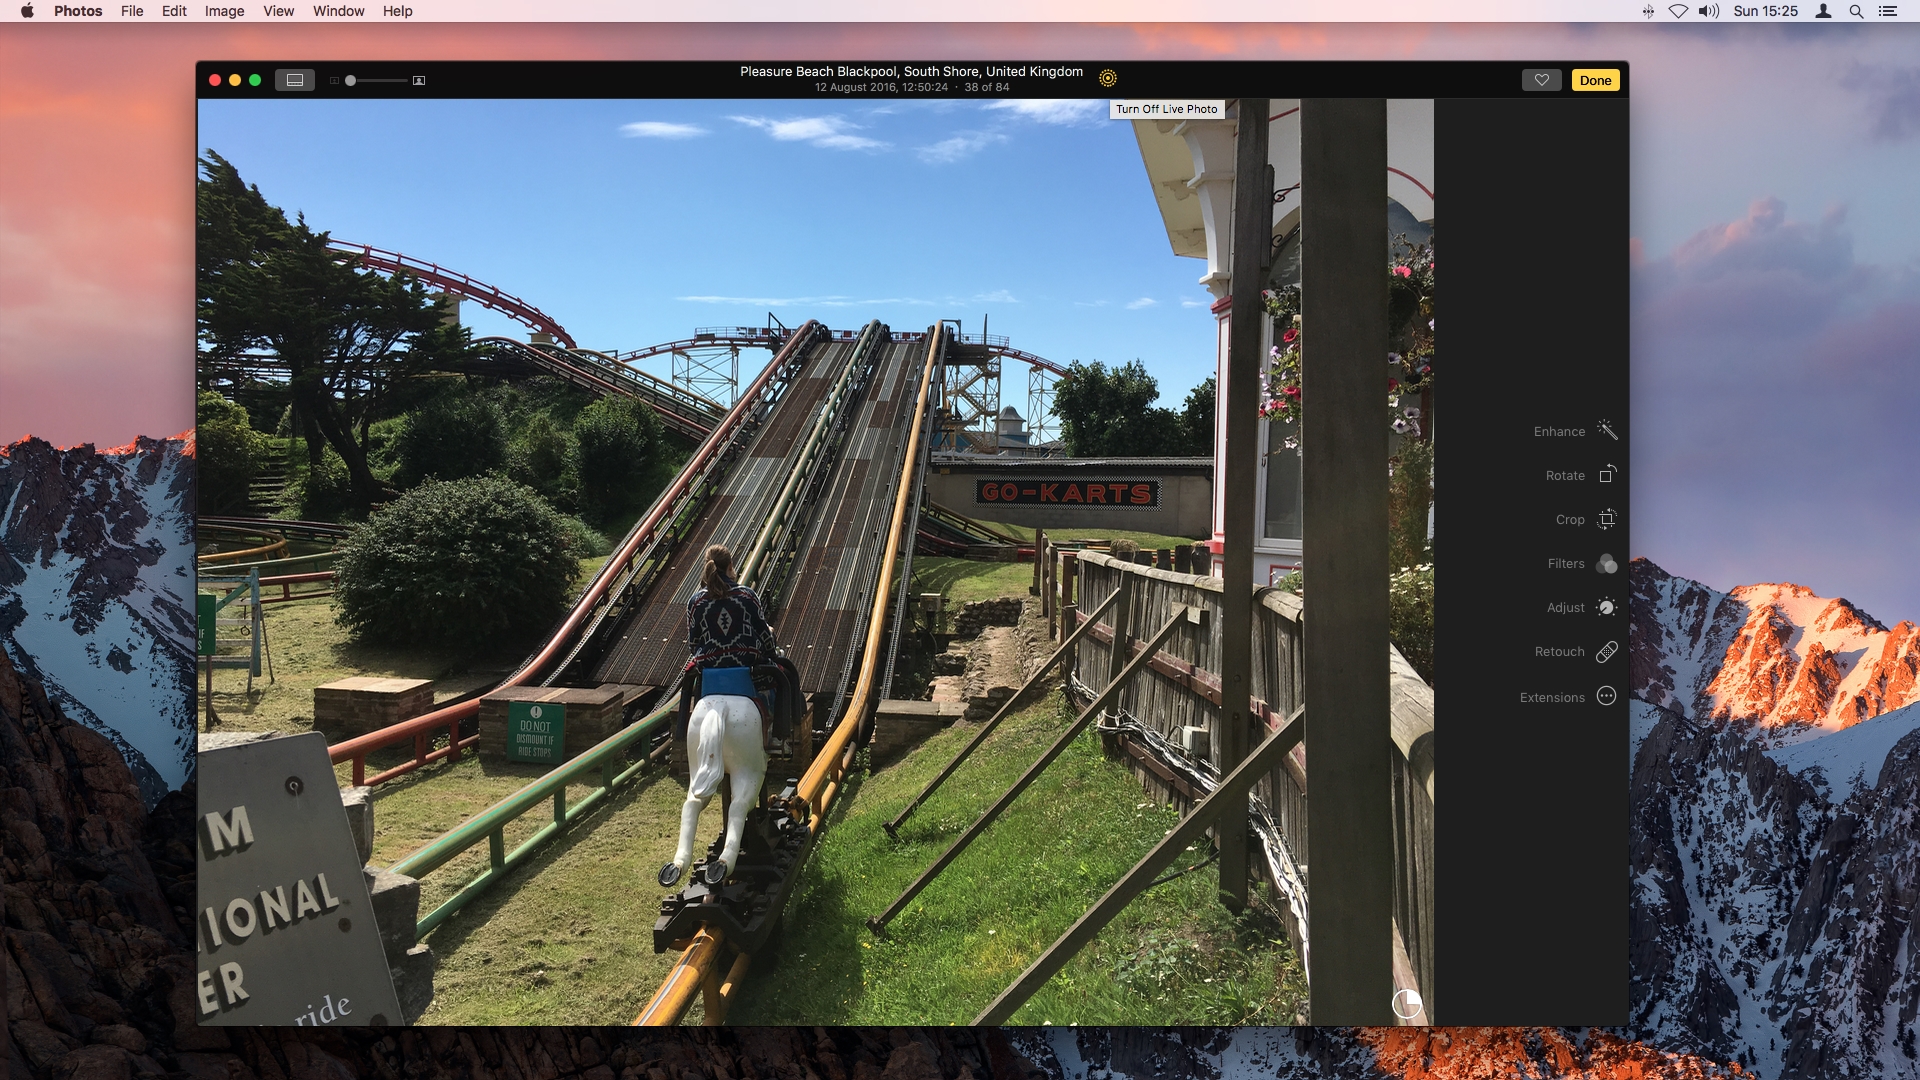
You can now edit Live Photos too. Double-click on a Live Photo and then click Edit. You'll see a yellow circle to the right of the location and time and date information. That allows you to turn Live on or off. You can now edit it as normal while it's live.
21. Use geolocation data to pinpoint your photos on a map
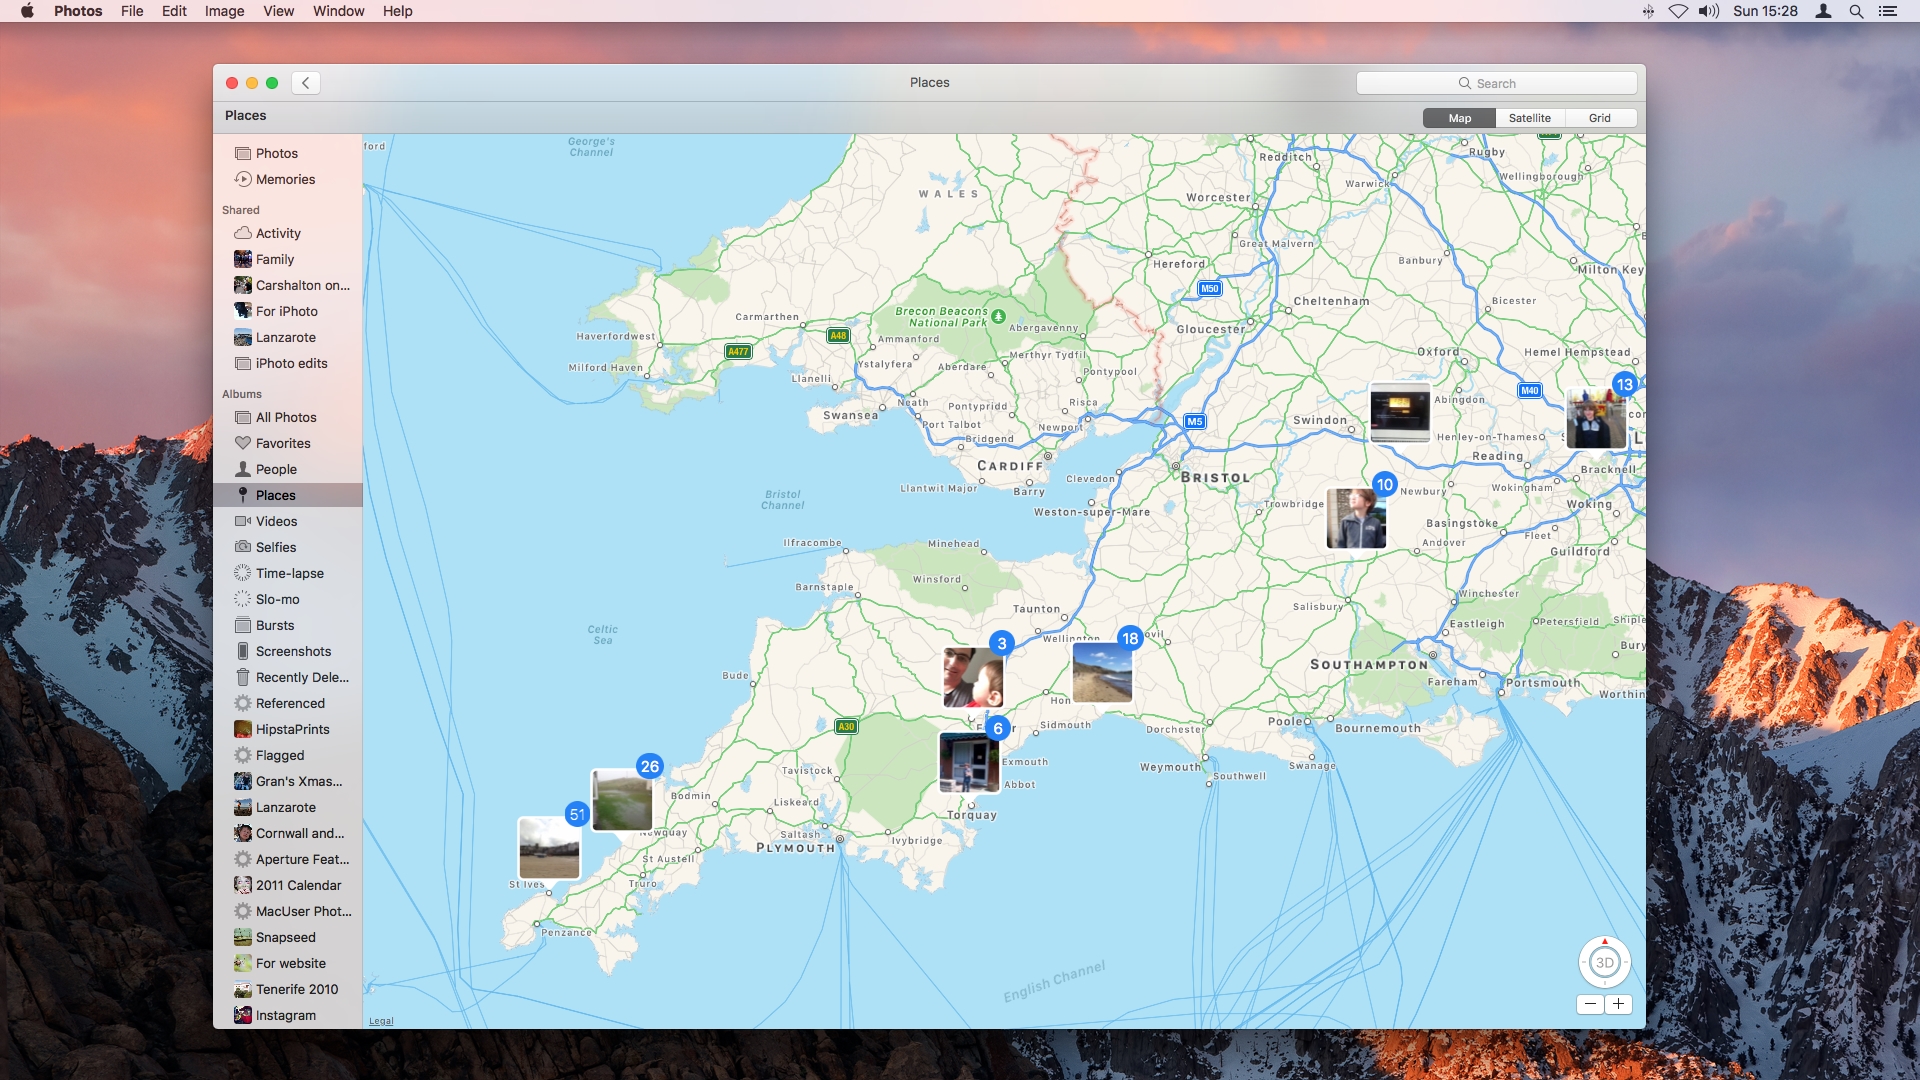
Go to Albums and click 'Places' (it only shows if at least one image has geotagged data). You'll see a map that centres on where most of your photos were taken.
Zoom in using the '+' button at the bottom right of the screen and you'll see photos that were bunched together spread out as you get closer to their location. The more you zoom the more the spread out they become and the more precisely they're located on the map.
22. Move an image's location
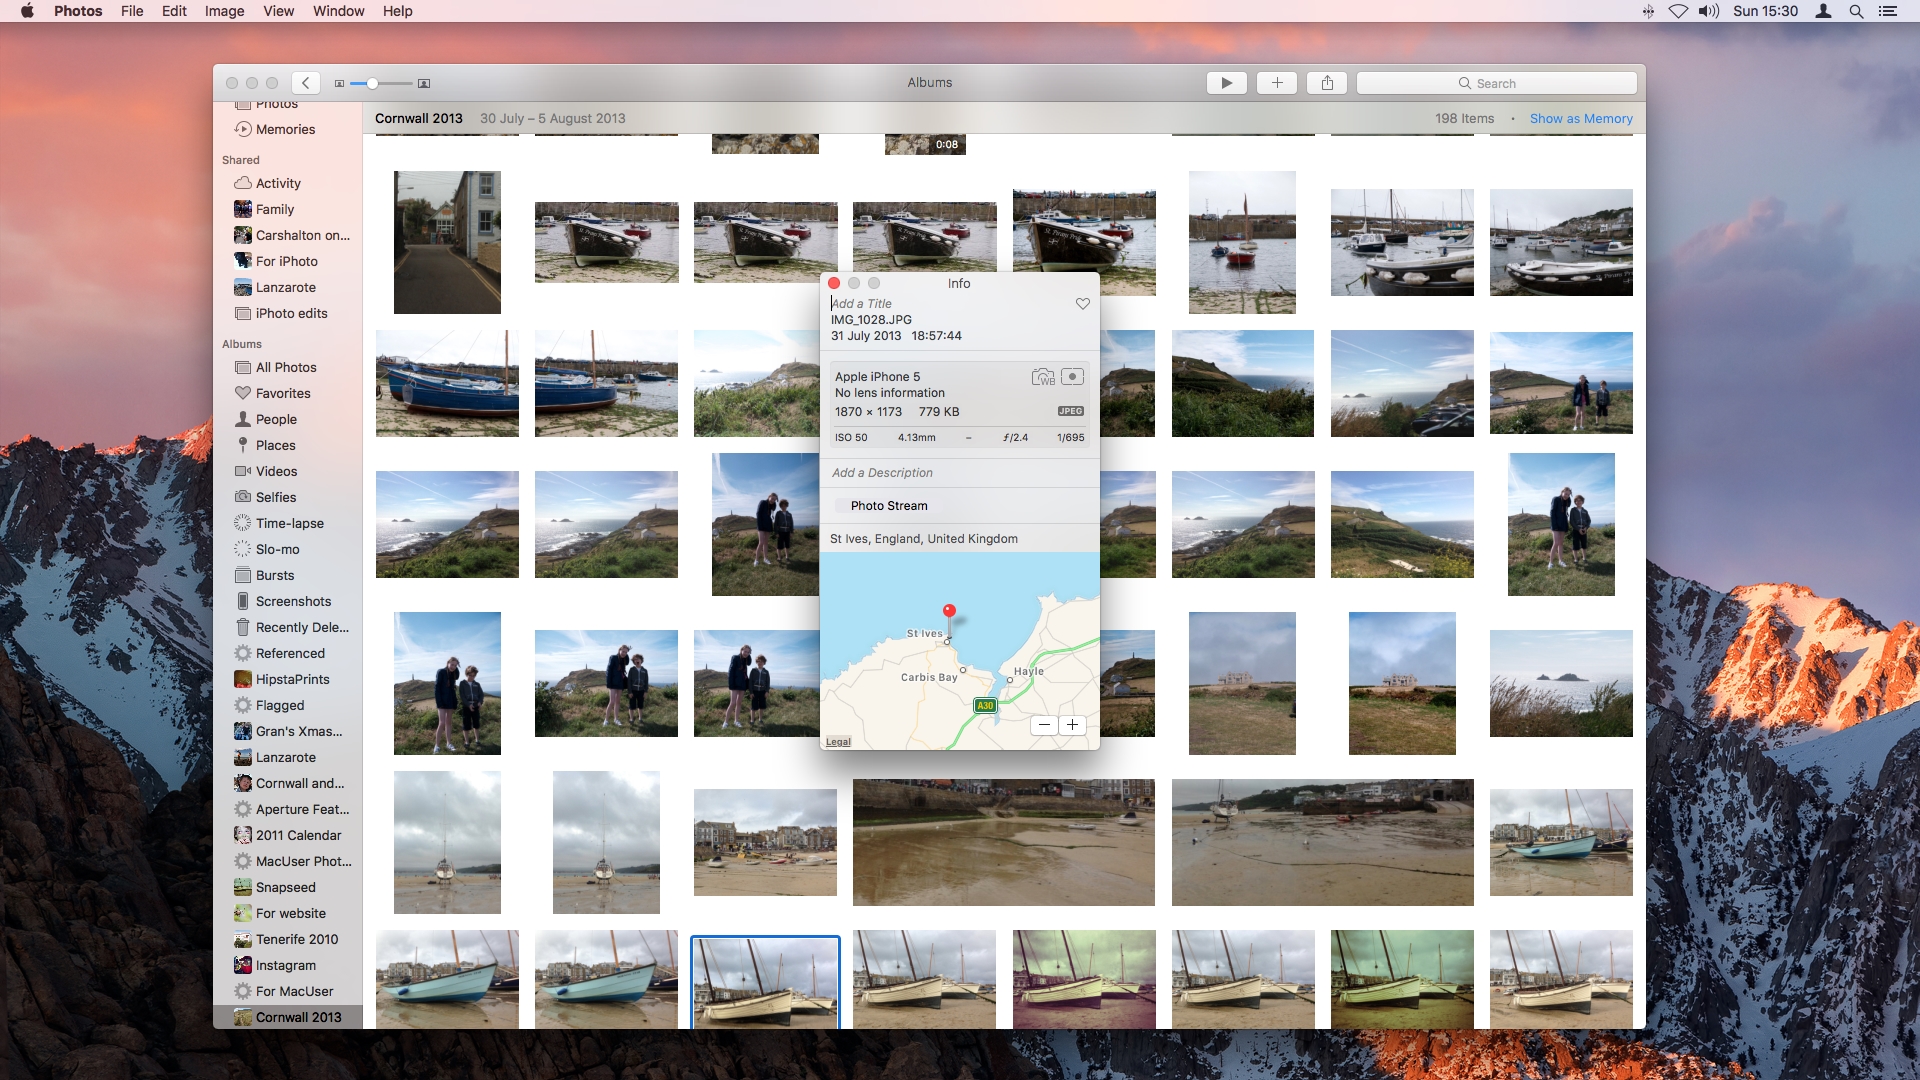
To re-locate an image in Places, right click on it (or Control-click) and select 'Get Info' from the menu. In the window that opens, find the red pin on the map and drag it to a new location. This works for multiple photos too.
23. Add a location manually
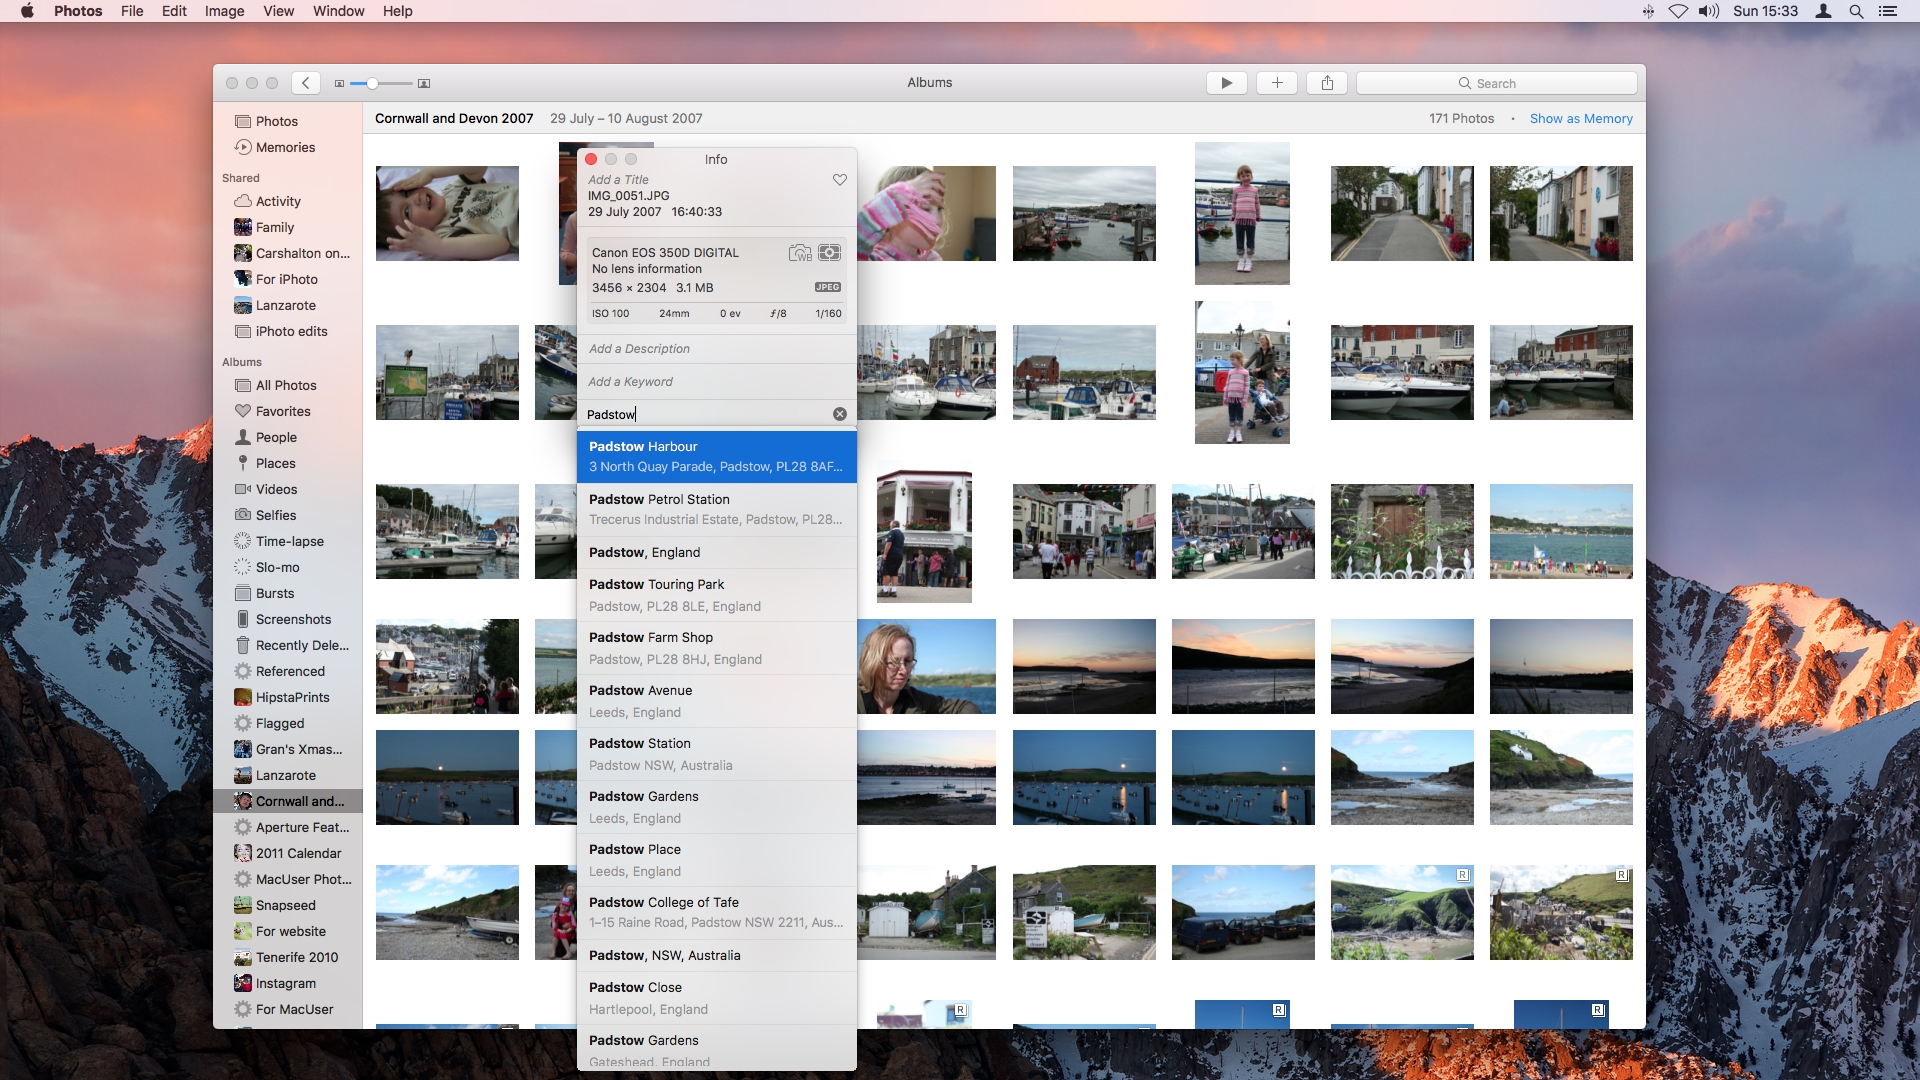
To add a location to a photo that isn't geotagged, perhaps because it was shot on a camera that doesn't support it, Control-click on a photo and select 'Get Info'.
Start typing a location into the Assign a Location box. Choose a location from the menu of suggestions.
- Get MacFormat from as little as £6 every 3 months and save up to 54% when you subscribe!
- Get Mac|Life from as little as $18 per year and save up to 72% when you subscribe!