The ultimate guide to backing up your Mac
Protect your files forever
Backup is crucial in the workplace since the implications of losing your data are legal and financial.
This data – such as customer lists and any digital products you sell – will have accumulated over the years. Unfortunately, recreating those products can be time-consuming, and rebuilding the contacts may be impossible. And so a weak backup regime might cost you money.
However, the legal ramifications are more severe and come into play monthly as you use locally hosted accounts data to file RTI payroll returns to HMRC and annually when you compile your end-of-year accounts. Lose the records that underpin either of these, and you face a fine or prosecution.
That's why business users need to step up to the next level and why cutting corners by sticking with local backups or no backups is a false economy.
By outsourcing your backup process to a remote service, such as CrashPlan, you'll have peace of mind knowing your data is being passively and securely (it's encrypted) moved off your premises the whole time your Mac is turned on.
It's stored in one of CrashPlan's remote data centers, so even if your building burns down, you can claim a new Mac on your insurance, install the CrashPlan client and download a copy of your backups onto the new machine the following day. In addition, the service also helps with threat detection and alert, investigation when there is a threat to your data and even file recovery
Get a plan
While CrashPlan used to have several different plan options, it's now offering a single subscription plan of $10 per month per device. This gives you free unlimited storage per month for each device and helps with data and file recovery in case of a ransomware attack.
Sign up for breaking news, reviews, opinion, top tech deals, and more.
The CrashPlan client is lightweight and easy to set up, allowing you to choose when the system is running and what to include or exclude in the backup set. In addition, there's no limit on the amount of online storage you use, so you can back up everything unless you have a reason for excluding some folders.
Even if you don't want to back up remotely, we'd urge you to download the CrashPlan client and take advantage of its free backup tools for a local network that let you create a secondary copy of your system (or a part of it) on any other machine on your network with automatic backups once a day. However, CrashPlan is far from the only remote backup service open to Mac users.
Carbonite offers a similar service starting at $6 per month. iDrive backs up PCs, Macs, and mobile devices, including iPads and iPhones, for free if you need less than 5GB storage or from $60 a year for more storage.
It will even send you a physical copy of your data should you prefer not to download it in the event of a disaster. Finally, if you prefer to keep your backups closer to home, Retrospect runs a local backup service across your network to minimize the time it takes to create an archive of your data (see above).
The latest version of its client has cut backup times, yet remains compatible with earlier editions, so your backups remain accessible for a very long time. In addition, it looks for duplicate files to reduce the amount of data it needs to process, maintains multiple independent backup sets, and supports external media, including NAS drives, cloud storage, tape drives, and flash drives.
It is a little more complicated to buy and install than the flatter services from the likes of CrashPlan and Carbonite. Still, a helpful configurator walks you through choosing the appropriate application with a series of common-sense questions. The basic option lets you back up five regular Macs. You can also add a Mac acting as a server into the mix.
How to set up online backup using Crashplan
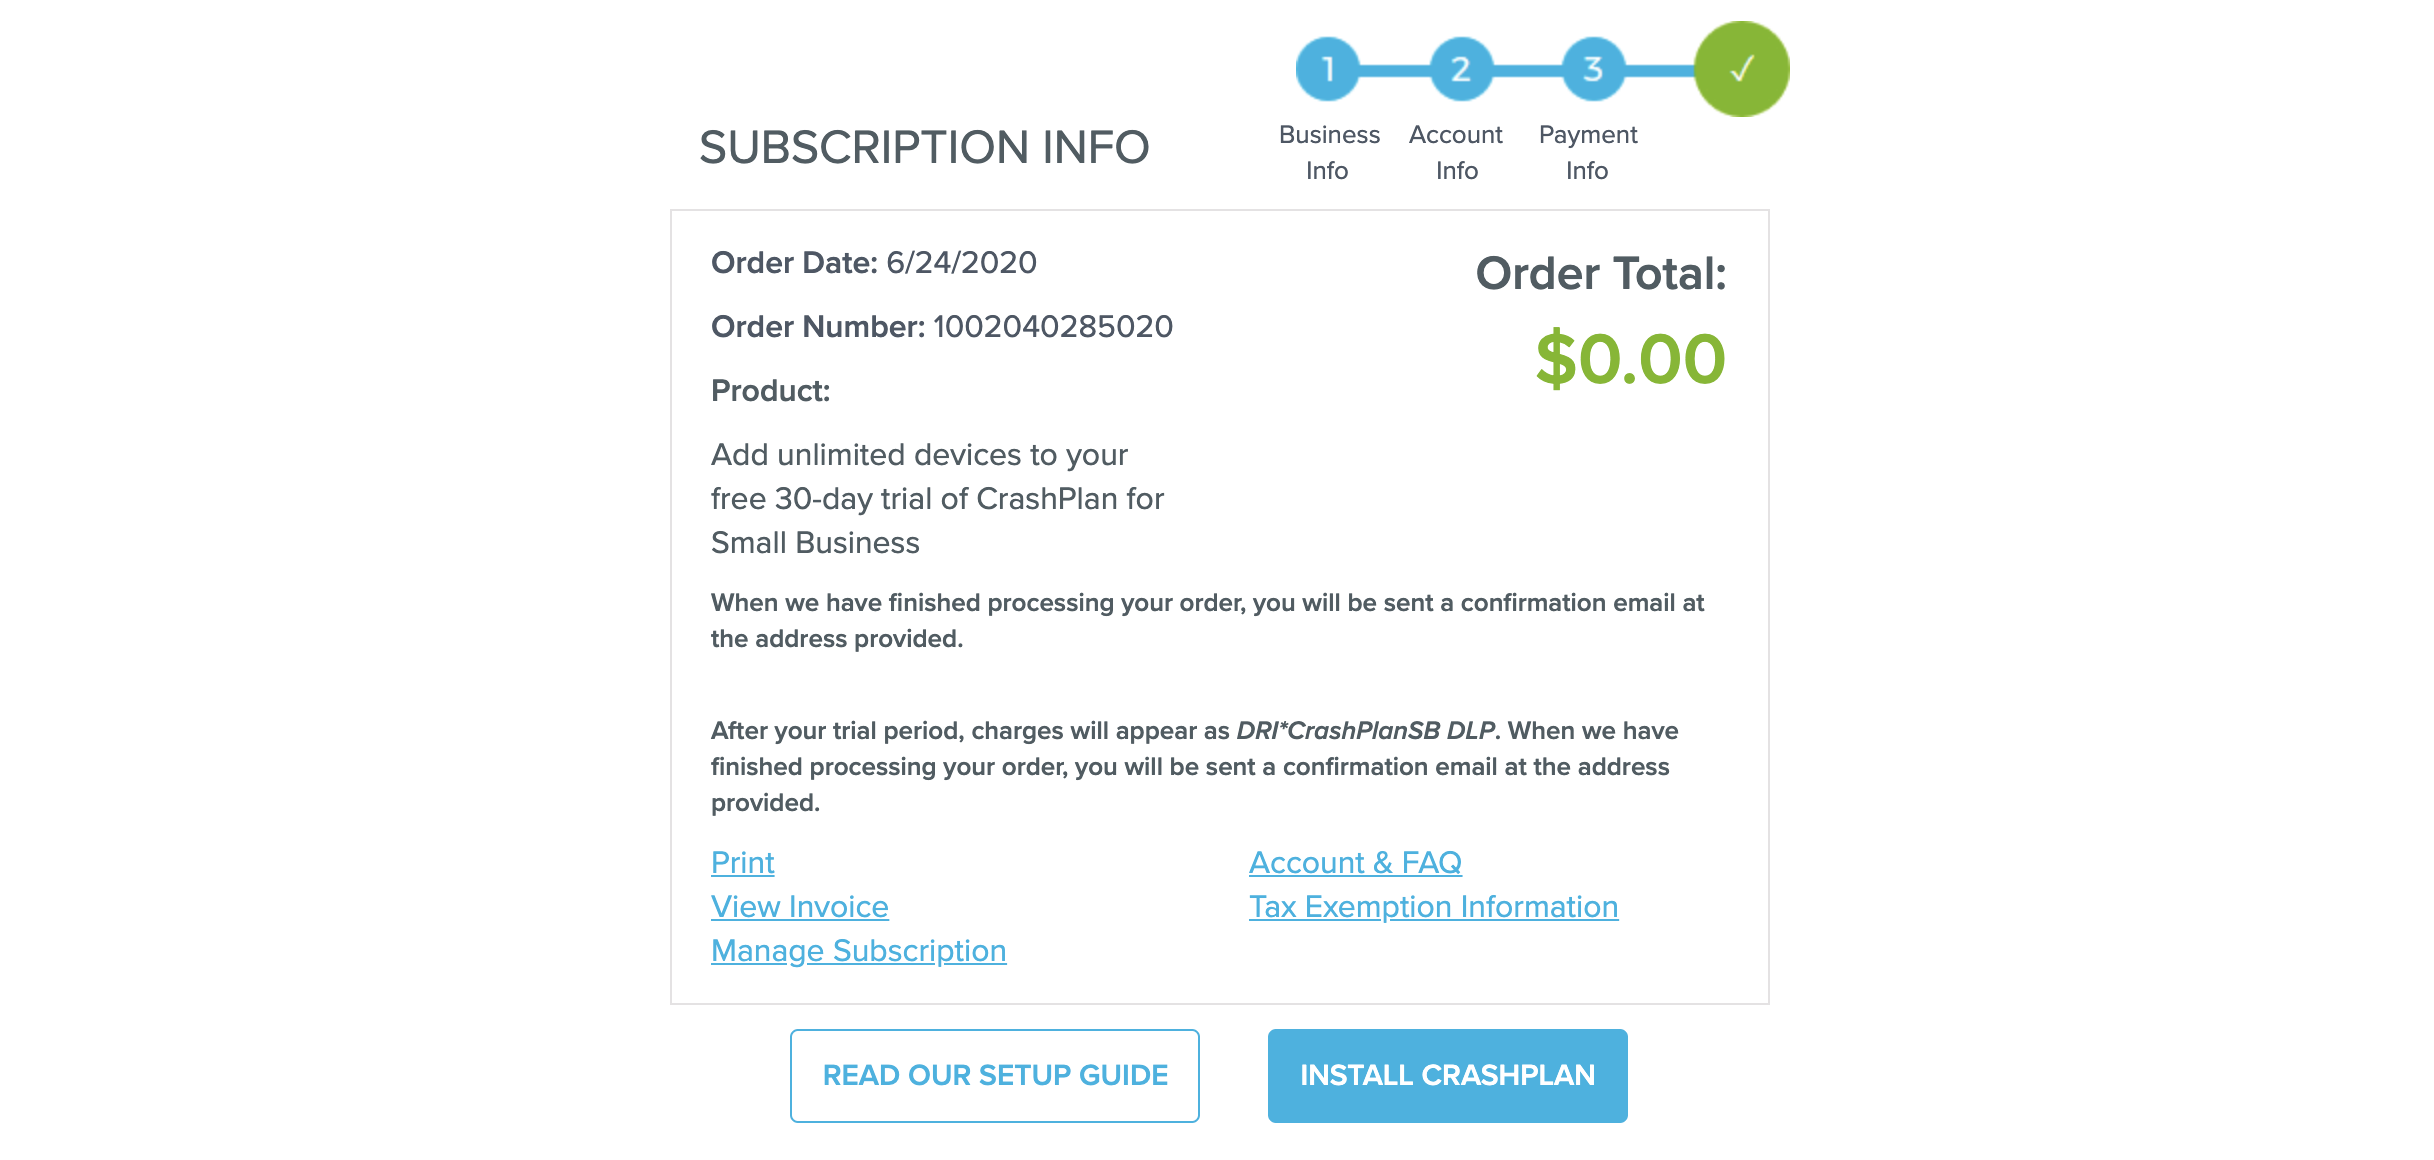
1. Sign up and download CrashPlan
Go to the Crashplan website, create an account and run through the simple instructions. Once your account is set up, you will be taken to a confirmation page with the option to download the CrashPlan application.
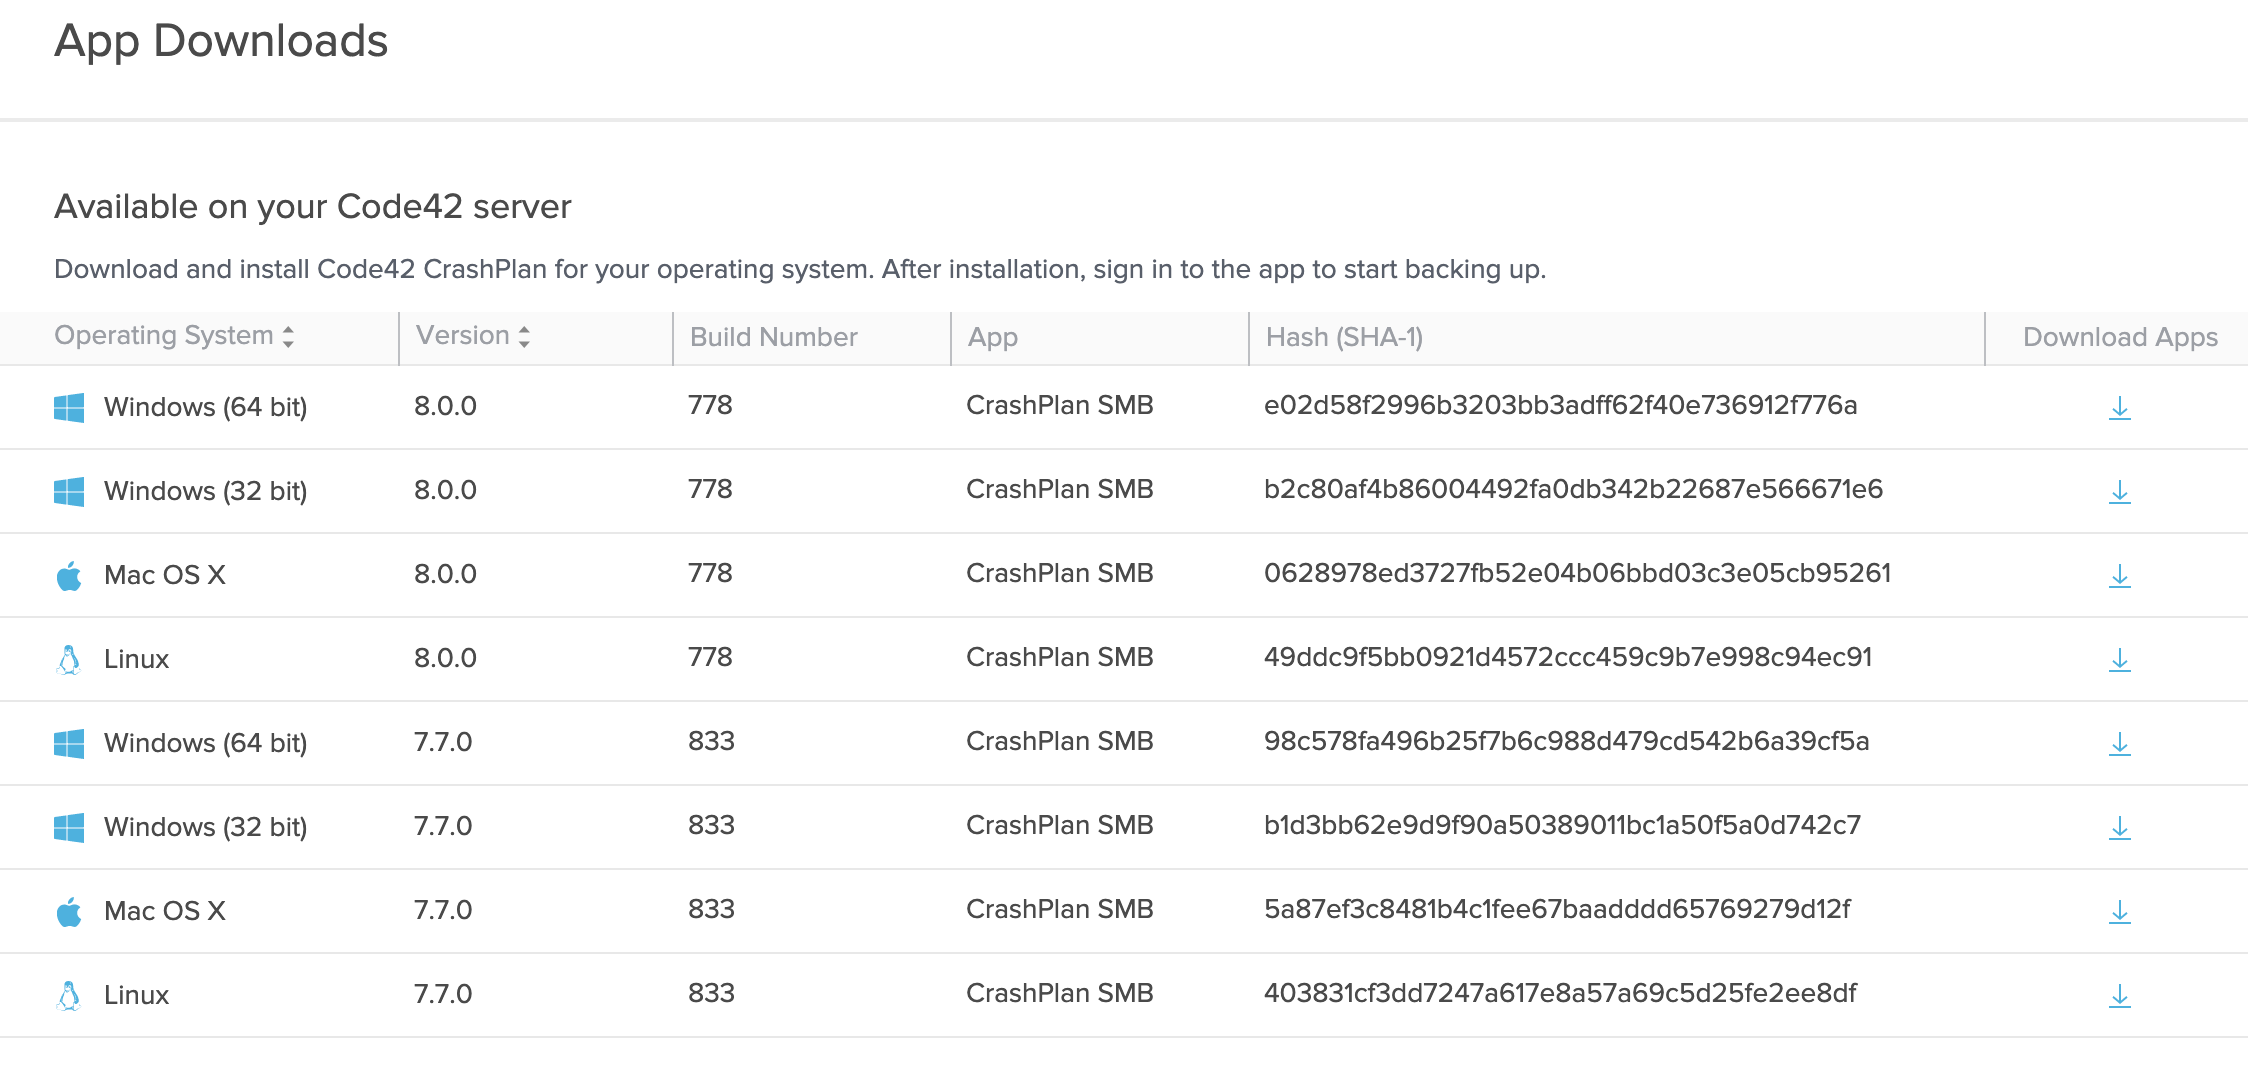
Click on Install CrashPlan. This will take you to the CrashPlan/Code42 administration dashboard, where you will be prompted to add your device. Once the device is added, you will be given a list of Code42 CrashPlan installers for different operating systems. Select the latest version for macOS, and click download.
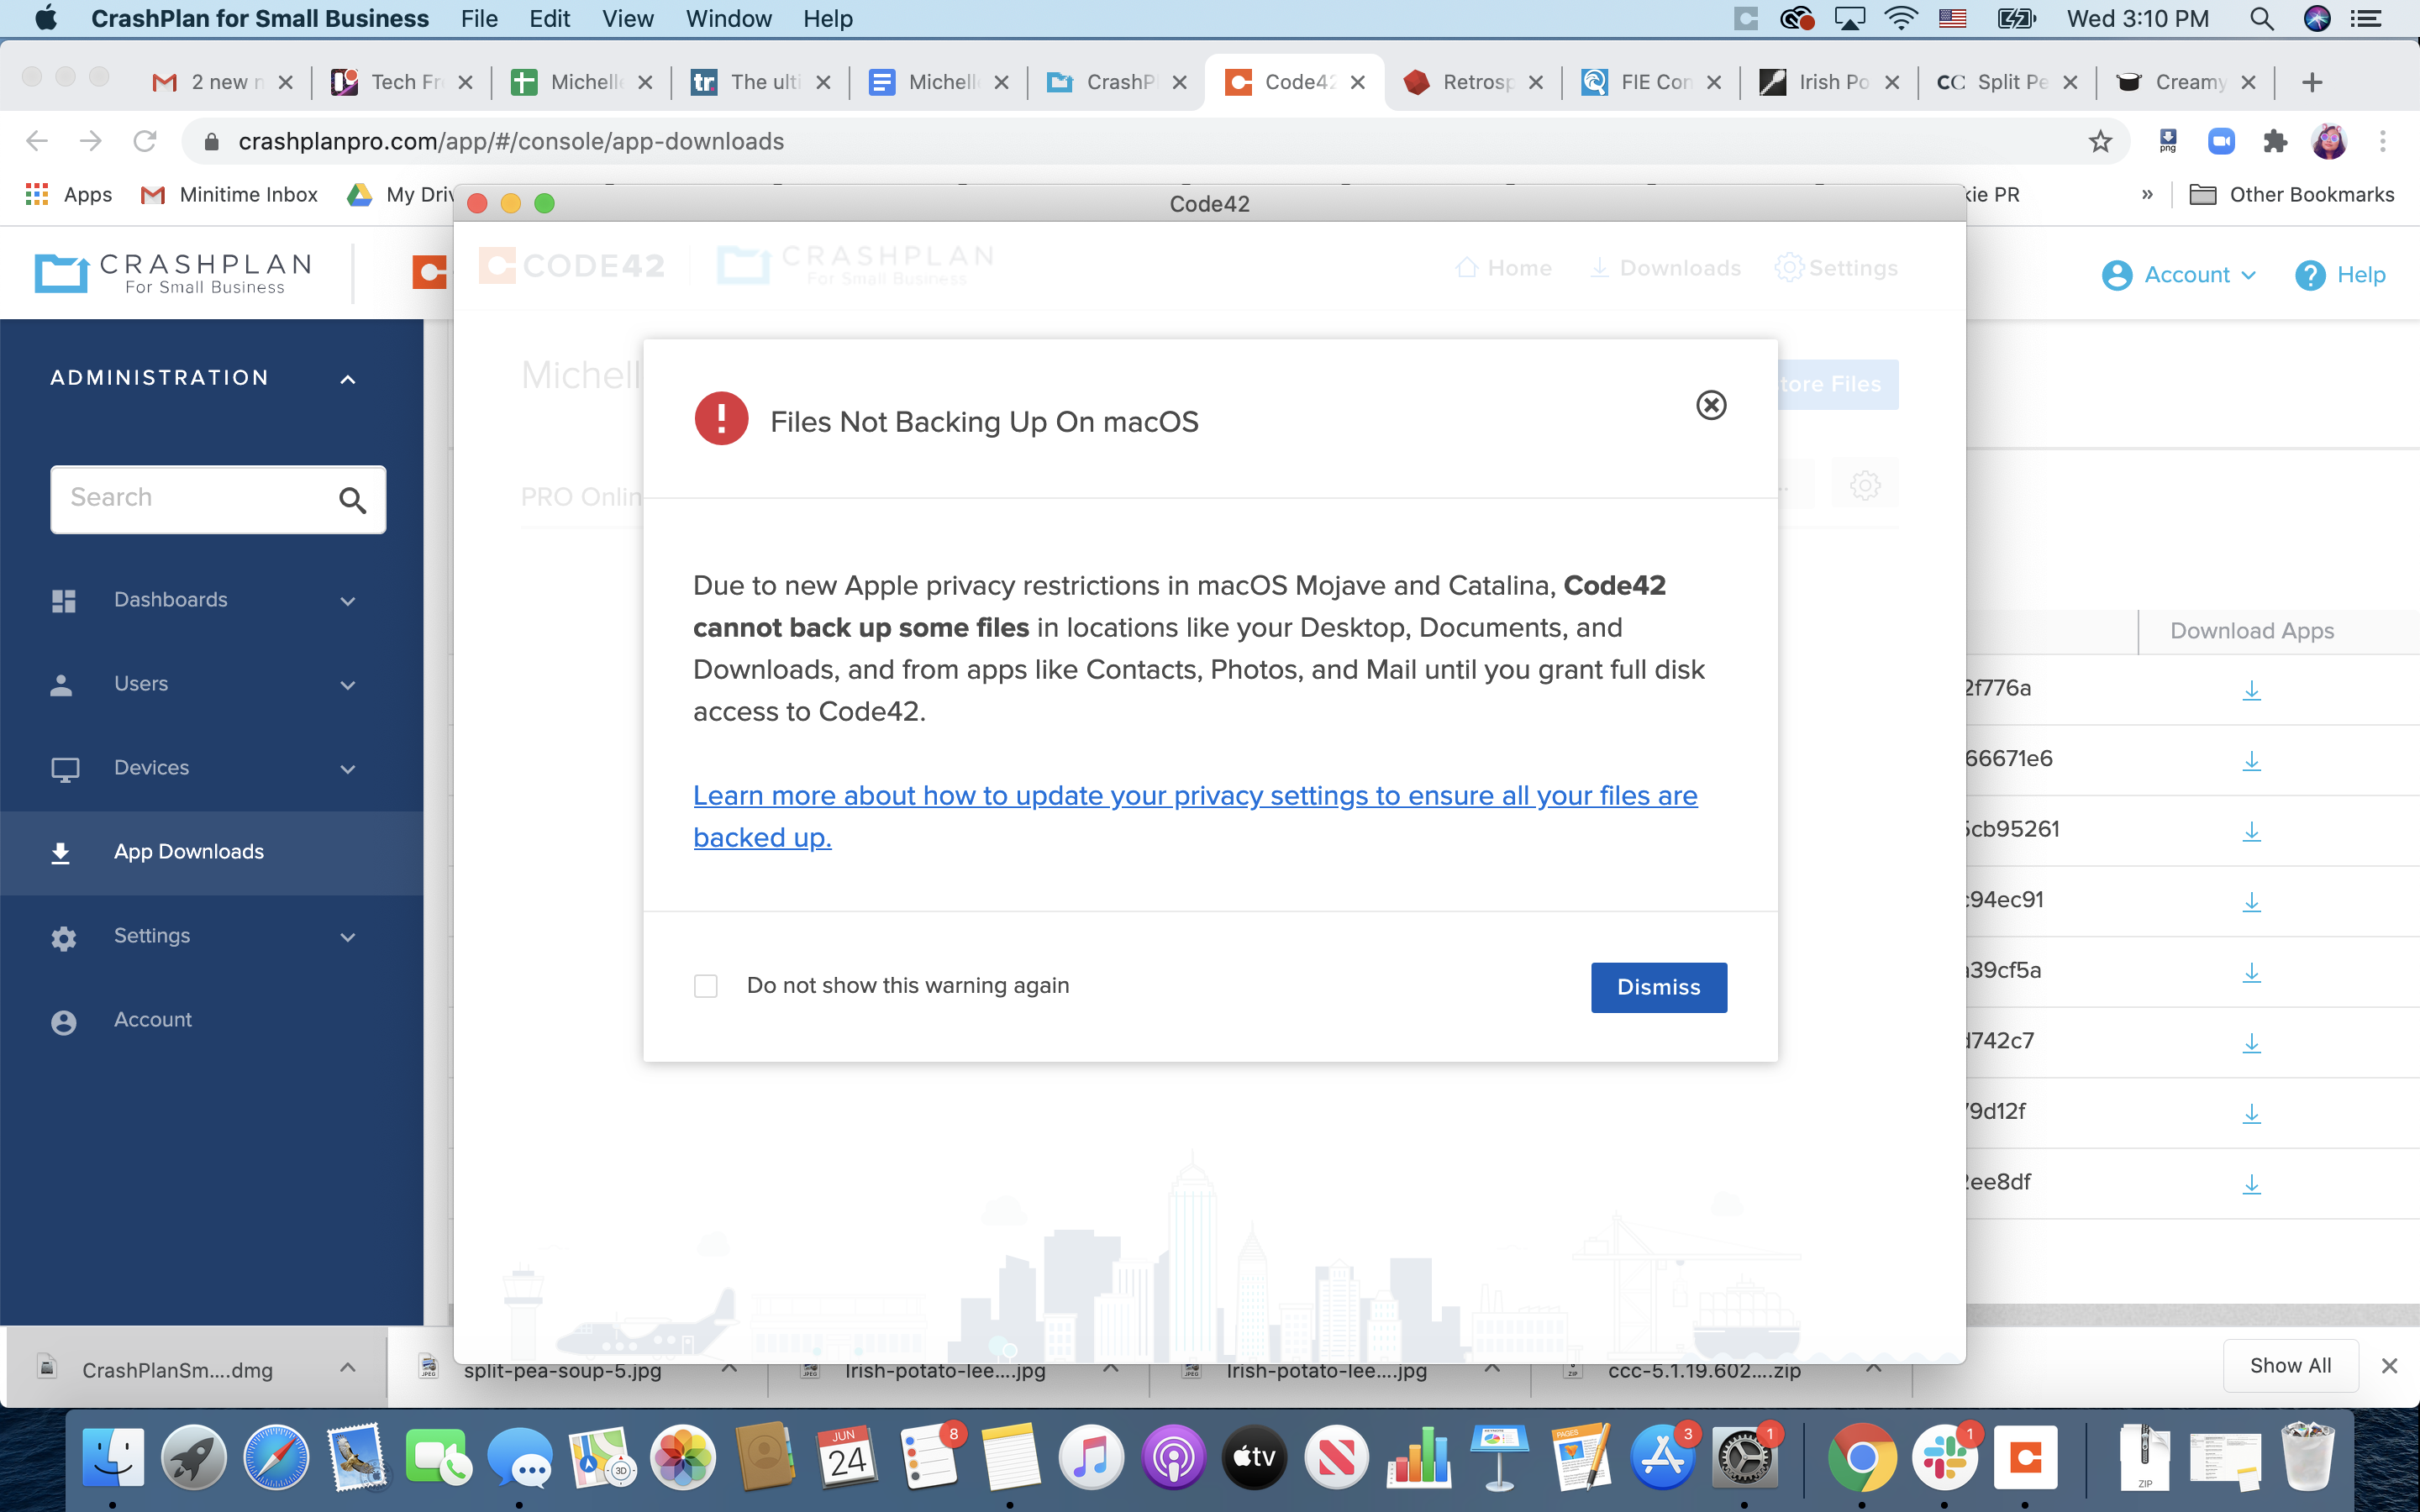
2. Toggle your privacy restrictions
You’ll have to grant full disk access to the CrashPlan app manually. The app will indicate this as soon as you open it.
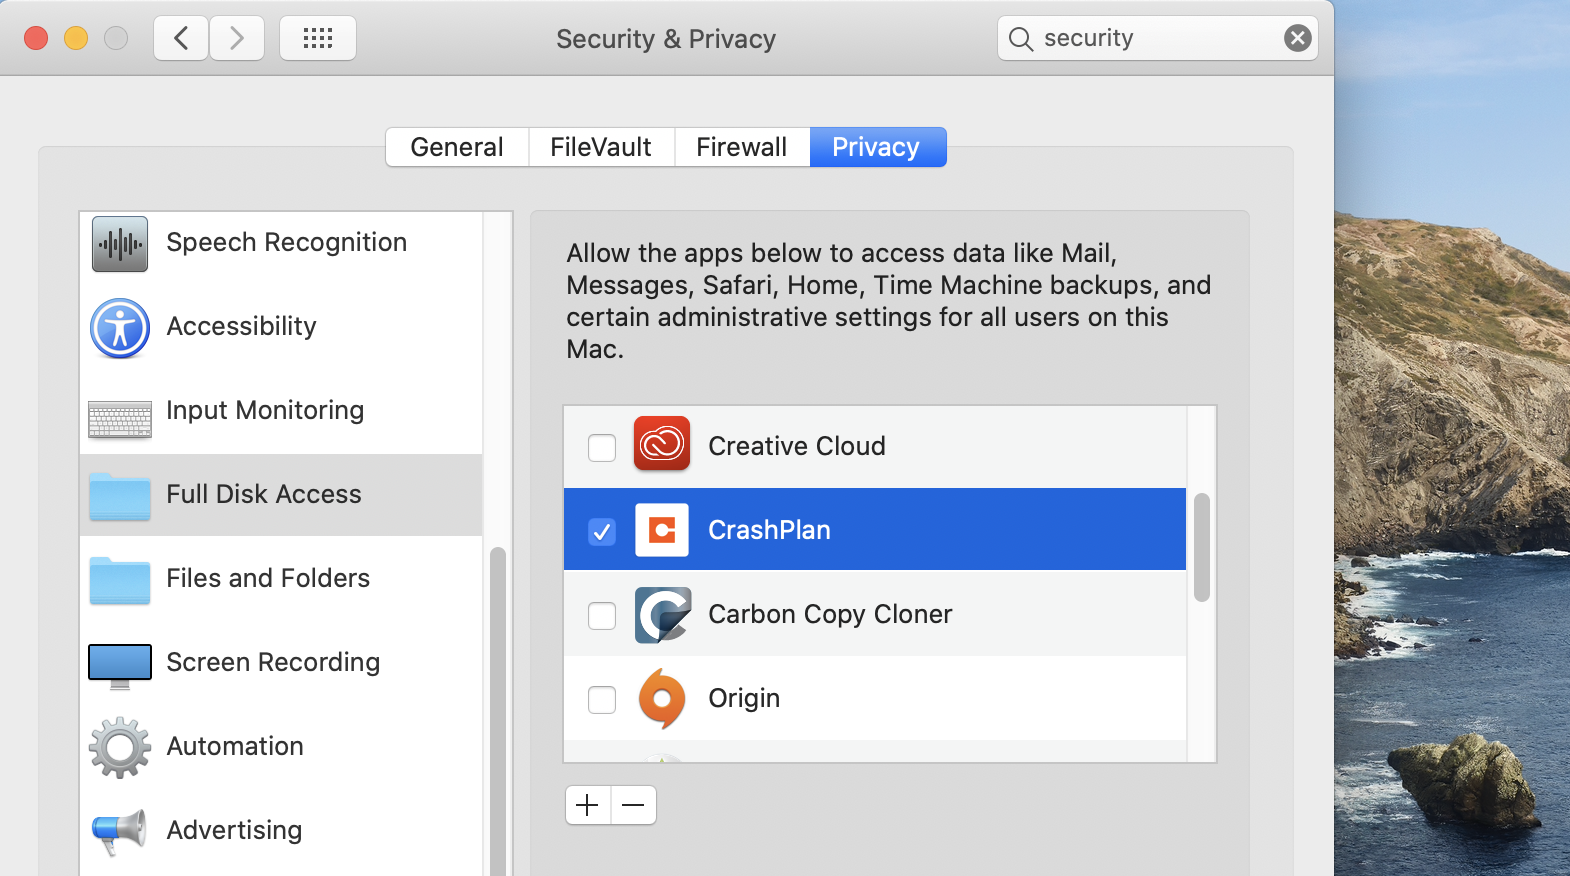
To change your privacy settings and give the app full access, go to System Preferences, click on the Security & Privacy icon, select Full Disk Access in the sidebar, and tick CrashPlan.
A message that says “CrashPlan will not have full-disk access until it is quit” should pop up. This is when you should close all your opened apps and restart your Mac. Once you’ve restarted, CrashPlan should have full-disk access when it reopens.
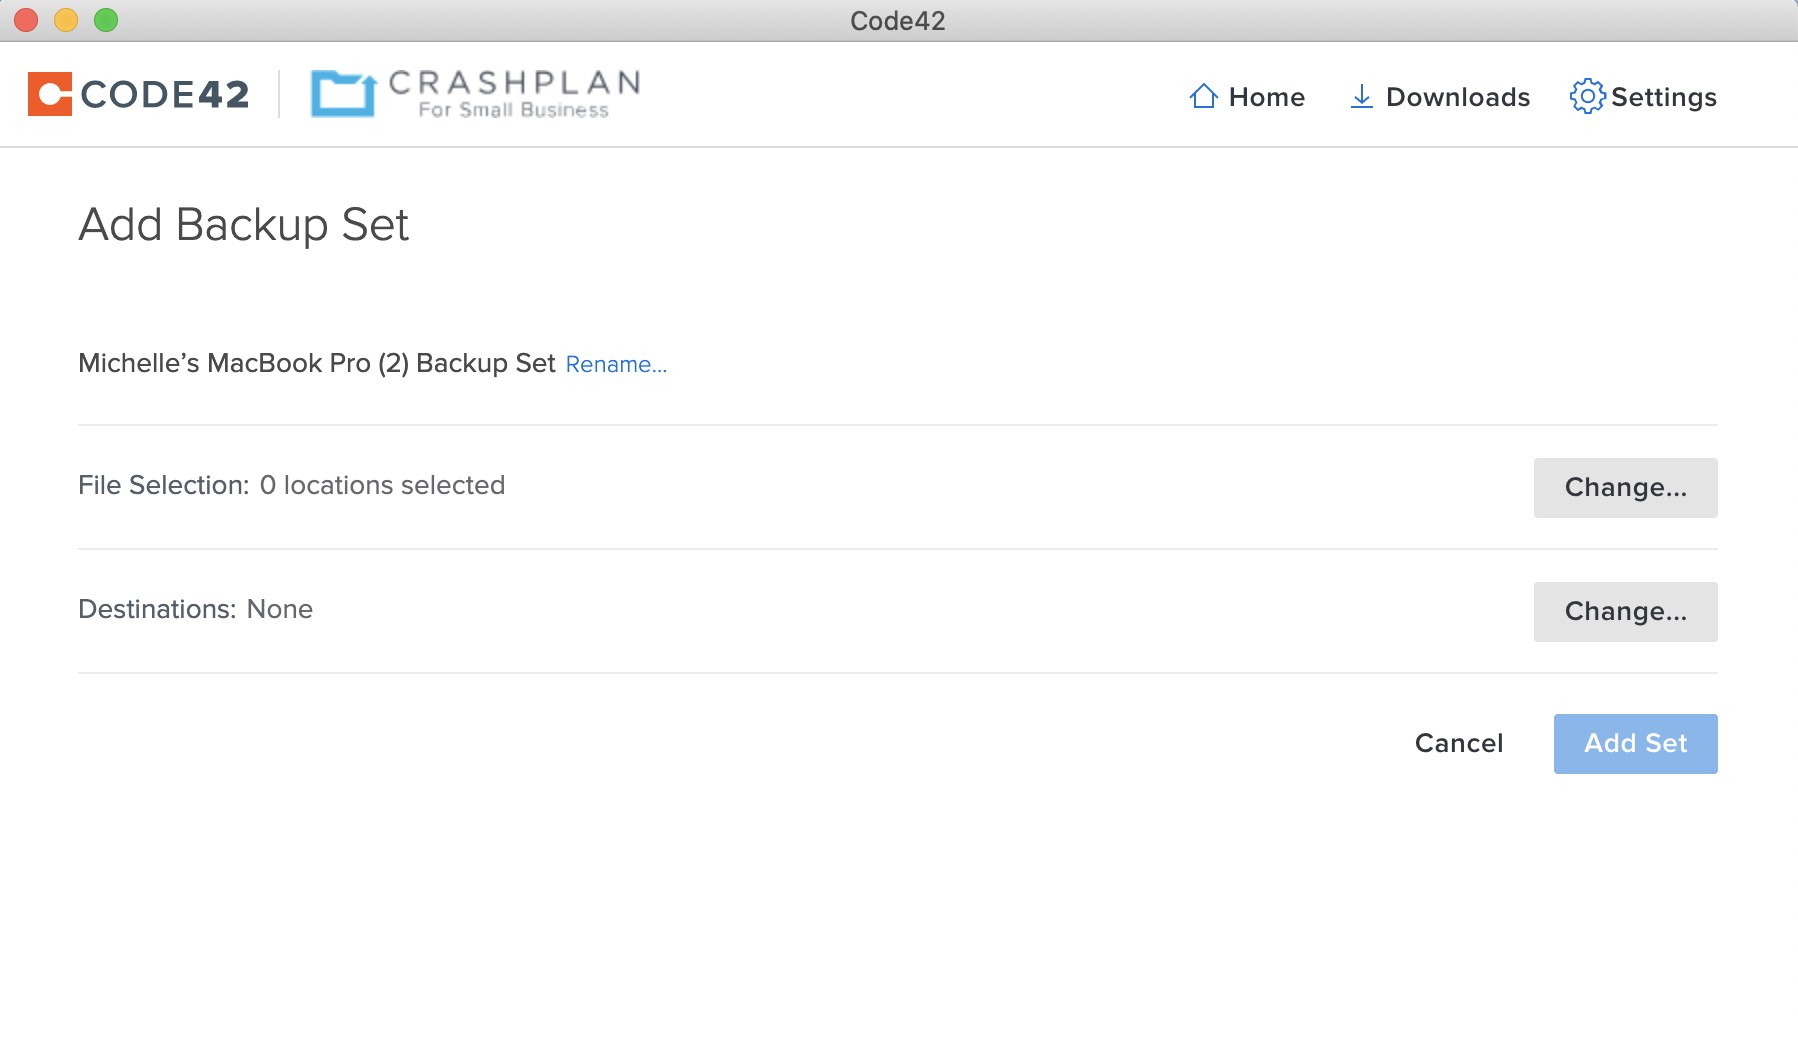
3. Build a back-up set
To start backing up your files, go to File on the CrashPlan main menu and select ‘Add Backup Set.’ Next, choose the files or folders you’d like to back up and the destination for your backup. You should have the option to either save to your CrashPlan PRO Online cloud account or a local destination like an external SSD. Once those are selected, click ‘Add Set.’
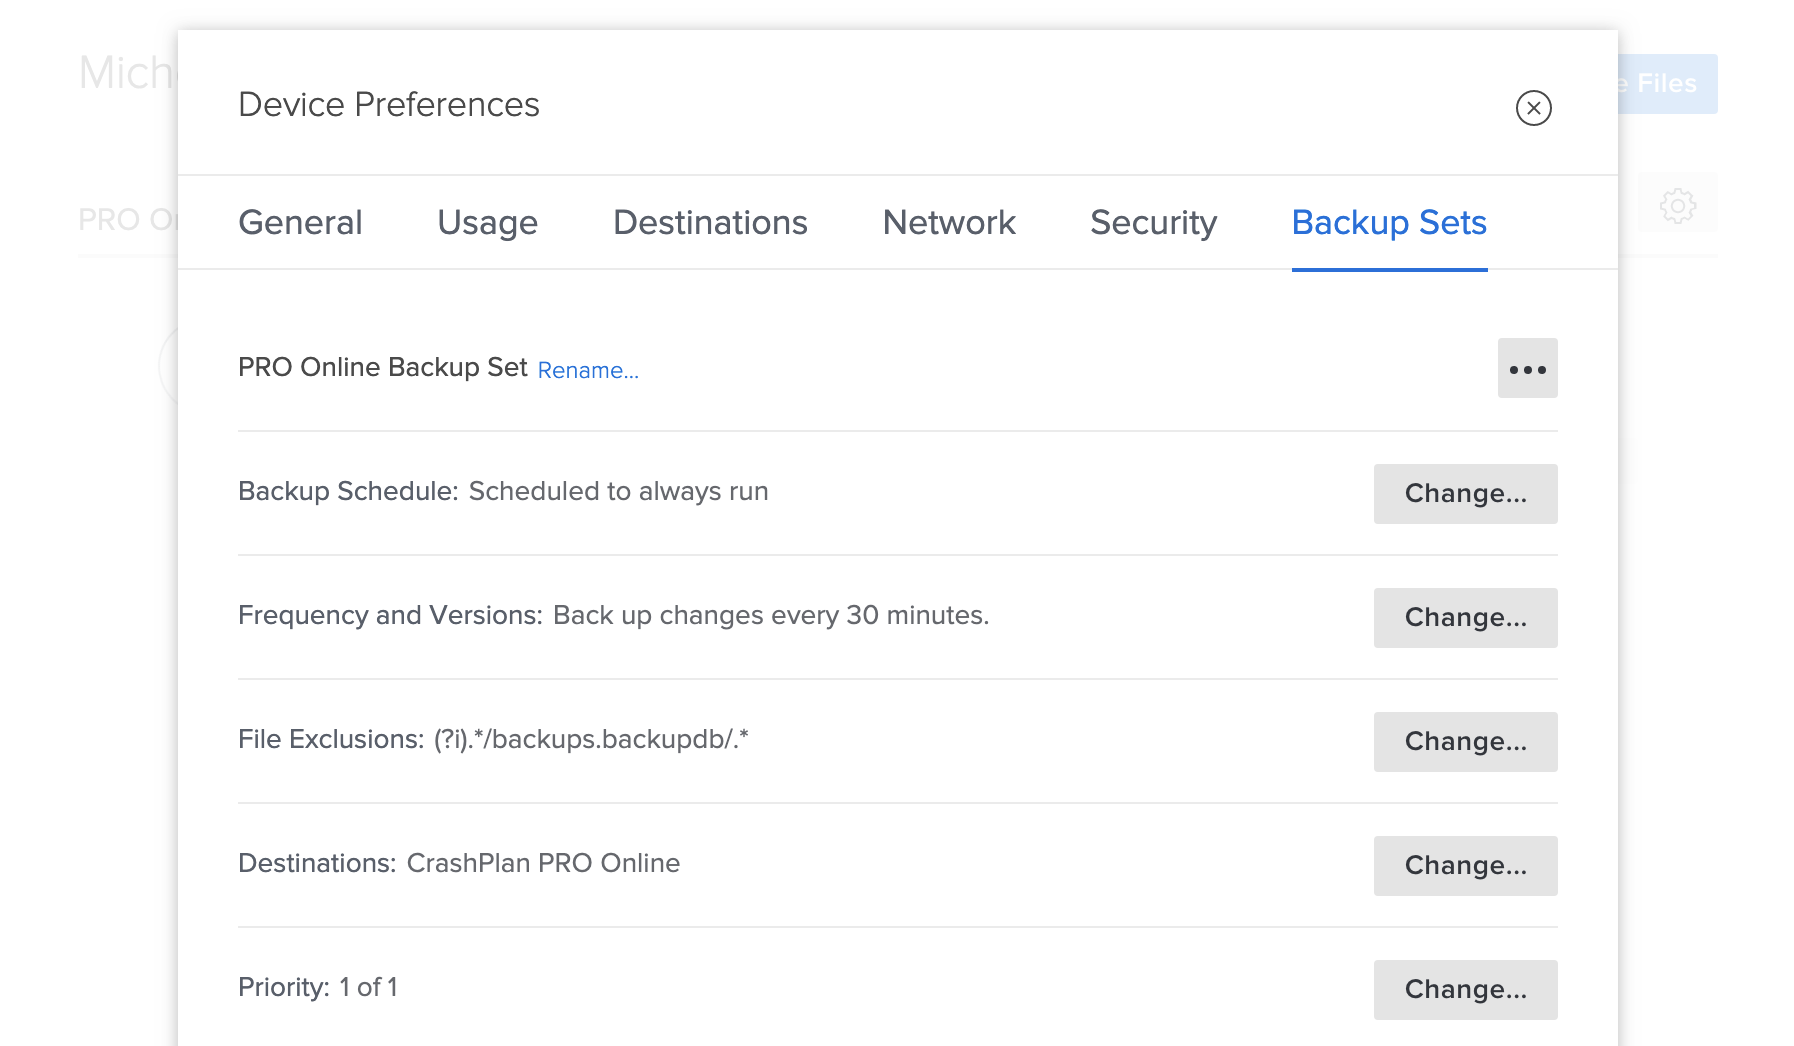
4. Now or never…
Go to Home, click the Settings button next to the Manage Files button, and select the Backup Sets tab. 'Backup schedule' is set to 'Scheduled to always run.' If your broadband is capped at certain times, you can set backups to run.
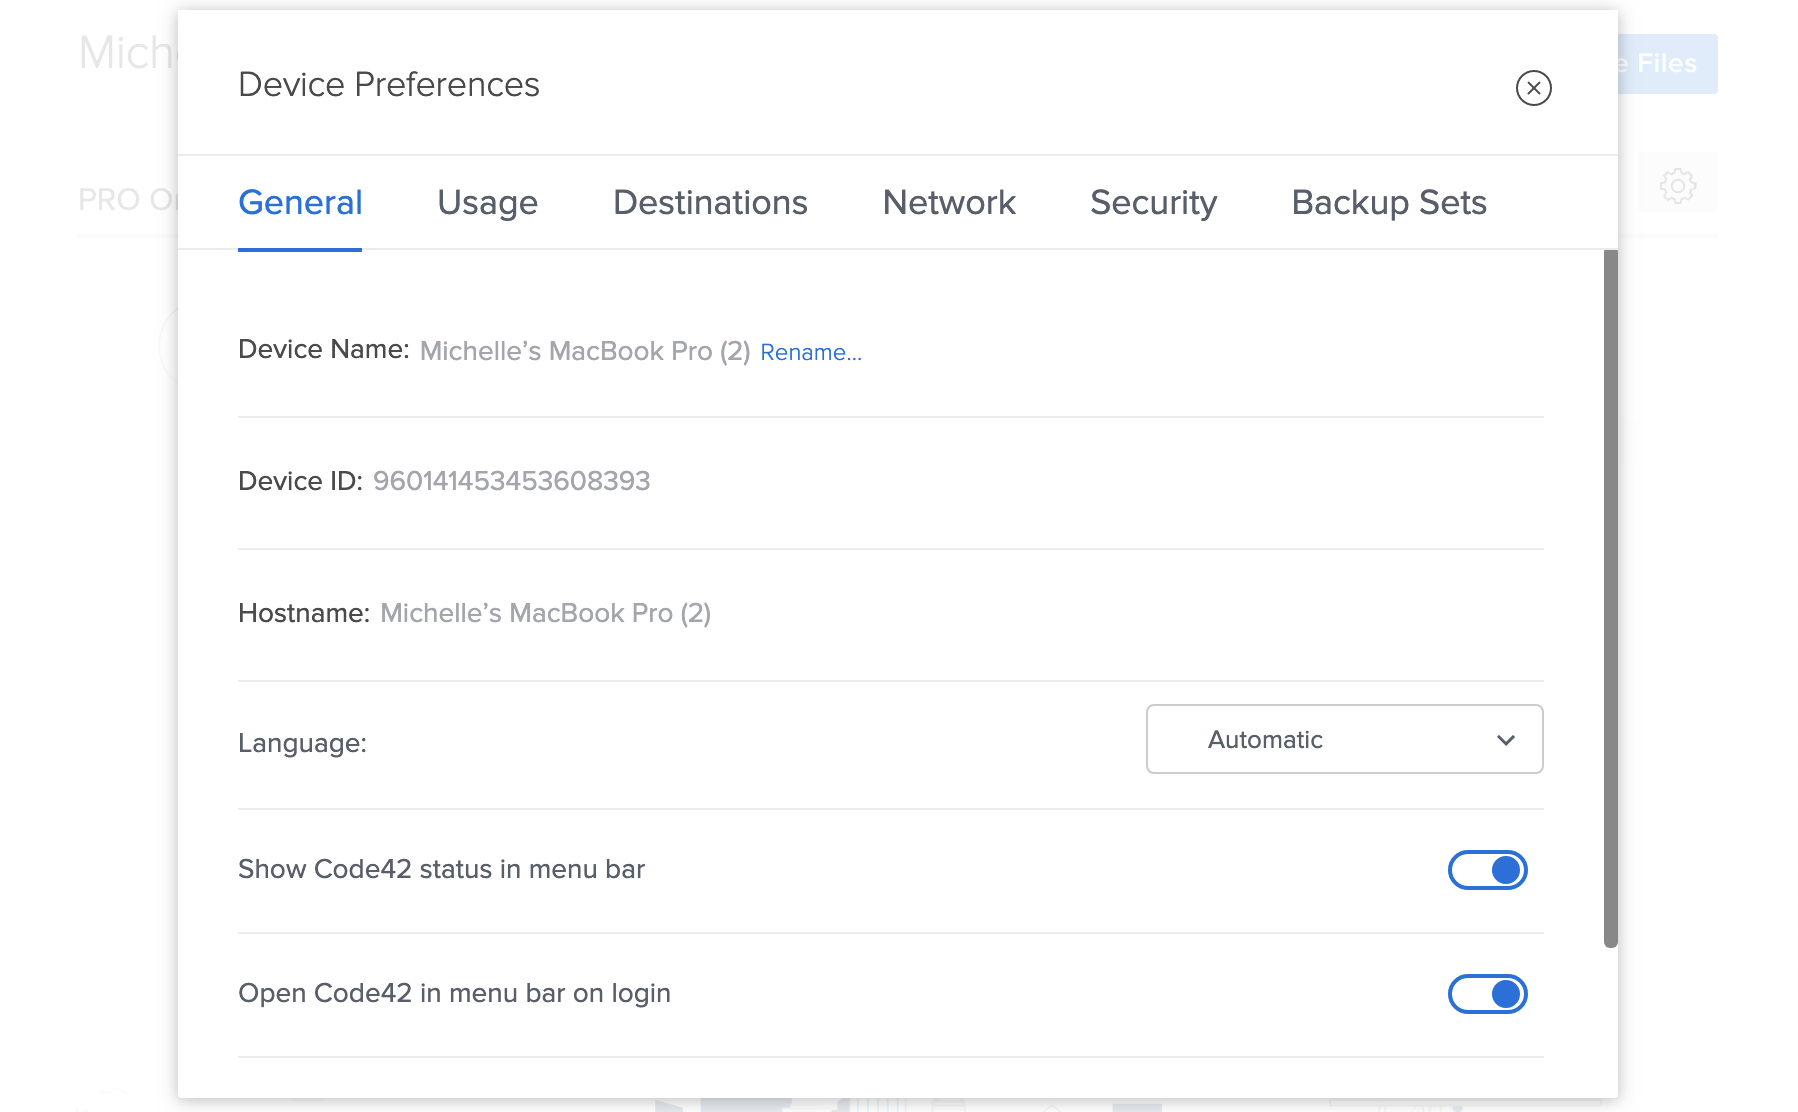
5. Check your backup
Click the General tab in Settings and 'Show Code42 status in menu bar'. Next, click the menu bar icon to monitor the backup – you can pause it if your connection gets sluggish.
Nik is an Esperanto-speaking, pencil-bothering, manual typewriter fan who also happens to have a soft spot for tech after sufficient years in the business to know what that disk icon on the save button actually means. Never happier than when out in his campervan, coffee in one hand, ebook in the other, listening to the rain on the roof.