Here's how to setup your own cloud
Use Nextcloud to roll you very own feature-rich alternative to Google Workspace

Despite all their apparent advantages, there are several drawbacks to using a cloud service. Even if you ignore the privacy repercussions of transferring confidential files to remote servers, many of the public services will quickly become financially infeasible for small businesses as the costs quickly mount with the addition of users and files.
This is where Nextcloud steps in, which lets you have your cake and eat it too. As a self-hosted option, Nextcloud ensures the data stays under your control. On top of that its ease of deployment helps take the pains usually associated with self-hosting.
The open source data sharing server is brimming with features for business users. Not only can it help you store, sync, and share your data, contacts, calendars, and more, but it also boasts of useful features such as single sign-on capability, theming functionality for custom branding, custom password policy, secure WebRTC-powered conferencing, Collabora Online Office integration and more.
- These are the best cloud hosting services on the market
- Here’s our roundup of the best cloud backup services
- Also check our roundup of the best cloud storage services
Furthermore, in addition to the data it houses, Nextcloud can also pool in files from external storage silos including Amazon S3, OpenStack Object Storage, Google Drive, and from across the network via popular protocols such as FTP, SFTP and WebDAV.
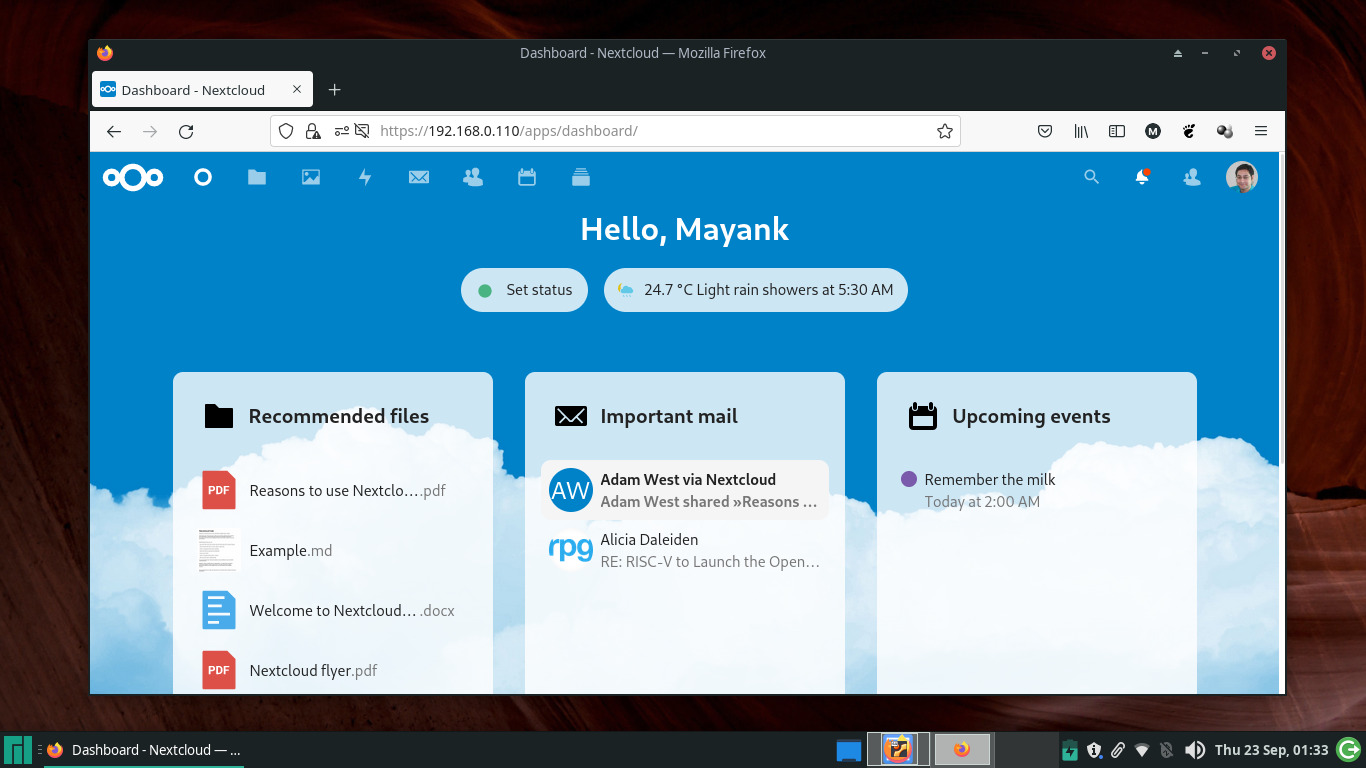
Installation
There are multiple mechanisms for deploying Nextcloud. The easiest option is to run it on a Virtual Private Server (VPS). You can find several VPS vendors that offer one-click Nextcloud deployments; find the one that’s closest to home that offers a suitable plan for your data-hosting requirements, and you’re all set.
Another easy-to-deploy option, that’s a little more involved, but is virtually free and more importantly ensures your data never leaves your network, is to use the official Nextcloud Virtual Machine (VM) disk images.
The official Nextcloud virtual images are created by Sweden’s T&M Hansson IT AB, who’ve configured the VMs to get a secure instance up and running with little effort. The company offers several pre-configured VMs with different-sized disks, from 40GB to 2TB, in both OVA and VHDX format.
Are you a pro? Subscribe to our newsletter
Sign up to the TechRadar Pro newsletter to get all the top news, opinion, features and guidance your business needs to succeed!
The OVA format works on VMware Player, VMware Fusion, as well as on VirtualBox. To get started, simply grab the file that’s sized as per your requirements. When it’s finished downloading, you can import the file into your virtualization platform of choice. The process will take some time.
Roll your cloud
Once it’s done, bring up the VM’s configuration page and head to the Network section to make sure it connects to the network adapter in bridged mode.
You’ll also have to make sure the Nextcloud VM has a static IP address. Most routers enable you to set a fixed IP address for a machine based on the MAC address of its network hardware. Optionally, you can also set one during the configuration process of the VM.
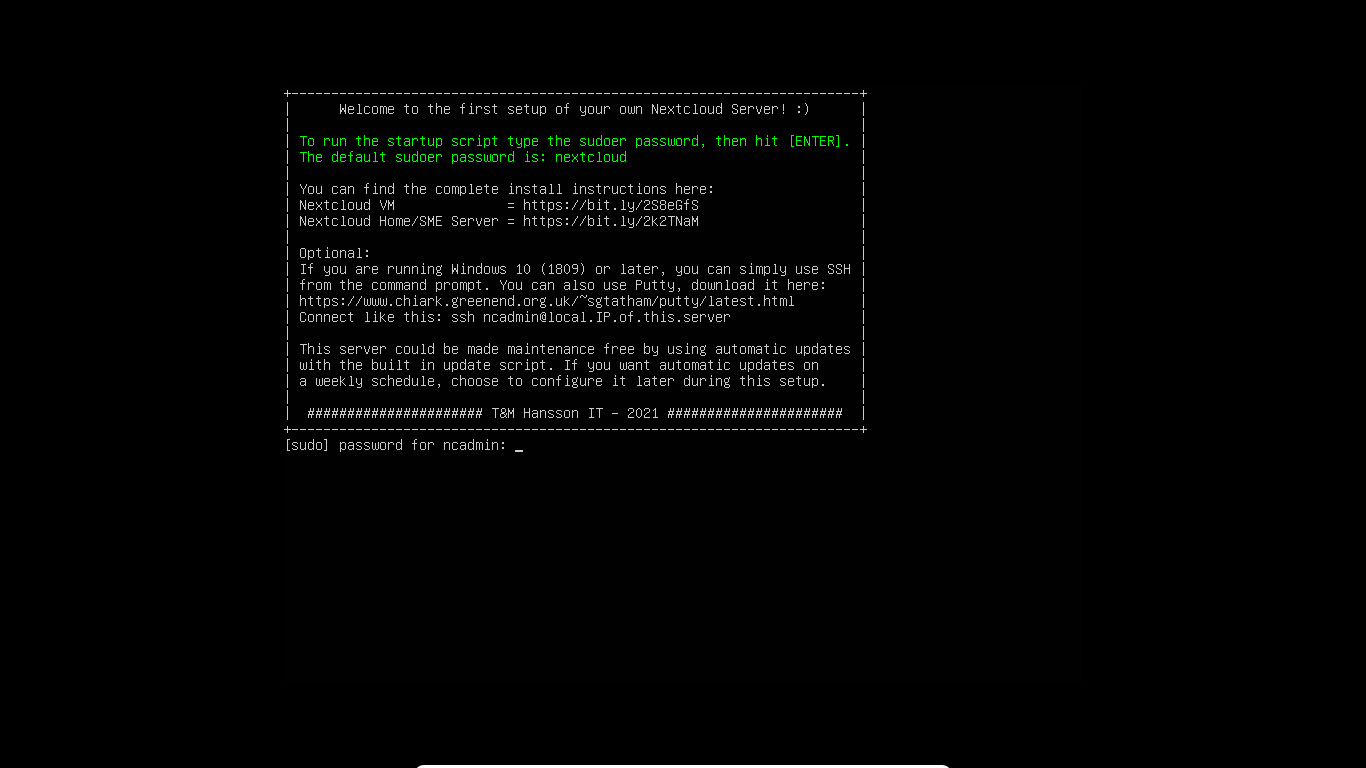
Now boot the VM and log in using the default credentials ncadmin and nextcloud.
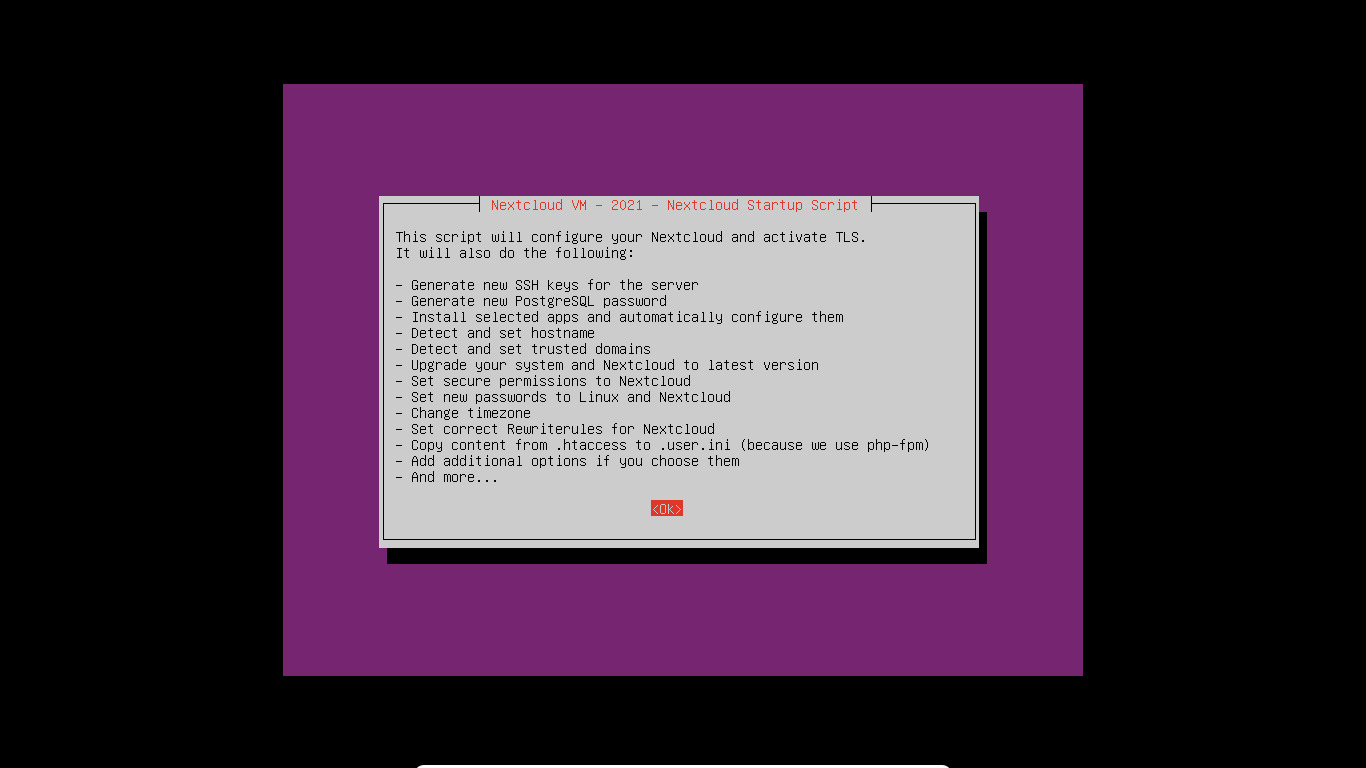
Since this is the first time you’re bringing up the VM, you’ll be taken through a brief configuration wizard. In case the VM fails to detect your network card, reboot it to unblock the virtualized hardware and it should work.
The VM will then grab the setup scripts from GitHub and help you customize your installation as per your requirements. The options are self-explanatory and easy to follow.
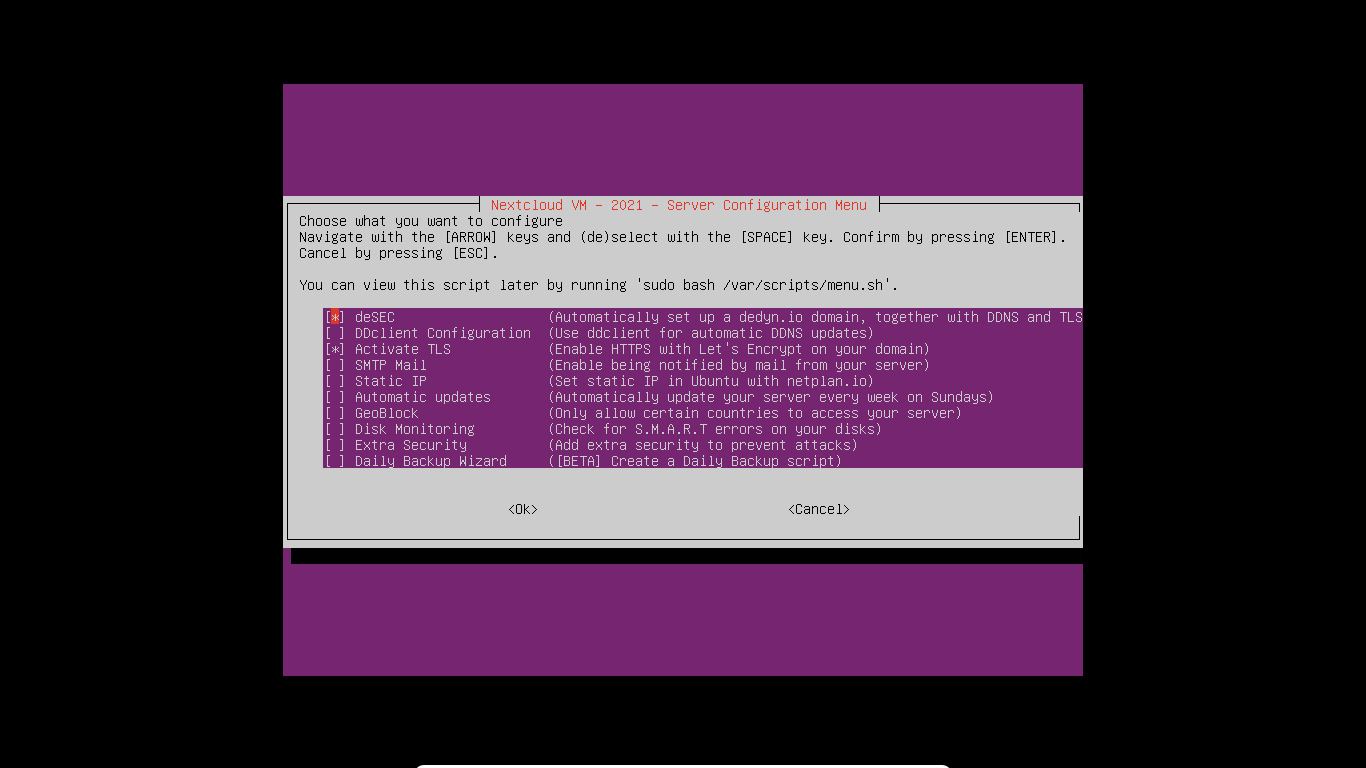
You can skip any options that don’t make sense during the initial setup and get back to it once your server is up and running with the sudo bash /var/scripts/menu.sh command.
Configure your cloud
When you’re done with the initial setup wizard, the VM will reboot into your customized Nextcloud instance.
Fire up a browser and point it to the Nextcloud server, either via the IP address on the local network or via the Dynamic DNS address if you’ve configured one, and log in with the credentials you entered during the initial setup.
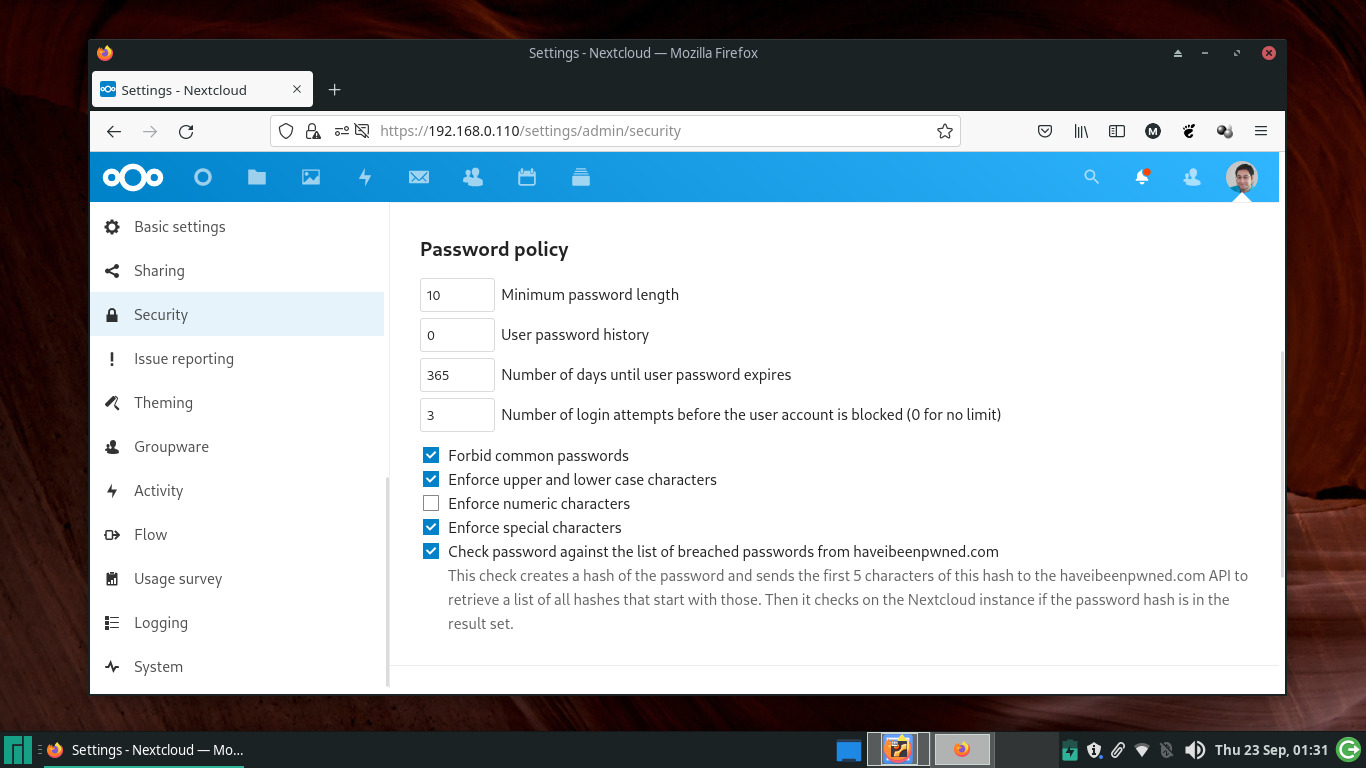
Although your Nextcloud server is now up and running, it’ll still require some tweaking before you throw it open to other users on the network.
Begin by heading to the Administration panel, by clicking your username in the top-right corner of the dashboard and then selecting the Settings option from the drop-down menu.
The Nextcloud server sends various notifications about different activities in the stored files via email. More importantly, it will send you a link to reset forgotten login passwords via email only.
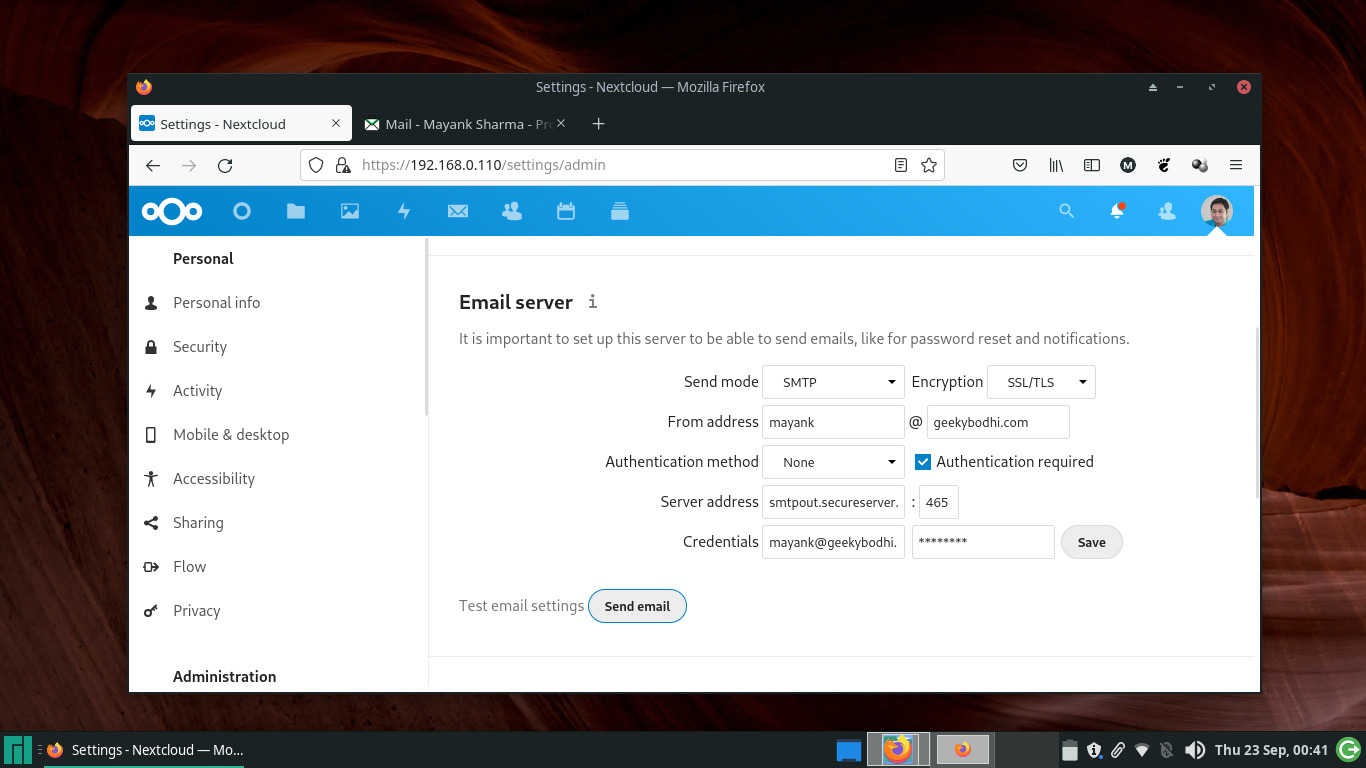
To enable your Nextcloud server to send emails, use the navigation menu to switch to the Basic settings panel and scroll down to the Email Server section. Here you can specify the settings of the email server that Nextcloud can use.
Once that’s taken care of, it’s time to set up some users. A pristine Nextcloud installation has only one user, the administrator. While you can operate your cloud as the administrator, it’s a good idea to employ Nextcloud’s excellent user-management facilities to create a new user.
Nextcloud enables you to create users and groups, send notifications to new users, set data quotas and more. To get started, click the admin’s username in the top-right corner and select Users from the drop- down menu.
This opens the Users page, which lists existing users in the Nextcloud server. Click the +New user button and fill in the relevant details. If you have lots of users, you can also optionally bunch them inside particular groups for easier management.
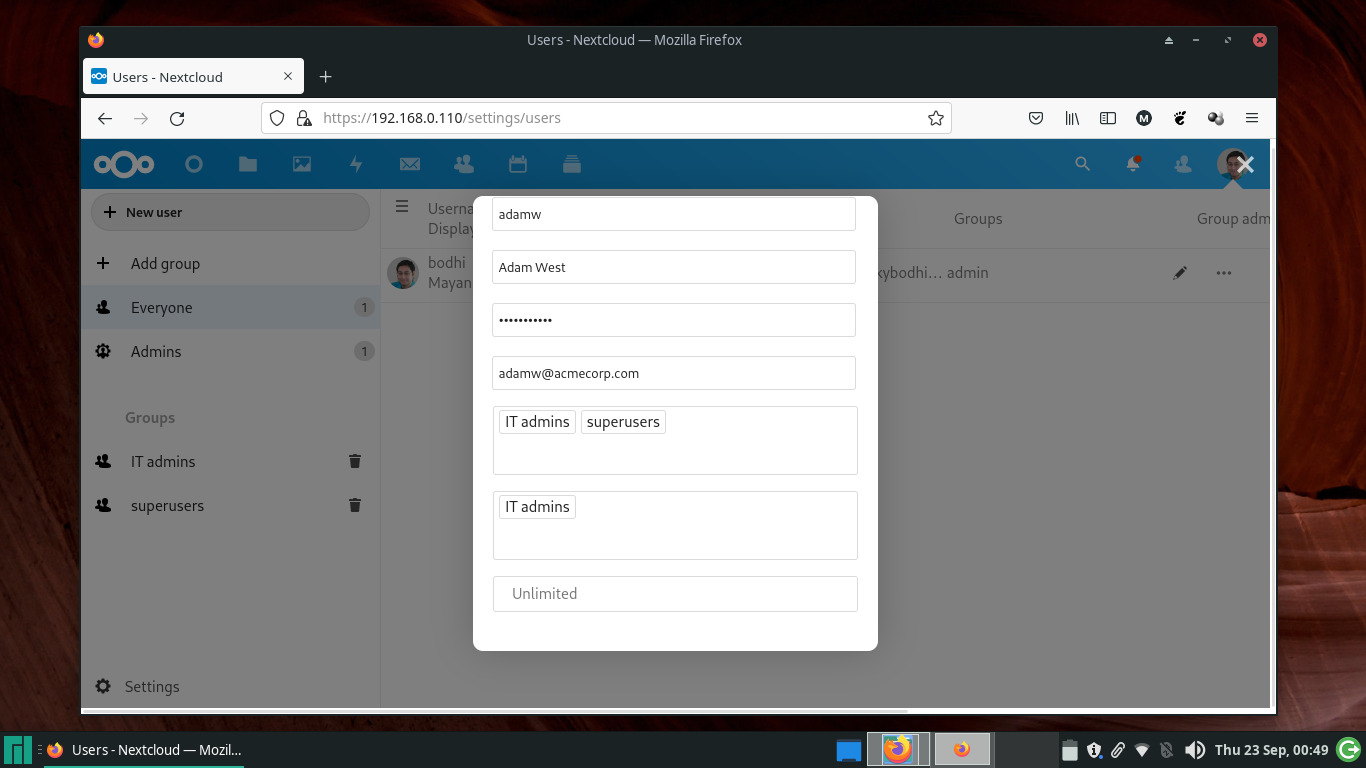
By default, Nextcloud will send an invitation email to all new users, along with a pointer to the Nextcloud installation. Each user also gets a storage quota. You can set this value when creating a user by either selecting a preset value from the Quota drop-down menu, or specify your own.
Use your cloud
You’re now all set to upload data to your Nextcloud server. Log out as the admin user, log back in as a regular user and you’ll land at the dashboard. You can now begin exploring your Nextcloud instance.
To upload files to your cloud, switch to the Files section from the menu at the top of the dashboard and click the + button.
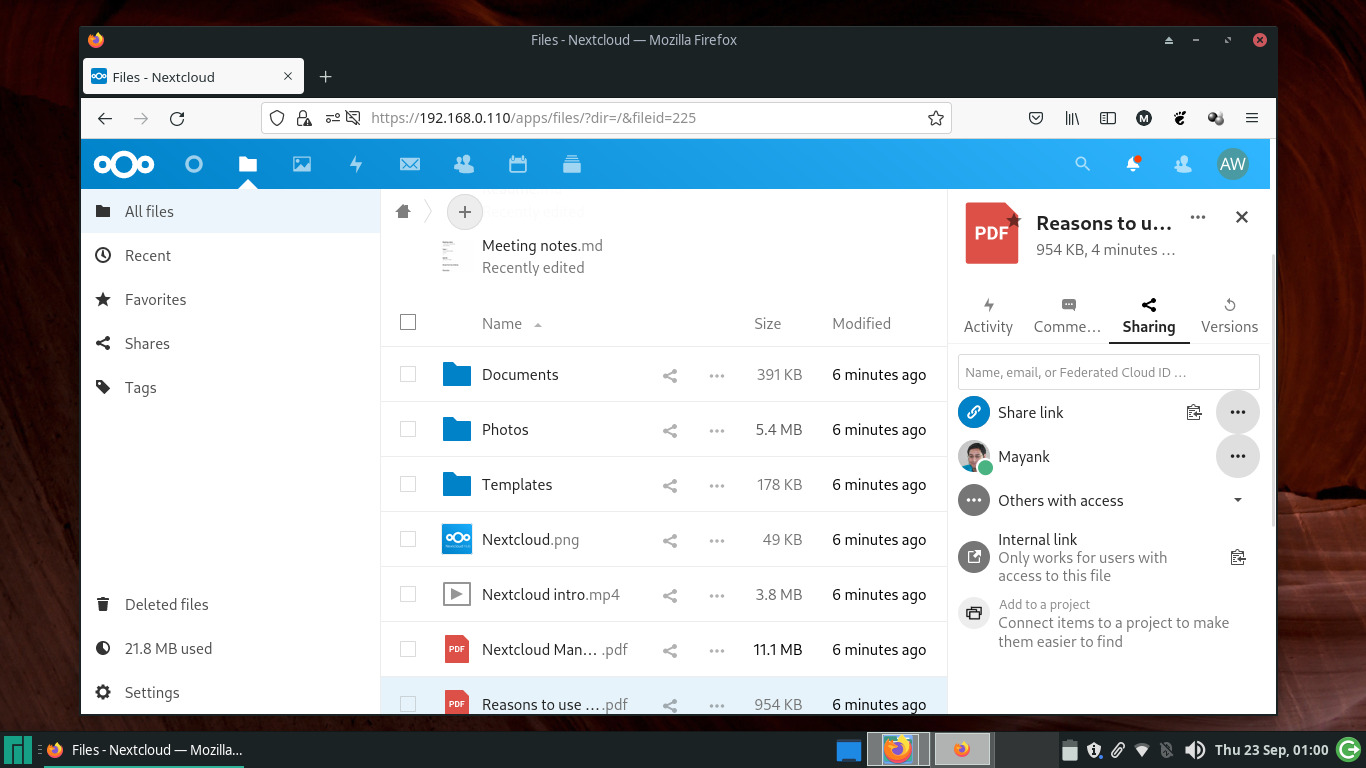
To organize files into folders, click the + button and select the New Folder option. If you’ve uploaded a file in a format that Nextcloud understands, you can click its name to view and edit the file.
To share uploaded files, click the Share button adjacent to the filename. This brings up a flap where you can specify the users and groups you want to share the file with, along with other options such as whether you want to give them permission to modify or further share the file.
Conclusion
We’ve helped you set up your personalized cloud, but there’s a lot more to Nextcloud than what we’ve covered here. Its interface is intuitive, and inviting to encourage exploration. That said, the project is well documented in case you need hand-holding.
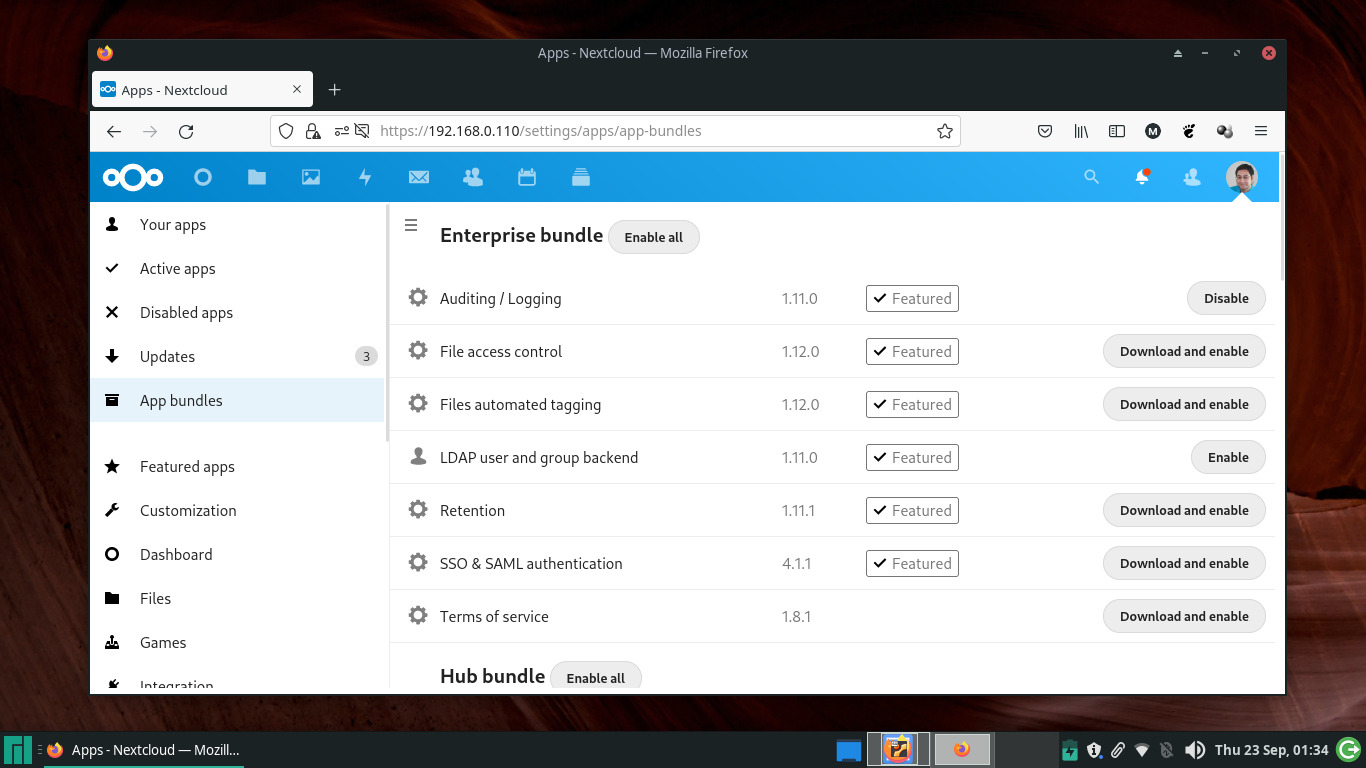
Nextcloud offers a lot more functionality than what it rolls in by default. Head to the Apps section to explore the vast range of additional functionalities you can add to your cloud with a single-click.
And before you finally open the doors of your cloud to other users, remember that while everyone can interact with Nextcloud using the web interface, it’s far easier to use one of its official clients, which are available for all major desktop and mobile platforms.
- Don’t forget to check our roundup of the best cloud computing services available
With almost two decades of writing and reporting on Linux, Mayank Sharma would like everyone to think he’s TechRadar Pro’s expert on the topic. Of course, he’s just as interested in other computing topics, particularly cybersecurity, cloud, containers, and coding.
