How to add two-factor authentication to Linux with Google Authenticator
Get Google Authenticator in Ubuntu

Locking access to your computer (and the data it holds) with just a password doesn’t cut the mustard any more in this age of multi-core processors and easy to use password cracking tools.
If you’re really concerned about unauthorised access to your computer, you should definitely add an additional layer of authentication.
One of the easiest mechanisms to implement such a two-step verification is the Google Authenticator service, which issues a time-based authentication token to supplement the existing password challenge.
- Countdown to the best Linux distro you can get on your PC
Once you’ve integrated the service with your Ubuntu login, in addition to your user password, you’ll be prompted for one of the quickly expiring tokens before being allowed to log in.
Google Authenticator will generate these OTPs on your Android device once it’s been configured for every user on your Ubuntu machine.
To implement multi-factor authentication, you’ll need the Google Authenticator PAM (Pluggable Authentication Module). A PAM is a mechanism used to plug different forms of authentication into a Linux computer.
Get daily insight, inspiration and deals in your inbox
Sign up for breaking news, reviews, opinion, top tech deals, and more.
The Google Authenticator PAM module is available in the official Ubuntu’s software repositories. To install the package on Ubuntu, head to the terminal and type:
$ sudo apt-get install libpam-google-authenticatorOnce the package has been installed make sure you’re logged in as the user you want to protect with the two-factor authentication. Now in the terminal window, type:
$ google-authenticatorThis will initiate the process of creating a secret key for the user by asking you a bunch of questions.
While it’s safe to answer yes to all of them, it’s a good idea to understand each one of them before making your final choice as these choices help balance security with ease-of-use.
The first question is a pretty safe one and you should allow the command to update your Google Authenticator file by answering yes.
You’ll then be asked if you’d like to restrict the use of a token which forces you to wait for 30 seconds between login.
While it might seem inconvenient at first, you should agree to this limitation for maximum protection. The next question asks for permission to increase the time window that tokens can be use for from the default 1:30 minutes to 4:00 minutes.
Although you can answer yes to this question to avoid any issues, type no for maximum security. If you notice any issues later on, rerun the command and increase the expiration time as suggested. The fourth and the last question asks you to limit the number of attempts for entering the authentication code.
You should definitely enable this option as it helps prevent brute-force login attacks.

Book of Codex
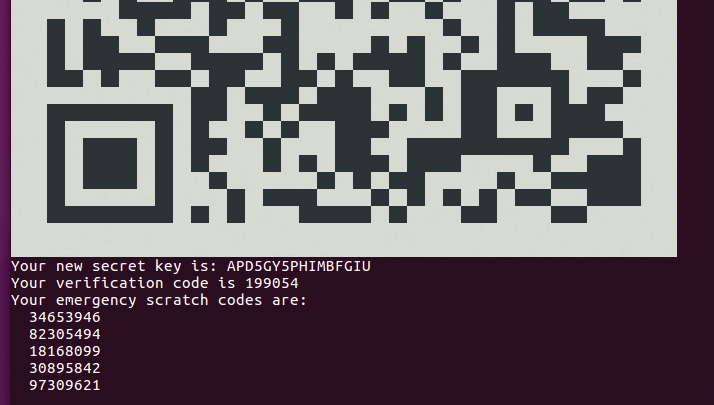
When it’s done, Google Authenticator will present you with a secret key and several emergency scratch codes.
You’ll need to make sure you note down these emergency scratch codes somewhere safe. They’ll help you log in if you misplace the Android phone which generates the OTP. Each code can only be used once.
The google-authenticator command will also generate a QR code that you can scan with your Android phone. Since we haven’t installed the app yet, for the time being just note down the 16-digit code.
Now repeat this process for each user account that uses your computer. Ask everyone you share the computer with to log into their account, run google-authenticator, and make a note of their respective emergency scratch codes along with the 16-digit code.
After you’ve generated the authentication code for all users, it’s time to configure the login process to work with Google Authenticator. All you need to do is edit one file to add two-step authentication for all login attempts. Again, fire up the terminal and type:
$ sudo nano /etc/pam.d/common-authScroll to the end of the file and add the following line:
auth required pam_google_authenticator.so nullok
Instead of local logins, some people prefer to enable two-factor authentication only for remote SSH logins.
For this, begin by making sure you’ve generated a code for the user you want to log in as the remote user. Next, make sure you use Google Authenticator for SSH logins by editing SSH’s PAM configuration file with sudo nano /etc/pam.d/sshd.
Scroll down to the bottom and add the following line to the file:
auth required pam_google_authenticator.so
nullok
Just as in the main tutorial, the nullok word at the end tells PAM that this authentication method is optional.
This allows users without a Google authenticator key to still log in using their SSH key. Remember that this is just a failsafe to prevent you from being locked out in case something goes wrong with the setup process.
However, once you’ve tested it successfully, generate a key for all SSH users and delete nullok from the end of this line to make logins via OTP mandatory.
After editing the SSH’s PAM file, it’s time to configure SSH to support this kind of authentication.
Open the SSH configuration file for editing with sudo nano /etc/ssh/sshd_config.
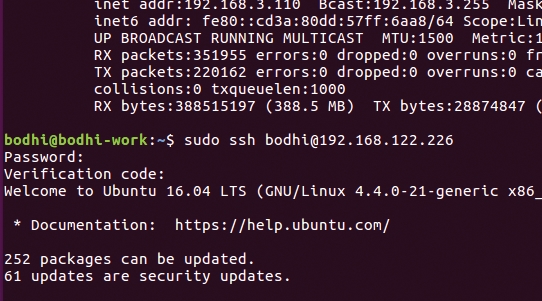
Look for the line that reads ChallengeResponseAuthentication and set its value to yes. If the line doesn’t exist, make sure you add it manually. Save and close the file, then restart SSH to reload the config files with sudo service ssh restart. You’ll now be prompted for both your password and Google Authenticator code whenever you attempt to log in via SSH.
Then save the file and exit. Here we’ve asked Ubuntu to use the Google Authenticator PAM module for all login attempts.
The nullok bit at the end asks Ubuntu to let a user log in even if they haven’t run the google-authenticator command to set up two-factor authentication. So let’s assume you have two users, amber and megan, and have setup Google Authentication only for amber.
Thanks to nullok, while amber will have to enter the OTP, megan will be able to log in with just her password.
Note however that while this is a useful flexibility to have while you’re testing Google Authenticator, once everything works smoothly and you have no issues logging in with the two factor authentication, it’s advisable to force all users to log in through Google Authenticator only by removing the nullok bit for this command.
Go go gadget
Your Ubuntu installation is now all set up for two-factor authentication. To receive the OTPs, you will need to have installed the Google Authenticator app on your Android mobile phone from the Google Play Store.
After installing the app, you will have to add an account for all of the users that you’ve run the google-authenticator command for on your Ubuntu installation.
To do this, open the app and from the main window, tap the menu button (the three vertical dots in the upper right hand corner).
Here tap ‘Set up account’ and then select the Enter key provided option. Now enter the 16-digit secret key that you have noted earlier after you had run through the google-authenticator tool.
Give the account a name (a good idea is to use the username of the account this is for) and tap the ‘Add’ button.
- These are the best Linux training providers and online courses in 2017
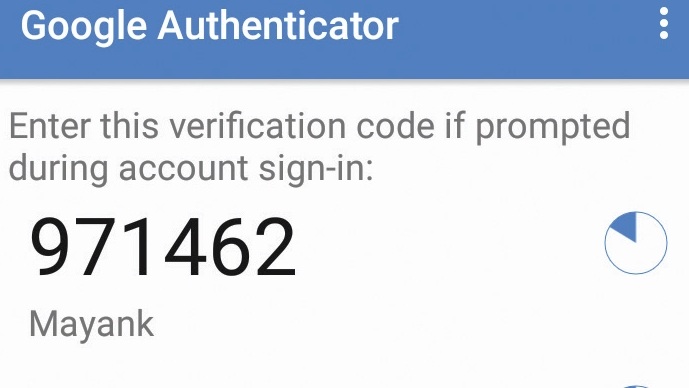
You’ve now set up two-factor authentication on your computer. The Android app will generate a new six-digit code for you every 30 seconds. When you log into your account or enter a sudo command, Ubuntu will prompt you for your password and you’ll then be asked to enter the authentication code.
At this point, enter the digits currently on display in the Android app. Once you’ve logged in successfully, make sure you edit the etc/pam.d/common-auth file and remove the nullok option to force login through Google authenticator.

Also remember to create an account in the Android app for all the users on your Ubuntu installation.
Going through the additional security prompt might seem like a hassle at first, especially when you need to switch to sudo to quickly edit a configuration file. However, if you’re using the computer in a public place, you’ll quickly learn to appreciate the benefits of the two-factor authentication mechanism.
- Enjoyed this article? Expand your knowledge of Linux, get more from your code, and discover the latest open source developments inside Linux Format. Read our sampler today and take advantage of the offer inside.
With almost two decades of writing and reporting on Linux, Mayank Sharma would like everyone to think he’s TechRadar Pro’s expert on the topic. Of course, he’s just as interested in other computing topics, particularly cybersecurity, cloud, containers, and coding.
