How to build a Linux-powered smart home
Add some intelligence to your home and offices
Jitsi? Probably too much coffee
In order for Jitsi to work for users stuck behind NAT, firewalls or other obstacles in the stack, XMPP messages and web traffic must be able to flow freely to your server.
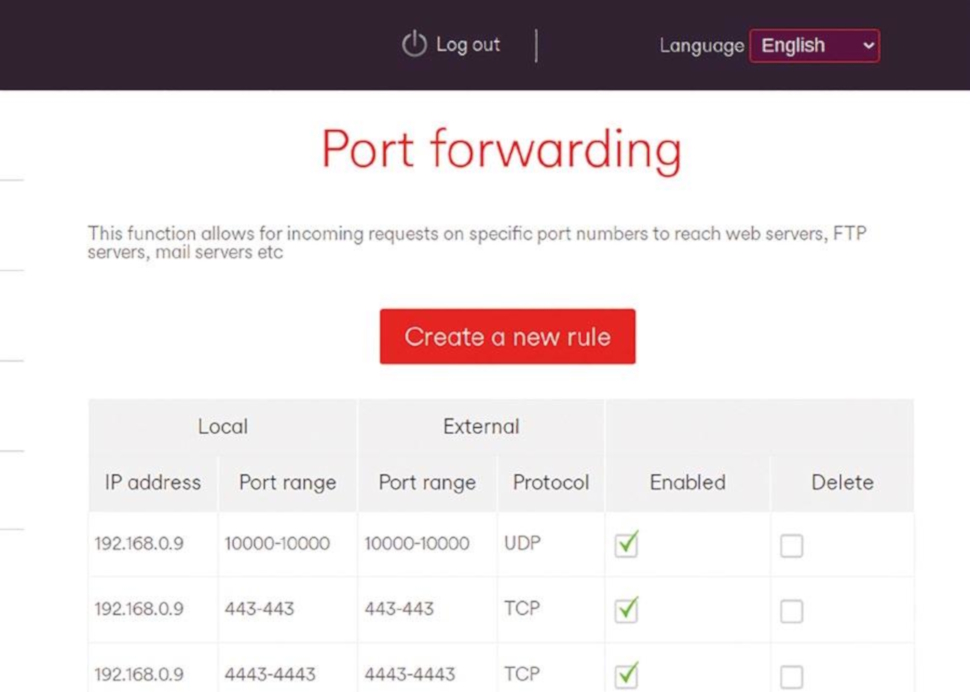
So you’ll need to open UDP port 10000 and TCP ports 80 and 443. TCP port 4443 can be used for fallback communications (if UDP connections are blocked for a user). If you’re doing this behind a home router, you’ll need to forward these ports.
In an ideal world, one-to-one calls should bypass the JVB, and connect directly to one another (so-called p2p mode), but this may be tricky to negotiate – as anyone who ever tried to share files over MSN Messenger in the early aughts will tell you.
Prosody can work with a TURN (or STUN) server to facilitate this, but we won’t cover this setup here.

We will, however get started with a simple setup after one final, but pertinent, warning: the default Jitsi configuration allows anyone to start or join a meeting on your server.
If you leave your server running in this way for any length of time, sooner or later people or bots may discover your machine and potentially cause trouble. The handbook covers how to set up authentication, which you should do.
You should also check the philosophy behind this openness . You’ll be fine using this guide to get things up and running, but just make sure you stop the services when they’re no longer needed.
Are you a pro? Subscribe to our newsletter
Sign up to the TechRadar Pro newsletter to get all the top news, opinion, features and guidance your business needs to succeed!
And now we can get on with installation. We’re more or less following the Self-Hosting Guide in the Handbook, so do check there if you run into difficulty. First add the Jitsi repo with:
$ https://download.jitsi.org/jitsi-key.gpg.key | sudo sh -c ‘gpg --dearmor > /usr/share/keyrings/jitsi-keyring.gpg’
$ echo ‘deb [signed-by=/usr/share/keyrings/jitsi-keyring.gpg] https://download.jitsi.org stable/’ | sudo tee /etc/apt/sources.list.d/jitsi-stable.list
$ sudo apt update
Then let the fireworks begin with:
$ sudo apt install jitsi-meetDuring package configuration, you’ll be asked for your Pi’s hostname, and whether you want to generate a new, self-signed certificate or use an existing one.
Choose the first option if you don’t already have a valid one for this domain. We’ll replace it with a Let’s Encrypt certificate later.
At this point, you should be able to log in to your server using your web browser. Just point it to https://meet.yourdomain.com and you’ll see the scary certificate warning we warned you about earlier.
You can skip this for now (just this once) and you will be greeted by the Jitsi welcome screen, from where you can start a new meeting. Your web browser will ask for permission to use the camera and microphone, and you should see a message saying that you are the rightful moderator of this room.
Being alone in a room is no fun, so on another device (or get a friend to do this, if you have such a thing) visit the meeting by appending a slash followed by the room name to the server’s URL.
With that working we can now address our server’s slightly too Open for Business attitude and add some authentication. Edit the prosody configuration at /etc/prosody/conf.d/meet.yourdomain.com.cfg.lua (replacing the domain name as appropriate).
In the section beginning VirtualHost “meet.yourdomain.com” change the authentication line, currently set to anonymous, so that it reads:
authentication = “internal_hashed”Then add (and adjust the domain in) the following at the end of the file to set up a guest domain:
VirtualHost "guest.meet.yourdomain.com"
authentication = "anonymous"
c2s_require_encryption = false
Don’t worry, the extra subdomains configured here are only used internally so they don’t need a bona fide DNS record.
Now we’ll go from Lua to JavaScript and add the guest domain to the frontend. Edit /etc/jitsi/meet/meet.yourdomain.com-config.js and add the following lines to the hosts section:
anonymousdomain: ‘guest.meet.yourdomain.com’,Finally we should make focus requests only available to registered users, which is done by editing /etc/jitsi/jicofo/sip-communicator.properties and adding:
org.jitsi.jicofo.auth.URL=XMPP:meet.yourdomain.comNow restart the services and add a user with the prosodyctl register command. You can now generate a Let’s Encrypt certificate with:
$ sudo /usr/share/jitsi-meet/scripts/install-letsencrypt-cert.sh