How to build a Linux-powered smart home
Add some intelligence to your home and offices
Portainer & Docker
When you’re running a home server or VPS, Docker is pretty great because you can add services without messing (too much) with the underlying system configuration.
As we saw with Nextcloud though, even with just four Docker containers things were starting to become unwieldy. Portainer is a Docker management system that aims to restore order to your containers.

It comes in two parts, server and agent, which both ship as Docker containers. We’ll only need the server image for this initial foray.
The agent is used to marshall Docker Swarms, which are another way of connecting containers together. We’ll start by creating a volume for data, and then firing up the image:
$ docker volume create portainer_data
$ docker run -d -p 9000:9000 --name=portainer --restart=always -v /var/run/docker.sock:/var/run/docker.sock -v portainer_data:/data portainer/portainer
Note that images can be added according to their listing on Docker Hub, so you can find out more about the Portainer image at https://hub.docker.com/r/portainer/portainer
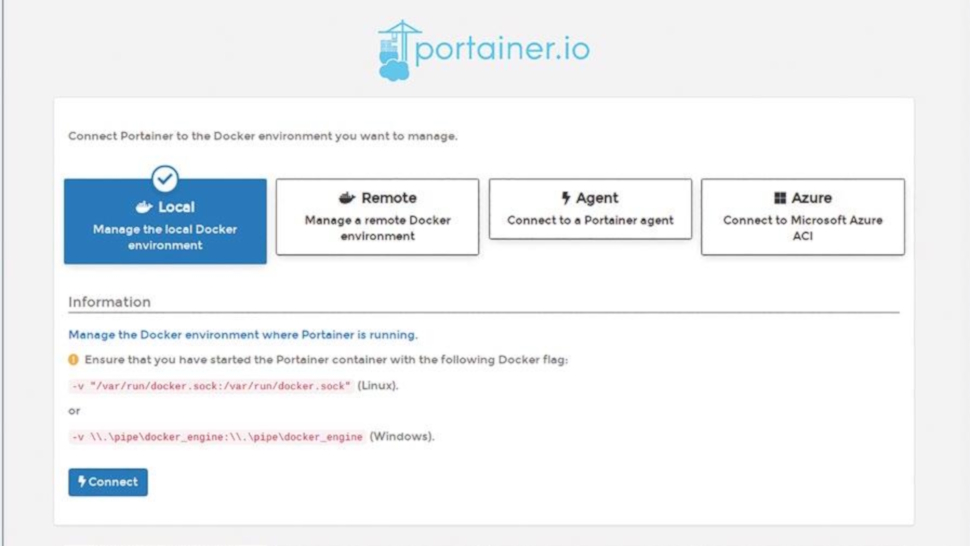
You should find Portainer’s admin panel now waiting for you on port 9000, so point your browser there, choose a password, select Manage the local Docker environment and enjoy the friendly interface.
If you installed Nextcloud through Docker earlier, you should see all those containers listed in the Local Endpoint on the Home screen.
Are you a pro? Subscribe to our newsletter
Sign up to the TechRadar Pro newsletter to get all the top news, opinion, features and guidance your business needs to succeed!
If you click Containers on the menu on the left, you’ll see these (and our latest Portainer container) in more detail. The quick actions column allows you to see each container’s logs, info, stats and also log in to each one directly from the browser.
This is a great way to do some troubleshooting, but recall that containers in general are quite minimal, so you won’t find any fancy utilities. Adding a new container is easy. For example, if you want to add Collabora’s CODE, and connect it with a Nextcloud install, hit the Add Container button and enter a meaningful name.
In the Image field enter collabora/code, and in the Manual network port publishing section enter 127.0.0.1:9980 in the host field and 9980 in the container field.
In the Advanced container settings below, go to the Env section and set the following environment variables:
domain: share\\yourdomain\\.com
username: admin
password: yourpassword
Finally in the Restart policy column select Always, so the container restarts on configuration change. Hit Deploy and the container will spring into life.
For guidance connecting it to your Nextcloud instance, check the documentation at https://nextcloud.com/collaboraonline.
All going well you should be able to specify it from Nextcloud, specifically from the Collabora Online section in Settings. You may need to tweak the reverse proxy container to direct traffic to the new container, if you used the Docker Compose example on the previous page.
In that case you’ll find that example in the Stacks section with a warning about it being created outside of Portainer.
In Portainer parlance, groups of containers are called Stacks, and it can only do limited things with externally created Stacks. However, it’s easy to create a new Stack; just paste, upload, or point Portainer to the URL of a docker-compose.yml file.
Current page: Portainer & Docker
Prev Page Nextcloud via Docker... continued Next Page Mailcow:Dockerized