How to build the fastest Linux PC possible on a budget
Using affordable performance-orientated components
Introduction
There’s nothing more satisfying than watching a system boot up almost instantaneously when the power switch is hit. Long gone are the days of going to make yourself a brew while those spinning platters buzz and the display kicks into life, lazily dragging you into the GUI you call home.
But surely that luxury of speed is reserved for those who are willing to drop £1,000+ on a new system? Fortunately, this is not the case anymore. With advancements in technology over the last six years, and Intel’s aggressive push to keep reinvigorating its chipsets each and every generation, we’re starting to see more and more affordable budget, speed-oriented components finally making it to market.
The SSD has succeeded the hard drive with sub 10-second boot times and lightning quick file transfers. However, three years on and we’ve seen both the rise and fall of the SATA III bus. This was a standard that was supposed to last us until 2020, but now lies completely saturated, with only the ever enduring HDD still making good use of the connectivity.
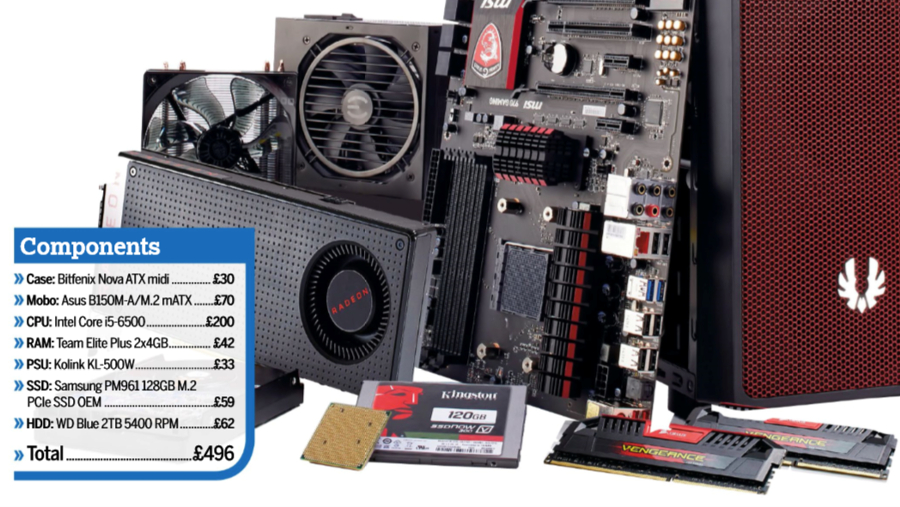
Fortunately for us, workarounds have been found in the search for ever increasing performance and ever increasing speed. Utilising the PCIe bus to transfer data to and from any hard drive to the processor has proved to provide almost limitless potential when it comes to file transfer speeds – at least for the time being. And as M.2 and U.2 PCIe SSDs have matured, so too have their sequential read and writes, alongside a continual plummet in cost to produce them. What this has led to is the potential to piece together a system for just over £400.
And that’s a system we intend to walk you through today. A system including an Intel Core i5-6500 quad-core processor, one of the latest chipsets featuring the lightning fast and insanely energy efficient DDR4 memory standard, alongside a PCIe M.2 SSD. In our case, we’ve opted for one of Samsung’s OEM PM961 M.2 drives, specifically the 128GB variant.
- These are the best Linux training providers and online courses in 2017

Choosing the right hardware
Sorting out hardware for a new system is a pretty daunting prospect for anyone and especially so if you’ve been out of the hardware game for any period of time as the progress never stops. Platforms, processors, sockets, connectivity standards change so often it can be hard to keep up.
A good place to start is with a budget. Once you’ve set out just how much you want to spend on a new system, head over to www.pcpartpicker.com, change the language to your country, hit ‘View Your System Build’ and begin work on piecing together just exactly what you want. You should always base it around a few key components.
For this build, we knew we wanted one of Intel’s latest quad-core processors and an M.2 SSD of some description. The beauty of PC Part Picker is that once you have a certain product selected, it’ll isolate the compatible components compatible from the other lists. Choose a processor that fits into an 1151 socket, and the website will make sure that you only see motherboards that are compatible with that chip.
Initial preparation and PSU installation
So you’re ready to build your new speedy system. The first thing you’ll want to do is prepare your work area. It goes without saying you’ll need a few tools. We suggest a range of Phillips head screwdrivers, some cable ties and a pair of scissors. Next, you’ll want to make sure you’re building your system in a static-free place. Avoid wearing woollen socks and jumpers for this.
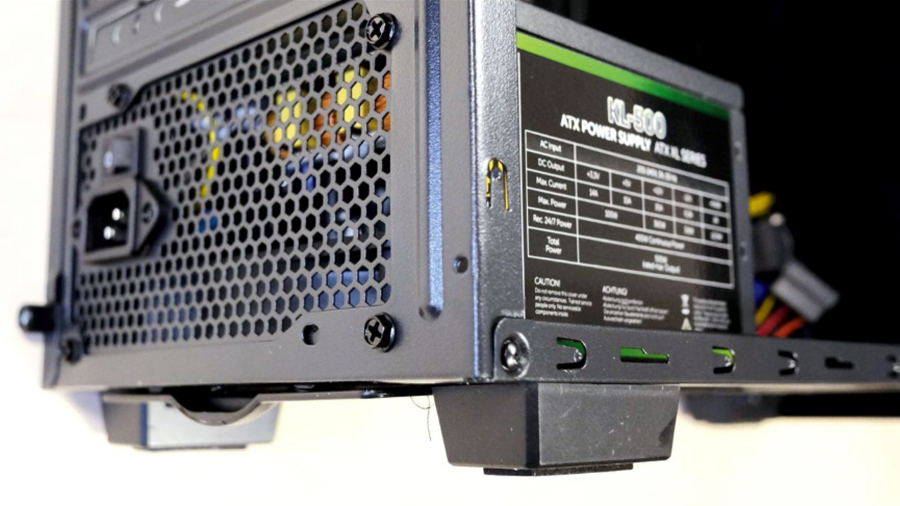
Now unbox your case, take off the side panels and pull out the included cardboard box with the screws and cable ties inside. You’ll then want to insert your power supply with the fan facing upwards if you wish to draw warm air out of your chassis or with the fan facing down, if airflow is going to be less of an issue. Secure the PSU with four screws. Then tuck the cables inside the chassis.
Motherboard installation
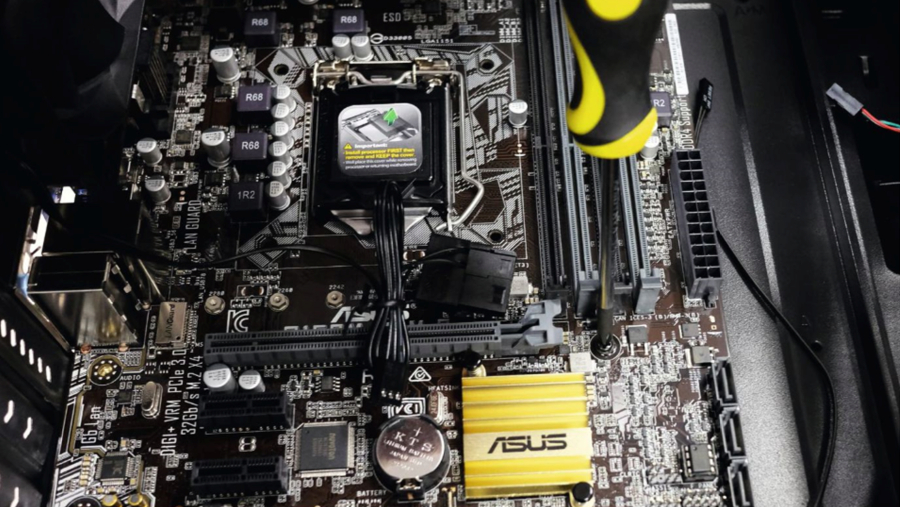
Next up on the list is the motherboard. Pull the Asus B150M-A out of its antistatic bag and place it down on your workplace. Next, find the rear I/O plate still inside the motherboard box. You’ll want to line this up correctly and install it into the rear of your chassis. This will help protect your system from any excess dust.
Word of advice, the cheaper I/O plates are a bit of a nuisance to install, we suggest bending or cutting off the metal clips blocking each of the rear I/O port covers off of the plate. Then, once that’s in, lay your chassis down on its side, and place your motherboard into the case.
Next, you’ll want to secure the motherboard onto the stand-offs preinstalled in the chassis. Take the screws from out of the cardboard box that came inside the Nova case and gently screw the board down into place. This will require some gentle pressure to line up correctly, but once two are in you’ll be fine.
Processor installation and cooling
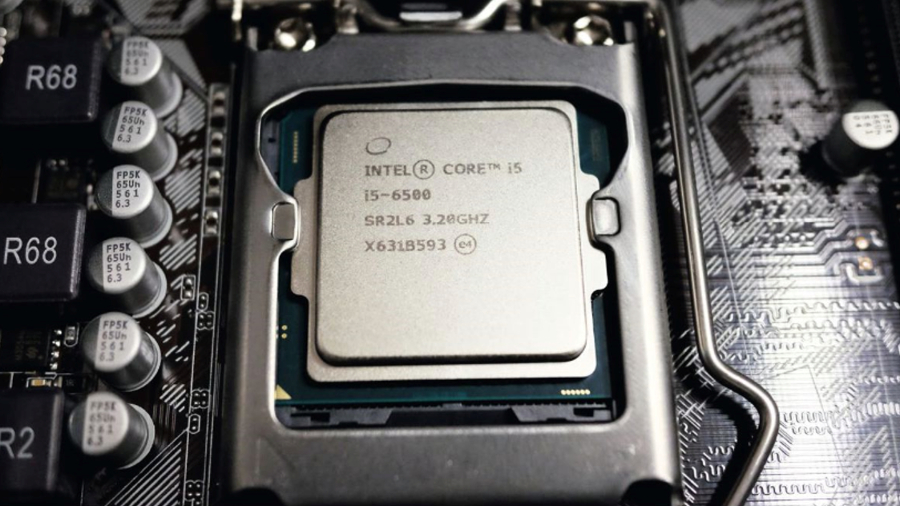
Next up is the processor. Lift the retention arm holding the socket down located in the middle of your motherboard. Leave the plastic cover in place and don’t touch any of the pins. Take your CPU and identify the golden triangle located on the corner of the top of the processor. Line this triangle up with the triangle on the motherboard’s retention bracket and gently place the processor into the socket. Next, place the retention bracket back down underneath the screw and re-lock the retention arm. The plastic cover will pop off.
Next, you’ll need to add sufficient cooling. To install this, simply take the bottom cover off of the CPU heatsink (located inside your CPU box). You’ll need to make sure not to damage the thermal paste, ensure the four locking pins on the outside of the fan are set to unlock.
Then, line up the fan with the processor and gently slot the fan mounting pins into the four holes located on the motherboard. Push each corner down until you hear a pop, then lock all four of the locking pins. Then it’s just a case of routing the cable to the CPU fan header located at the top of the motherboard and you’re good to go.
The future is Zen?
We’ve used a Skylake CPU here, but what about AMD? Well, the old mantra goes, if you want a cheap and cheerful core, go AMD. If you want a powerful core, go Intel. At least, that’s how it used to be around seven to eight years ago. Alas, the game has changed and AMD’s ageing architecture just cannot keep up with the powerhouse that is Intel.
Intel dominates the field when it comes to performance per watt and AMD just can’t keep up because of it. With an ageing architecture and chipsets that just don’t provide any of the modern features natively, AMD is sorely in need of an update.
That’s where Zen comes in. Ryzen processors are about to be launched and will fit into the AM4+ socket, consolidating all the previous motherboard choices down into a singular board. On top of that, AMD will be moving down from the 32nm manufacturing process to 14nm.
So far, leaked performance numbers look good, with AMD’s high-end chips easily competing with Intel. This should drive down the price of Intel’s processors and reinvigorate the market, and mean better performance at more affordable prices all-round.
Installing hard drives
Now we move on to storage. First off, you’re going to want to get your Samsung PM961 128GB SSD. As this is an OEM drive it should be just wrapped up in a small amount of bubble wrap inside your order. It’s worth noting it’s quite a small device.
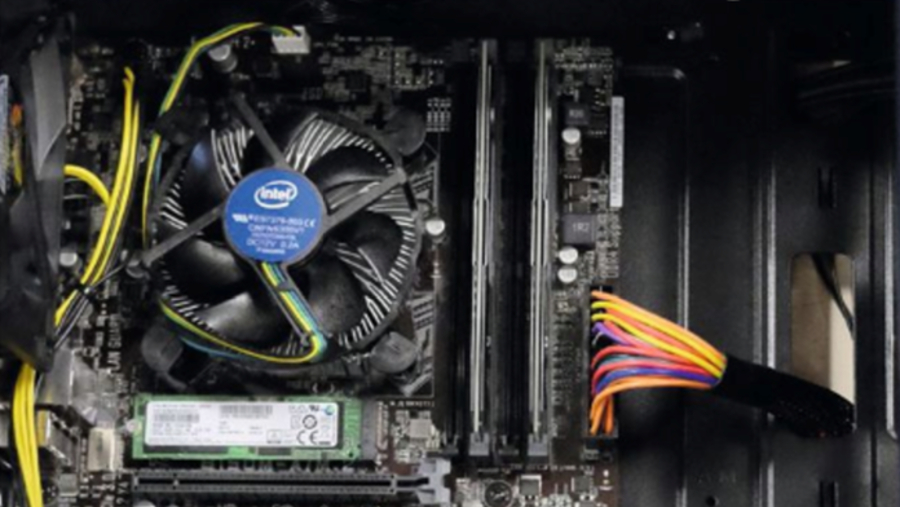
Identify the M.2 slot on the motherboard (in our case, just below the processor) and unscrew the top screw on the furthest side away from the M.2 slot. This is tiny and silver. Next, place your M.2 drive into the port, making sure to line up the connectors with the notch on the drive. The drive should stick up at an odd angle but this is fine. Gently push the drive down, and secure the screw we took out earlier back into its position, securing the M.2 drive in the process.
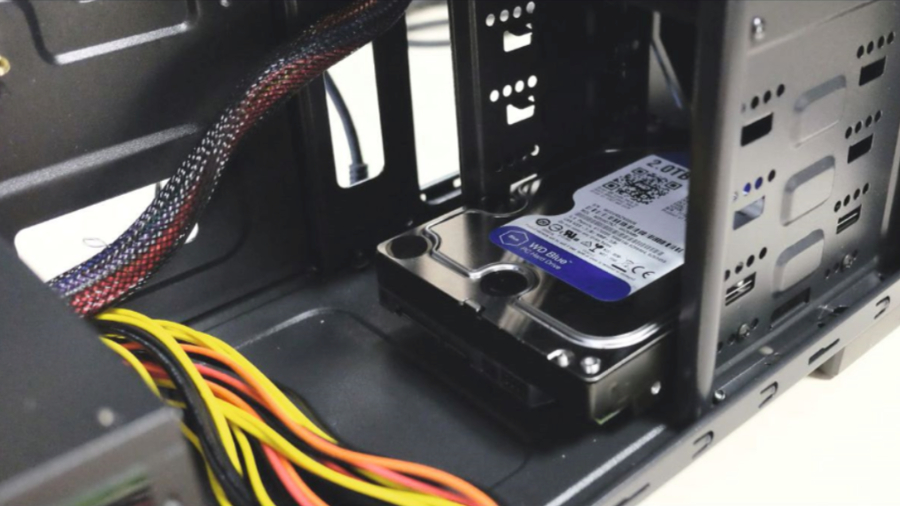
Let’s move on to the 2TB hard drive. Simply slide it into the drive cage located below the 5.25-inch bay with the connectors facing towards your power supply. Then secure this down with two screws from either side. Next, connect one of the SATA cables included with the motherboard into the L-shaped connector in the back of the drive and plug it into the uppermost matching L-shaped SATA port on the board.
Memory and cables
Your next key component to install is your RAM. To do this, unlock the latches on the memory slots located to the right of your processor. Make sure you line up each stick with the notches on the board and firmly slot each stick into place, pushing down on both ends until you hear a satisfying click sound.
Then it’s onto cabling. You’ll want to plug in the largest 24-pin ATX cable into the motherboard. Install the 8-pin CPU power at the top of the board. (These look similar to those used with add-in cards and GPUs, however, each pin is shaped differently to ensure you don’t plug it into the wrong place). Next, you’ll want to plug SATA power into your hard drive. Find the one that looks like a slightly longer L-shaped SATA cable and install that next to the SATA cable you installed earlier.
And finally, let’s deal with the front panel I/O. Locate the cables tucked away in the 5.25-inch bay and drag them out of the enclosure. You’re looking for the ones with the tiny small rectangular pins. These should have the words ‘Power’, ‘Reset’, ‘LED +’, ‘LED -’ and ‘HDD LED’ on them.
Now open up your motherboard manual and look for the section explaining the front I/O connectors. Connect the cables to the correct pins on the motherboard, connect the USB 3.0 front panel header to the USB connector on the board and the front audio pass through as well and you’ve got yourself one sweet system.
If gaming is on your mind…
The four cores held within Intel’s Core i5-6500 provide plenty of computational power when it comes to modern workloads, but if you’re looking to game, you’re going to need to push the boat out a bit further than our £500 budget and invest in a discrete graphics card.
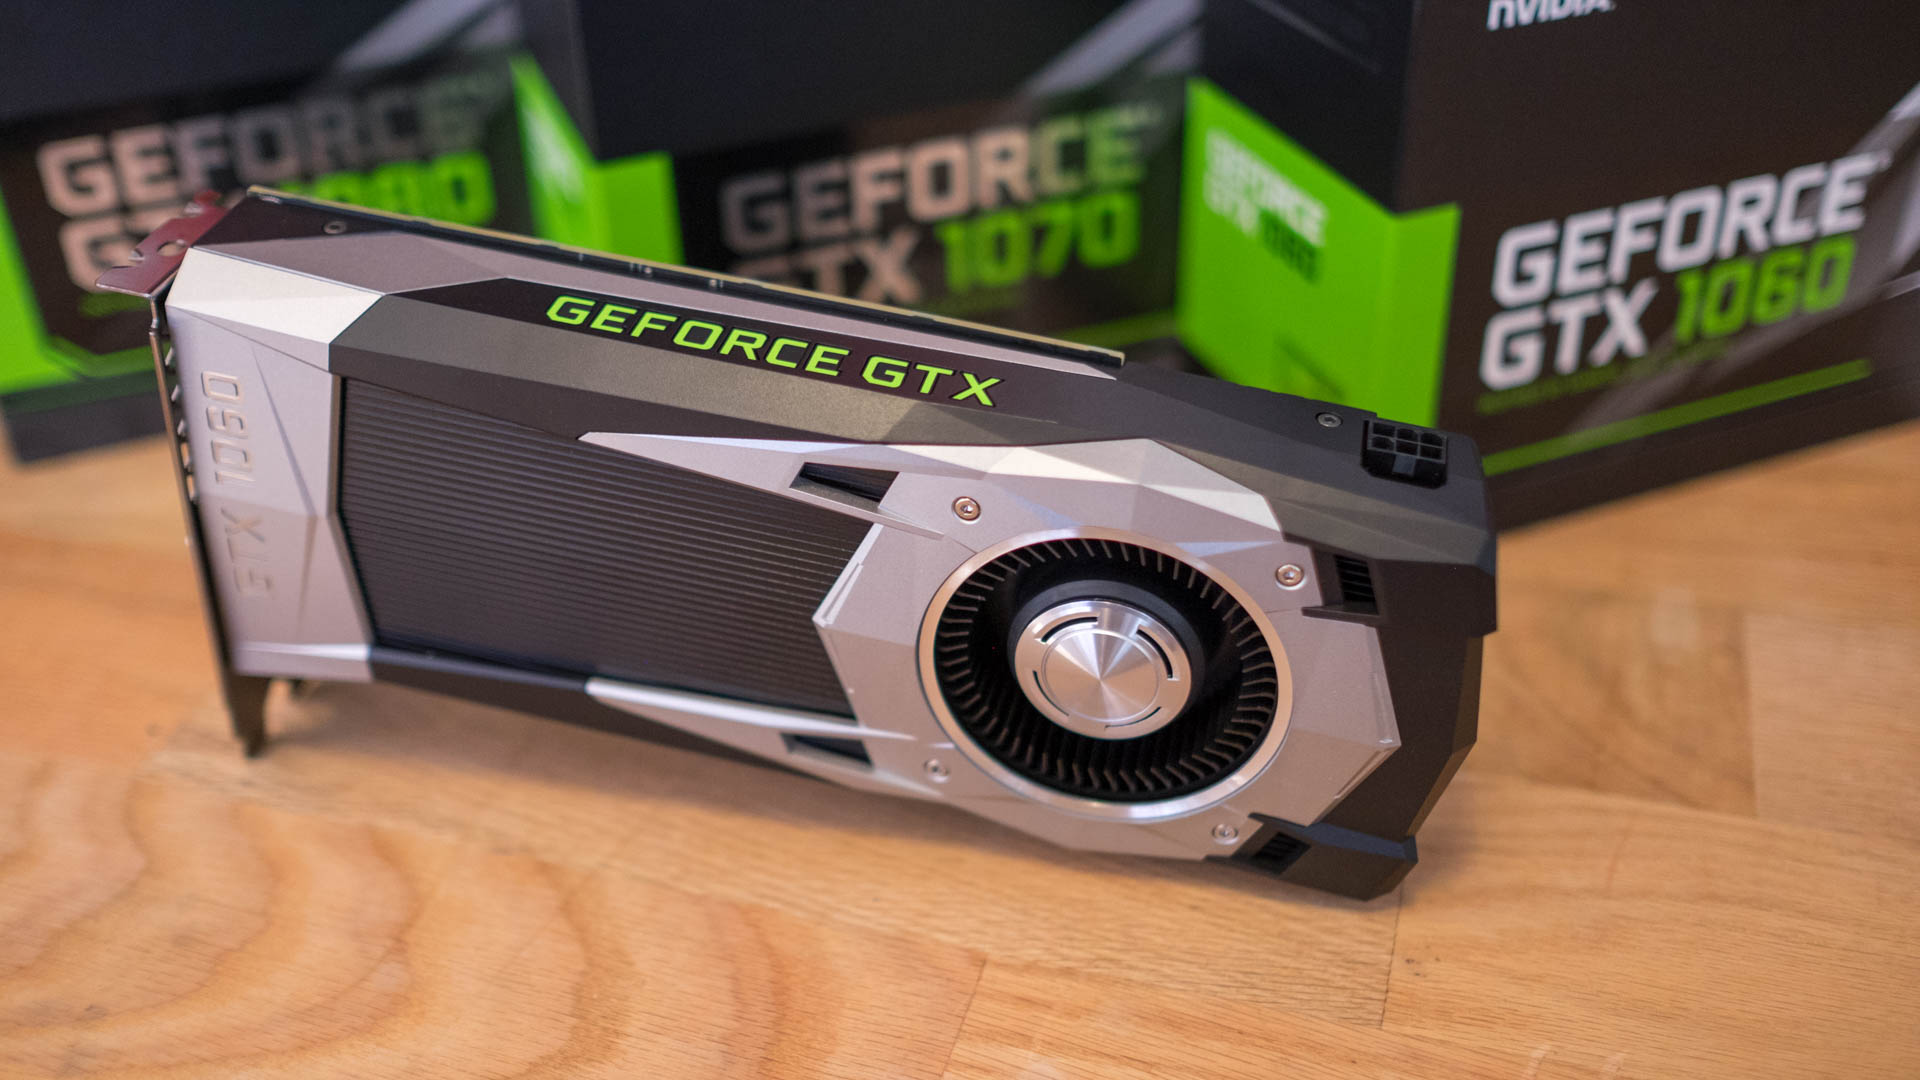
In short, there’s never been a better time to buy a graphics card than right now. With both AMD and Nvidia making the jump from a 28nm processing node down to 14nm and 16nm respectively, the power gains in graphical horsepower have seen an exponential jump, with both AMD’s RX 480 and Nvidia’s GeForce GTX 1060 providing phenomenal value for money.
In our testing the GTX 1060 3GB is by far the best value card you can buy right now. If you’re looking to game at 1080p, these are the two cards to buy today, with the best price to performance ratios out there. That said, if you’re looking to use this as a home theatre PC, the Core i5-6500 will be more than powerful enough to keep your 4K dreams happy.
- Enjoyed this article? Expand your knowledge of Linux, get more from your code, and discover the latest open source developments inside Linux Format. Read our sampler today and take advantage of the offer inside.

Zak is one of TechRadar's multi-faceted freelance tech journalists. He's written for an absolute plethora of tech publications over the years and has worked for Techradar on and off since 2015. Most famously, Zak led Maximum PC as its Editor-in-Chief from 2020 through to the end of 2021, having worked his way up from Staff Writer. Zak currently writes for Maximum PC, TechRadar, PCGamesN, and Trusted Reviews. He also had a stint working as Corsair's Public Relations Specialist in the UK, which has given him a particularly good insight into the inner workings of larger companies in the industry. He left in 2023, coming back to journalism once more. When he's not building PCs, reviewing hardware, or gaming, you can often find Zak working at his local coffee shop as First Barista, or out in the Wye Valley shooting American Flat Bows.