How to connect or switch to an IPVanish server on Windows
We show you how to pick the best server for your needs

One of the things in which all VPN (Virtual Private Network) providers try to excel is the wide range of server locations they offer. IPVanish is one of those services that manage to do this, with 1,000+ servers distributed across 60+ countries around the world.
This guide will show you different ways to connect to, as well as change an IPVanish server on your Windows app.
The app has more than one way to connect to a server. Let’s go through all of them.
- Check out our list of the best VPN services
Option #1 - Quick Connect
1. Start the app
Locate and open your IPVanish app.
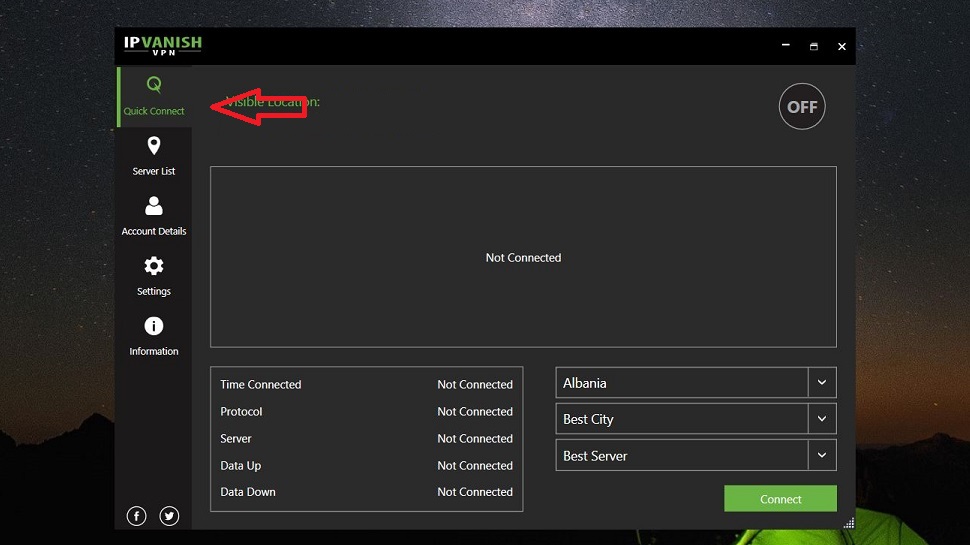
2. Select ‘Quick Connect’
Click the Quick Connect button in your IPVanish app.
Are you a pro? Subscribe to our newsletter
Sign up to the TechRadar Pro newsletter to get all the top news, opinion, features and guidance your business needs to succeed!
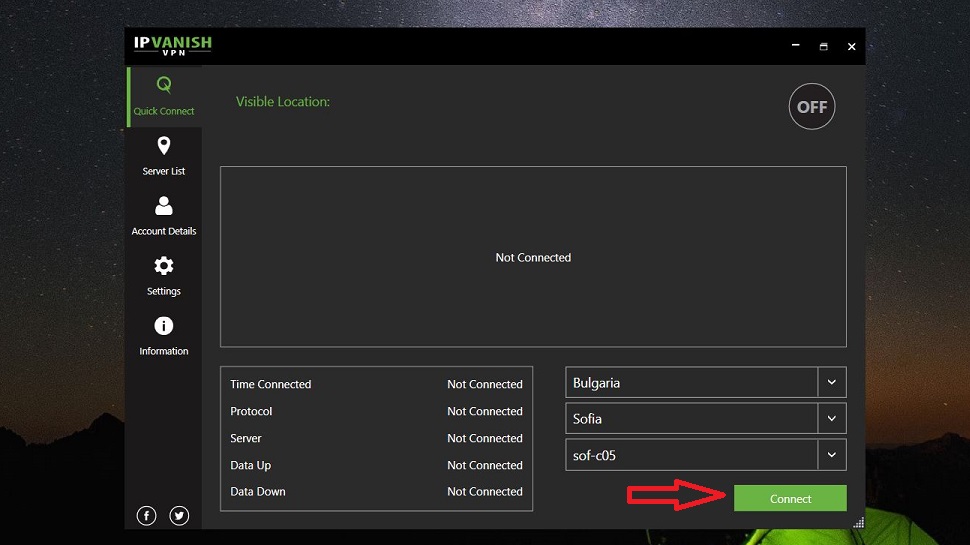
3. Connect
From the Quick Connect screen, select the country, city and IPVanish server you would like to connect to and click Connect.
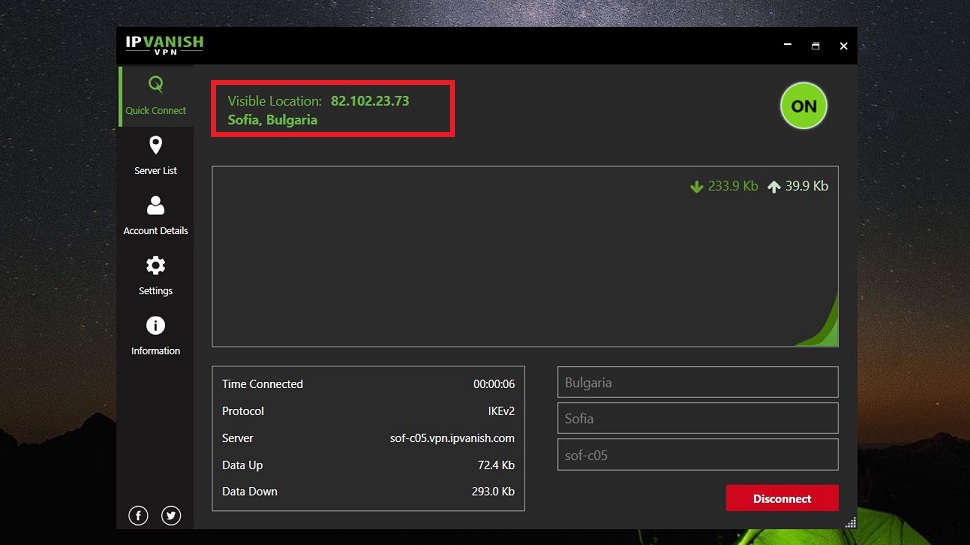
Once you’ve successfully connected, look at the main app window and verify that you are connected and that your IP has successfully changed. Disconnect any time by clicking that red Disconnect button in the lower right corner of the app window or the green ON button in the upper right corner.
Option #2: Server List

1. Start the app
Locate and open your IPVanish app.
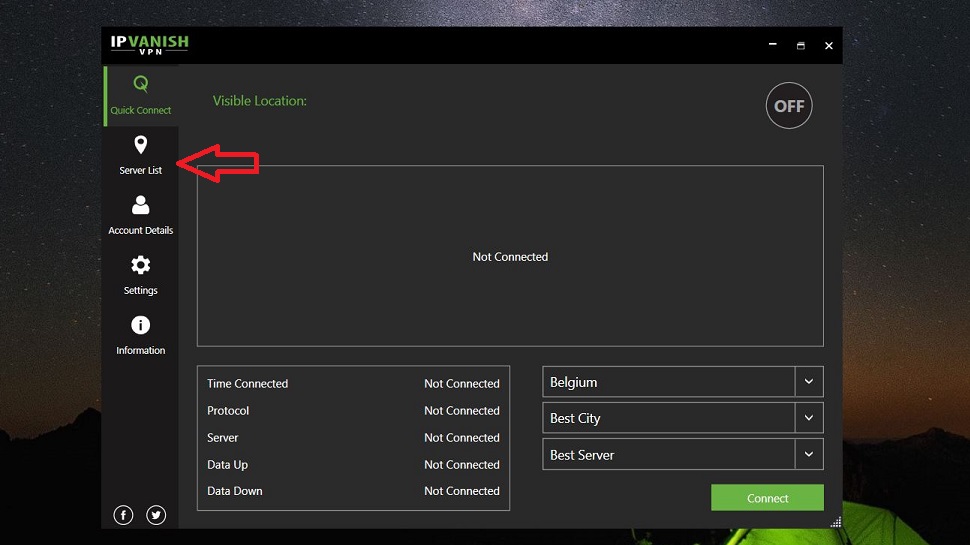
2. Go to ‘Server List’
From your app, click the Server List icon on the toolbar in the left part of the app window.
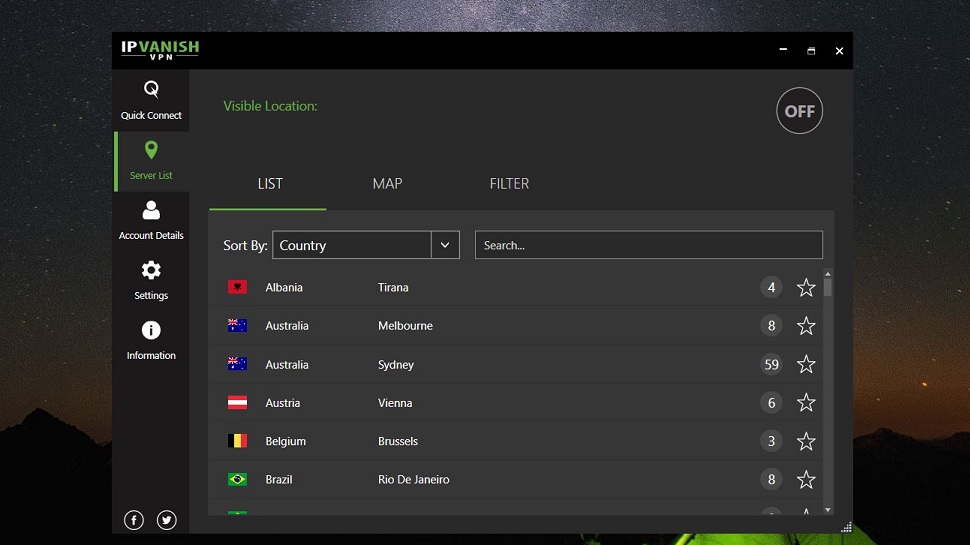
3. Connect to a server
You can browse through the list to find the server you want to connect to. Click once on any of the locations’ names to connect to it.
You can also use the search bar to find the country you want to connect to. Just type in the name of the location in the search bar and click once to connect to a server in the search results.
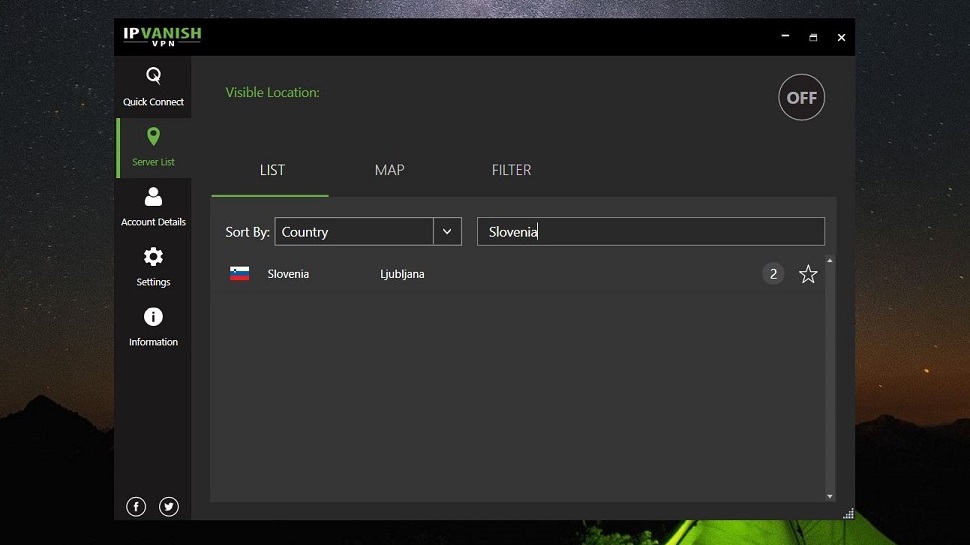
You can sort the search results by the names of the countries, response time, load, or you can choose your favourite locations if you have any. You can mark a location as a favourite by clicking the star icon next to the location’s name.
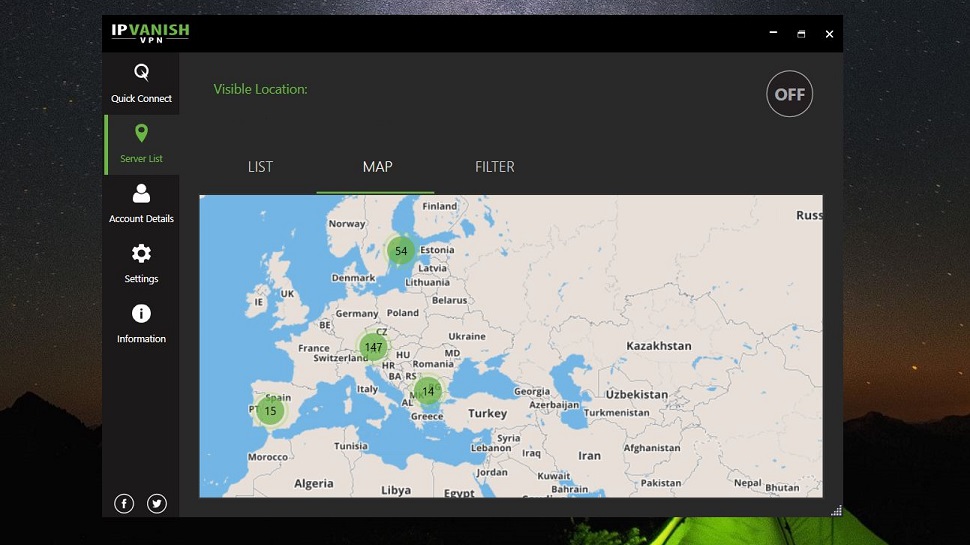
Alternatively, you can use the map and select a location from there. To access it, click the MAP tab, located between the LIST and FILTER tabs. Click on the location on the map to connect to it.
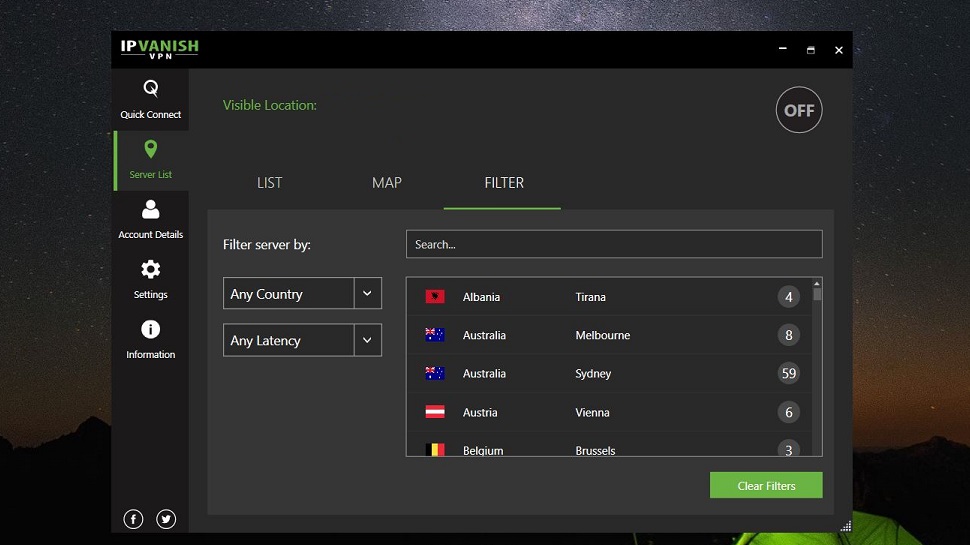
Another way to find a server you want is to click on the FILTER tab and filter the server list according to two parameters shown on the left side: Country and Latency. Select any parameter you want by clicking the dropdown list and choosing the parameter. The list will change to show only those locations that fit your chosen parameters. Click the location you want to connect to.
4. That’s it!
You’re now connected. Notice that whenever you connect, the round black OFF button in the top right corner of the app window will turn to green ON button. You can click this button to disconnect from the VPN server.

Désiré has been musing and writing about technology during a career spanning four decades. He dabbled in website builders and web hosting when DHTML and frames were in vogue and started narrating about the impact of technology on society just before the start of the Y2K hysteria at the turn of the last millennium.