Designing your own Windows 10 interface
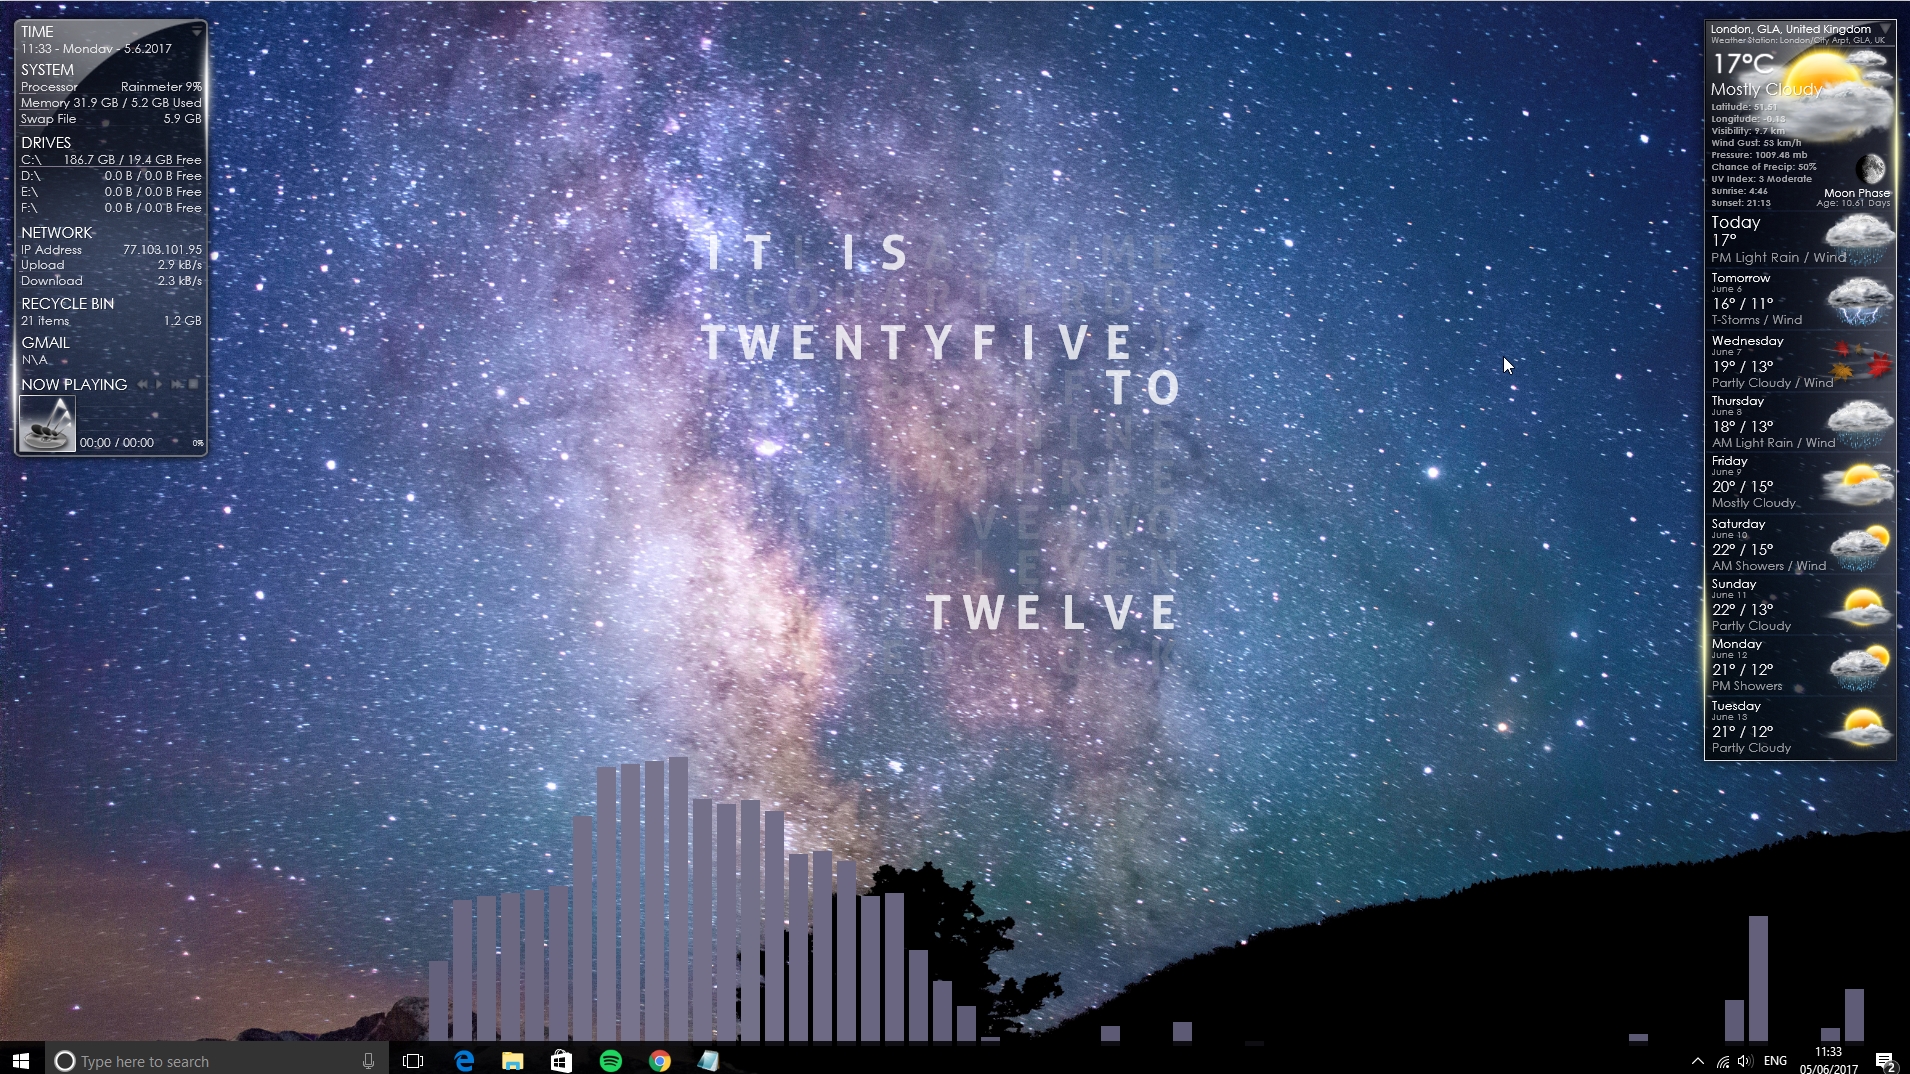
Microsoft doesn’t make the most of the Windows desktop. Granted, it’s not averse to supplying some awesome desktop wallpaper, and it’s made attempts to doll it up in the past - Windows Vista’s poorly fleshed out desktop gadgets spring to mind - but that blank space behind your programs could be used for more than just storing too many icons. And so it shall be.
Rainmeter is the premier desktop customisation tool. It’s kind to your system resources, it’s robust enough that you’ll rarely, if ever, see it crash, and it’s free and open source.
This doesn’t just mean that you won’t have to pay - it means you have the freedom to create your own custom desktop tools. So let’s get installed, make a beautiful desktop, and see what else we can do.
1. Grab and go
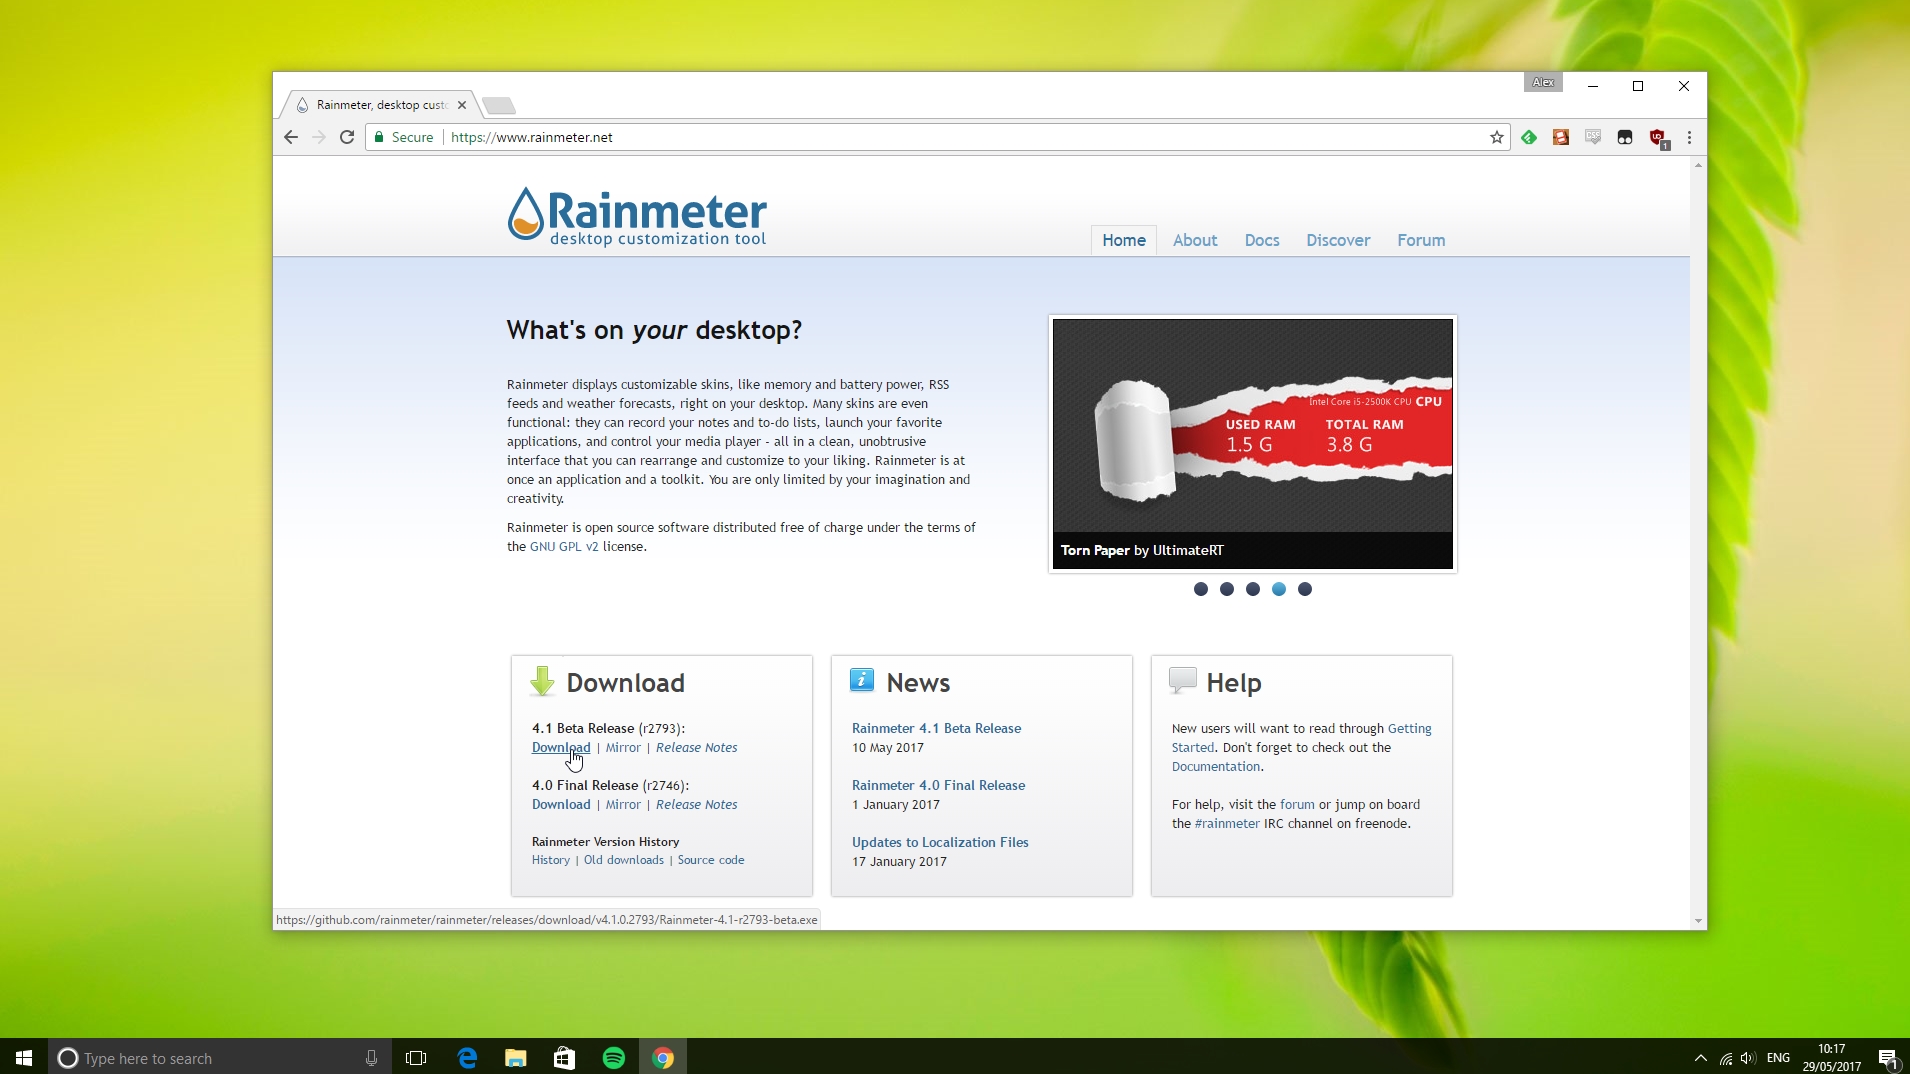
Getting hold of Rainmeter is easy. Just head to the Rainmeter website and click one of the download links in the bottom left corner of the page.
We’re using the latest beta here, but you’ll also find a link to the most recent full release version if you’re more concerned about stability than you are about pushing the envelope.
Run through the install process --it’s not difficult - and keep the box ticked at the end to run Rainmeter straight away.
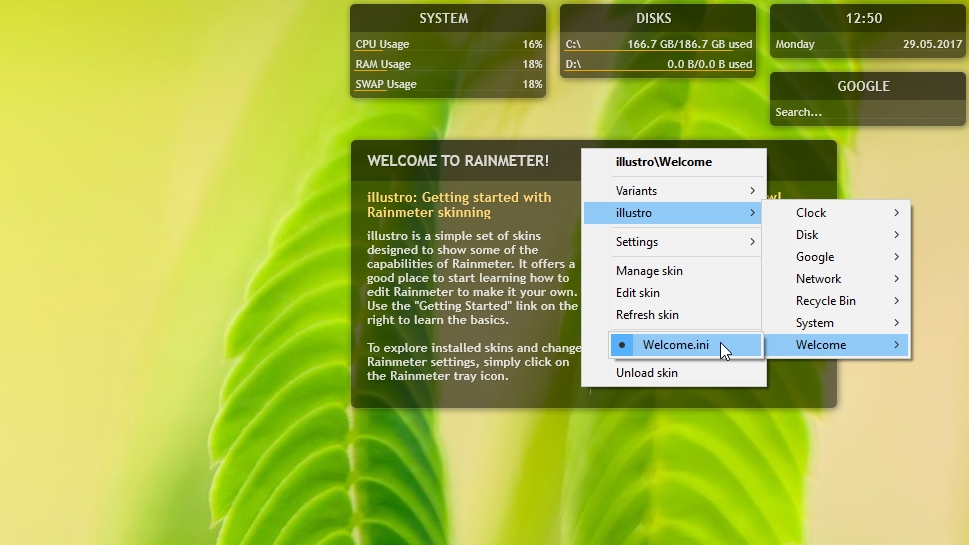
You’ll see a number of desktop gadgets appear on your main monitor. Rainmeter’s default selection is not outrageously beautiful, but it’s a functional way to keep tabs on certain system statistics.
2. Move and add
While they’ll always sit on the desktop layer, you can move the individual Rainmeter widgets - known as skins - around with a simple left-click drag. Move them next to another skin and they’ll snap in place a certain distance away, so it’s easy to rearrange them in an attractive manner.
The default collection also helps you reach important Windows tools; try clicking ‘system’ for example, to bring up Task Manager, or any of the drives listed in the Disks skin to open File Explorer at that location.
This default collection, called Illustro, includes more skins than the default three. Right-click an existing widget, head to ‘Illustro >’, and you can switch off the Welcome skin in the middle of the screen, or add things like a quick Google search box or a network monitor.
3. Further tweaks
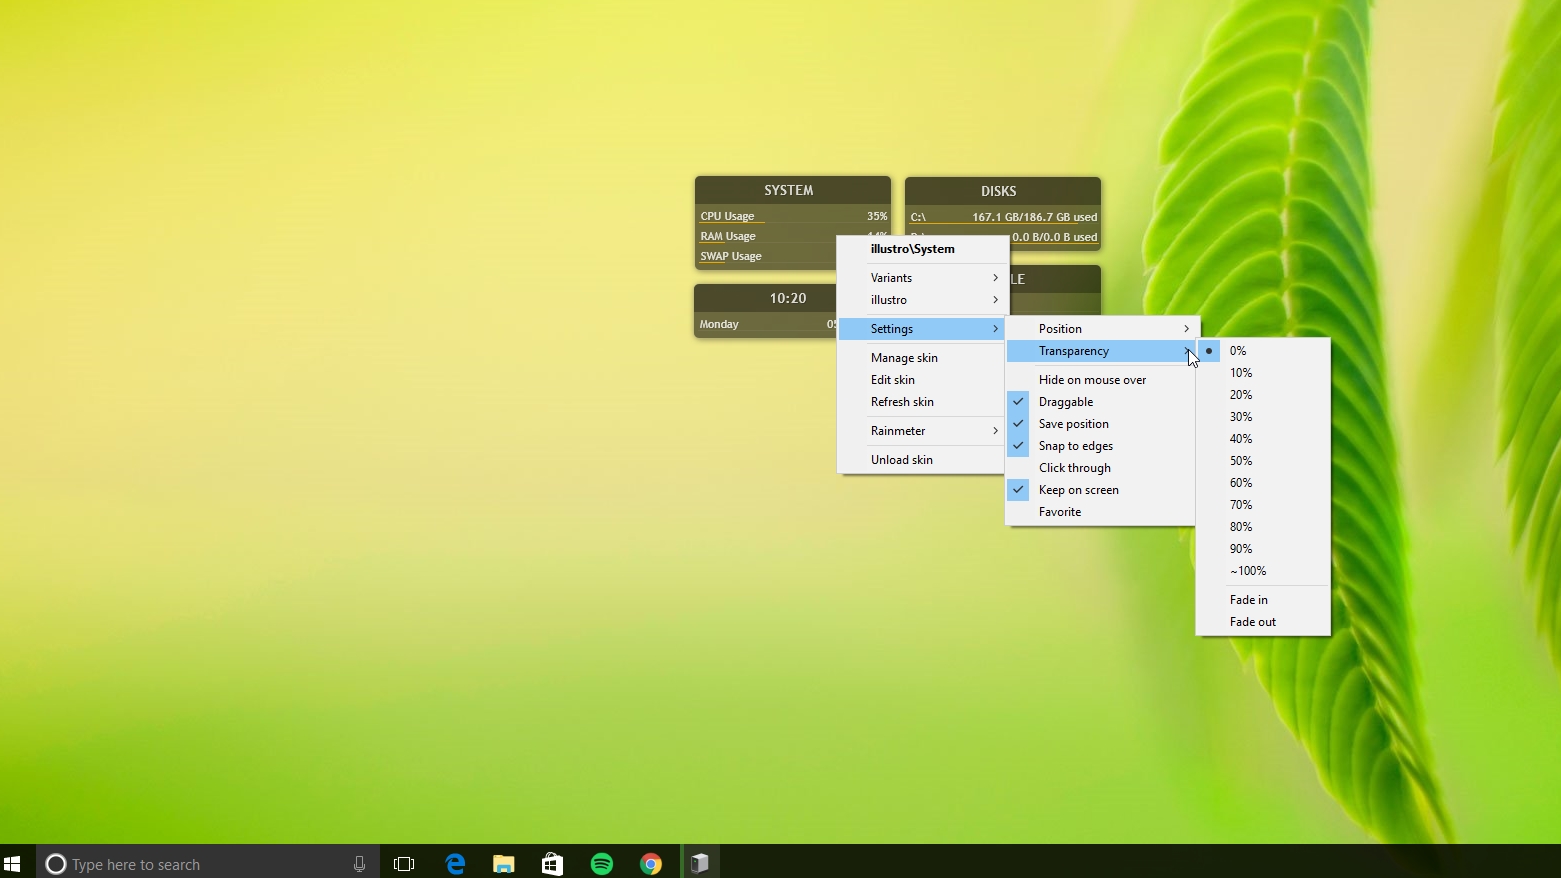
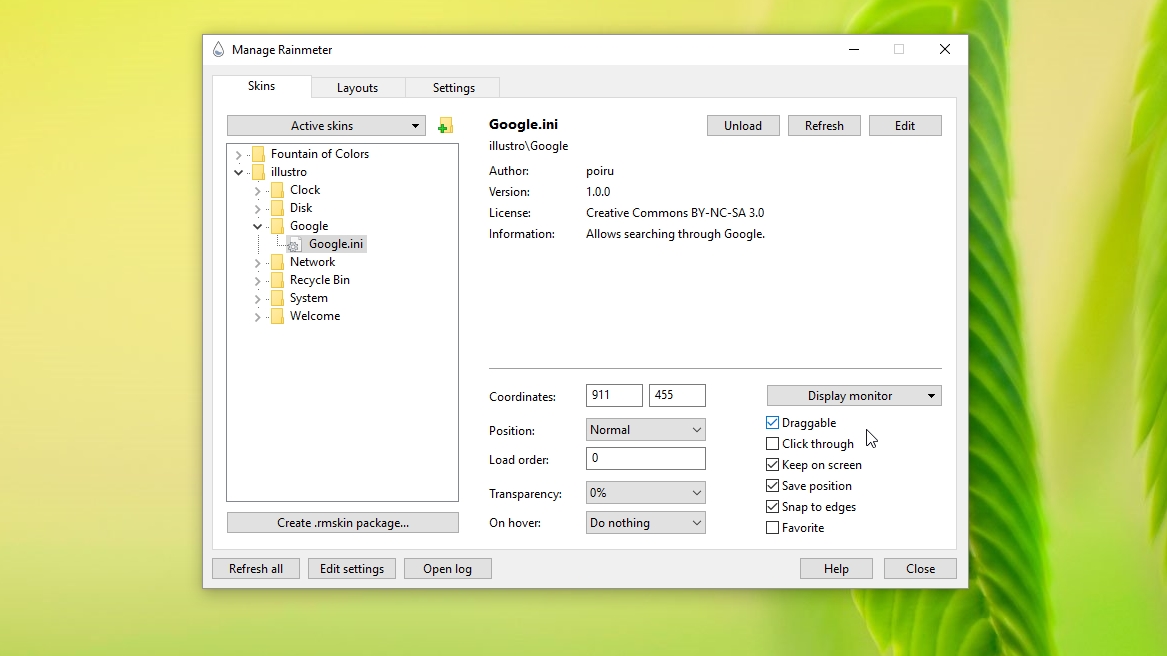
Before we move on to a slight more attractive skin collection, let’s cover a few of the more important settings, applicable to each skin individually. Right-click and head to the 'Settings' option to see them.
You can adjust the level of transparency, and set a fade option which brings the skin to the foreground if you mouse over it.
You can switch off snapping if custom positioning is more your thing, and in the Settings > Position menu you’re able to layer your skins - select topmost if you want one of your widgets to float above any windows you have open.
4. Locking down
You can use the Settings menu to stop each skin from being draggable, a toggle which comes in particularly handy once you’ve arranged everything just so.
This, and the visual tweaking options, can also be found in the ‘Manage skin’ right-click menu -- head there and check the Settings tab to disable dragging for the whole of Rainmeter, not just an individual skin.
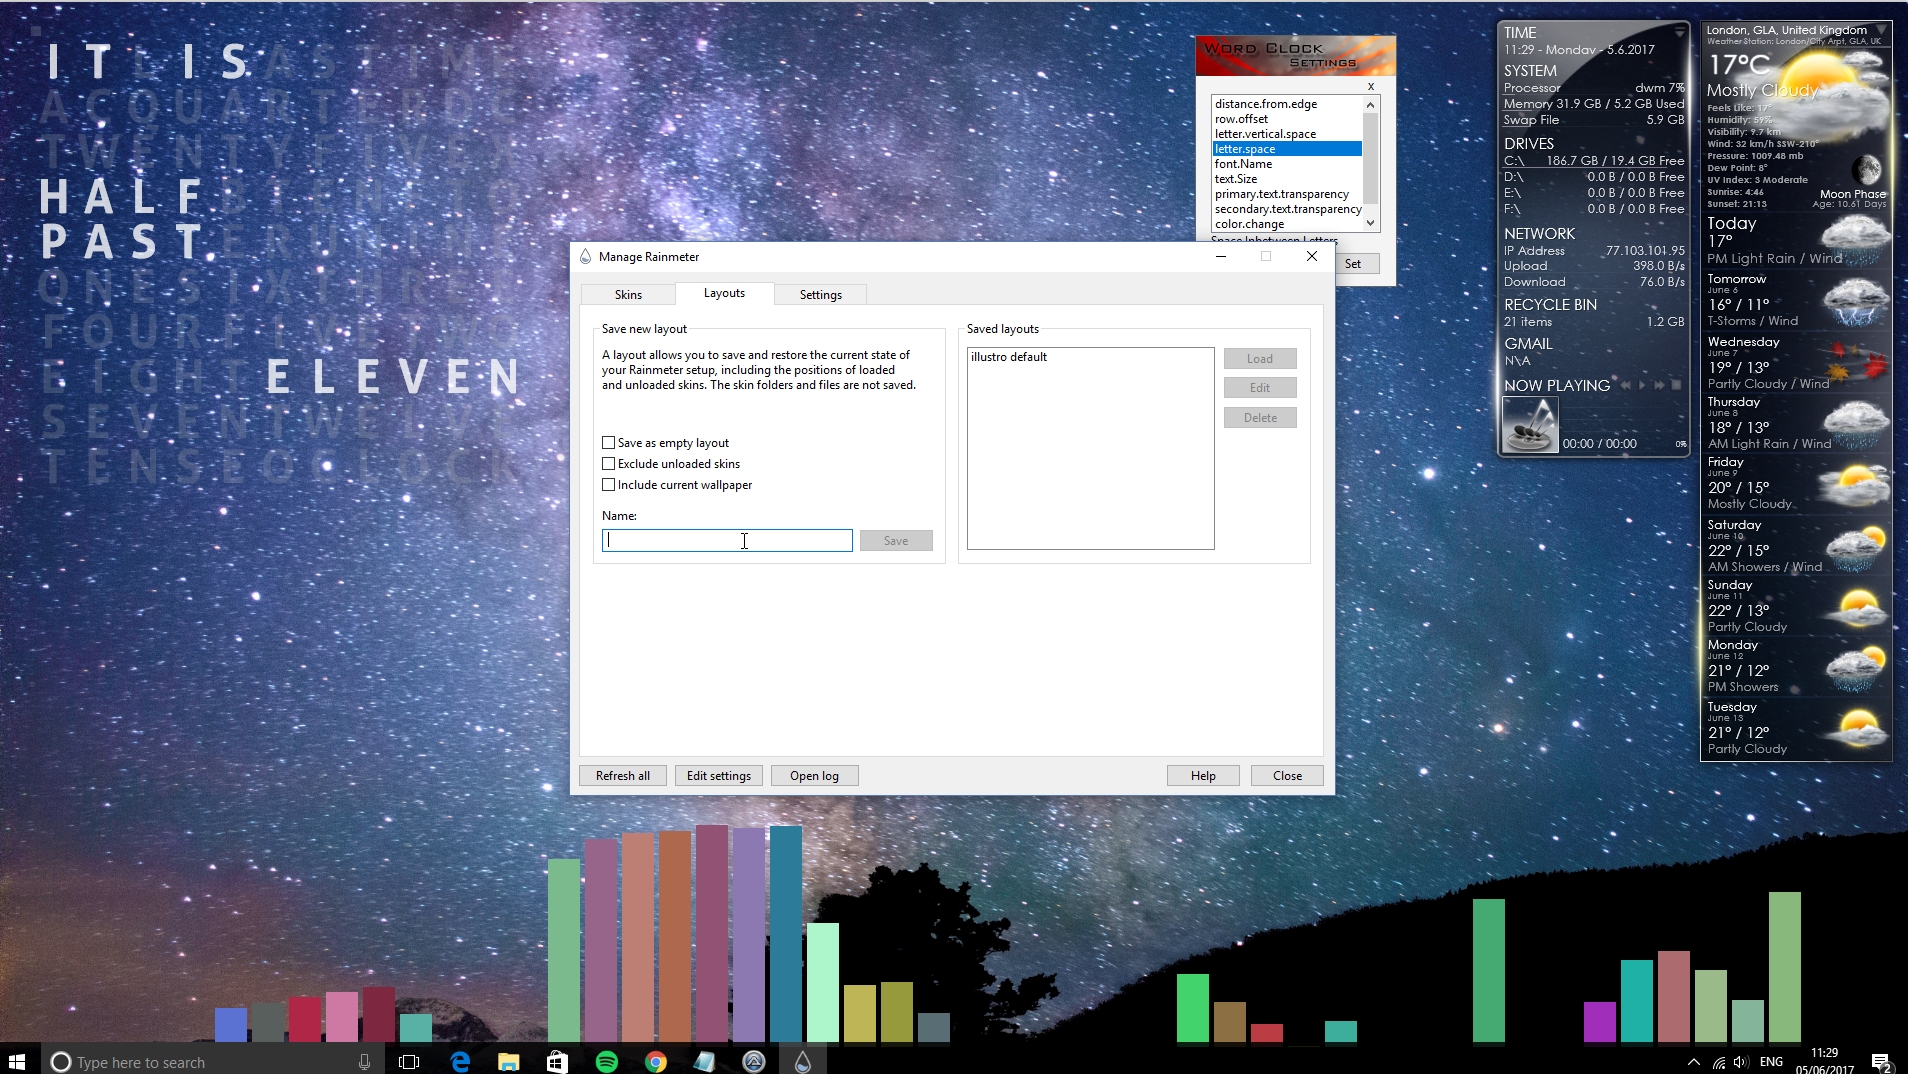
With the management window open, you may also wish to head to the layouts tab to save the position of your current skins. If you’ve arranged them around particular elements of your desktop wallpaper, tick the appropriate box to save the wallpaper along with their locations.
5. New skins
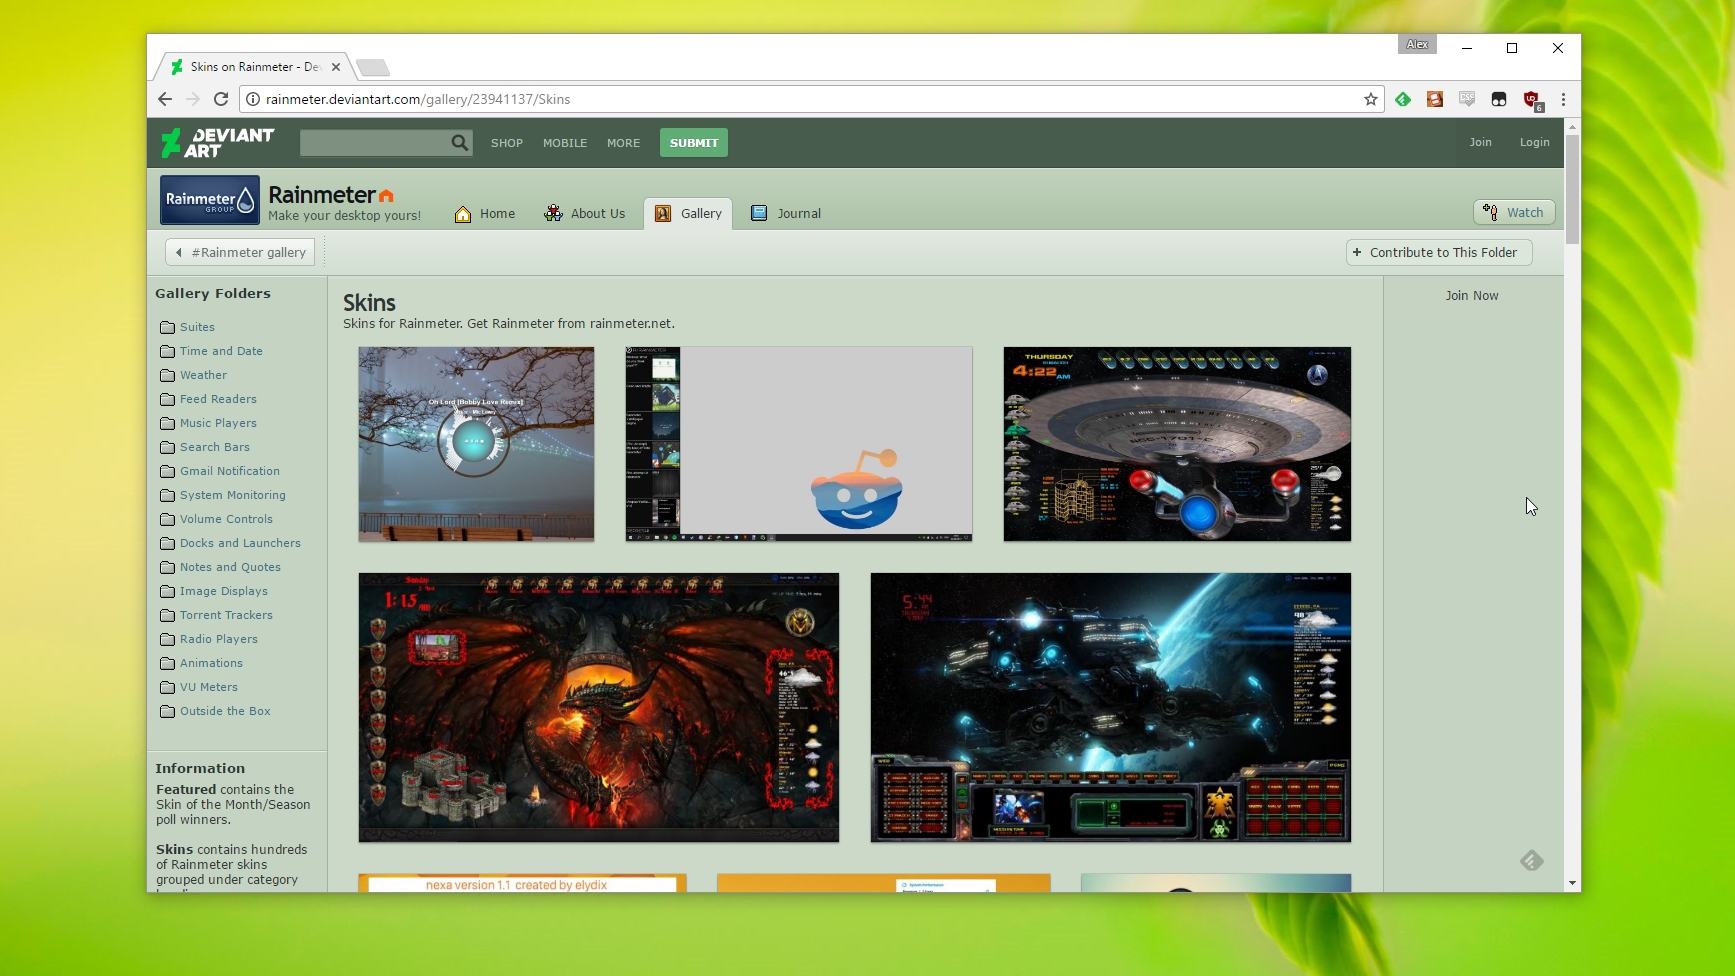
Let’s find some new widgets. Rainmeter skins are completely user-created, which means two things: that they often display a level of uniqueness and flair you wouldn’t find from a centrally-created crop, and that the best ones take some finding. There’s no central pool of skins - but there are a few places to look.
The first is Rainmeter’s Deviantart which includes a bunch of examples of users’ cool desktops - generally, clicking one that you like the look of will lead you to a number of links to its individual components.
You can also check out the Rainmeter subreddit which, more often then not, will send you to Deviantart, or see what’s happening on the Rainmeter forums.
6. Add features
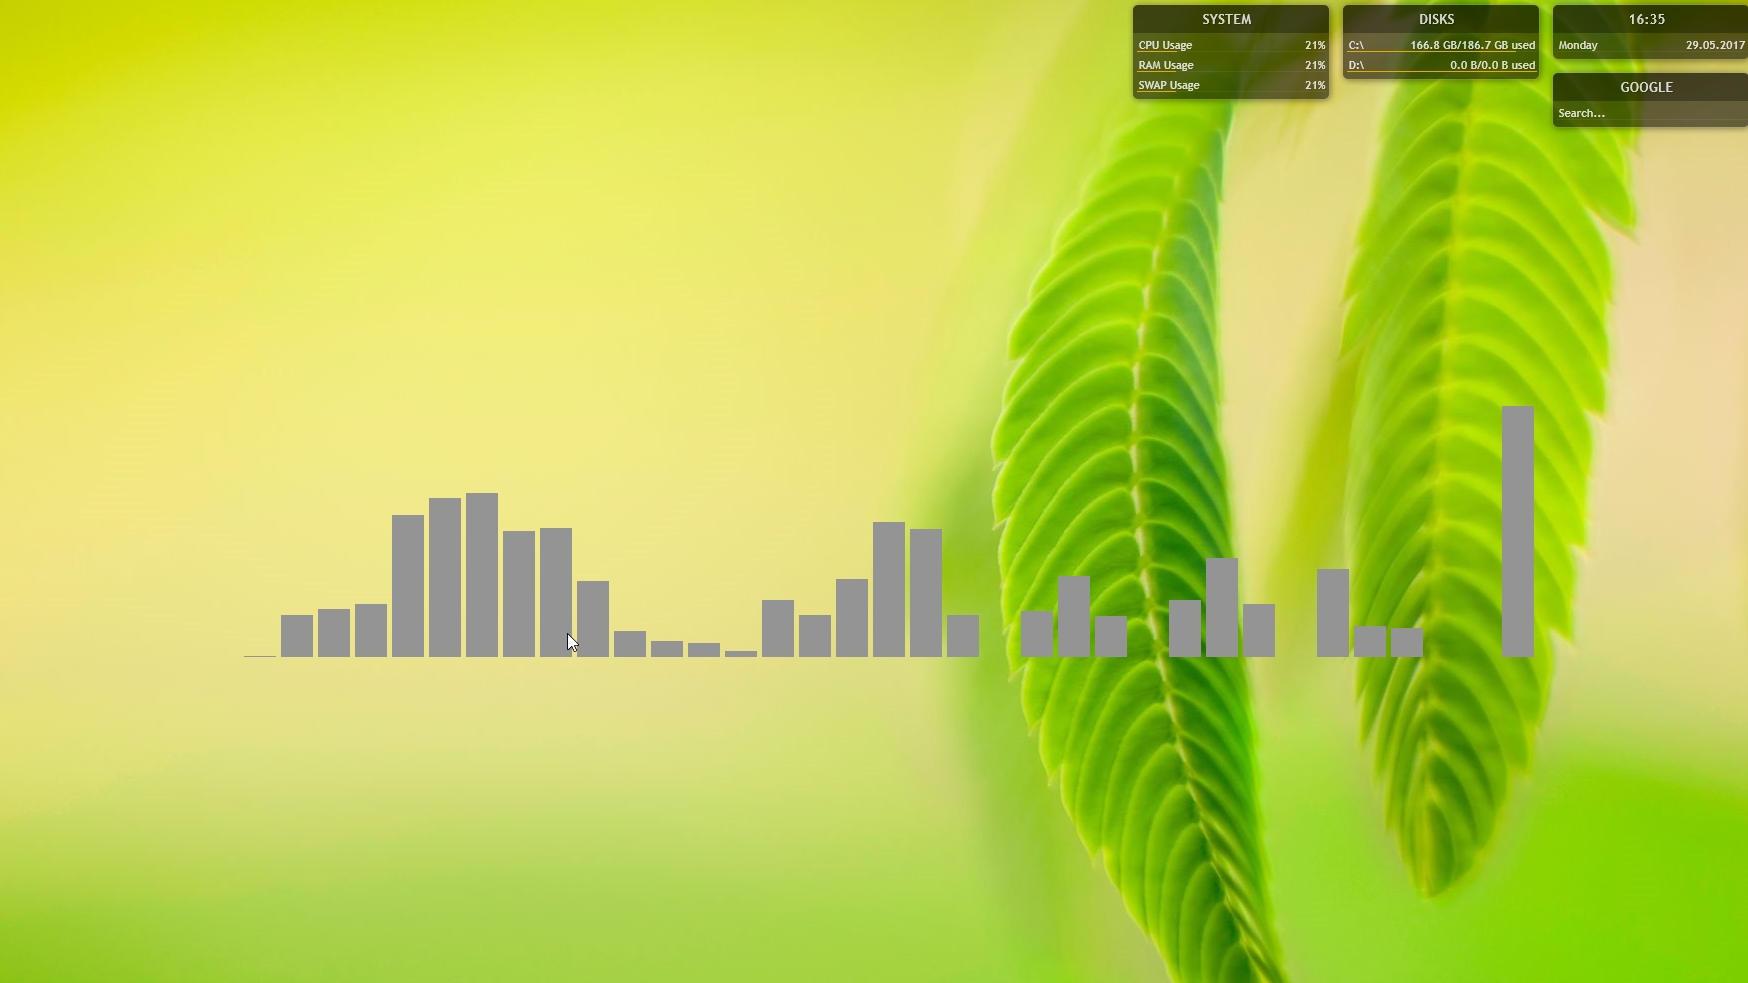
Once you’ve found and downloaded a skin - we’re going for this simple but awesome audio visualiser - you’ll have a file with a .rmskin extension. Despite the suggestive name, adding a skin does not affect the look or performance of any other skins on your system, and you can add as many as you like.
Open the file you’ve downloaded (it should be associated with Rainmeter by default) and click Install to bring it in. It should appear on your desktop and get to work straight away, and you can reposition it as we did previously.
7. Deep tweaks
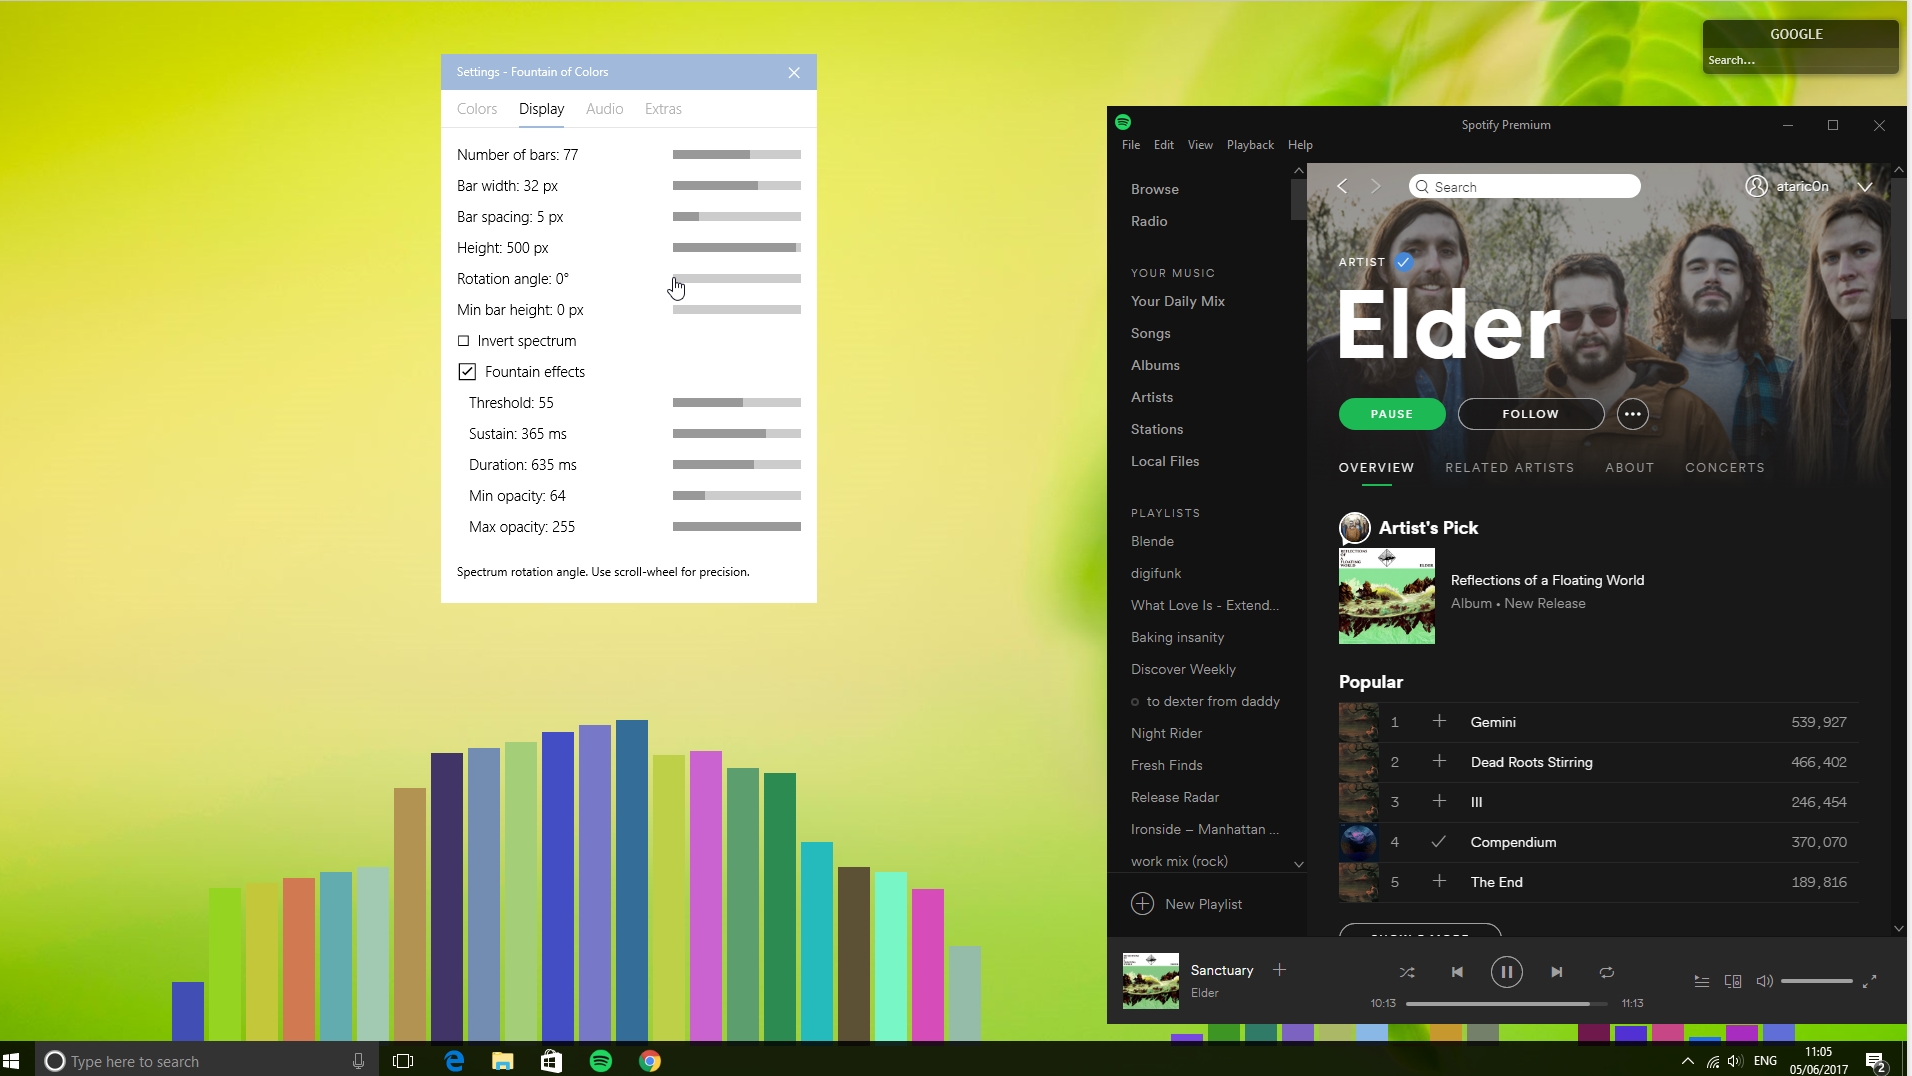
The plugin we’ve chosen, Fountains of Color, includes an extensive options menu to tweak its many settings exactly to your liking - get some music going, right click that visualiser, and choose 'Options' to see it.
You won’t always be so lucky. Many skins require a little manual manipulation, which involves editing sometimes cryptic configuration files. Take, for example, one of the Illustro modules that come built in.
Click the Rainmeter icon in your taskbar to bring up its management console and dig down to, for example, the clock.ini file, right-click it, and select Edit to see the content.
If you’re happy experimenting, go for it - but there’s no specific requirement to do so.
8. Build it up
Adding new elements to awesome wallpapers (check out the Desktoppr website or, again, Deviantart) is a long-winded and very personal approach. You’ll want to play around endlessly, so we won’t tell you exactly what to use.
But once you’ve found a combination of system monitors, visualisers, weather widgets and other ways to hook into Rainmeter’s measures - its name for the system metrics that make it what it is - make sure you save your desktop so you can restore it if something goes wrong, or when you inevitably want to fiddle and create another fresh look. And consider sharing it – it’s what keeps the community going.
- Not upgraded to Windows 10 yet? Here's how to upgrade to Windows 10 for free