How to create a Strava route: plan your own custom running or cycling map
Create and use your own custom maps

There are a lot of perks to using social apps to track your workout activity. Of course, the perk of cheers coming from friends and sharing tips and tricks for how you’re getting up and around town.
Even better, research shows that those who use exercise apps are more likely to exercise during their free time than those who do not use exercise apps. And if you’re one of Stava’s reported more than 50 million users, you’ve got a lot of routes to check out.
But did you know that you can create a custom route to follow on your next workout? Here, we break down everything you need to know to create a Strava route.
Plotting your route
First things first, you’ll have to be a Strava subscriber to create and utilize the route mapping feature, and the most important thing about creating a successful route in the Strava app is that you want to do it within Strava. While you can use a third-party option and import the data, it can be pretty tough to make it all work.
Note: you’ll be able to create a route both in-app on your mobile device, and via Strava's online platform. Our tip is to do it at a computer if you have the opportunity.
If you're using Strava's desktop website, log in and hover over 'Explore' in the top menu, then click 'Create a route'. In the mobile app, tap the 'Explore' icon at the bottom, tap 'Explore routes' and then select 'Draw your own route'.

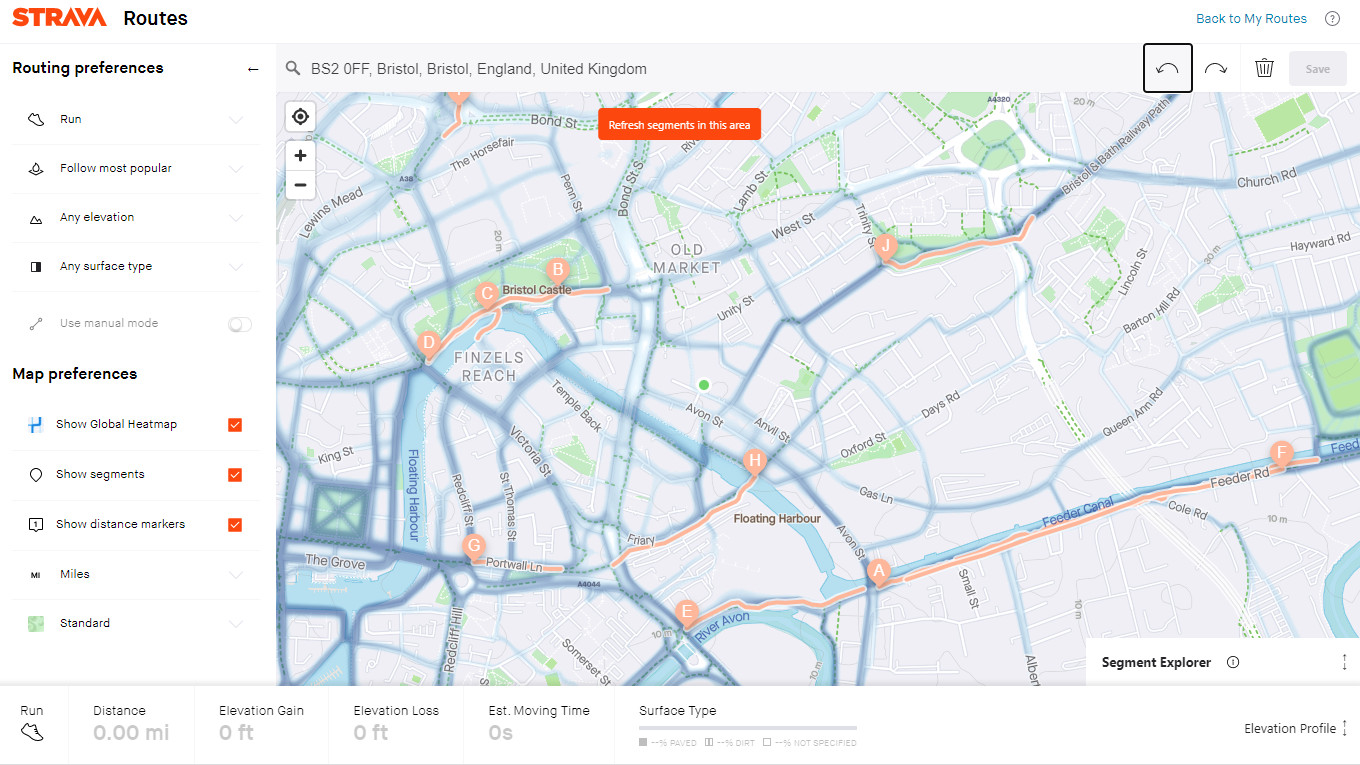
You have a few options from the get-go, including running or cycling, miles versus kilometers, whether you’d like to follow the most popular or direct route, what types of surfaces you prefer (dirt versus paved) and if you’d like to maximize or minimize. After you make those critical decisions, the rest is pretty simple. Simply select a starting point, and then continue to tap along — creating waypoints on your desired route.
Get daily insight, inspiration and deals in your inbox
Sign up for breaking news, reviews, opinion, top tech deals, and more.
As you proceed, you’ll notice a few things. Firstly, there’s a tally of data along the bottom of your screen that gives key metrics you’ll want to be in the loop about, including distance, elevation gain and loss, and estimated moving time (according to Strava, this estimated moving time is calculated by your four-week average speed or pace). This way, if you’re plotting seems to get too challenging or perhaps too lengthy, you can circle back and easily tweak your route.

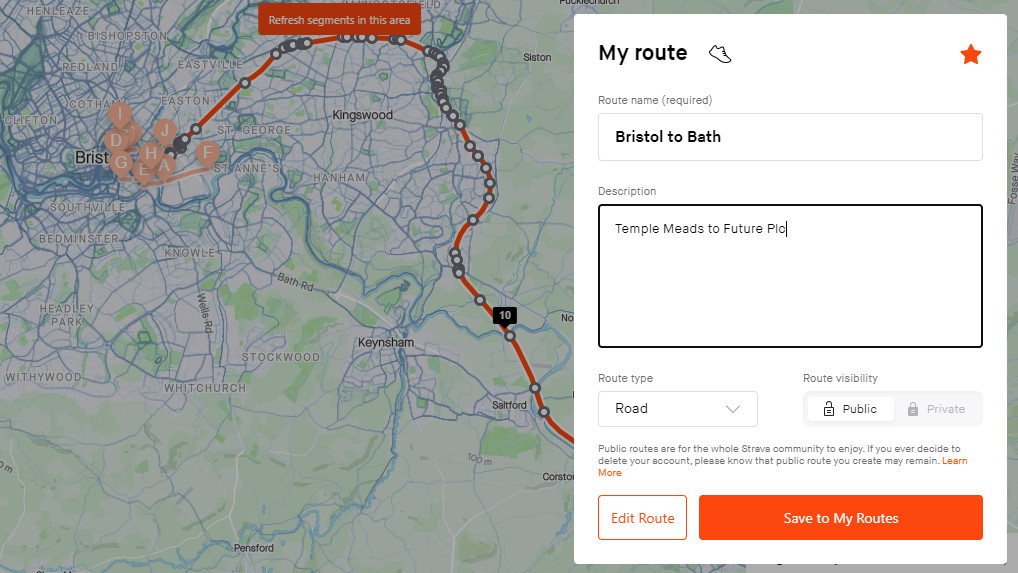
Once you’ve finished your route design, you’ll name your course, add a description including details or notes about your upcoming workout, and select whether you’d like to make this route public or private. This is when the real fun begins.
Using your route
The execution of Strava maps is really in which device you use to access them. If you export your routes to something like a Garmin or Wahoo, then you’ll get turn-by-turn navigation which is clutch, especially when you don’t know exactly where you’re going and you’re not local to home.
However, if you simply press 'Use route' on Strava, it will not offer vocal cues to help direct you where you’re going, and rather – just show a breadcrumb trail on a map as you’ve created.
Great for referencing? Sure, but it seems preferable if apps don't just let you design something, but also have a lot of user-friendly aspects to put it into practice.
Still, as a perk to a paid Strava subscription, in addition to a slew of other goodies, like custom heart rate zones, in-depth race analysis, cumulative stats, and personal heatmaps, it’s not so bad.
- Check out our complete guide to the best fitness trackers
Emily Abbate is a freelance writer, certified trainer and run coach, and host of the podcast Hurdle. You can find her work in GQ, Shape, Runner’s World, and other health and fitness publications. She is a self-motivated, social media-savvy writer and editor with more than a decade of constructing brands from the ground up.
