How to create your own website with Soholaunch
A unique self-hosted website builder

Soholaunch is a self-hosted website builder that includes a range of content management and site creation tools. Despite recent changes to its operations and being a little outdated, Soholaunch is still a user-friendly option worth considering.
In this guide, we take a closer look at creating your own simple business website with Soholaunch. Work through the following steps to get your site online in no time!
How to create your own website with Soholaunch: Preparation
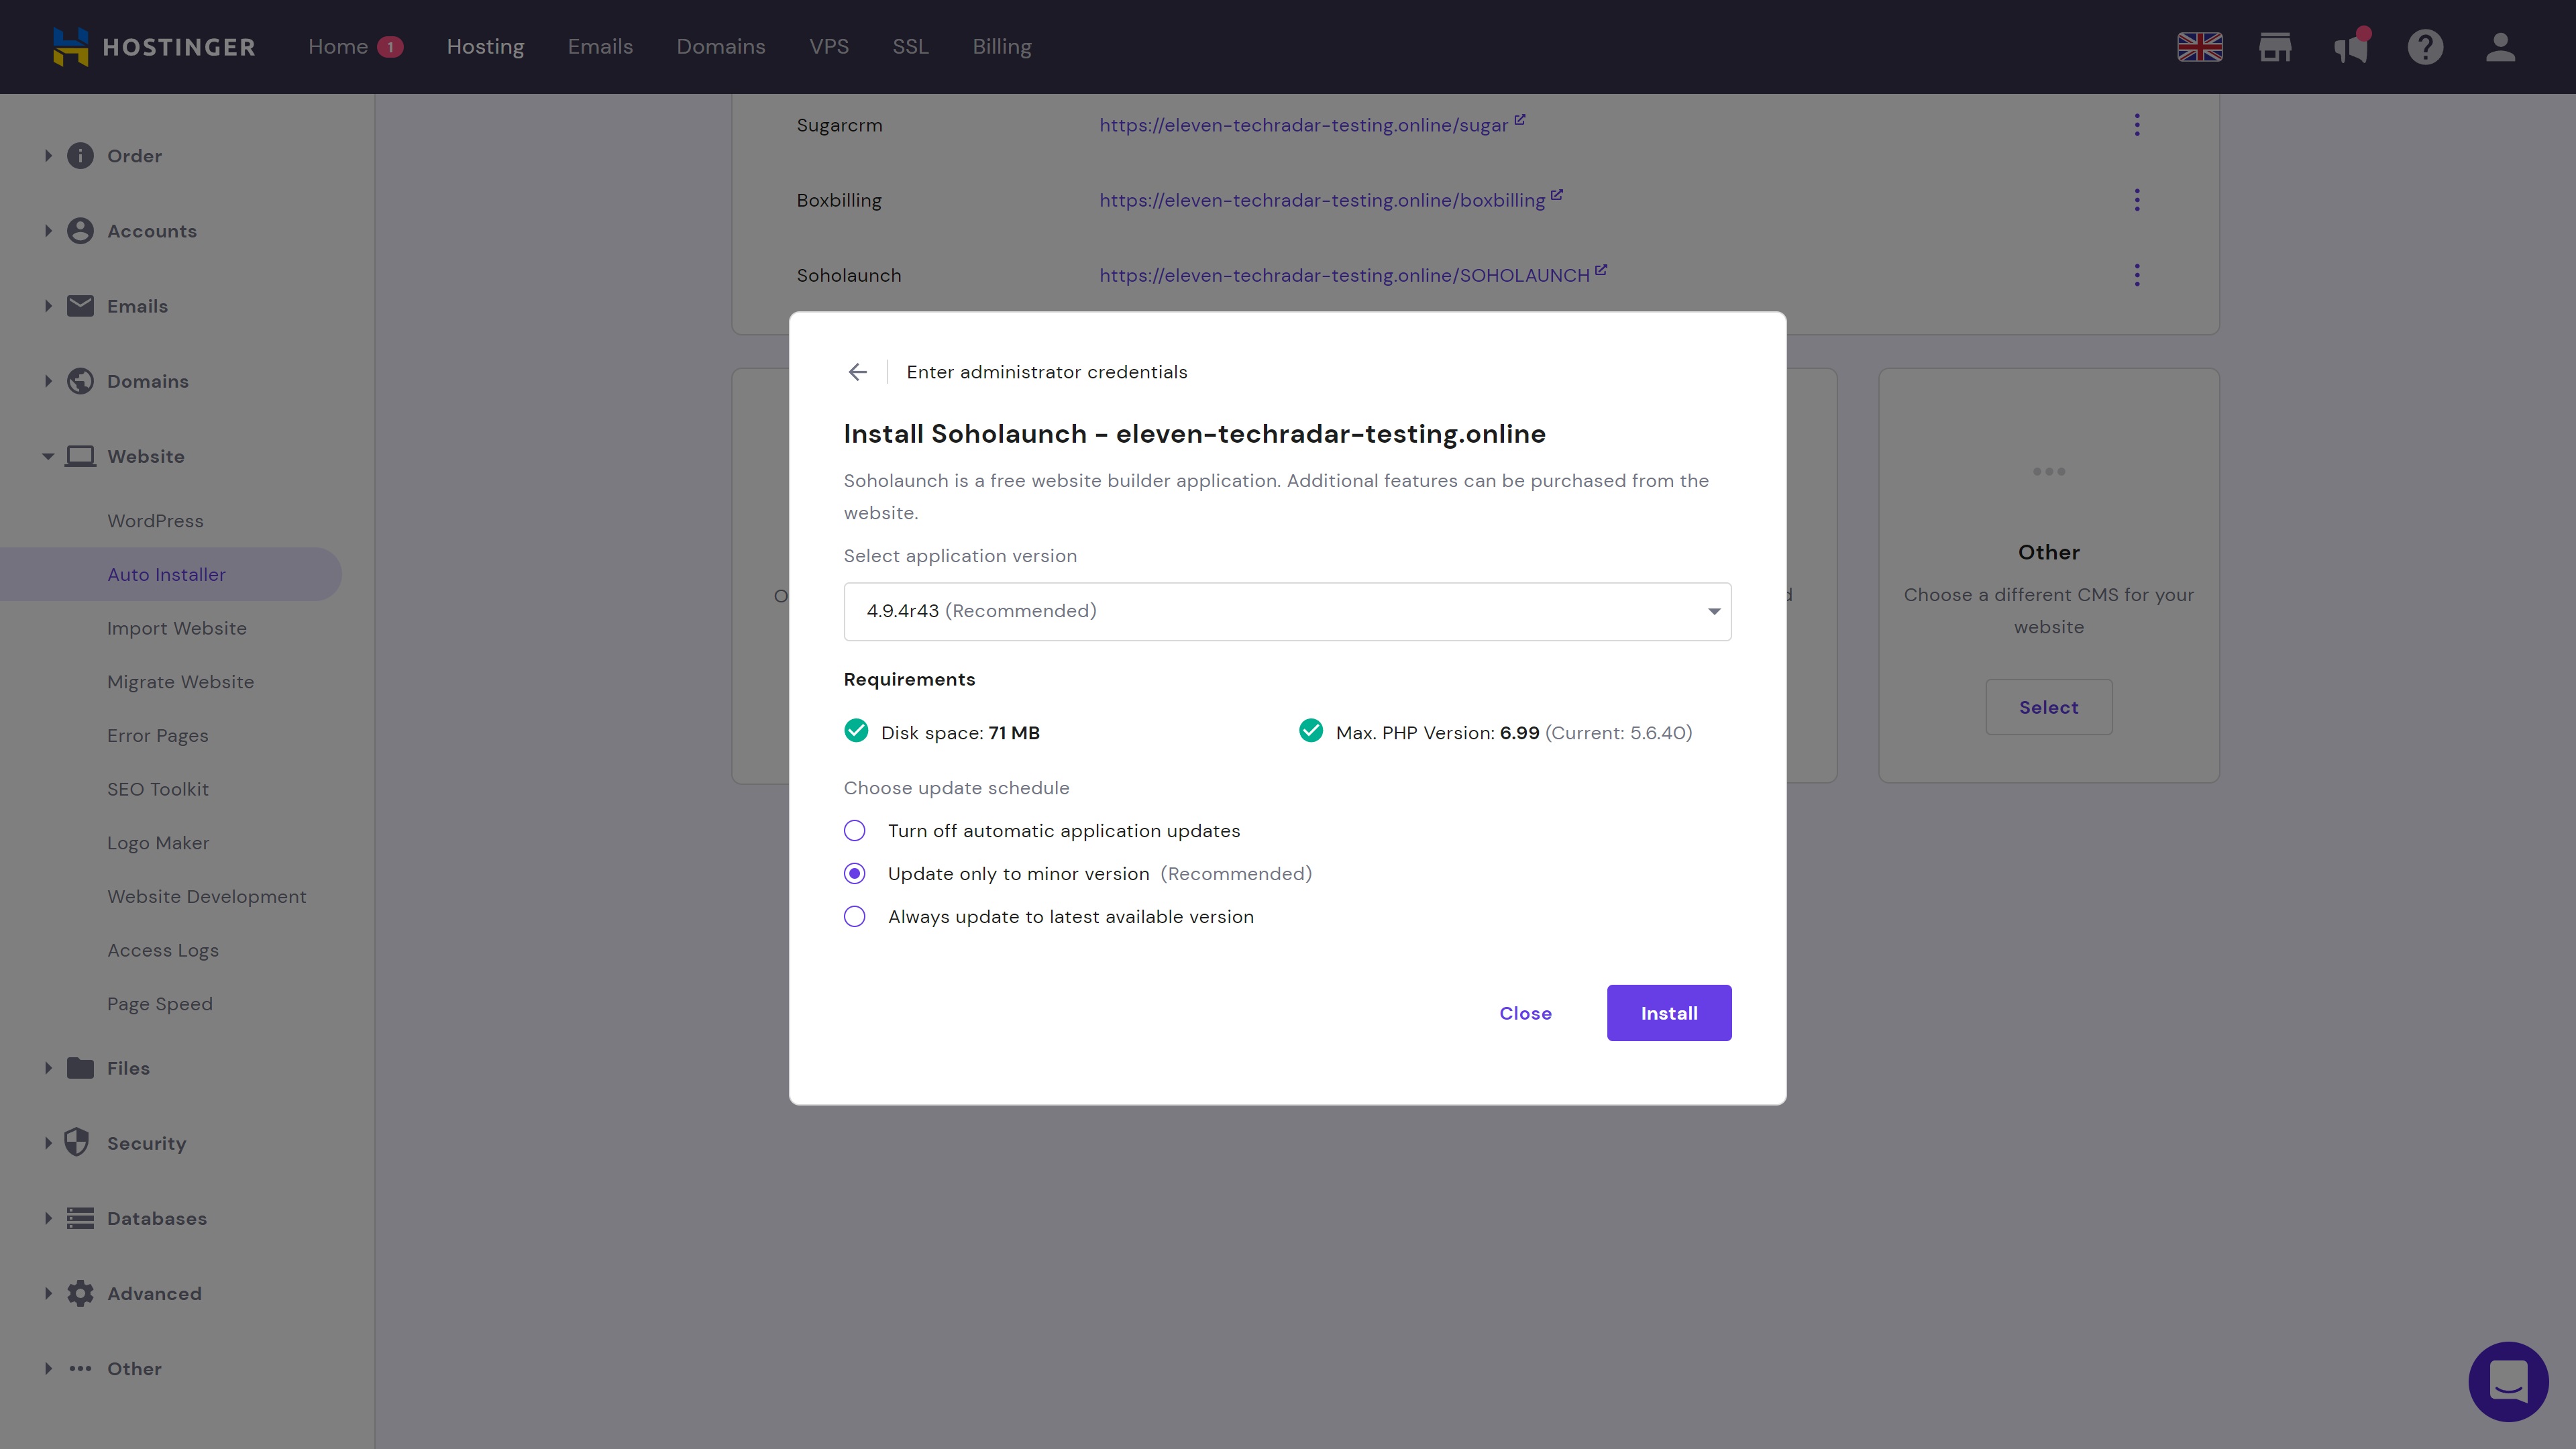
Soholaunch is a self-hosted solution. Before you can begin creating your website, you will need to purchase web hosting. This provides the processing power and infrastructure needed to run the SohoLaunch program. There are numerous hosting providers to choose from. We used Hostinger, an industry-leading option with very competitive prices.
Most hosting platforms offer some sort of one-click installer (such as Softaculous or Installatron) that will install scripts like Soholaunch in just minutes. If you use Hostinger, you can take advantage of its proprietary Auto Installer, which enables you to install Soholaunch and various other programs in just a couple of clicks.
You can find the Auto Installer on your main hPanel control panel. Simply follow the prompts to install Soholaunch. A full installation guide can be found in the Hostinger support center.
Step 1: Add pages
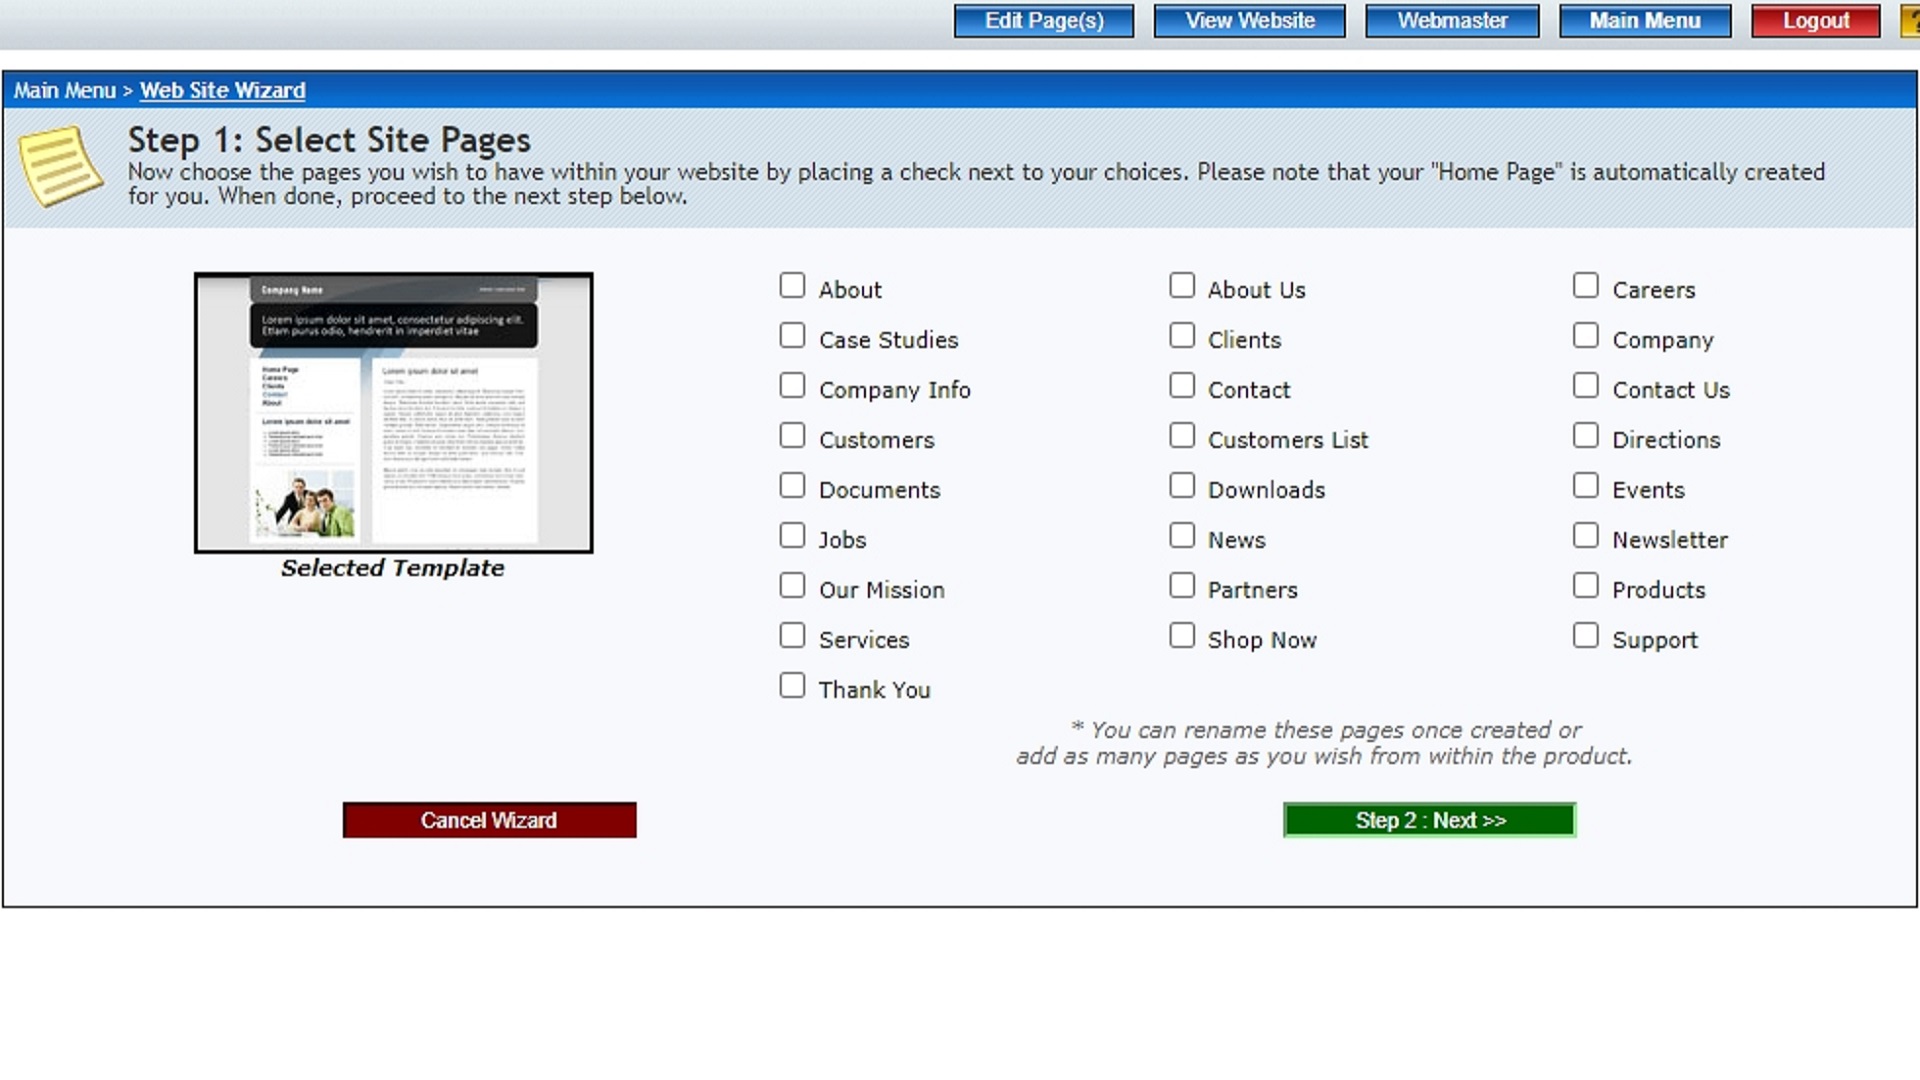
When you open Soholaunch for the first time, you’ll be given the option of using the Web Site Wizard to get your site up and running. The first step is to select the pages you want to add to your site.
There are numerous options available, and each page you select will be automatically created. All sites have a homepage, even if you don’t select any other pages.
Are you a pro? Subscribe to our newsletter
Sign up to the TechRadar Pro newsletter to get all the top news, opinion, features and guidance your business needs to succeed!
Step 2: Enter website information
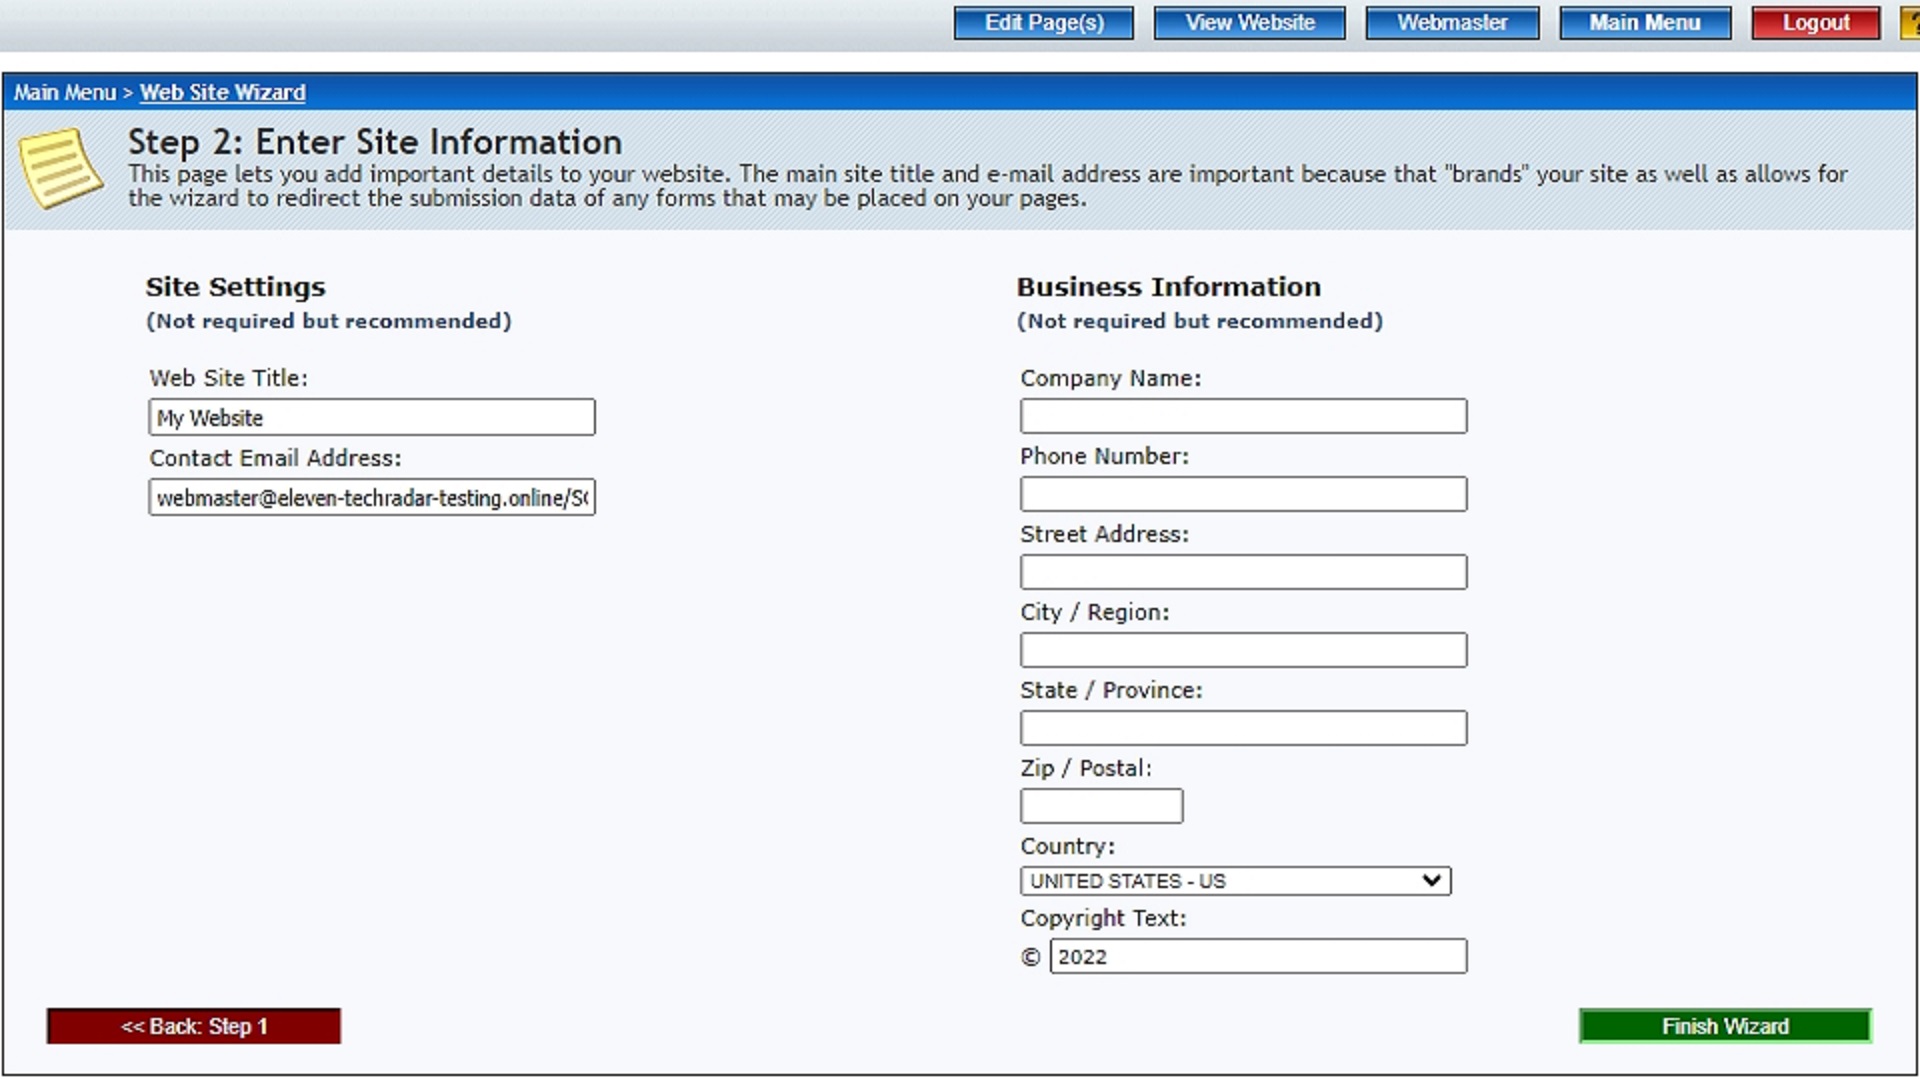
Next up, the Soholaunch installation wizard asks for a website email address, website title, and some basic business information. None of this is required, but it’s usually a good idea to add basic information at least.
Step 3: Customize your page content
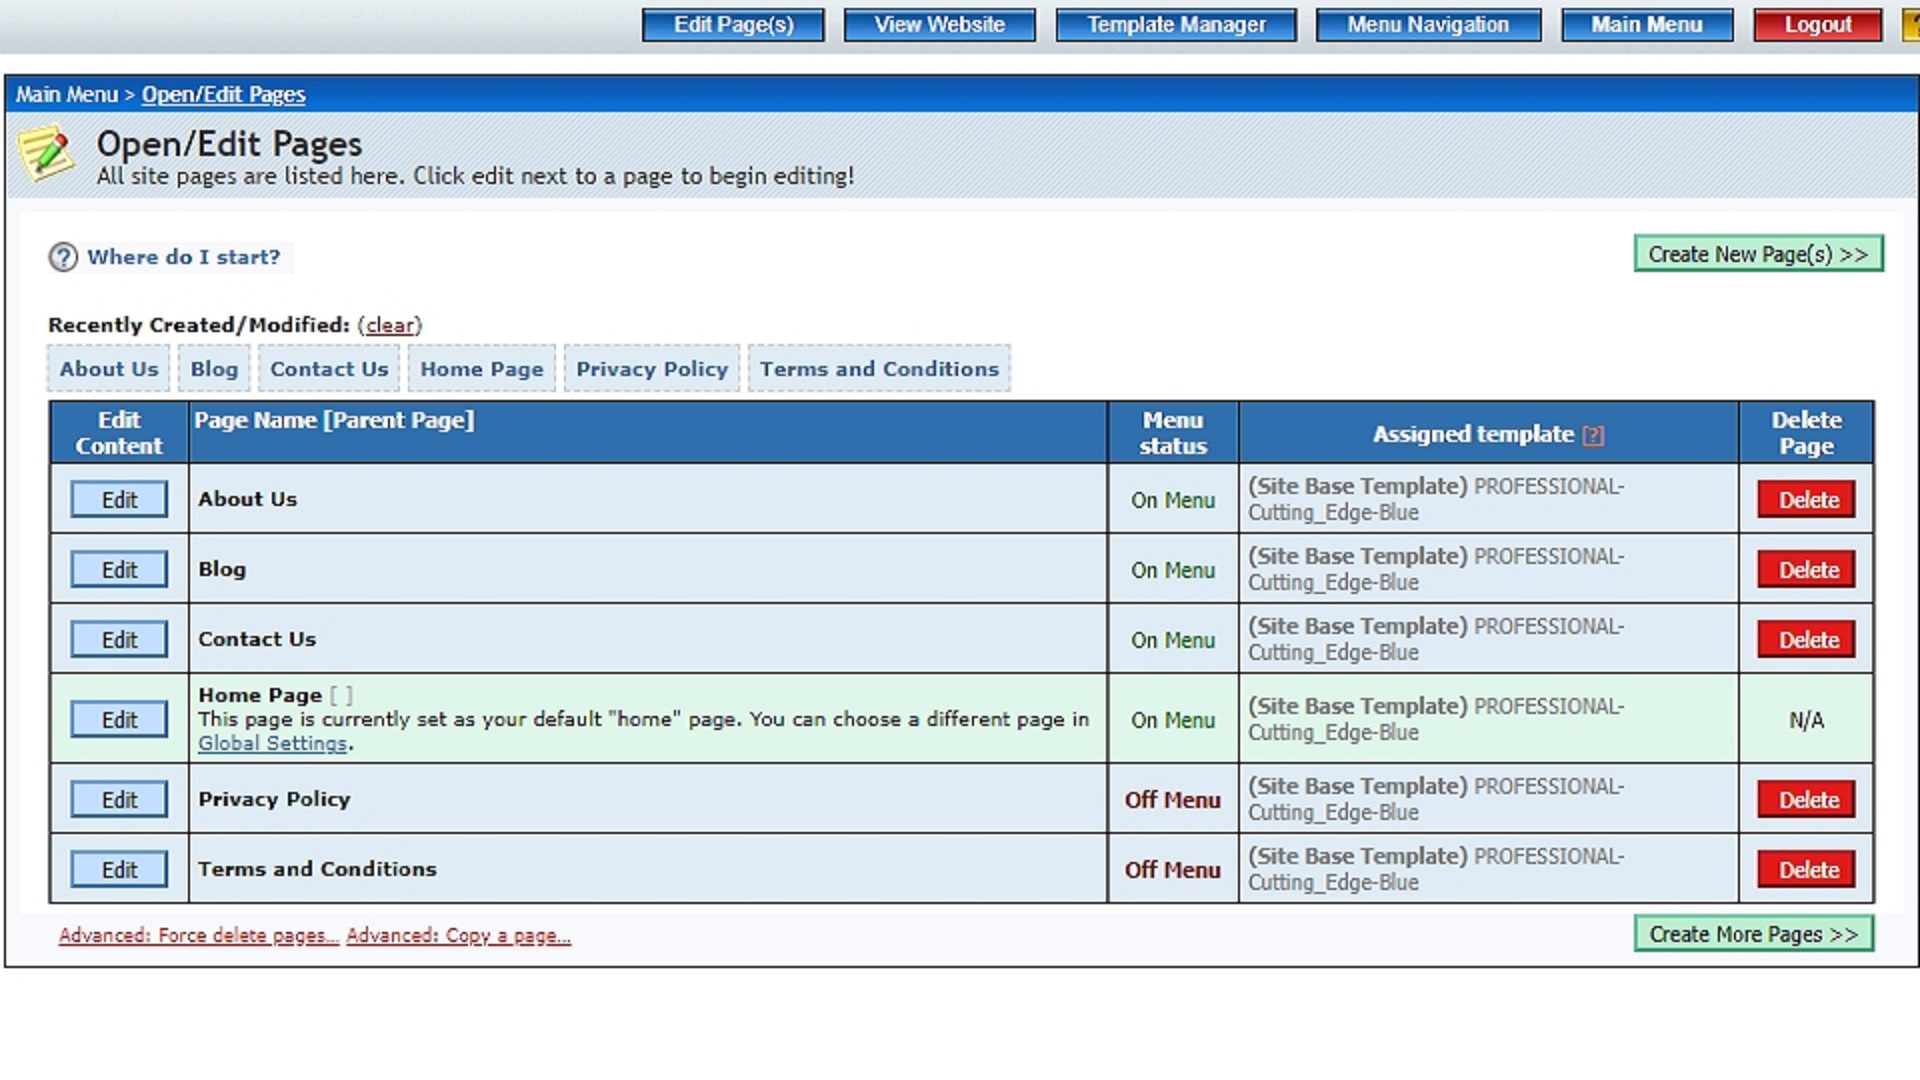
Once you’ve worked through the initial setup wizard, we’d recommend customizing your page content a little more. To do this, head to the pages tab and hit the edit button on the page you want to customize.
Soholaunch uses a very unique editor. It involves adding new blocks to a grid and customizing each one individually. This can be a little confusing to get the hang of at first, but it’s actually very efficient.
You can also edit the page properties. Some things you can change include the page title, page template, keywords, and description. We’d suggest spending a little time on these, as quality descriptions and titles will help you land a higher search engine ranking.
Step 4: Try a new template
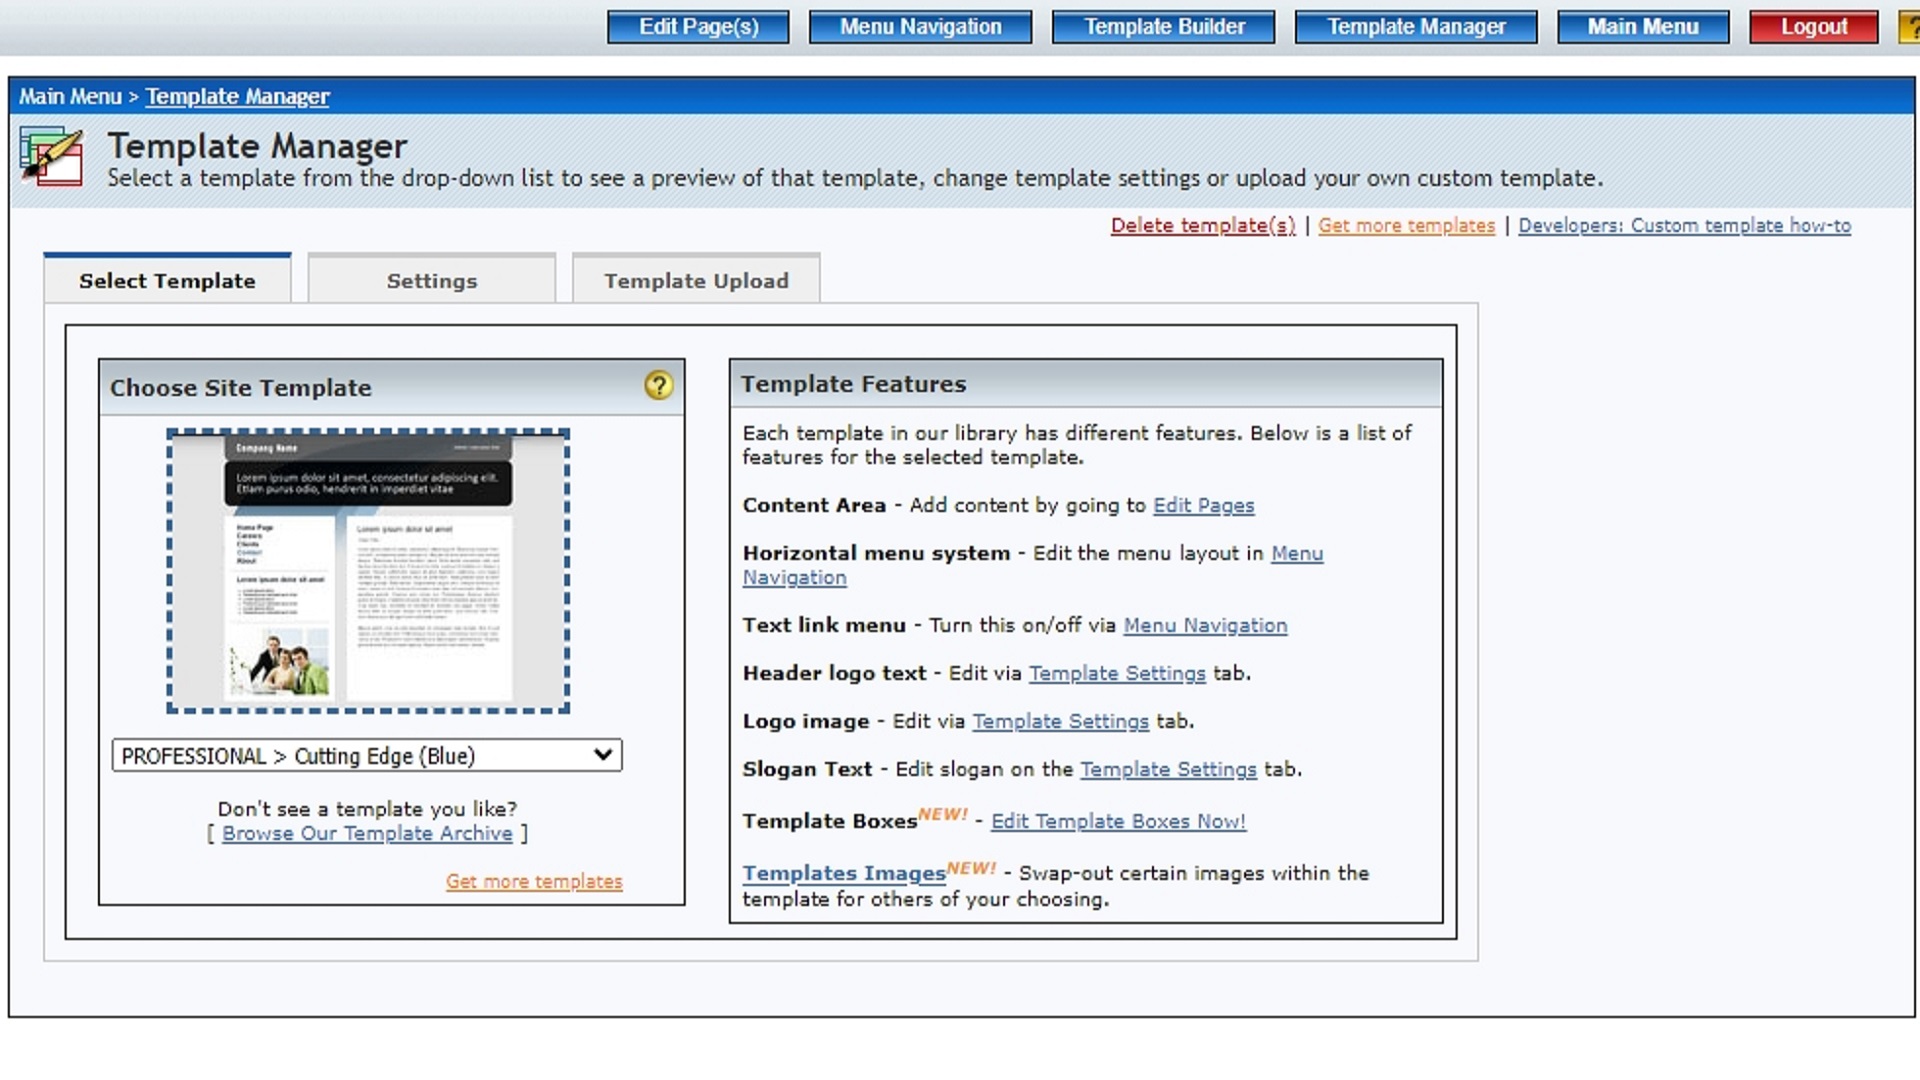
Under the Template Manager tab, you will find a selection of themes that you can use to change the global appearance of your site. Most of the built-in themes are quite outdated, but it’s possible to upload your own template if you’d like to. There’s even a template builder that lets you put together a truly personalized design.
Look out for the features included with each template. These are listed on the right of the screen, and some designs have more features than others.
Step 5: Configure your menu
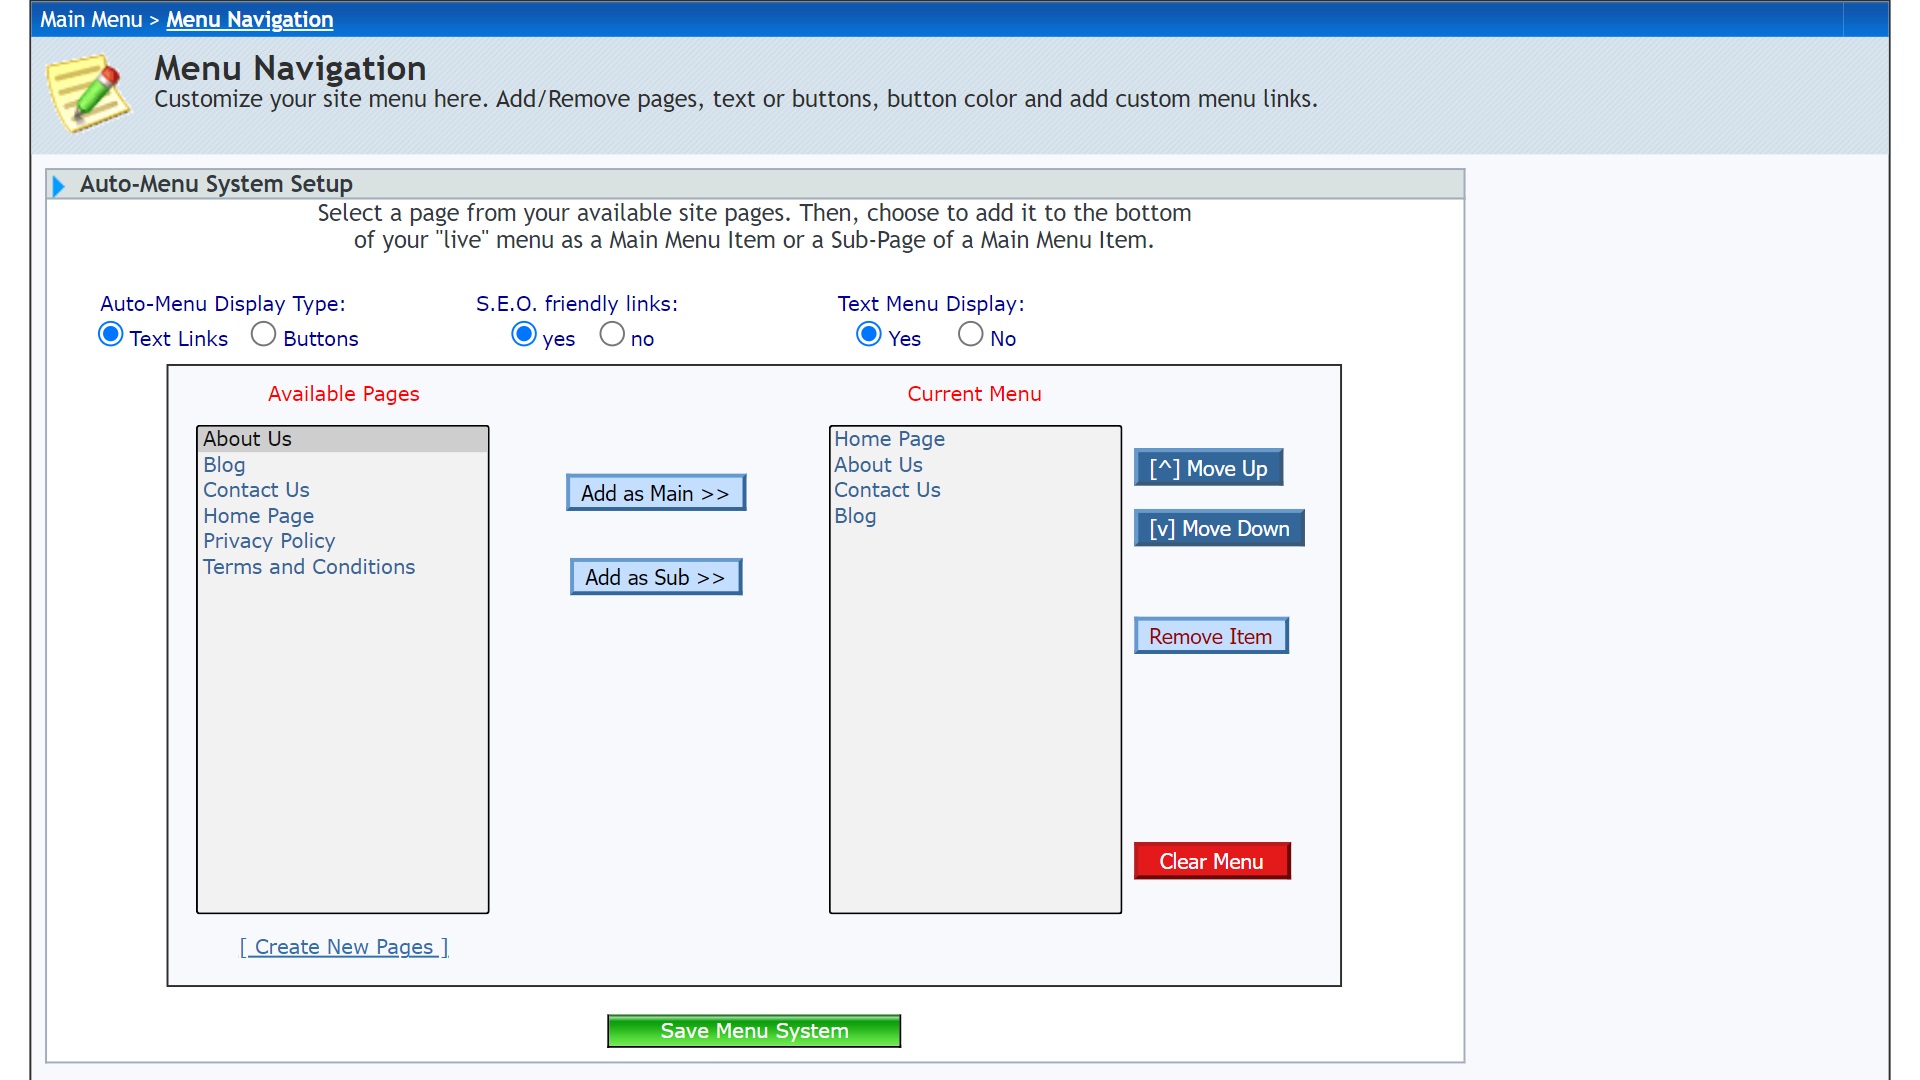
Next up, we’d suggest personalizing your menu design. Under the Menu Navigation tab, you will find loads of settings that enable you to change your menu layout, order, and display settings. You can create submenus if required, and custom menu links are available if you want to link to an email address or external website.
Step 6: Add plugins
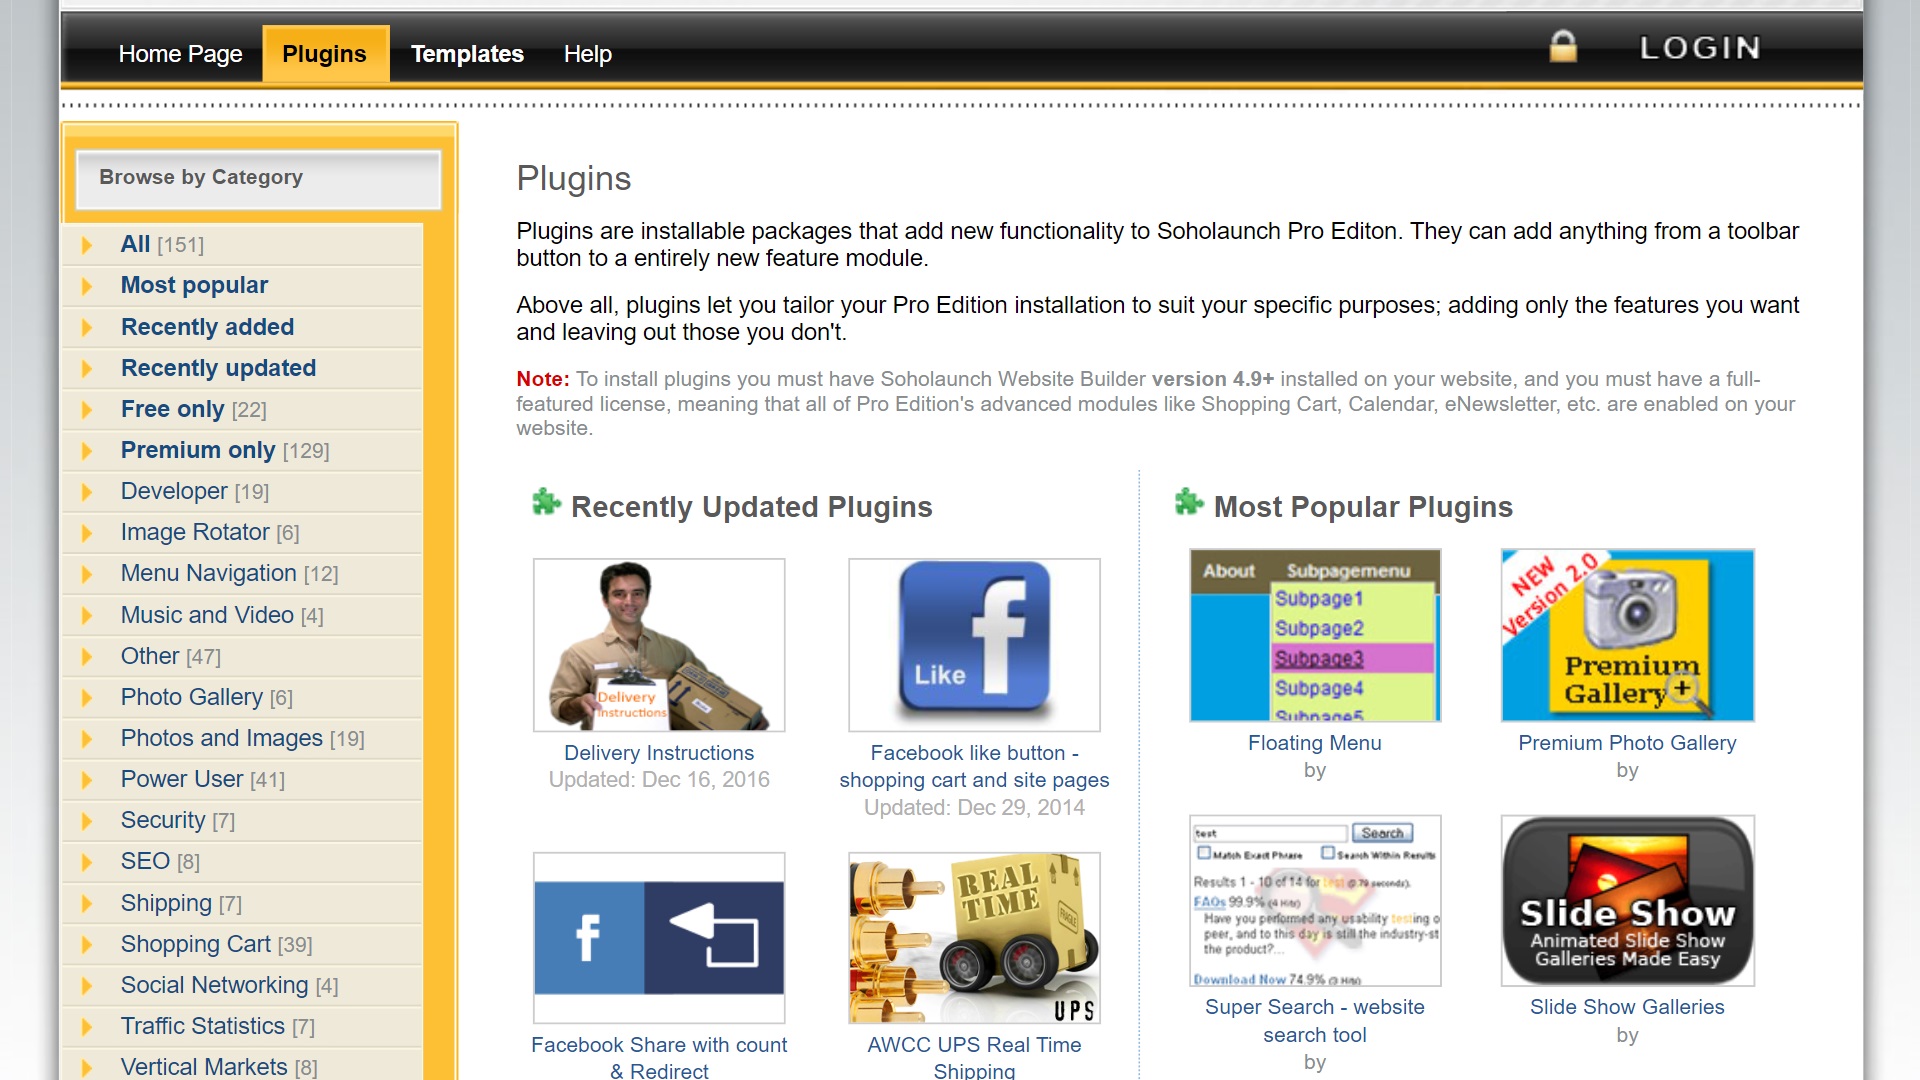
The Soholaunch Add-ons Library contains numerous plugins that you can use to add extra functionality to your website. We’d suggest taking a look to see if any of them are useful. However, be aware that the plugins have not been updated for over five years.
It’s also possible to create and upload custom plugins if required.
Step 7: Familiarize yourself with the advanced tools
By now you should have a pretty decent website up and running. Under the Advanced Features Group heading, there are a few more specialized tools that you might find useful. For example, you can add a shopping cart to your site if you want to sell products, add FAQs via the FAQ Manager, and take care of your blog via the Blog Manager.
You can also access website backups, traffic stats, and more via the Administrative Features menu.
Summary
Soholaunch is something of an outdated website builder, but it’s still fully functional and surprisingly user-friendly. In this guide, we’ve taken a close look at the steps involved with creating a Soholaunch website, outlining everything you need to know to get your site up and running.
Check out our guide to the best website builders and discover some of the more modern alternatives to Soholaunch. You might also like to read our Hostinger review to find out why it’s one of our top-rated hosts, or read more about what a website builder is.
Read more in this series:
- How to start a blog with Joomla
- Build your own CRM using SugarCRM
- How to host your files online using Nextcloud Hub
- How to start your own help desk with Hesk
- How to build an HR System using OrangeHRM
- How to generate your own invoices using Invoice Ninja
- How to install live chat software with Sales Syntax
- Run your own ecommerce platform with PrestaShop
- How to launch your own website with WebsiteBaker
- How to learn search engine optimization with SEO Panel
- How to kickstart your own Ancestry.com alternative with webtrees
- How to install a free ERP software called Dolibarr
- Demand gen vs lead gen: What's the difference?
- Host your own private forum with MyBB
- Build your own calendar application with WebCalendar
- Set up your own groupware service with Tiki Wiki CMS
- How to build your own email marketing service with phpList
- A Google Photos alternative: Store your photos online with Piwigo
- How to start with project management using The Bug Genie
- Make your own poll platform with LimeSurvey
- Roll out your own Wikipedia clone with MediaWiki
- How to host your own learning management software with Moodle LMS
- Set up an accounting system with FrontAccounting
- Produce your own bills with BoxBilling
Daniel is a freelance copywriter with over six years experience writing for publications such as TechRadar, Tom’s Guide, and Hosting Review. He specializes in B2B and B2C tech and finance, with a particular focus on VoIP, website building, web hosting, and other related fields.
