How to enable/disable the ExpressVPN kill switch
Keep your data secure if the VPN connection drops with a kill switch

Over 3,000 servers in 160 locations across, 90+ countries, fast performance, and strong 256-bit AES encryption are just some of the features that make ExpressVPN one of the better VPN providers around. Add fair pricing and tight security features such as a kill switch into the mix and you get quite a deal.
A kill switch is a VPN feature that helps you protect your sensitive data in case your VPN connection is interrupted.
ExpressVPN’s kill switch is called Network Lock and it is currently available for Windows, Mac, and Linux.
The purpose of Network Lock is to prevent your network traffic from flowing outside the encrypted VPN tunnel. Therefore it safeguards your data against becoming exposed to unwanted parties if your VPN connection drops, thus preserving your anonymity and security on the Internet.
When Network Lock is enabled, you will only be able to access the internet when you are connected to the VPN. If your VPN connection suddenly breaks, Network Lock is there to block all internet access so that your data is kept safe.
This step-by-step guide will show you how to activate and deactivate a kill switch in your ExpressVPN Windows app.
- Check out our list of the best VPN
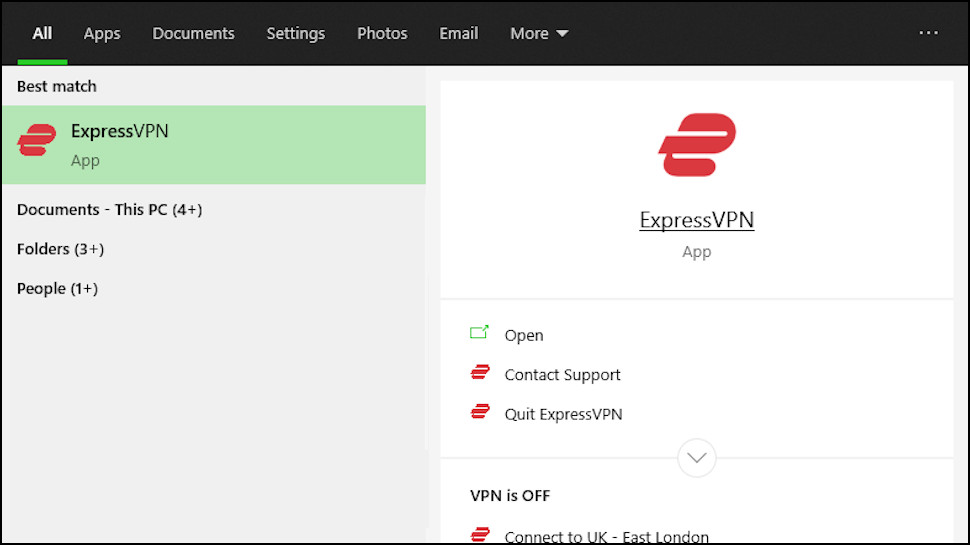
1. Start your ExpressVPN app
Are you a pro? Subscribe to our newsletter
Sign up to the TechRadar Pro newsletter to get all the top news, opinion, features and guidance your business needs to succeed!
Open your ExpressVPN app, if it hasn’t automatically started with your system.
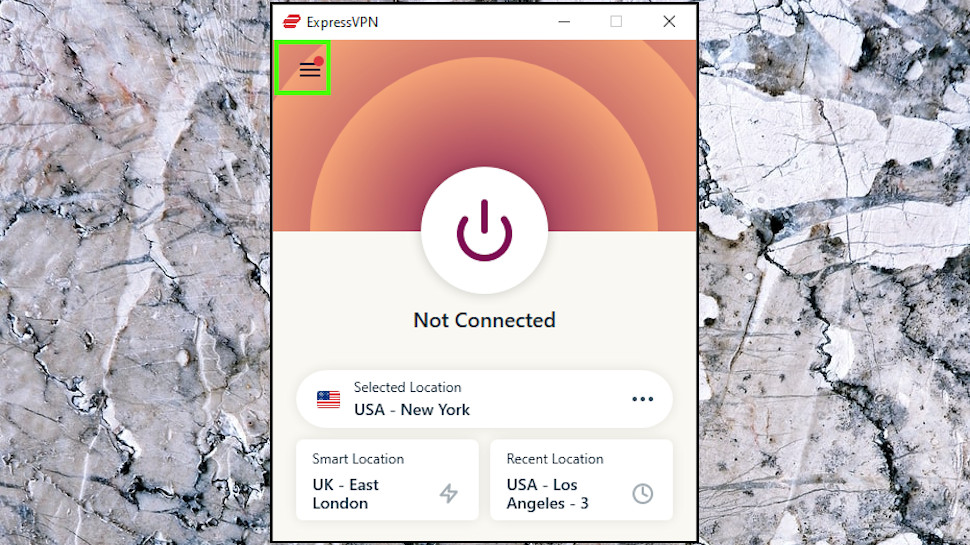
2. Open the menu
In the app, click the hamburger menu button in the upper left part of the app window.
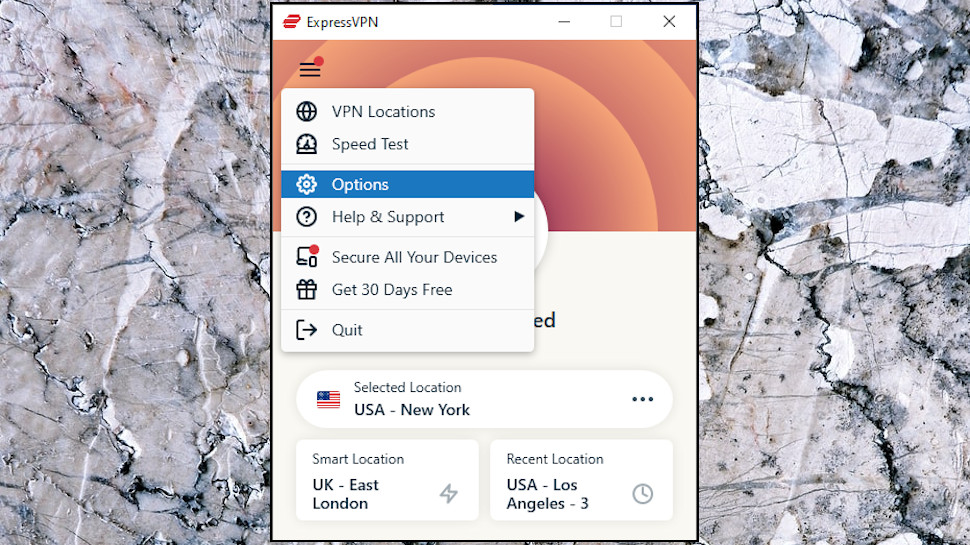
3. Click Options
In the menu that pops up, select Options.
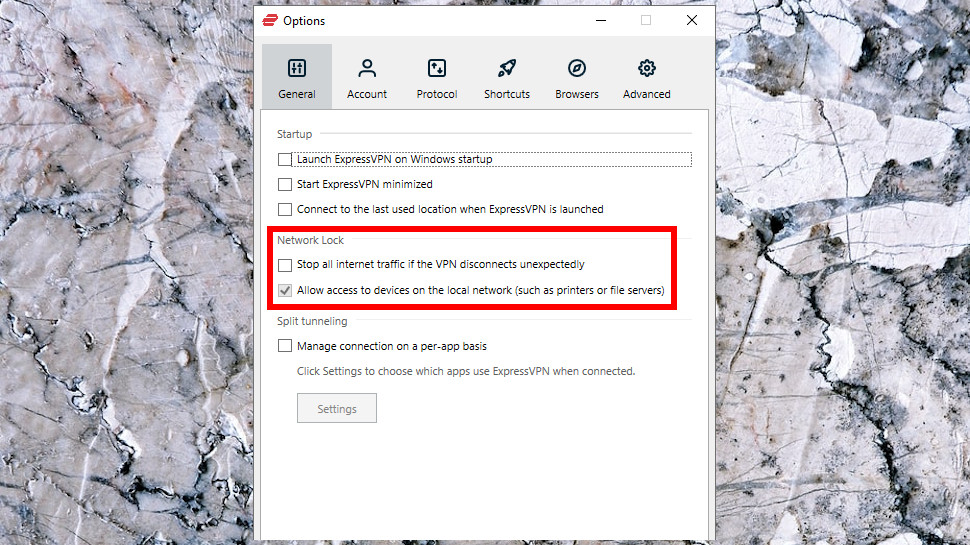
4. Locate the Network Lock settings
The Network Lock settings are located under the General tab, just below the Startup options.
5. Check/uncheck the Network Lock option
If you want to have the kill switch option on, check the box next to Stop all internet traffic if the VPN disconnects unexpectedly. If you don’t, uncheck it.
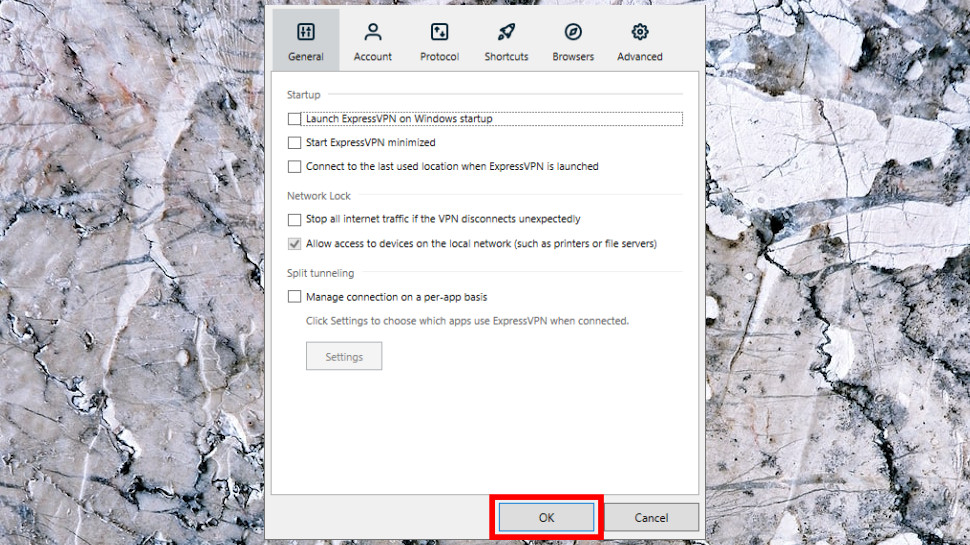
6. Click OK
Whichever option you selected, click the OK button for the changes to take effect.
7. Connect to a server
All you need to do now is connect to a server and you can resume your online activities with ExpressVPN. You can do this by pressing the big round on/off button, or one of the two panes labeled Smart Location (which automatically chooses a location best suitable for your device) and Choose Location (which allows you to choose a server you want to connect to).

Désiré has been musing and writing about technology during a career spanning four decades. He dabbled in website builders and web hosting when DHTML and frames were in vogue and started narrating about the impact of technology on society just before the start of the Y2K hysteria at the turn of the last millennium.