How to generate your own invoices using Invoice Ninja
A popular open-source invoicing program
Invoice Ninja is a free, open-source program that comes with a suite of invoicing and account management tools. It enables you to accept payments online, create invoices in a streamlined, hassle-free manner, and manage your clients through a central dashboard.
Invoice Ninja is a self-hosted program, which means it takes a little more to set up than your average business software. In this article, we walk you through the steps involved with installing Invoice Ninja and creating your own invoices.
How to generate your own invoices using Invoice Ninja: Preparation
To get started, you will need to purchase web hosting. There are numerous reliable options out there, and we’ve chosen Hostinger as the leading choice available today. Hostinger ordinarily offers low prices combined with exceptional service, and we’ve managed to arrange an exclusive free hosting deal for our readers!
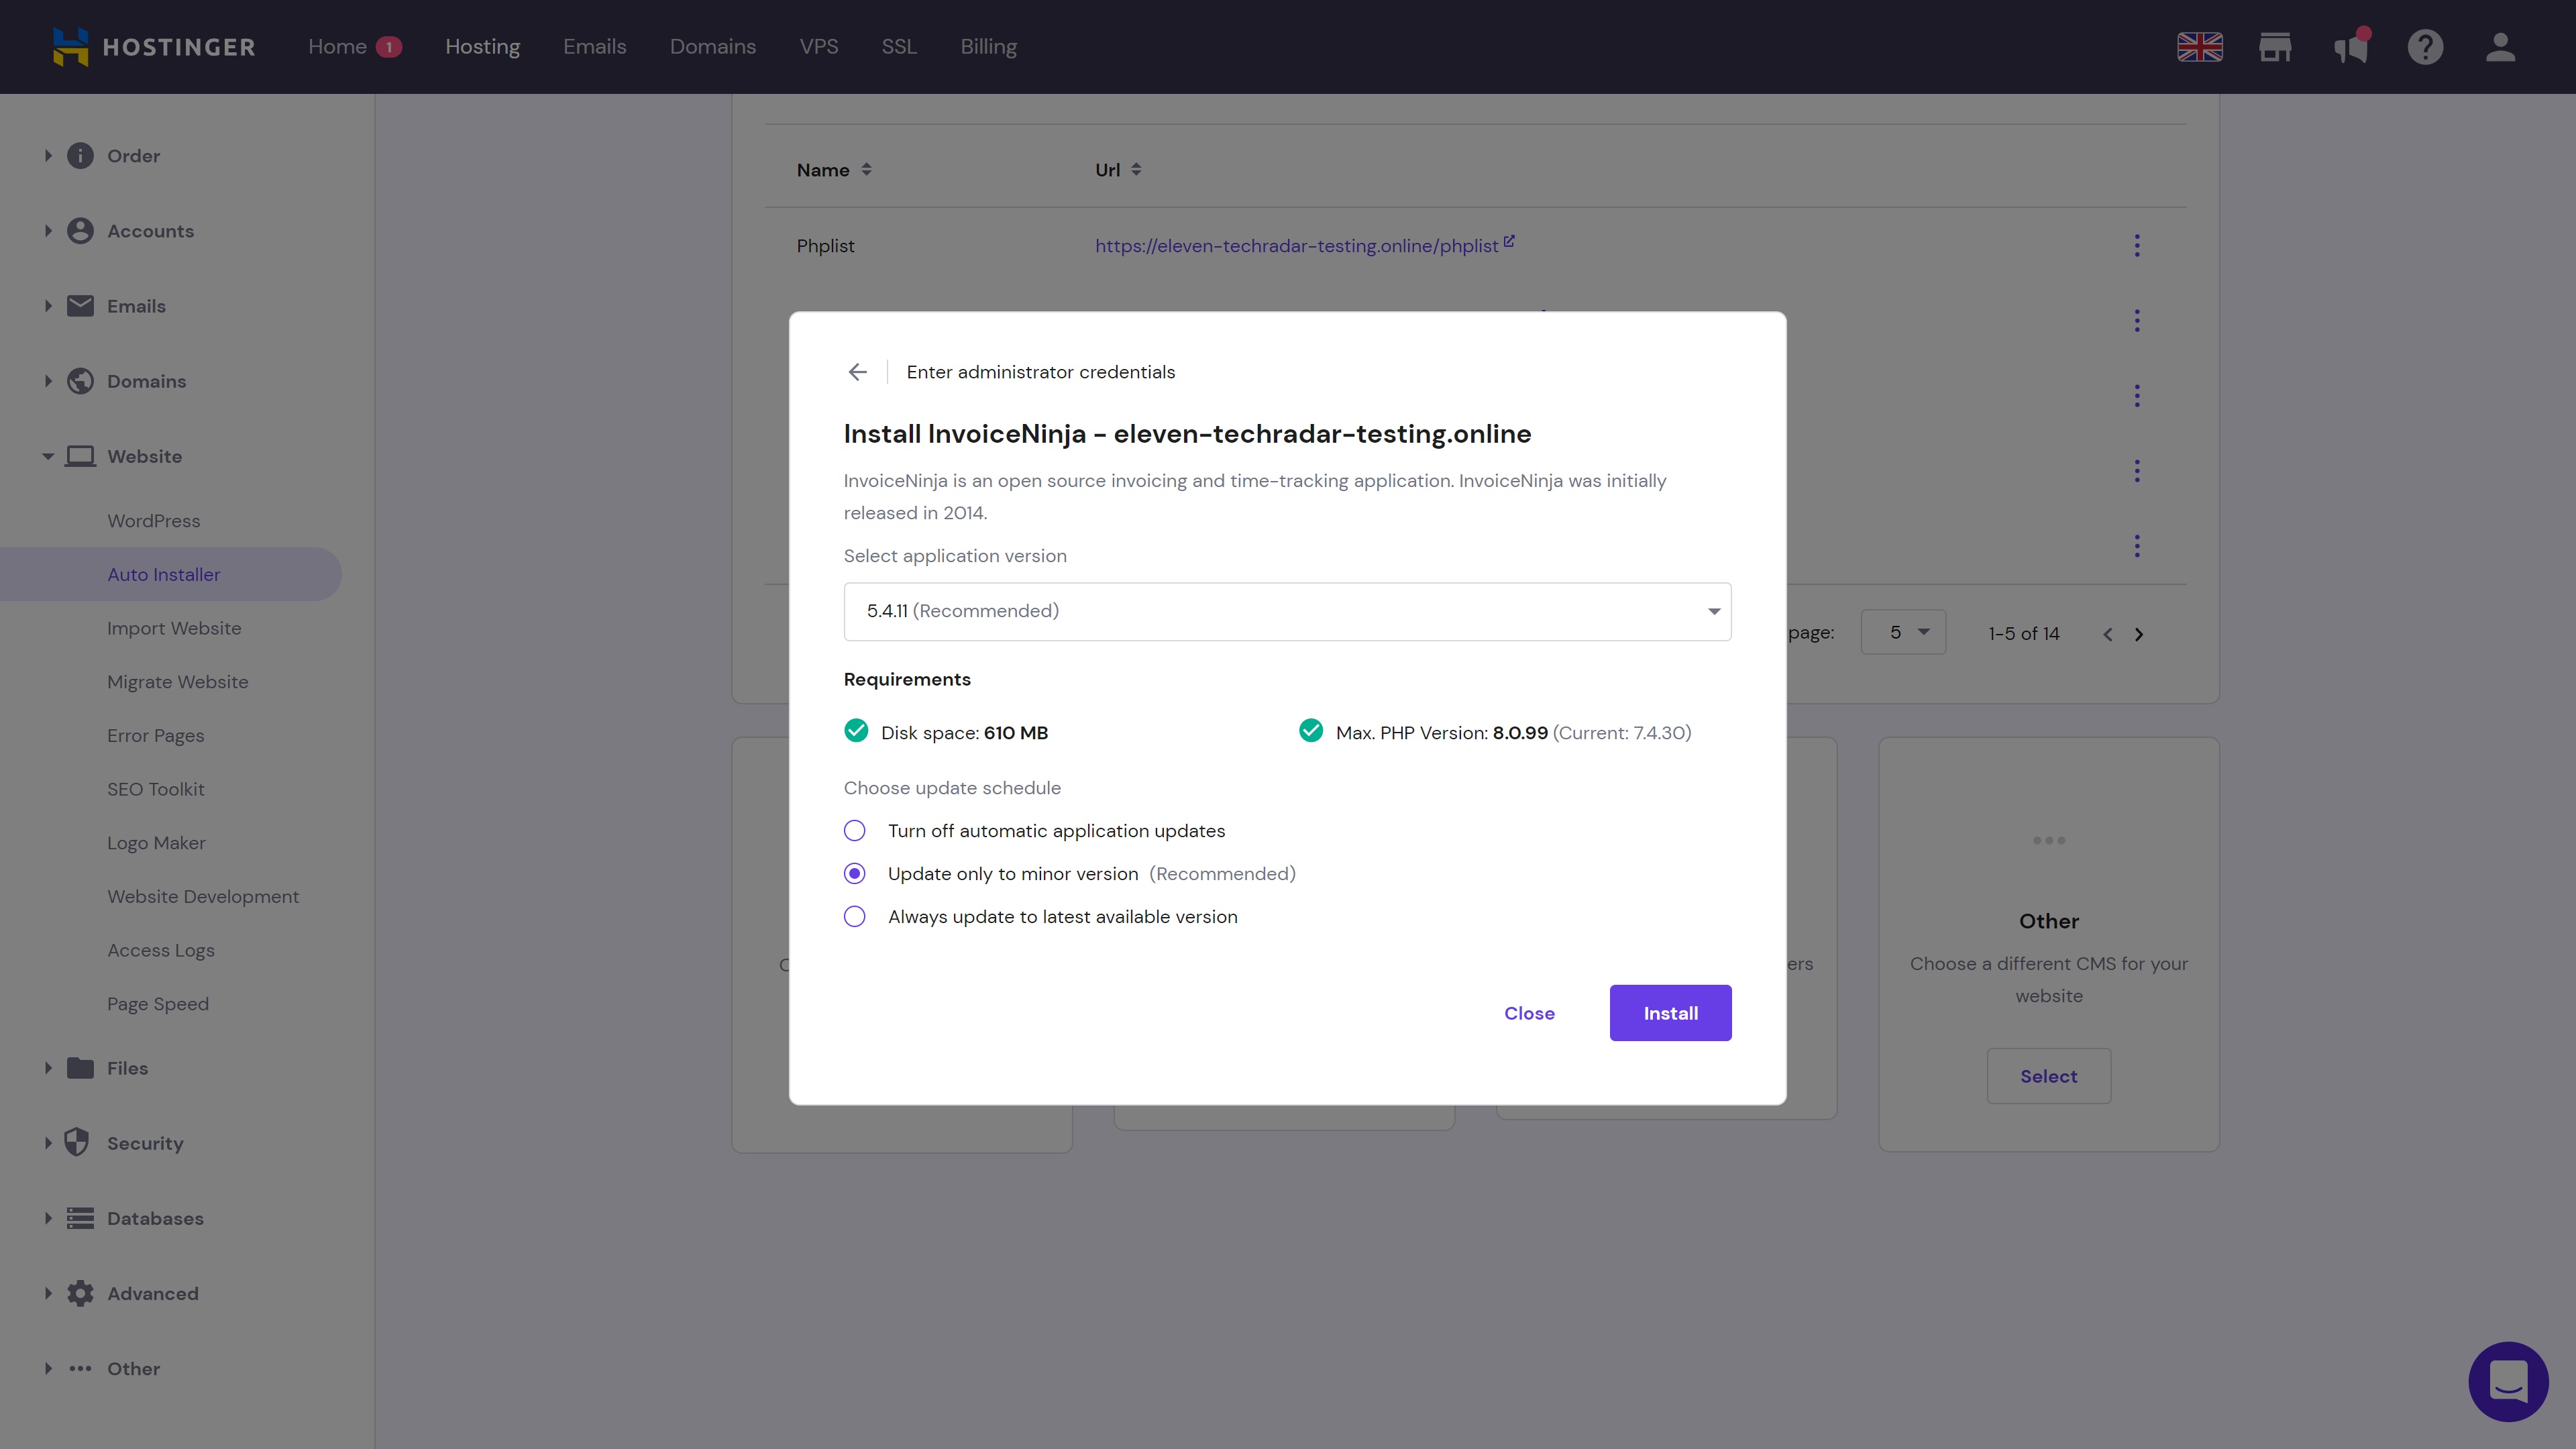
Once you’ve purchased web hosting, it’s time to install the Invoice Ninja software. Hostinger makes this super easy with its Auto Installer, which enables you to install it in just minutes. You will find the installer on your hPanel control panel, and it’s super easy to use. Detailed instructions are available here if required.
Most web hosts offer some sort of one-click installer that you can use to install Invoice Ninja. If your web host doesn’t offer this, be prepared for the time-consuming and possibly difficult task of installing it manually.
Step 1: Set basic settings
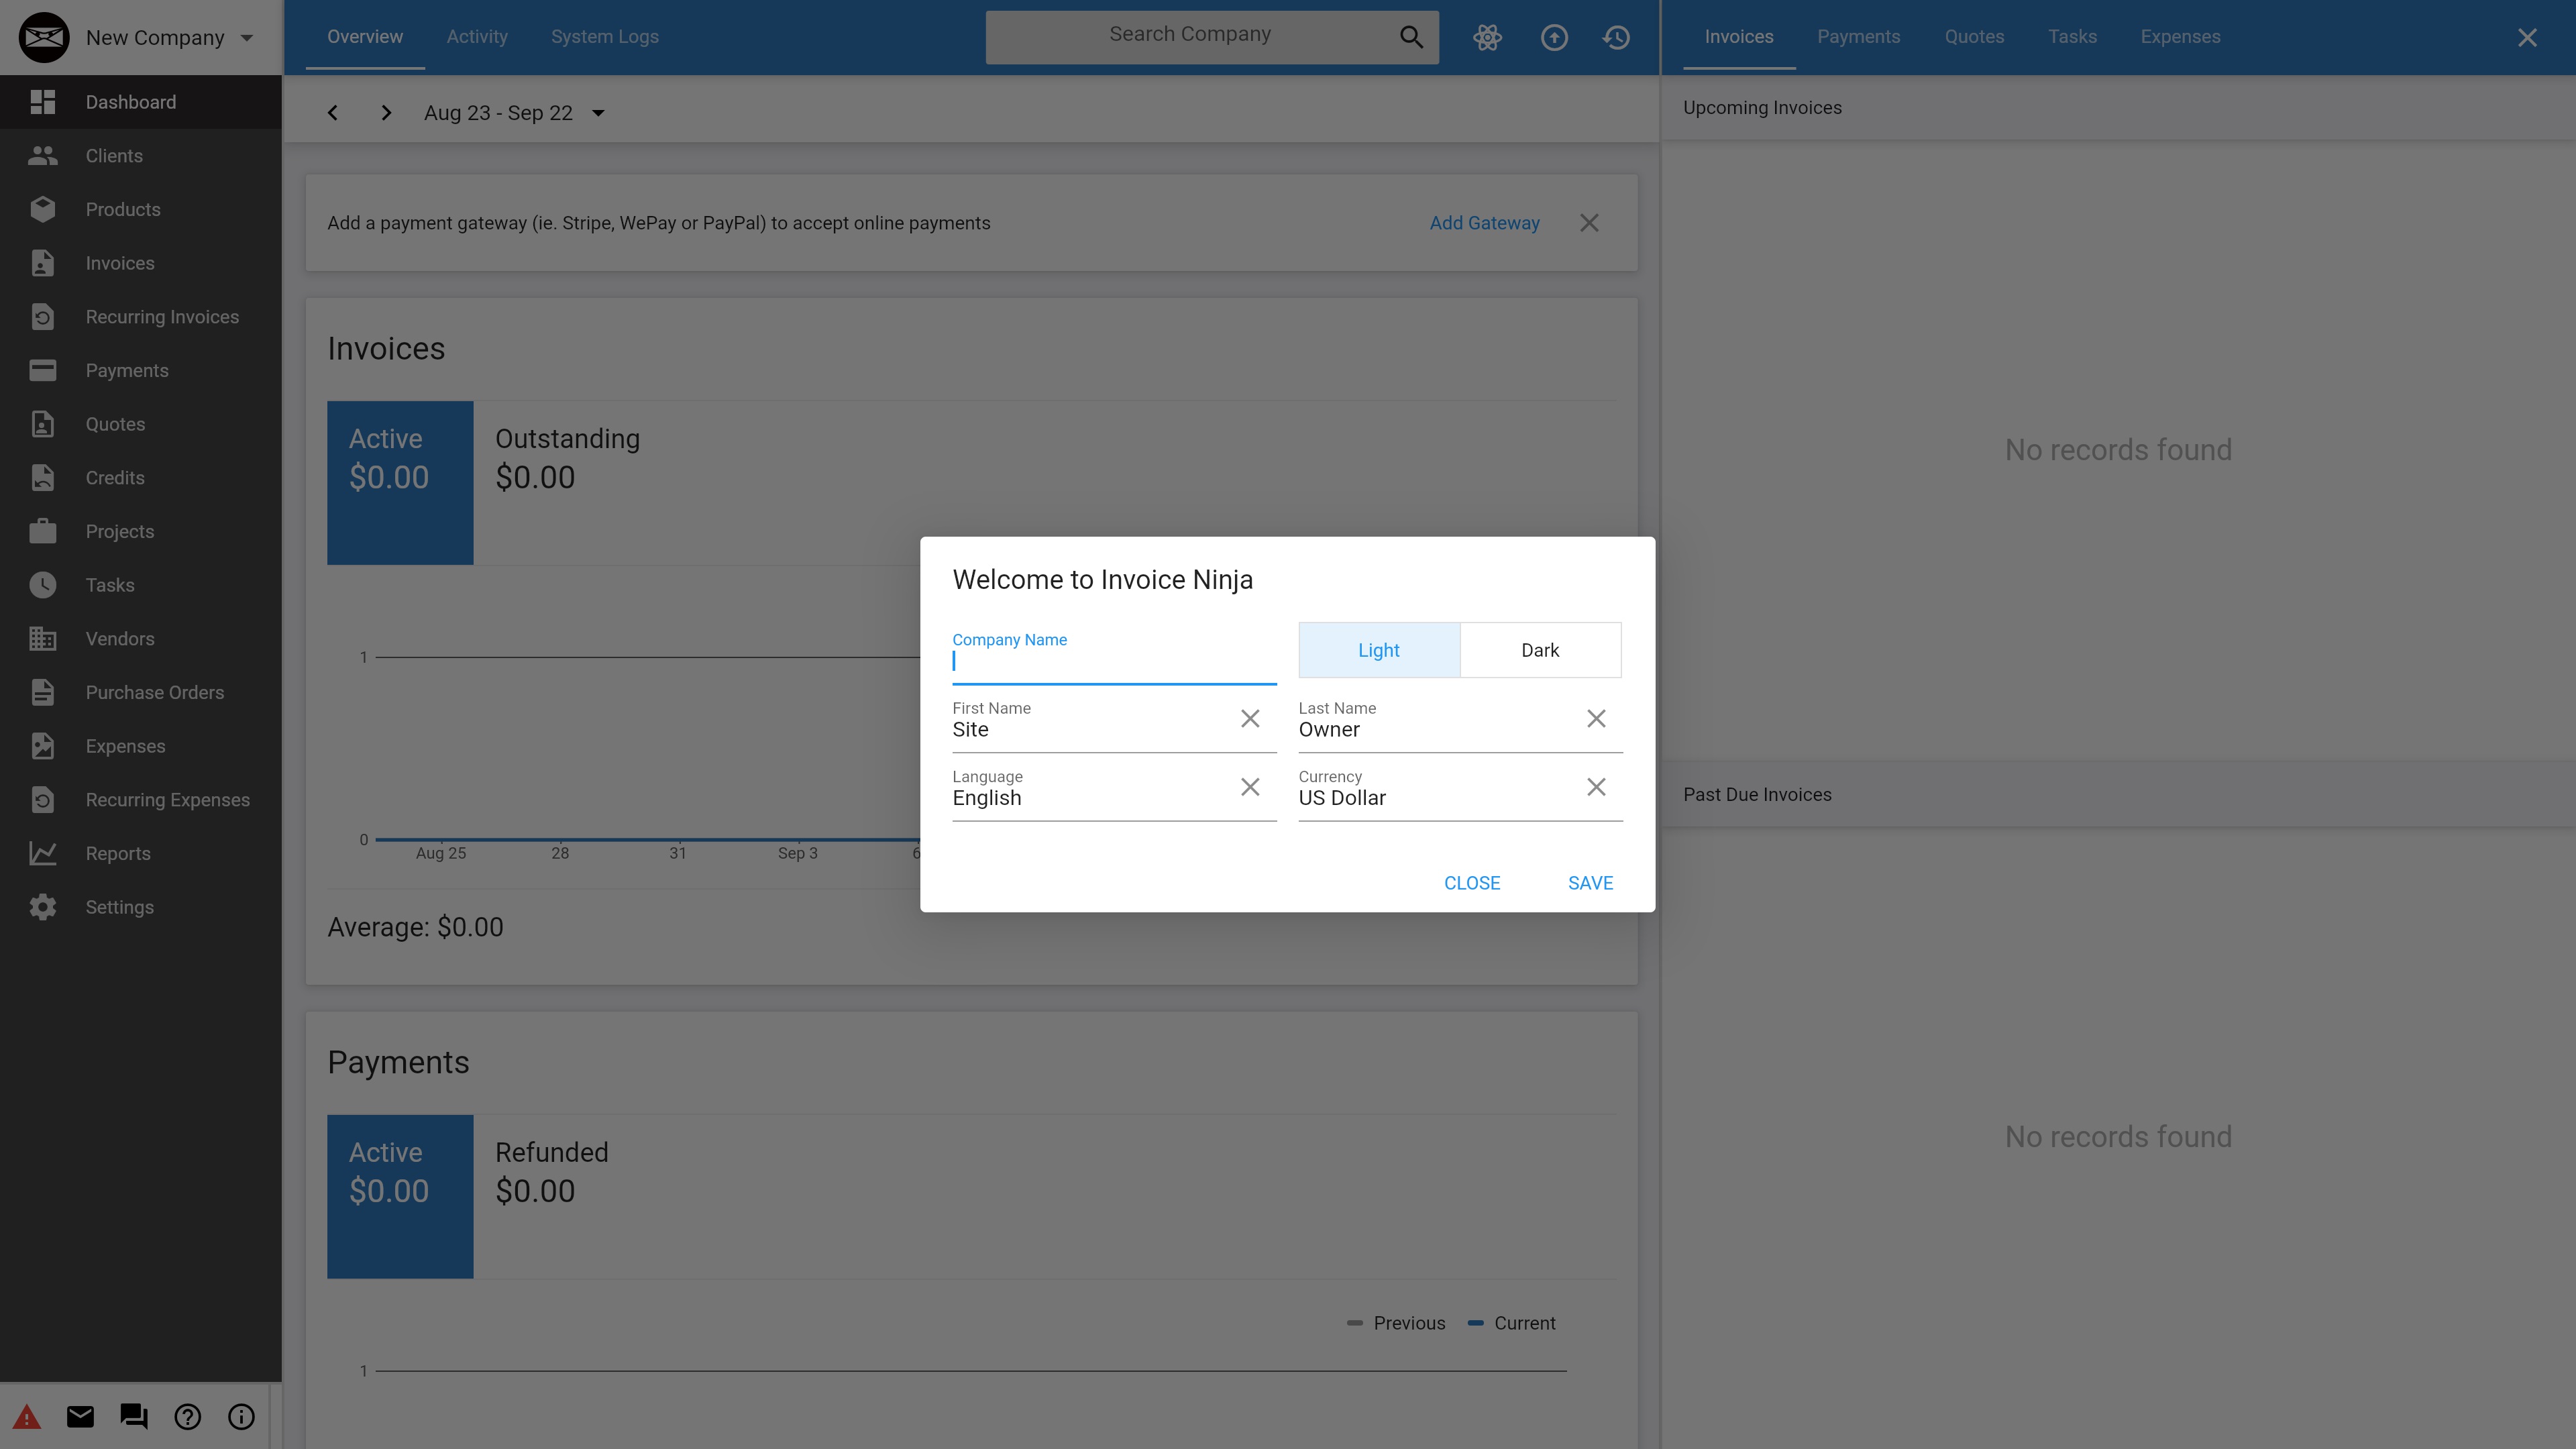
When you launch Invoice Ninja for the first time, you will be asked to fill in a few basic details about your business before using the platform. First, enter your company name, first name, last name, language, and currency. You can also choose between a light and a dark theme.
Next, head to Settings > Company Details to update the rest of your company information. You won’t be asked for anything too complicated, and you can always come back to this step later.
Are you a pro? Subscribe to our newsletter
Sign up to the TechRadar Pro newsletter to get all the top news, opinion, features and guidance your business needs to succeed!
Step 2: Add payment gateways
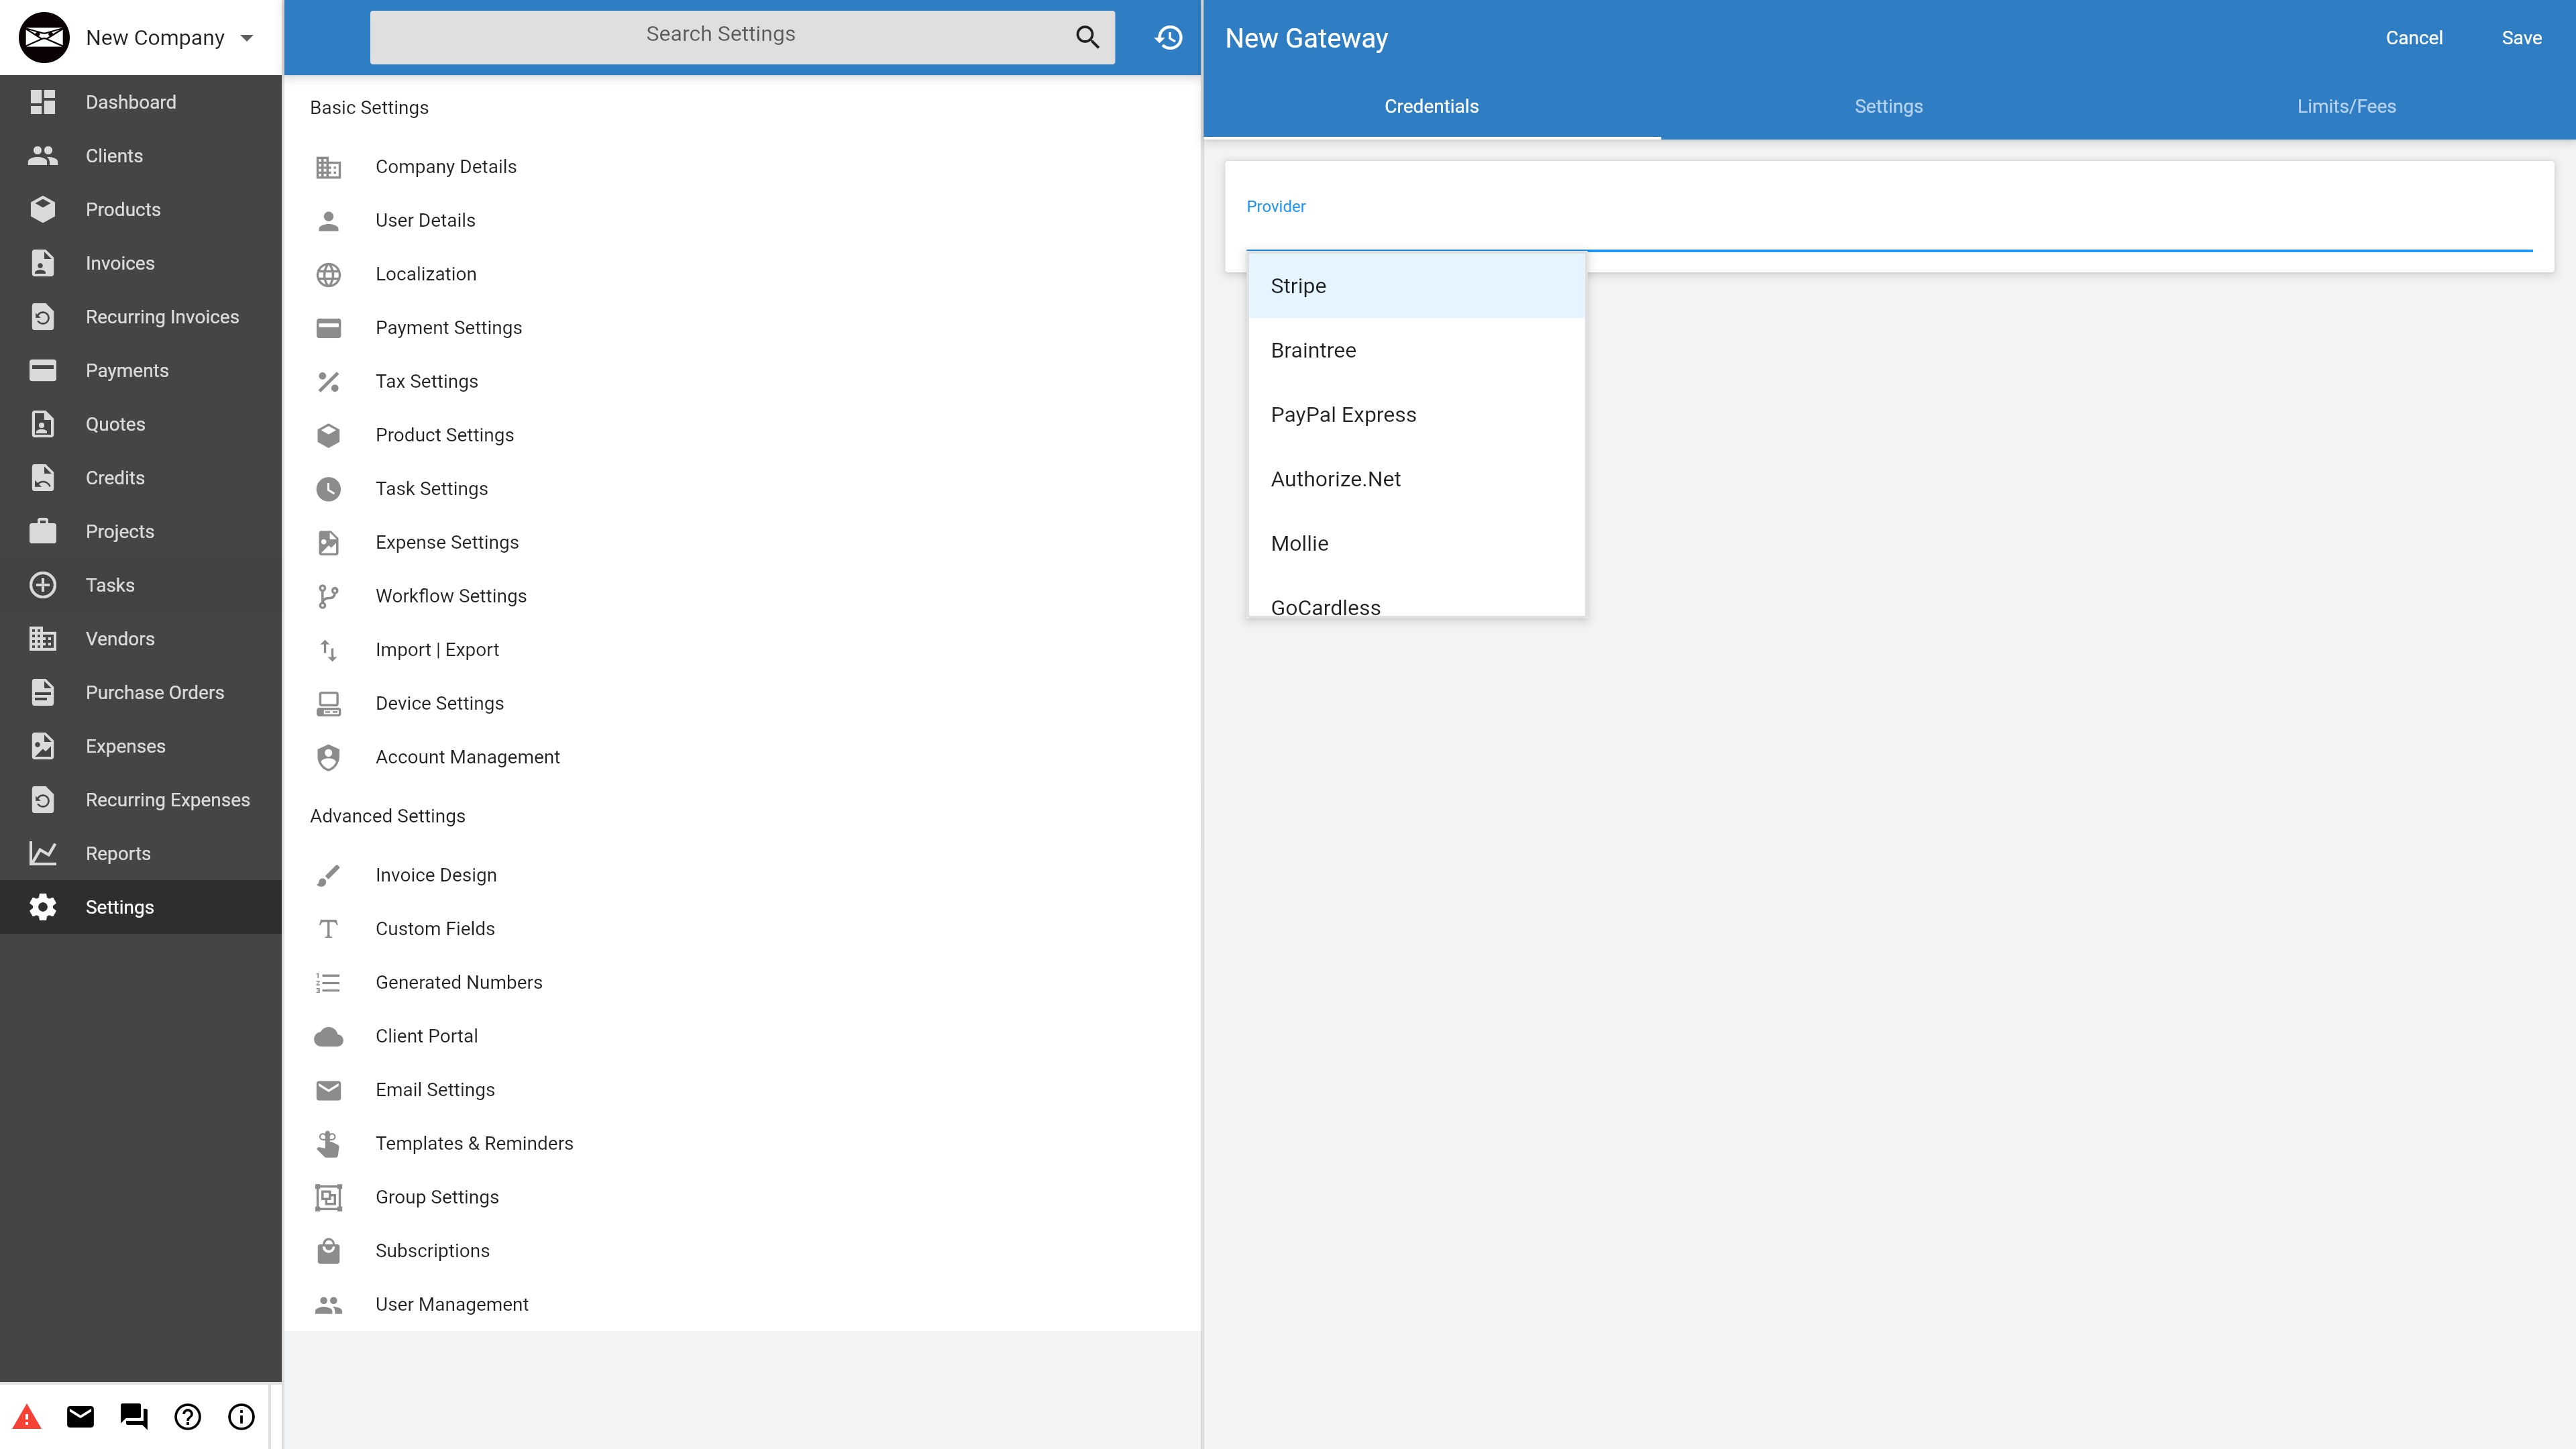
Next up, head to Settings > Payment Settings > Configure Gateway to add your first payment gateway. You can add your existing credentials from numerous popular providers, including Stripe, Braintree, and PayPal. You can also configure basic payment settings here, including specifying the information that’s collected during payment.
If you don’t already have an account set up with one of the compatible payment gateways, you’ll need to do this first. Our guide to the best payment gateways outlines the leading options.
Once you’ve set this up, you can also configure things like recurring payments. Your invoices will also include a payment button that enables your clients to pay immediately.
Step 3: Configure email settings
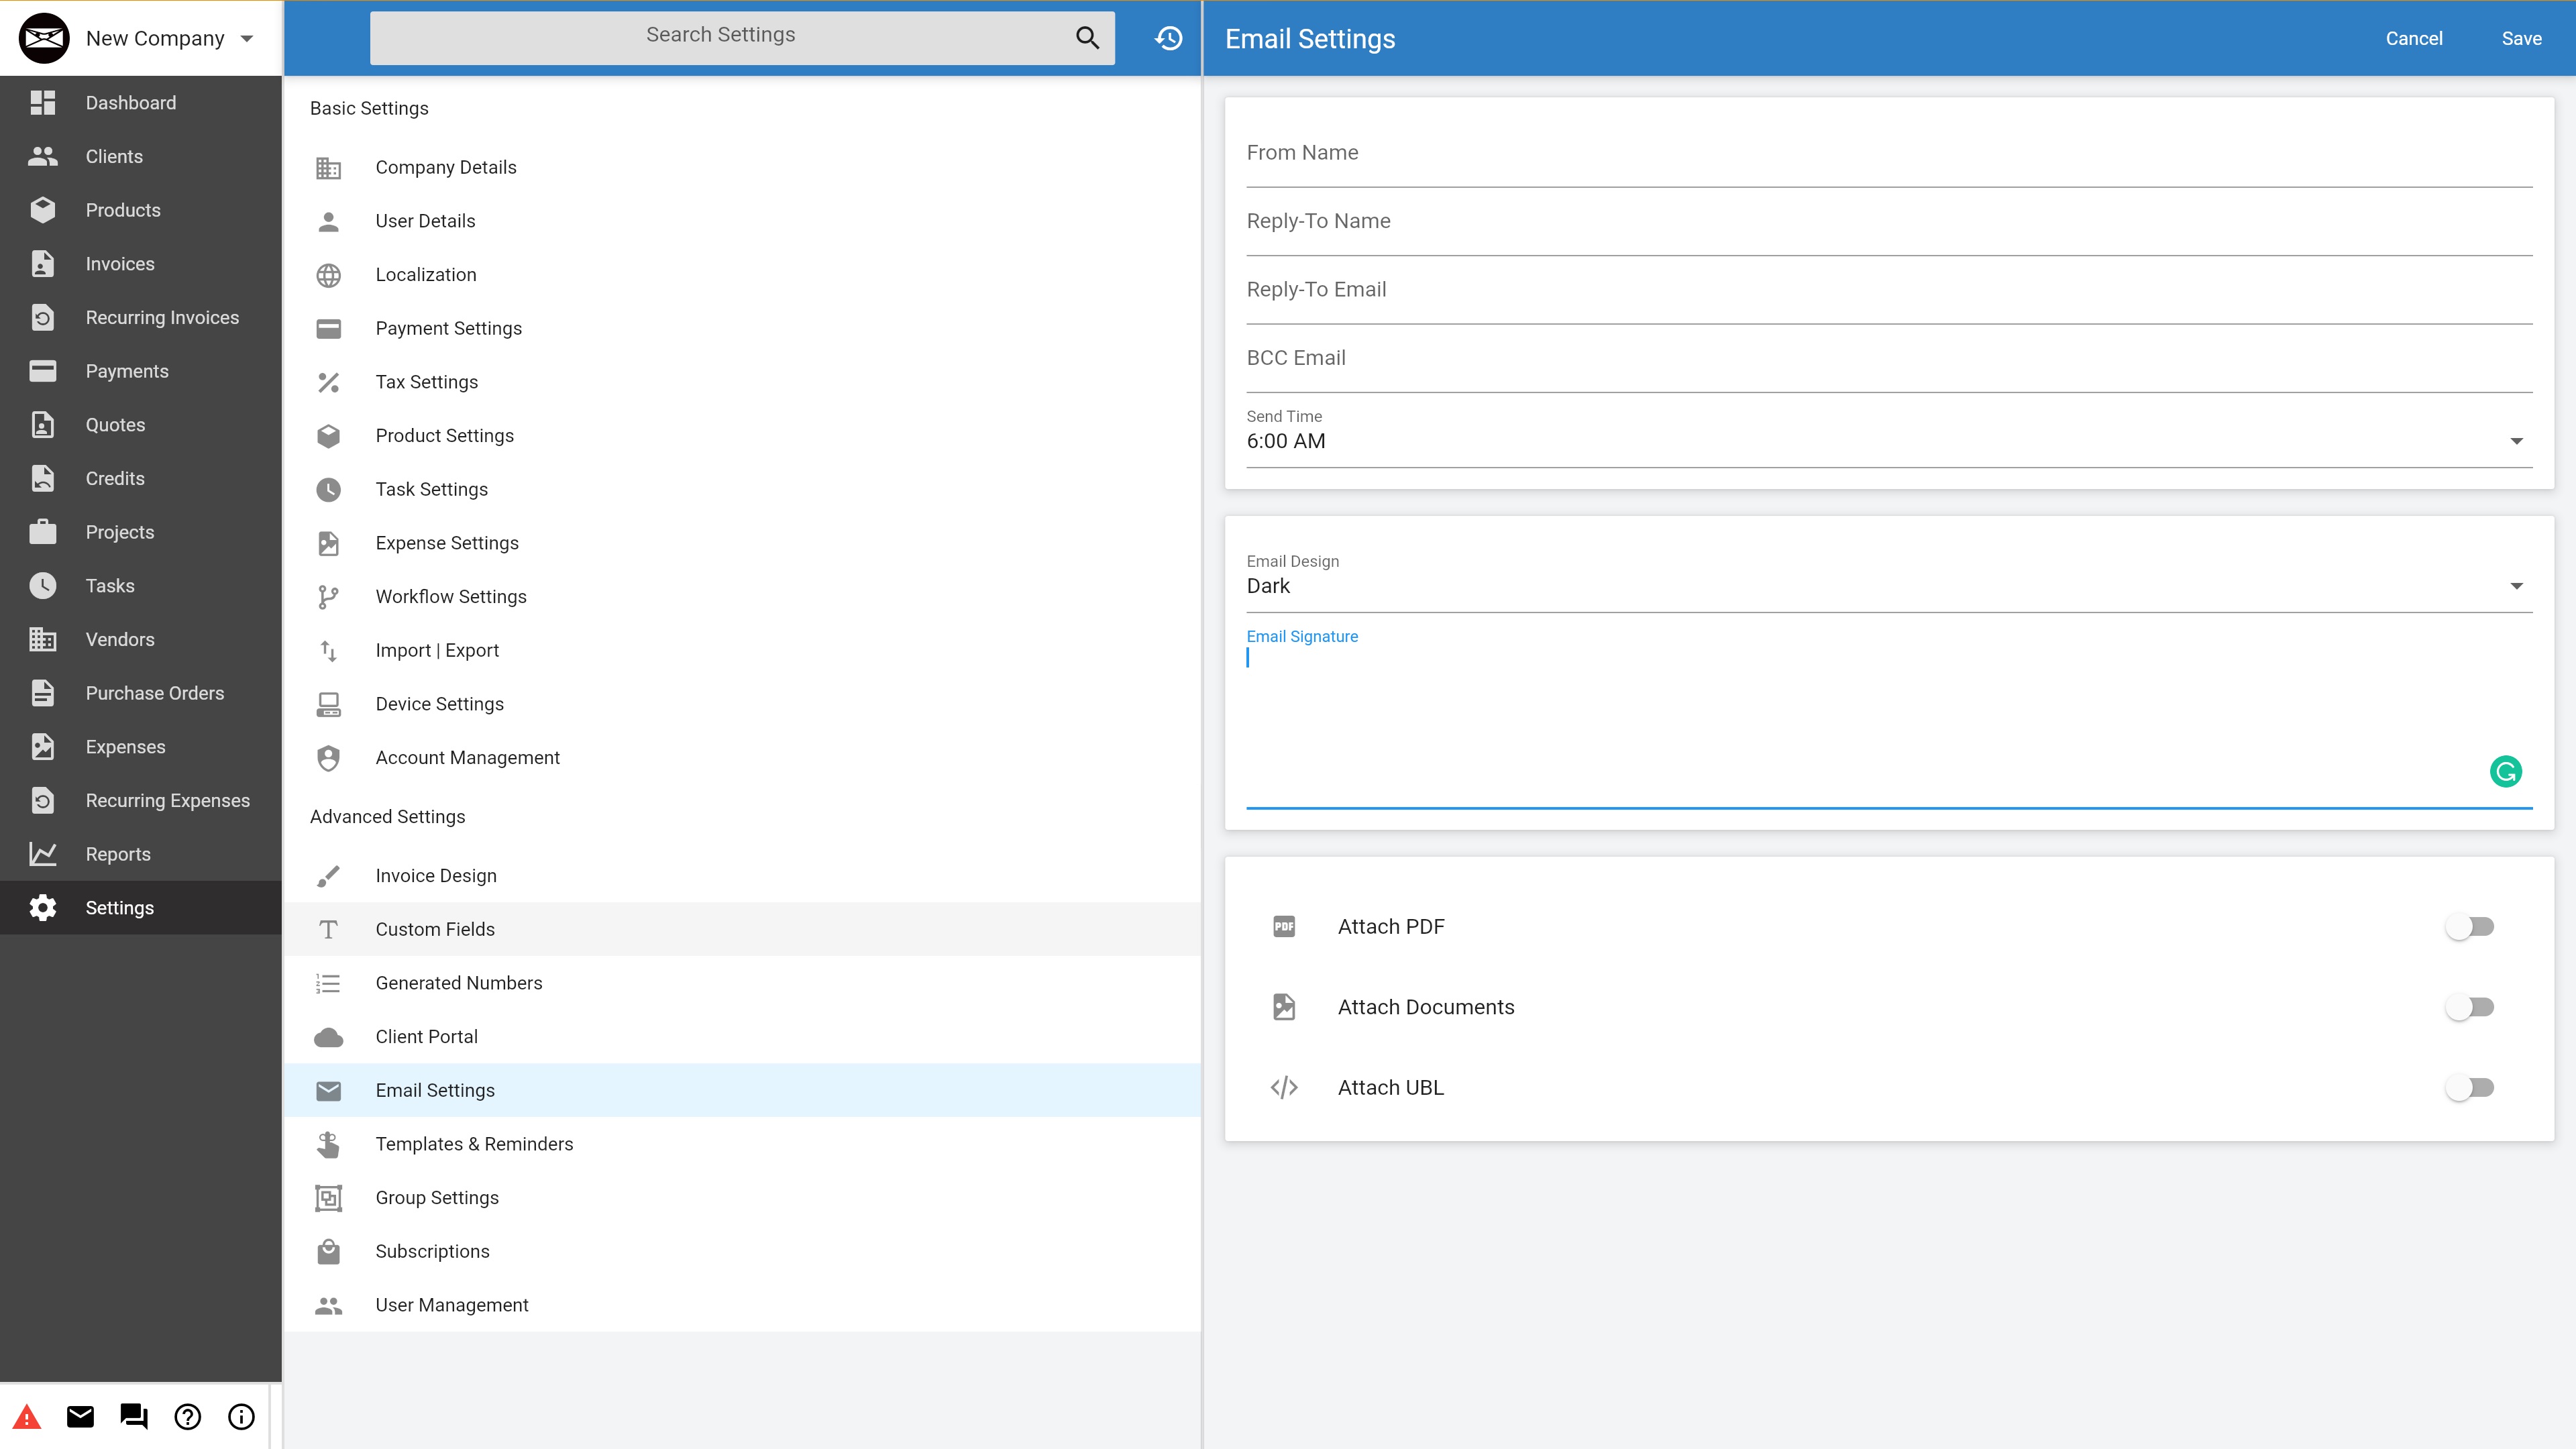
Before you can automatically send client invoices, you will need to configure your email settings. To do so, head to Settings > Advanced Settings > Email Settings.
Here, you can specify important details such as the sent-from name, the BCC email, and the reply-to email. You can also select an email template or upload your own HTML design, and you can have PDFs and other documents attached to emails automatically if required.
Step 4: Add your existing clients
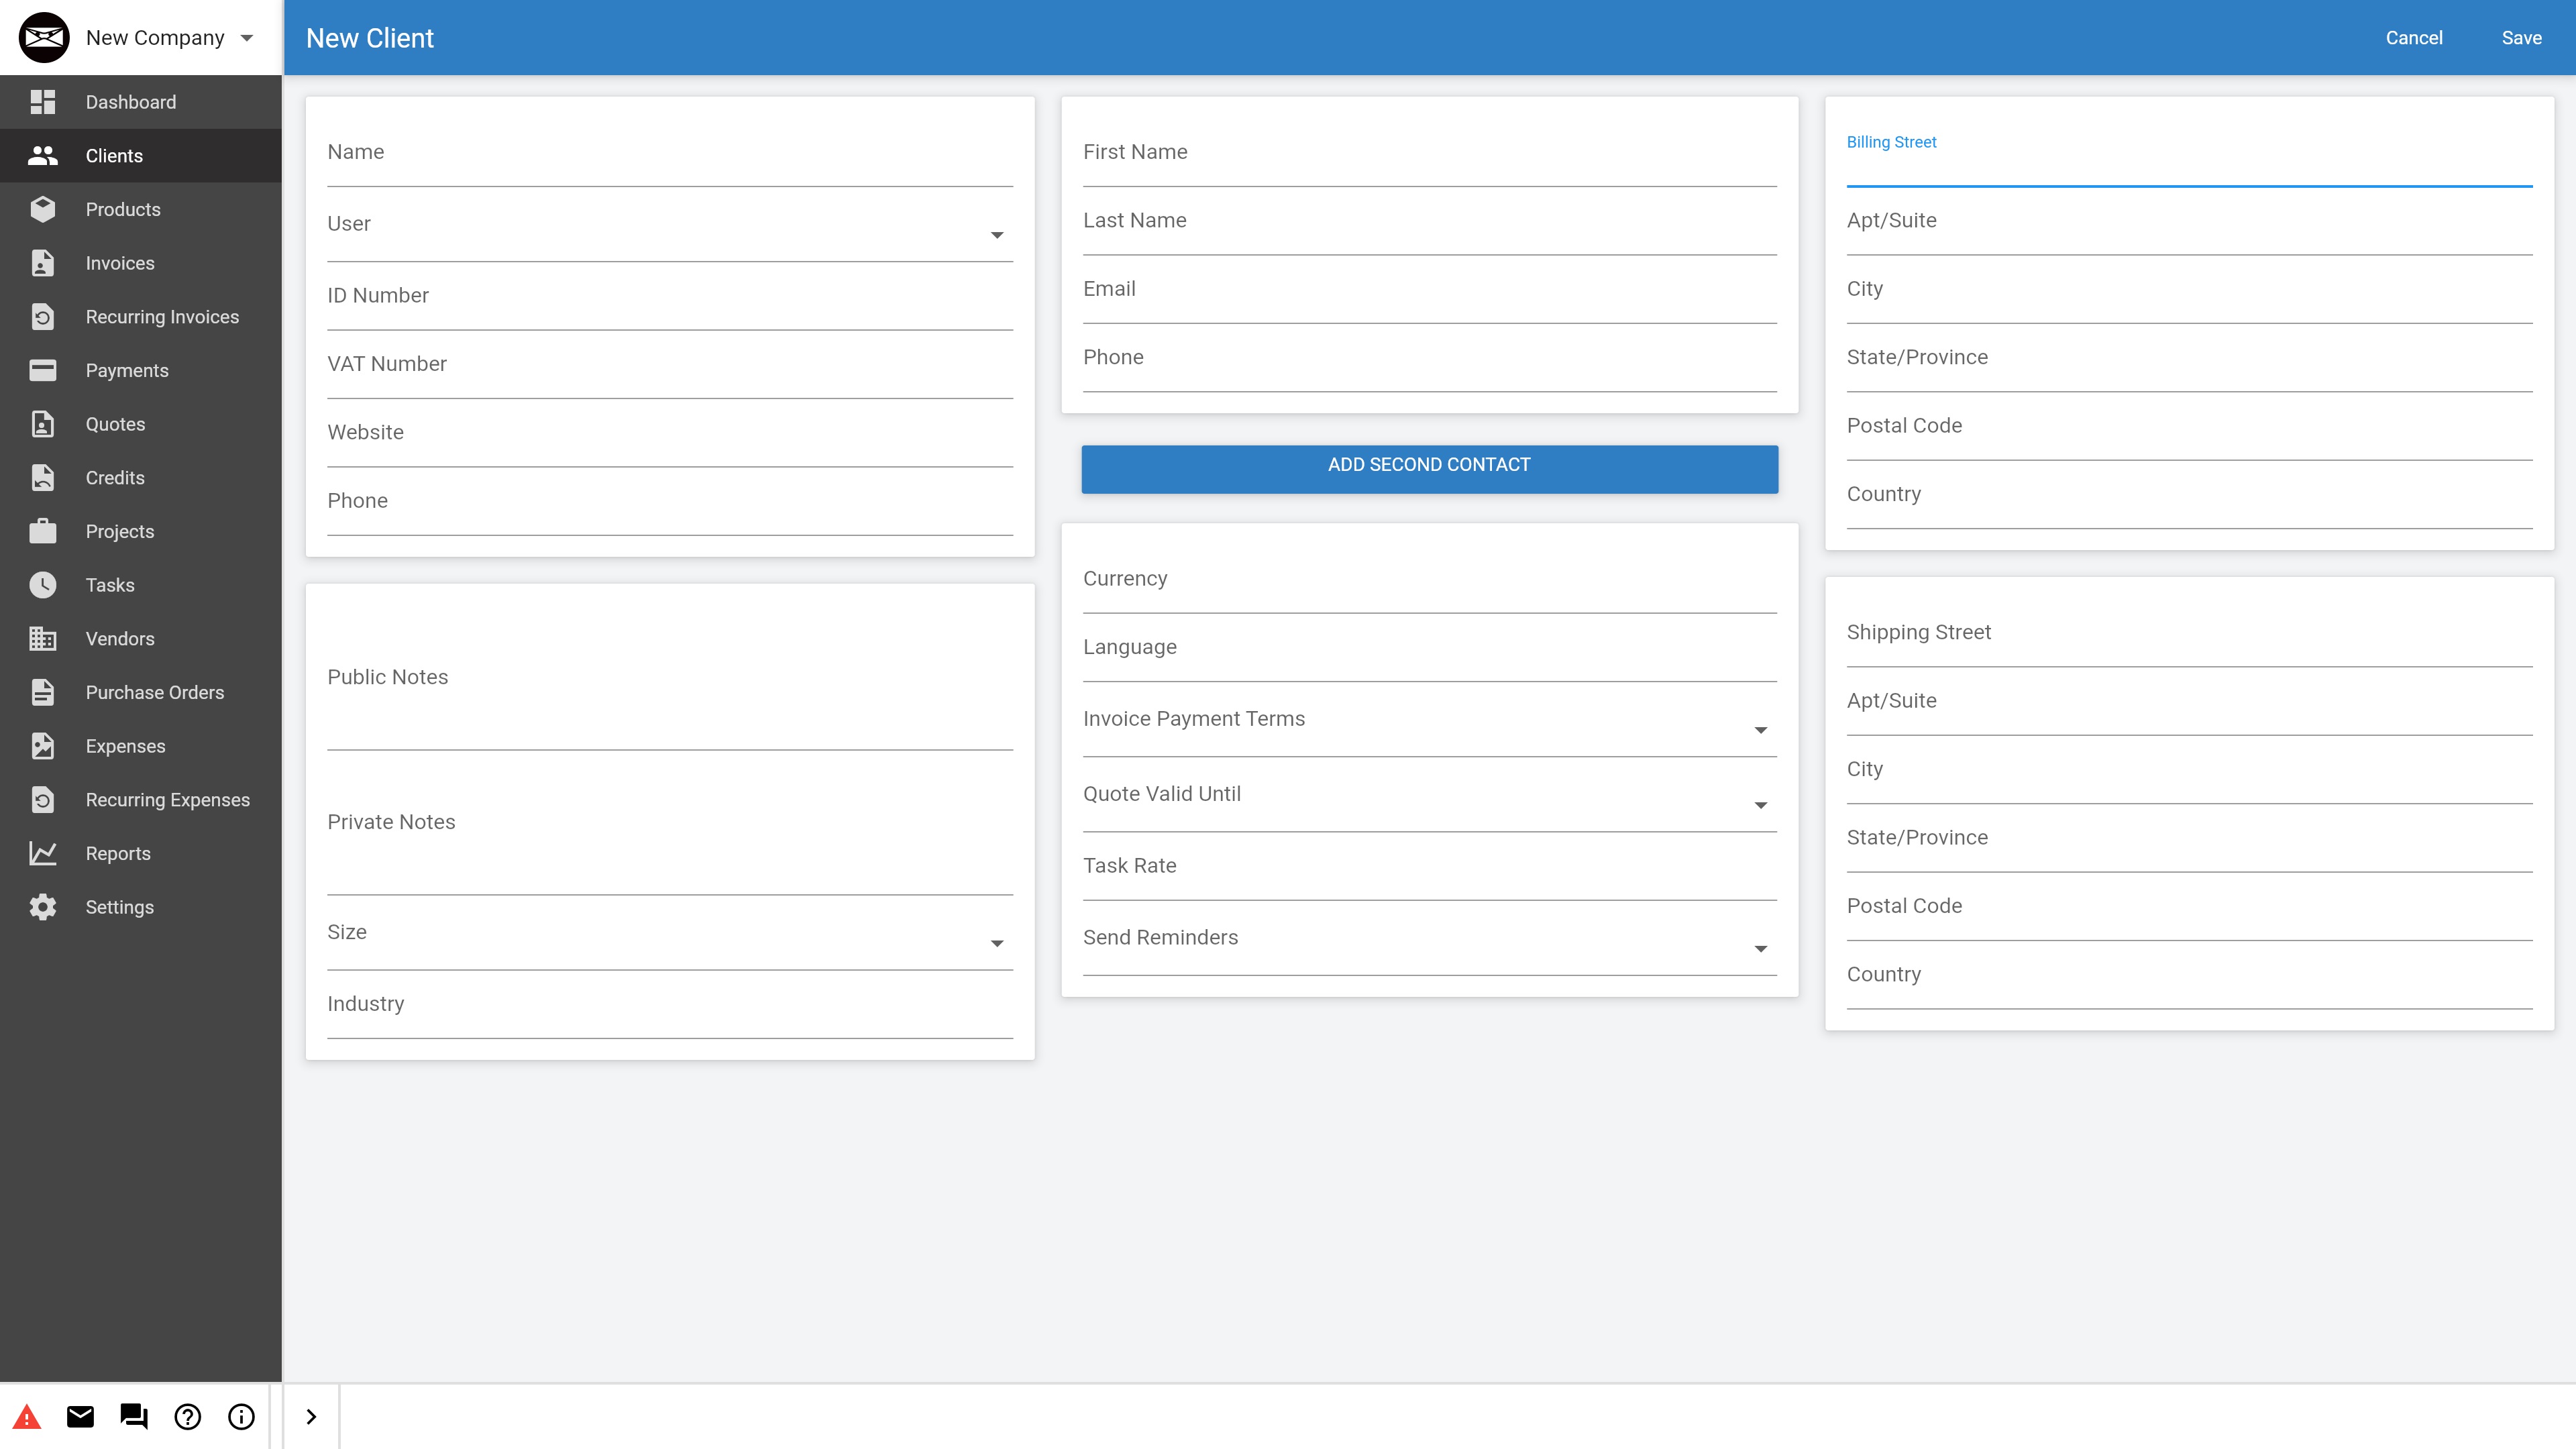
If your business already has clients, you can add them to your Invoice Ninja account for streamlined future billing. To do this, head to the Clients tab on the left of the screen and hit the plus sign to add a new profile.
Here, you can add information about the new client. This includes basic information such as their name, website, and VAT number, along with more detailed settings like their billing currency, invoice payment terms, and quote validity.
To manage existing clients, use the main Client window.
Step 5: Create your first invoice!
Invoice Ninja has loads of extra features, but by now you should have covered the basics needed to generate your first invoice. To get started, head to the Invoices tab.
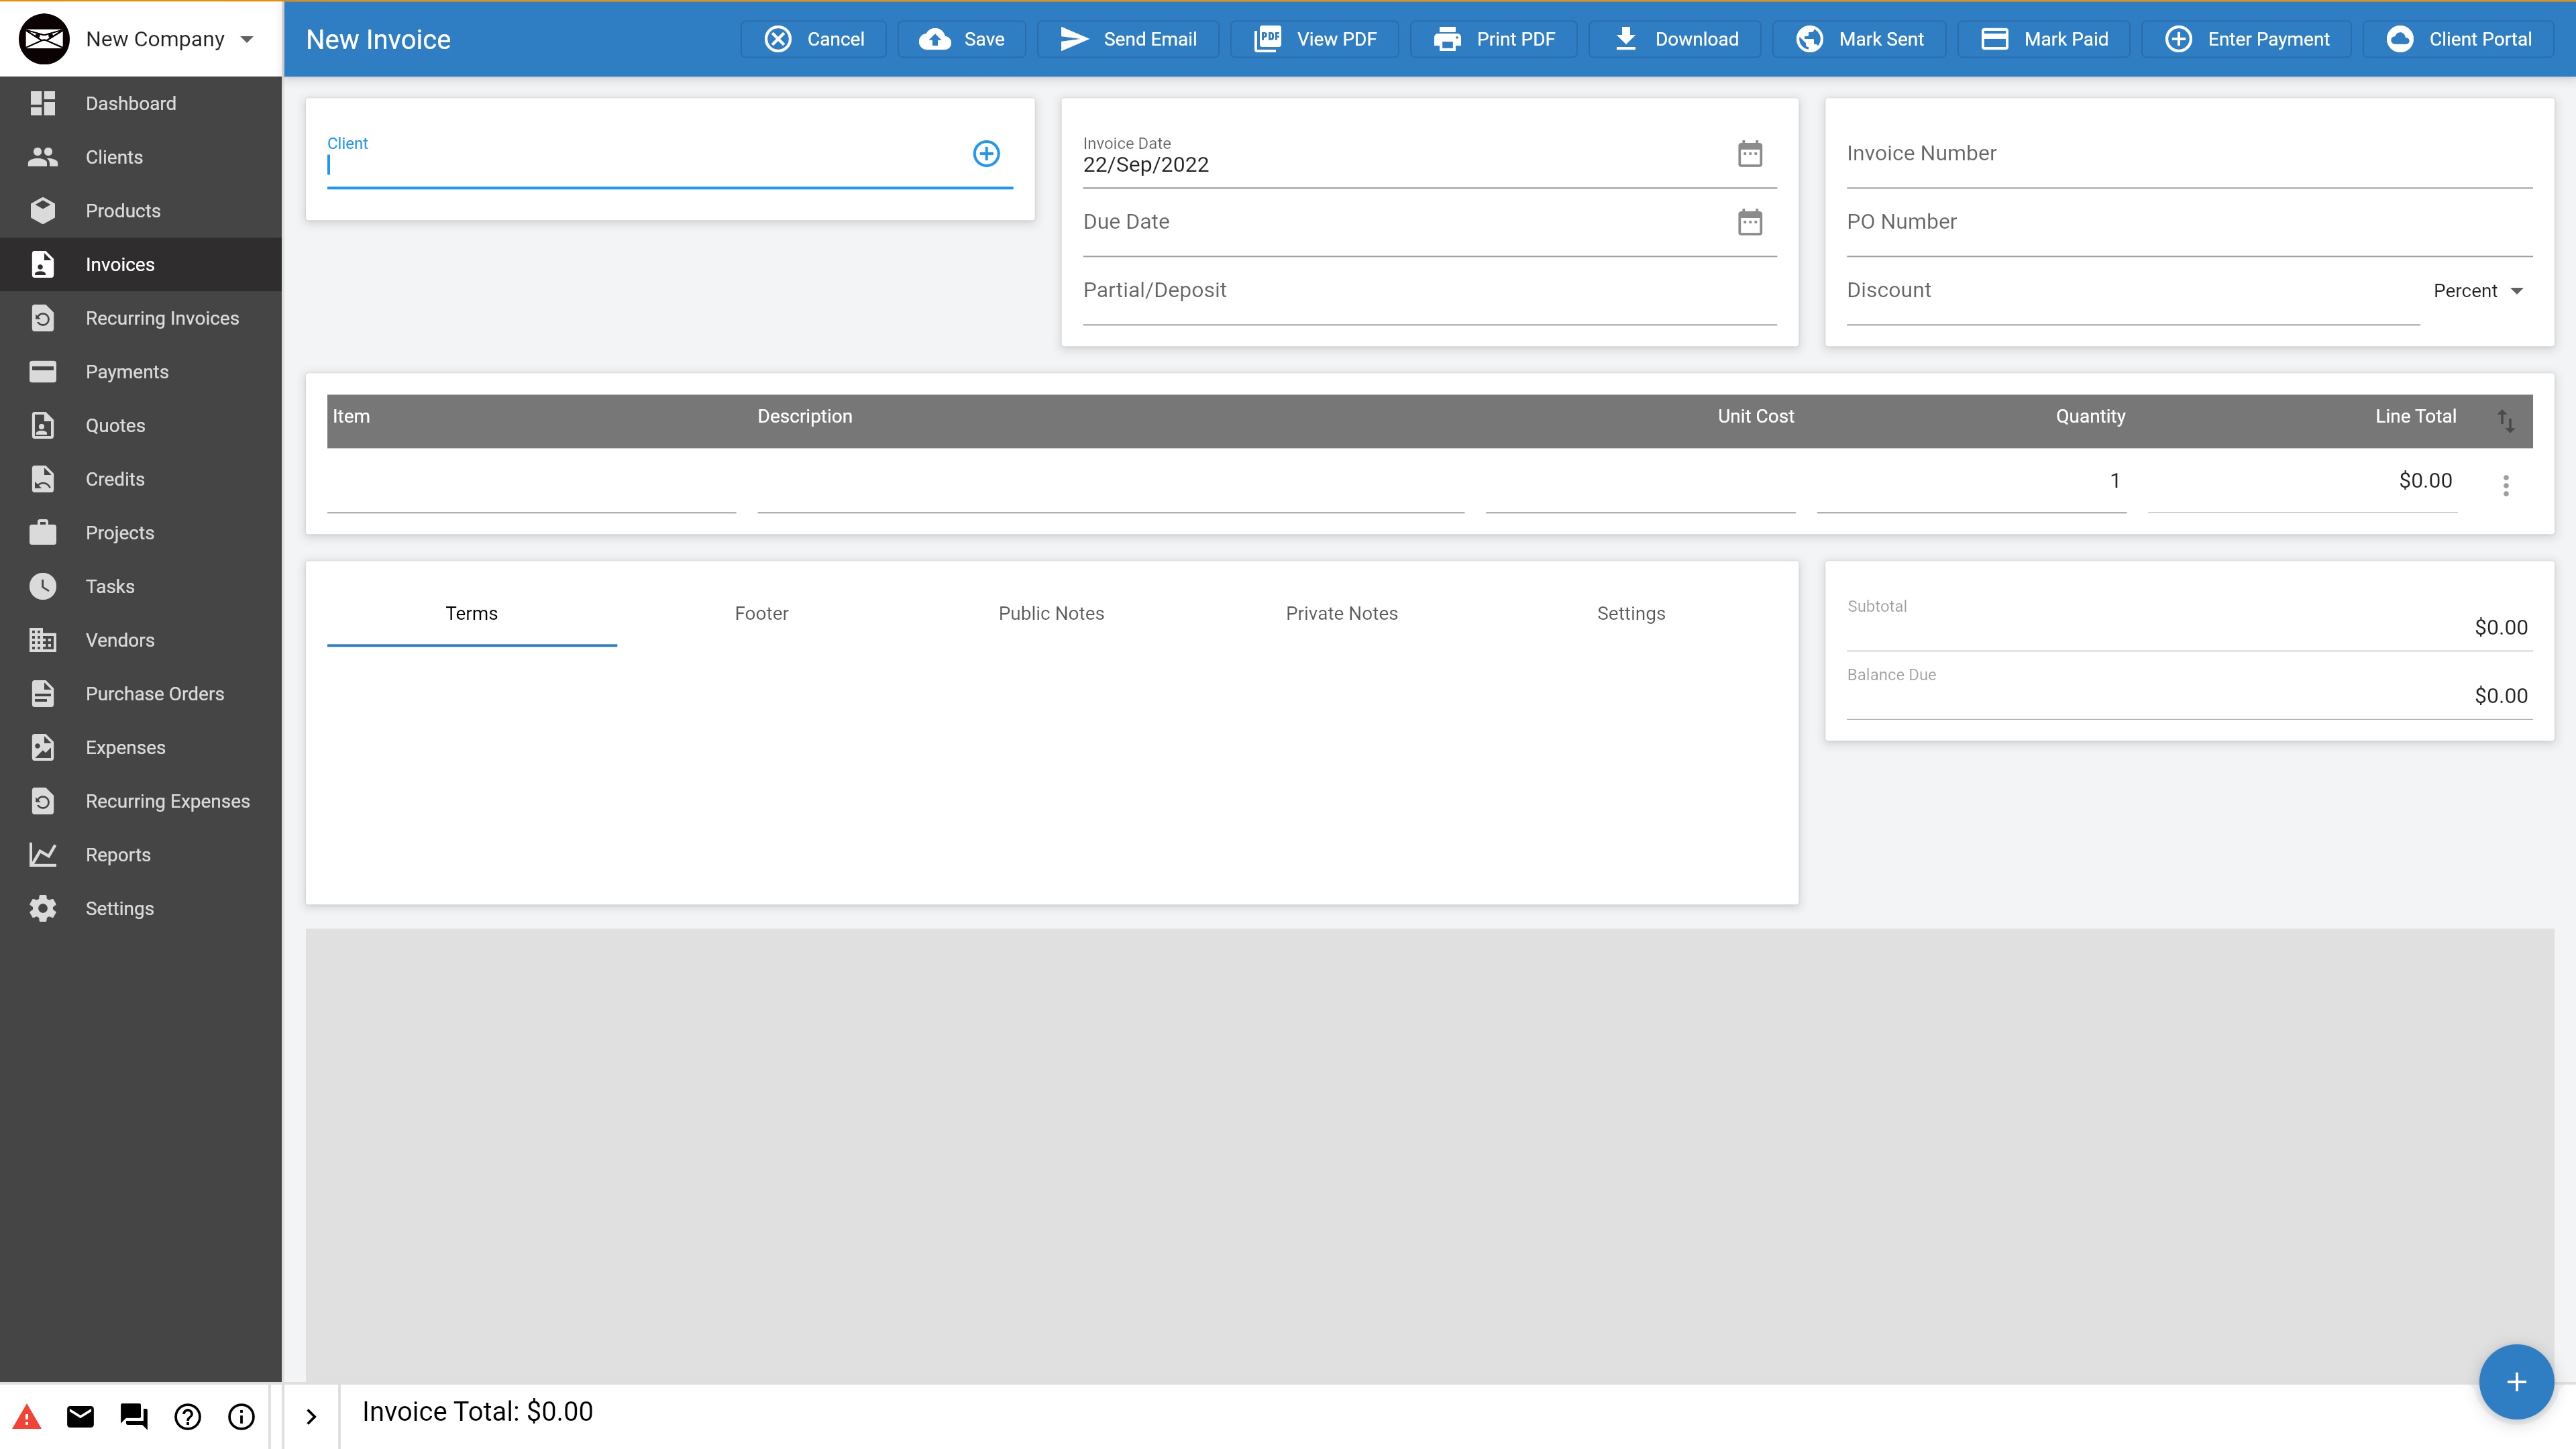
To add a new invoice, hit the plus sign on the top right of the screen. Next, you will be able to add a client, set the invoice due date, and other information. You can fill out the invoice itself, describing each item and outlining the costs clearly.
When you’re done, we’d suggest saving your invoice. You can view it as a PDF to ensure everything looks correct before sending it as an email. It’s also possible to customize the content of the email before you send it.
Summary
In this guide, we’ve provided step-by-step instructions to get you started with Invoice Ninja. This powerful invoice generation and management tool operates as a self-hosted program. Invoice Ninja is a little more difficult to use than some alternatives, but it’s still definitely worth a look.
Our guide to the best invoicing software contains more information about the leading alternatives to Invoice Ninja, and we’d recommend giving it a read. You might also like to read about mastering business accounting and invoicing or check out our Hostinger review to see why we rate this web host so highly.
Read more in this series:
- How to start a blog with Joomla
- Build your own CRM using SugarCRM
- How to host your files online using Nextcloud Hub
- How to start your own help desk with Hesk
- How to build an HR System using OrangeHRM
- How to install live chat software with Sales Syntax
- Run your own ecommerce platform with PrestaShop
- How to create your own website with Soholaunch
- How to launch your own website with WebsiteBaker
- How to learn search engine optimization with SEO Panel
- How to kickstart your own Ancestry.com alternative with webtrees
- How to install a free ERP software called Dolibarr
- Demand gen vs lead gen: What's the difference?
- Host your own private forum with MyBB
- Build your own calendar application with WebCalendar
- Set up your own groupware service with Tiki Wiki CMS
- How to build your own email marketing service with phpList
- A Google Photos alternative: Store your photos online with Piwigo
- How to start with project management using The Bug Genie
- Make your own poll platform with LimeSurvey
- Roll out your own Wikipedia clone with MediaWiki
- How to host your own learning management software with Moodle LMS
- Set up an accounting system with FrontAccounting
- Produce your own bills with BoxBilling
Daniel is a freelance copywriter with over six years experience writing for publications such as TechRadar, Tom’s Guide, and Hosting Review. He specializes in B2B and B2C tech and finance, with a particular focus on VoIP, website building, web hosting, and other related fields.
