How to host your files online using Nextcloud Hub
Unlock highly secure file storage solutions
Cloud-based file and data storage solutions have become increasingly popular over the last few years - witness the dozens of cloud storage services around - , but some consumer-grade options don’t have the security or proper operating procedures to meet regulatory requirements.
Nextcloud Hub is a self-hosted storage solution that includes document management tools, secure email, a built-in calendar, and secure video chat, offering full control of your files and data. In this guide, we explain exactly how to use Nextcloud Hub to host your files easily and securely.
How to host your files online using Nextcloud hub: Preparation
Nextcloud Hub is a self-hosted solution, so you should purchase hosting before you can use it. We used Hostinger for this how-to guide, which is a popular hosting provider with a strong focus on security. Its basic plans start from just a few dollars per month, making it an ideal solution if you’re on a tight budget, or just don’t want to spend too much.
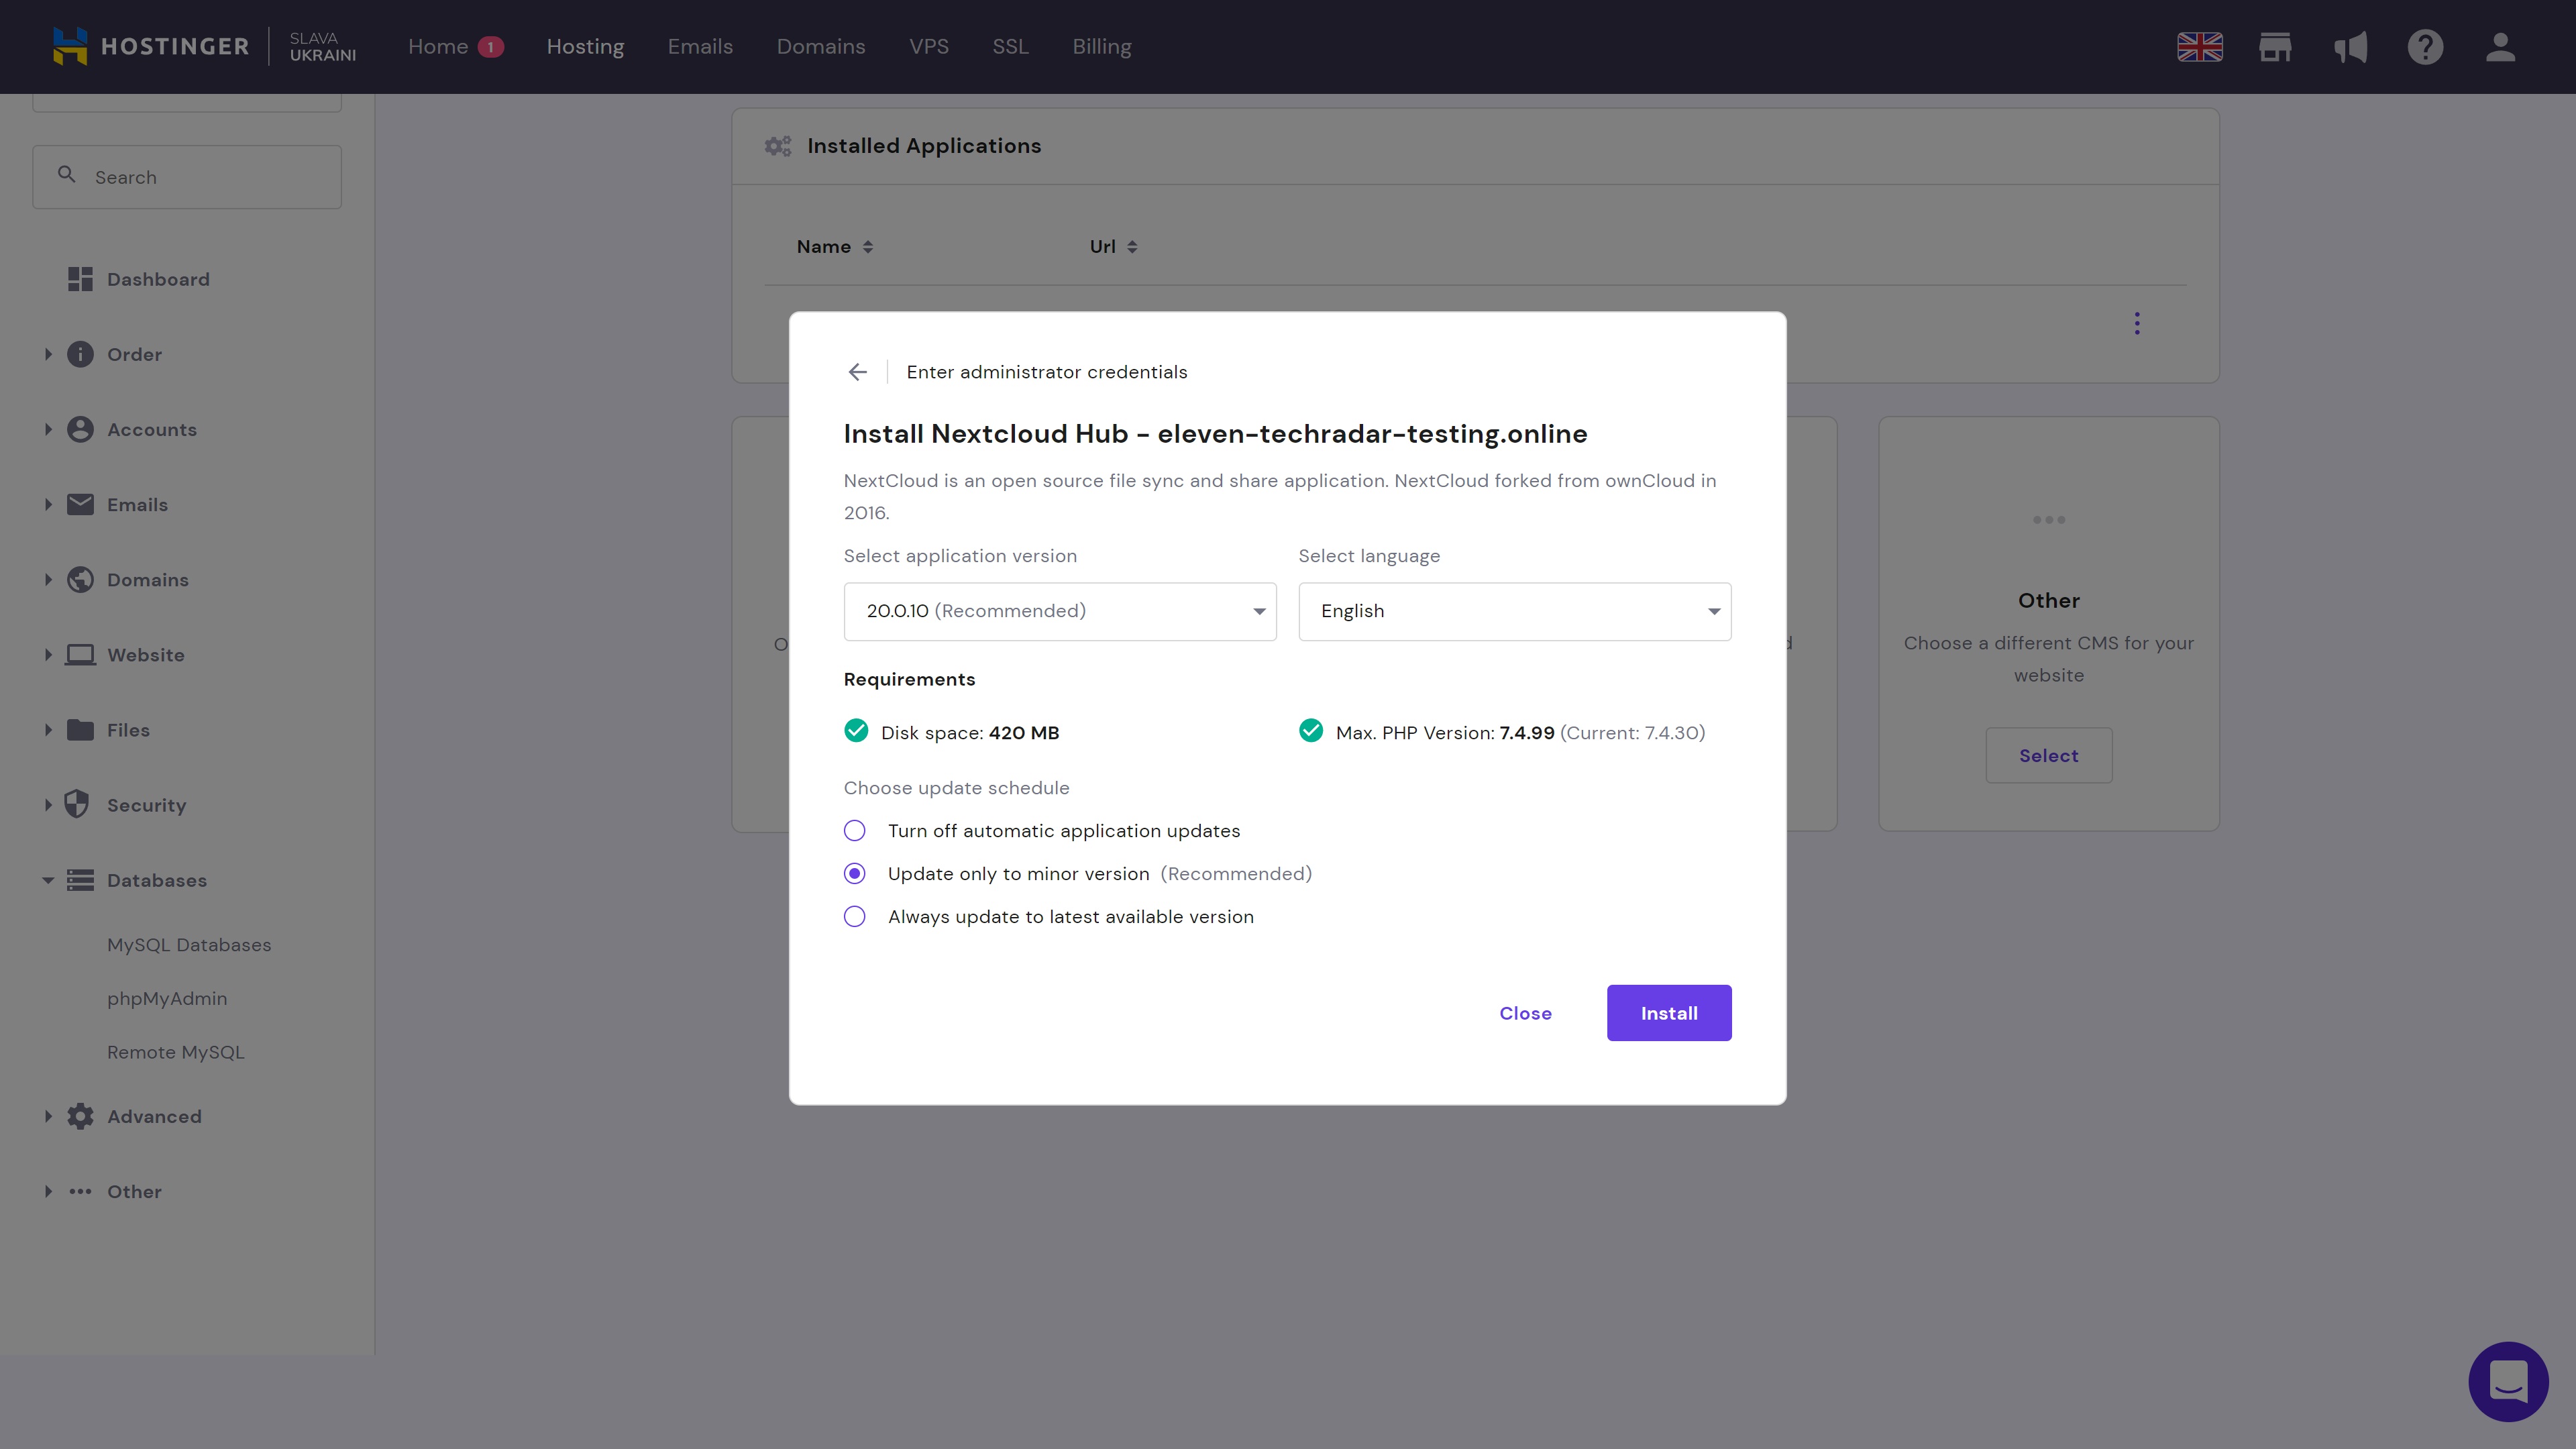
With your server in place, the next step is to install the Nextcloud Hub. Many hosts, including Hostinger, have some form of auto installer you can use to add scripts quickly. Hostinger’s Auto Installer enables you to do this, and supports Nextcloud Hub and a suite of other popular apps and content management systems. You can find it in your hPanel control panel. The installation process is super simple, and you can follow the complete guide on the Hostinger website.
Step 1: Familiarize yourself with the user resources
Nextcloud provides comprehensive user and admin manuals that contain a wealth of information. These should be your go-to documents if you encounter issues setting up your server or performing specific tasks.
Step 2: Customize your user dashboard
Next up, you can customize the main user dashboard and alter its appearance to suit your tastes. You can change the dashboard background, and can even pick a personal background image from your files.
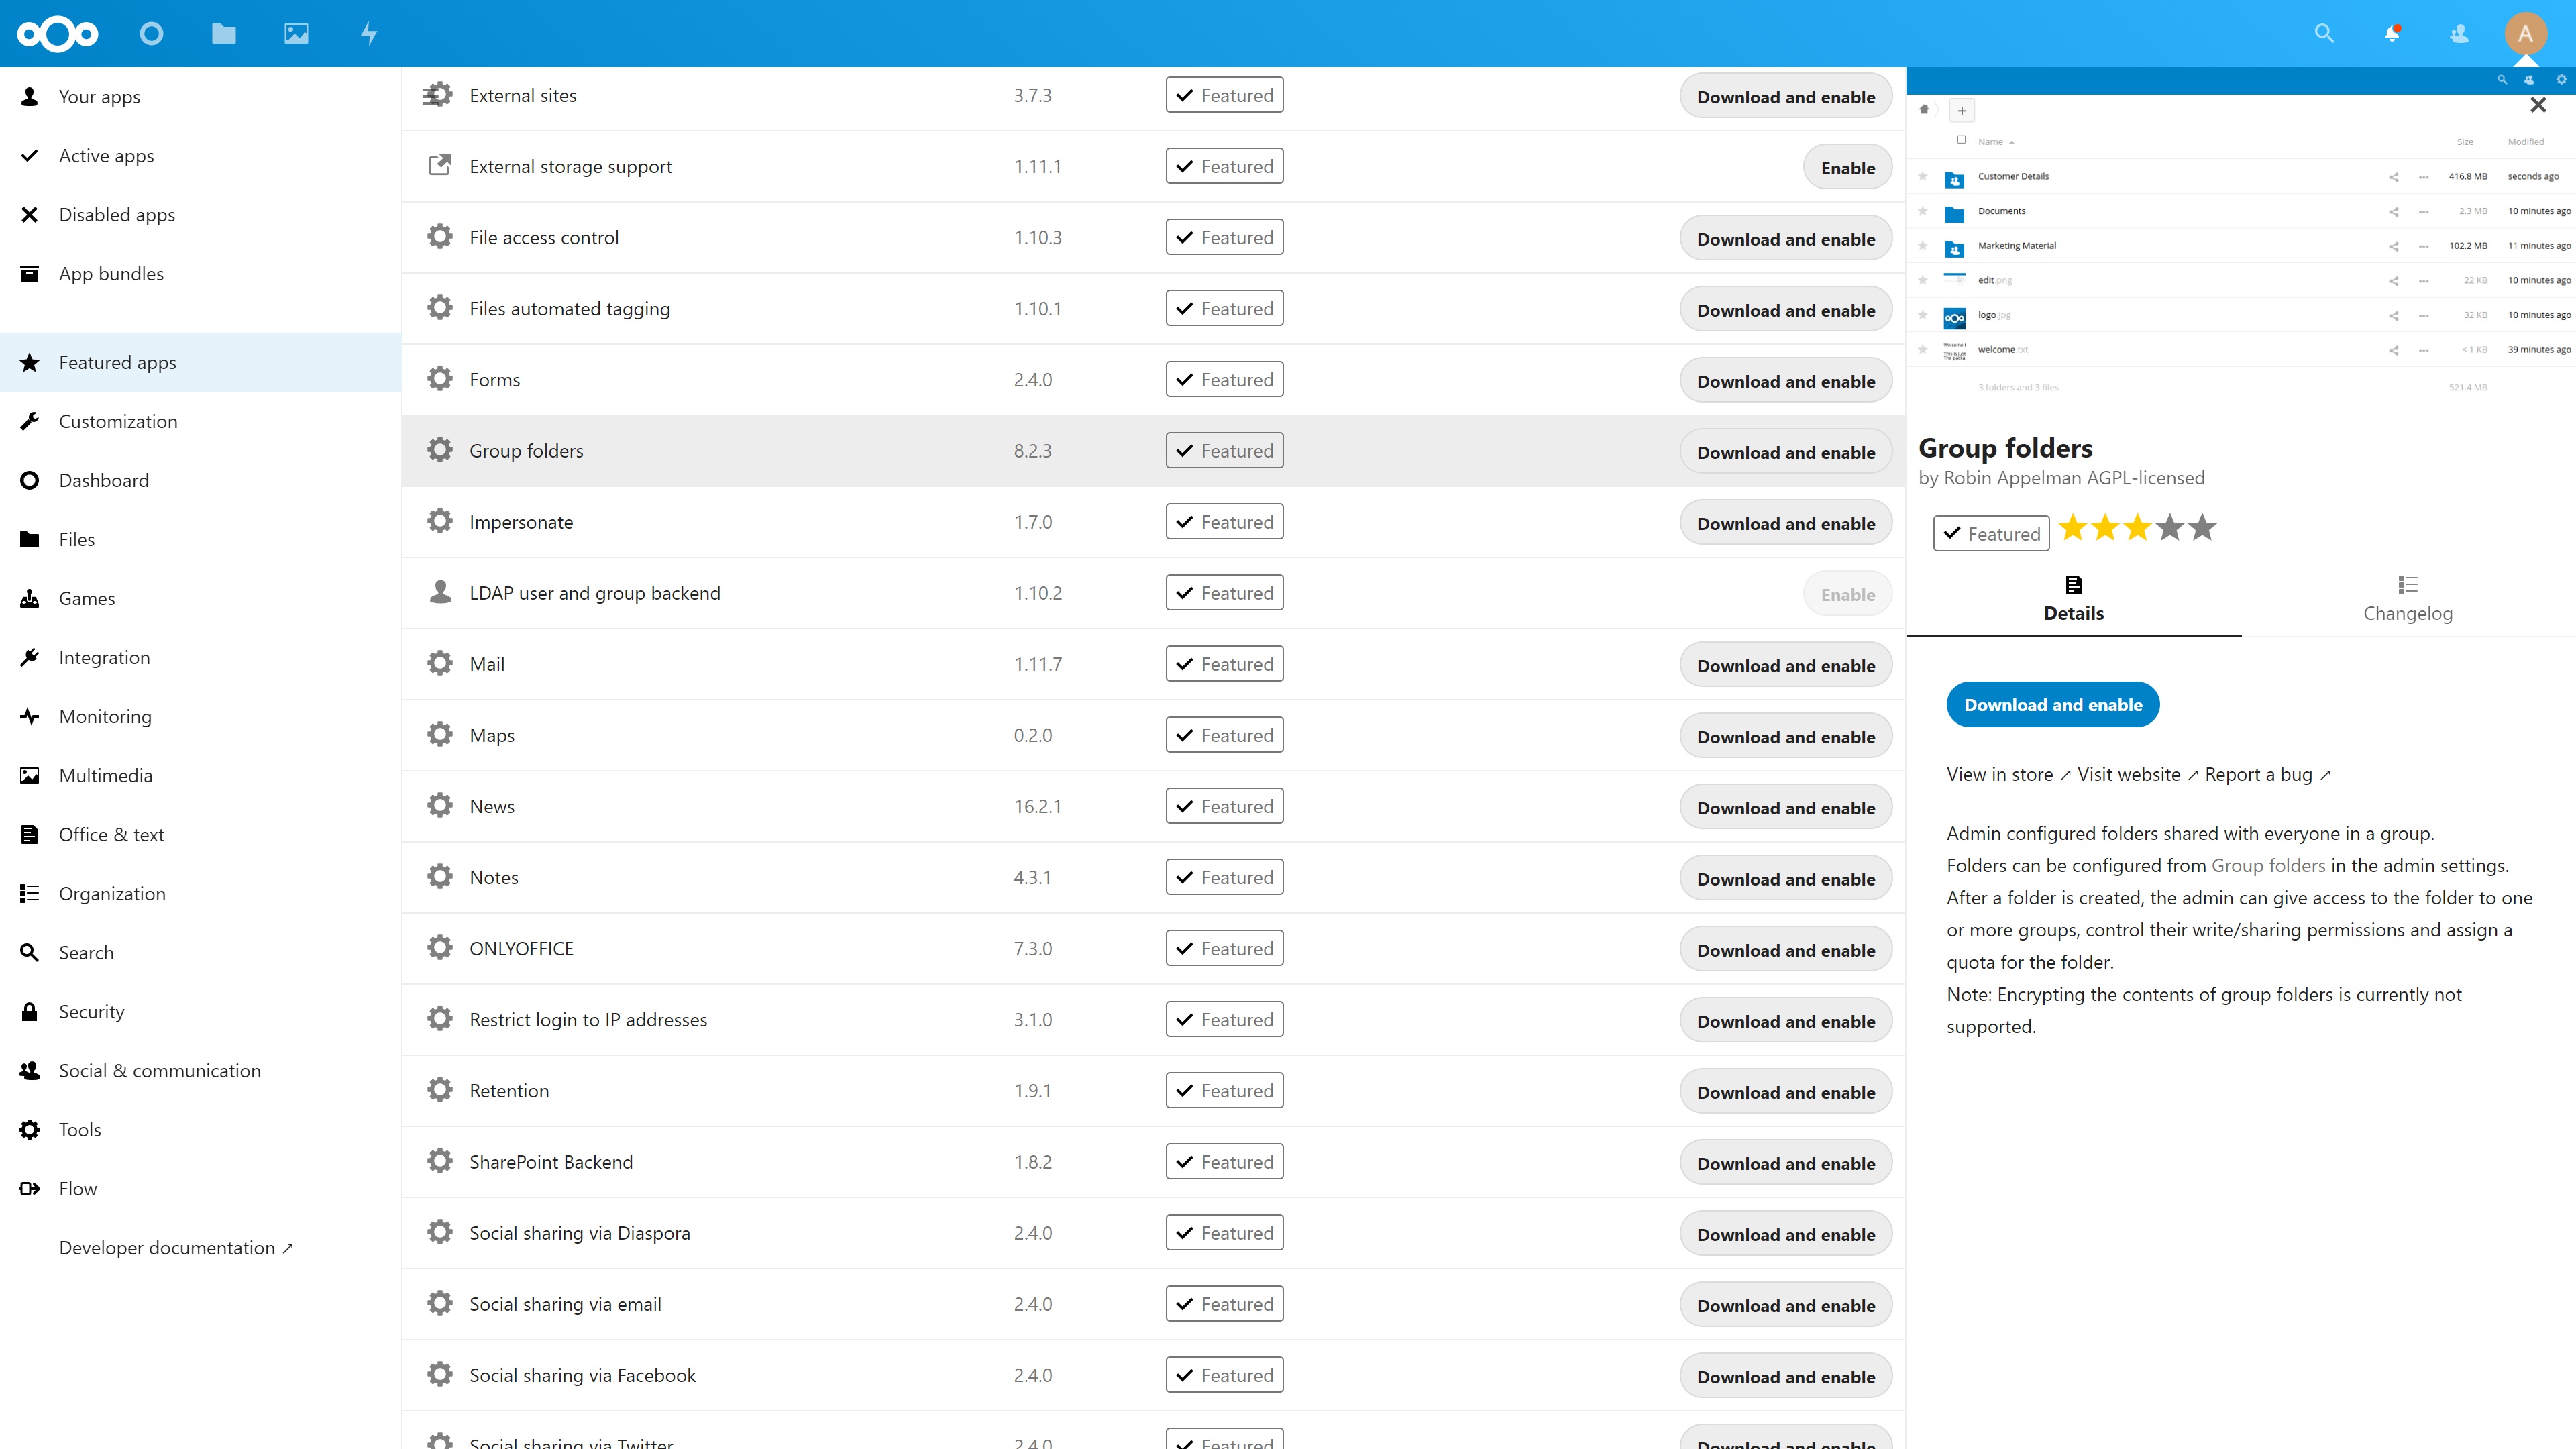
A wide range of widgets are available, and several are preinstalled, but you can add extras from the Nextcloud App Store if required. Here, you will find numerous apps covering everything from news widgets to security add-ons to help protect your files.
Are you a pro? Subscribe to our newsletter
Sign up to the TechRadar Pro newsletter to get all the top news, opinion, features and guidance your business needs to succeed!
Step 3: Add new users
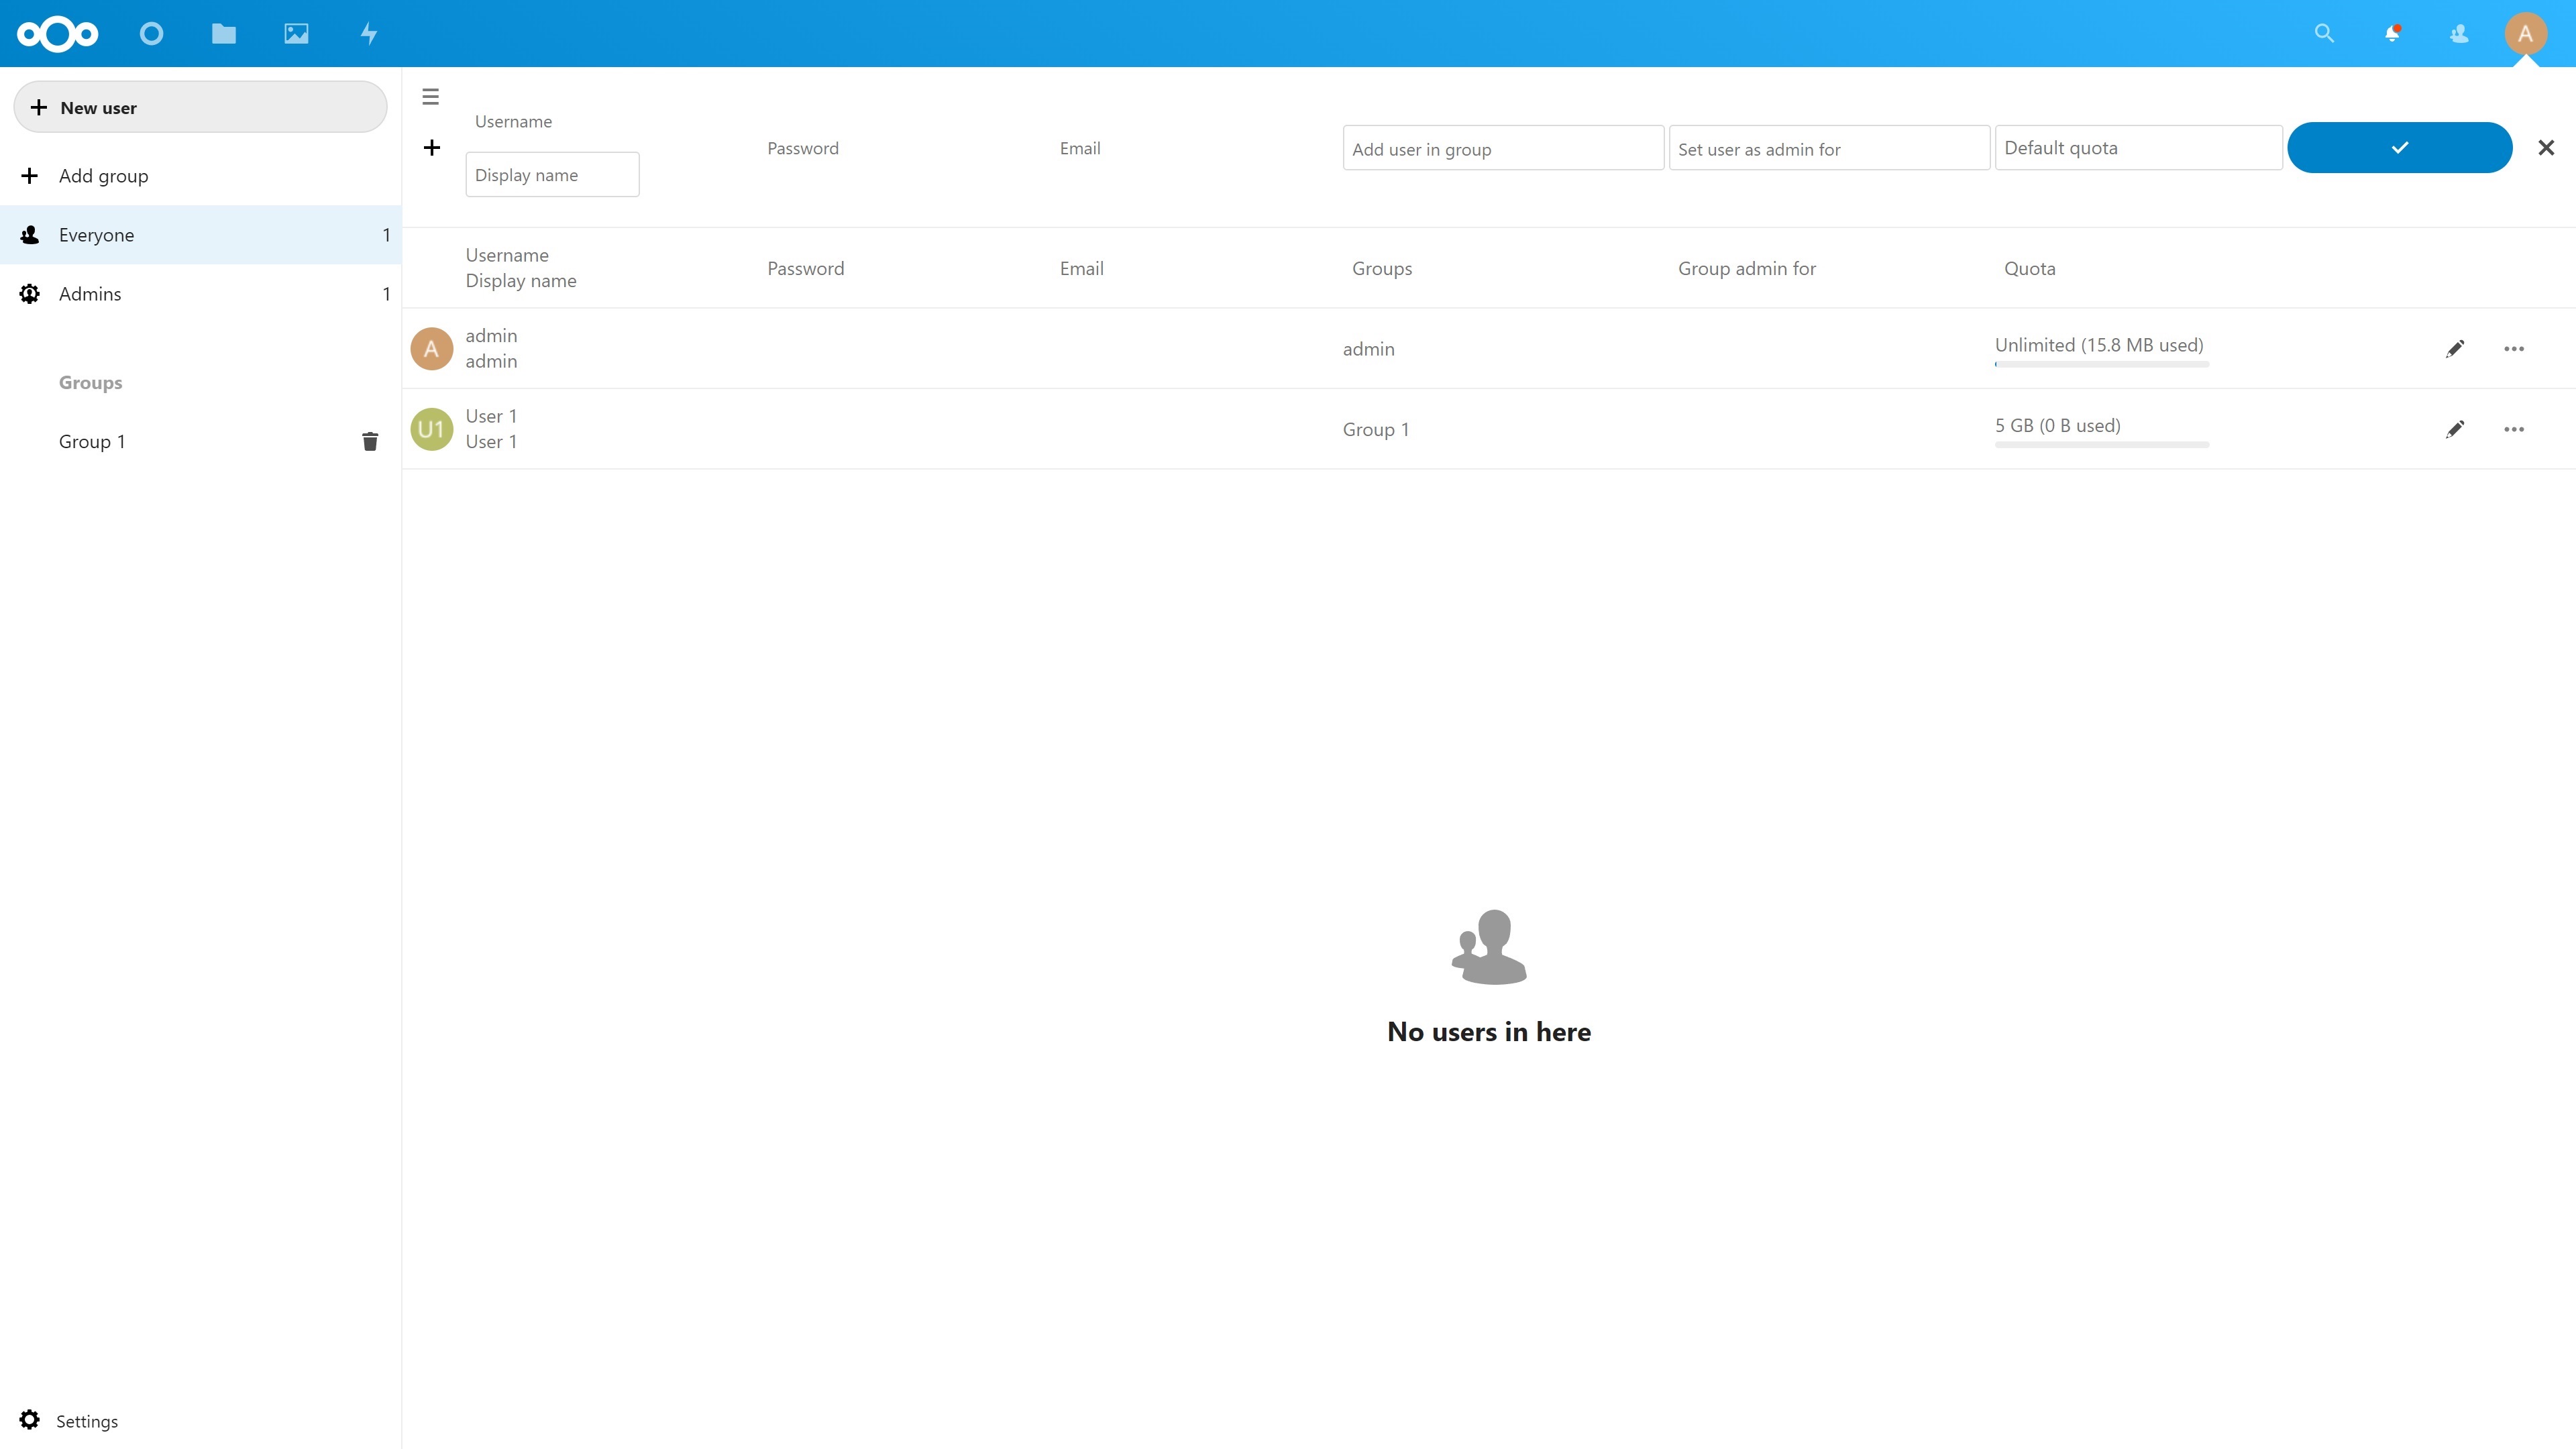
If multiple employees or team members require access to files stored in your Nextcloud Hub, you can add individual profiles and set clear access permissions. This is particularly useful if you’re working with a larger team, where different people need access to different sensitive documents.
To change user permissions, click on the dropdown menu at the top-right of your main dashboard and hit the Users button. Here, you can add new users, create user groups, and edit existing access controls.
Step 4: Tighten your security
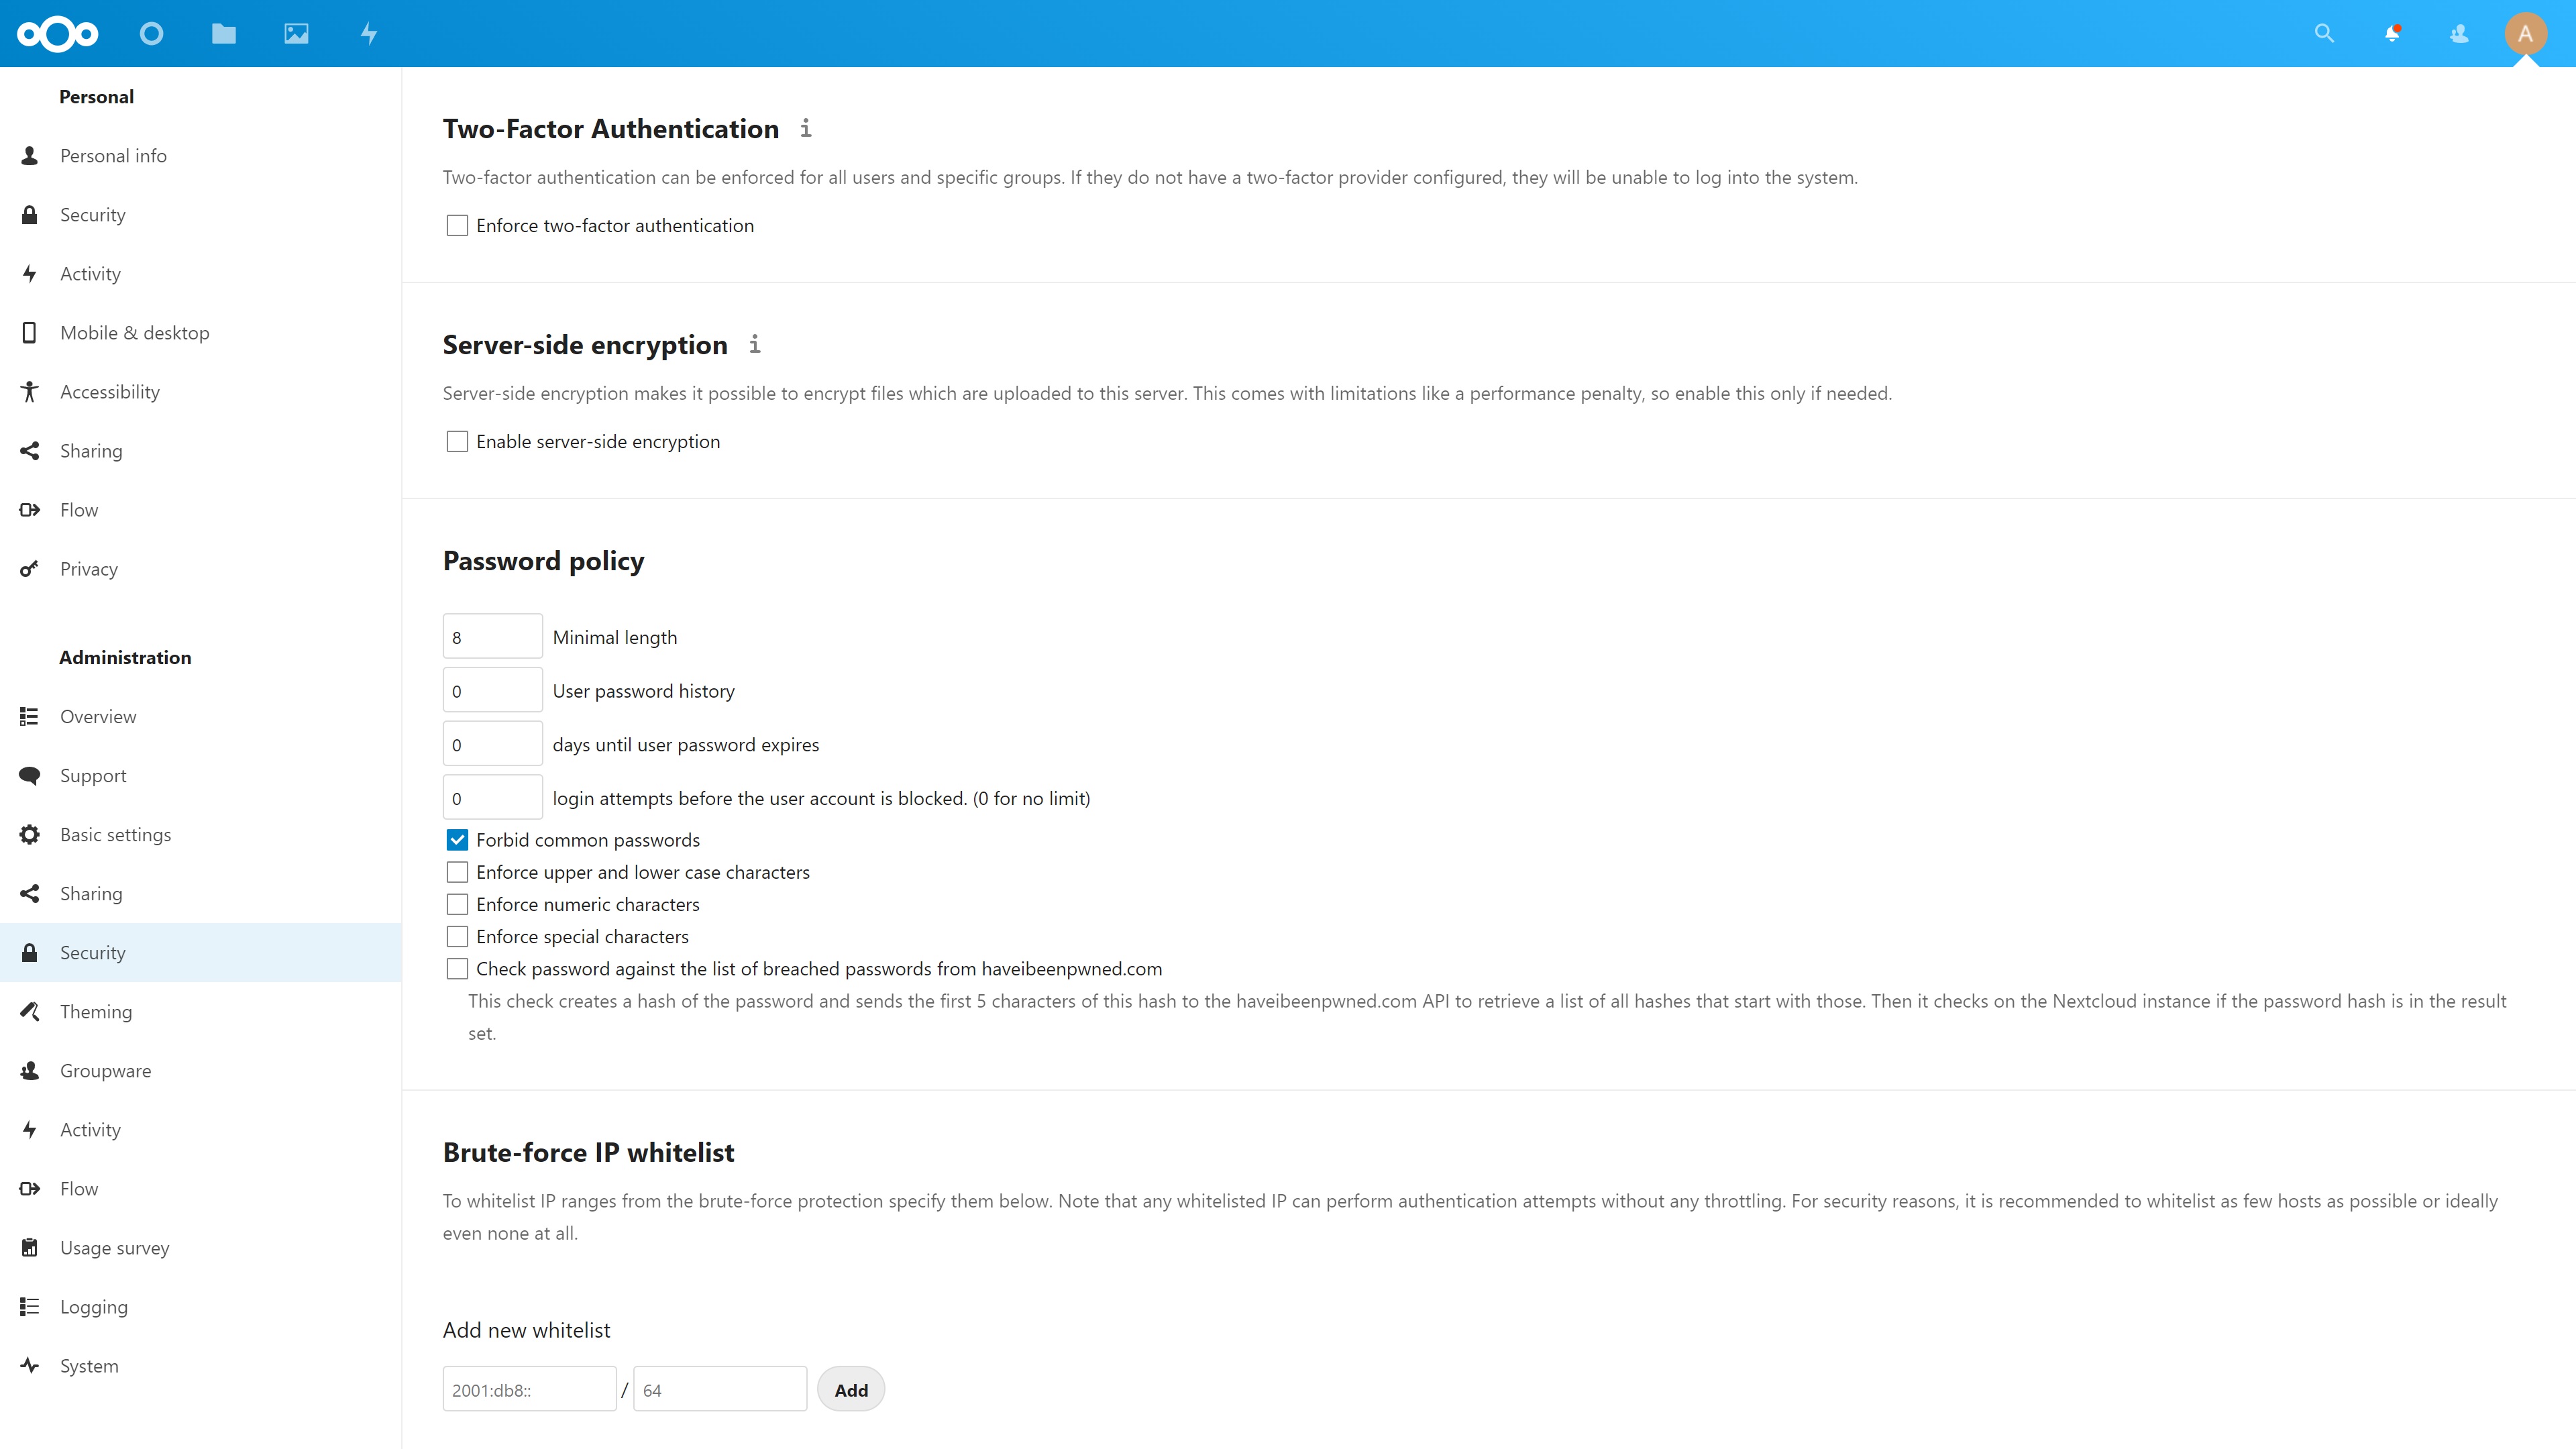
The point of using a self-hosted file storage solution like Nextcloud is that it offers better security than most alternatives. However, you should still ensure your security settings are configured correctly. Under the Settings menu, you will find a security tab with numerous options.
For instance, you can require that all users use two-factor authentication (2FA), which we highly recommend. You can also switch on server-side encryption, which provides an additional layer of security to protect sensitive files. However, this will also make your upload and download speeds significantly slower, so only use it if you have to. You can also create global password policies to ensure all users have strong passwords.
It’s also a good idea to check up on your hosting provider’s security, as this can be a major weak point if it isn’t following security hygiene best practice. Ensure you have an SSL certificate installed to allow secure data transmissions, and use other security measures where appropriate.
Step 5: Create a clear file hierarchy
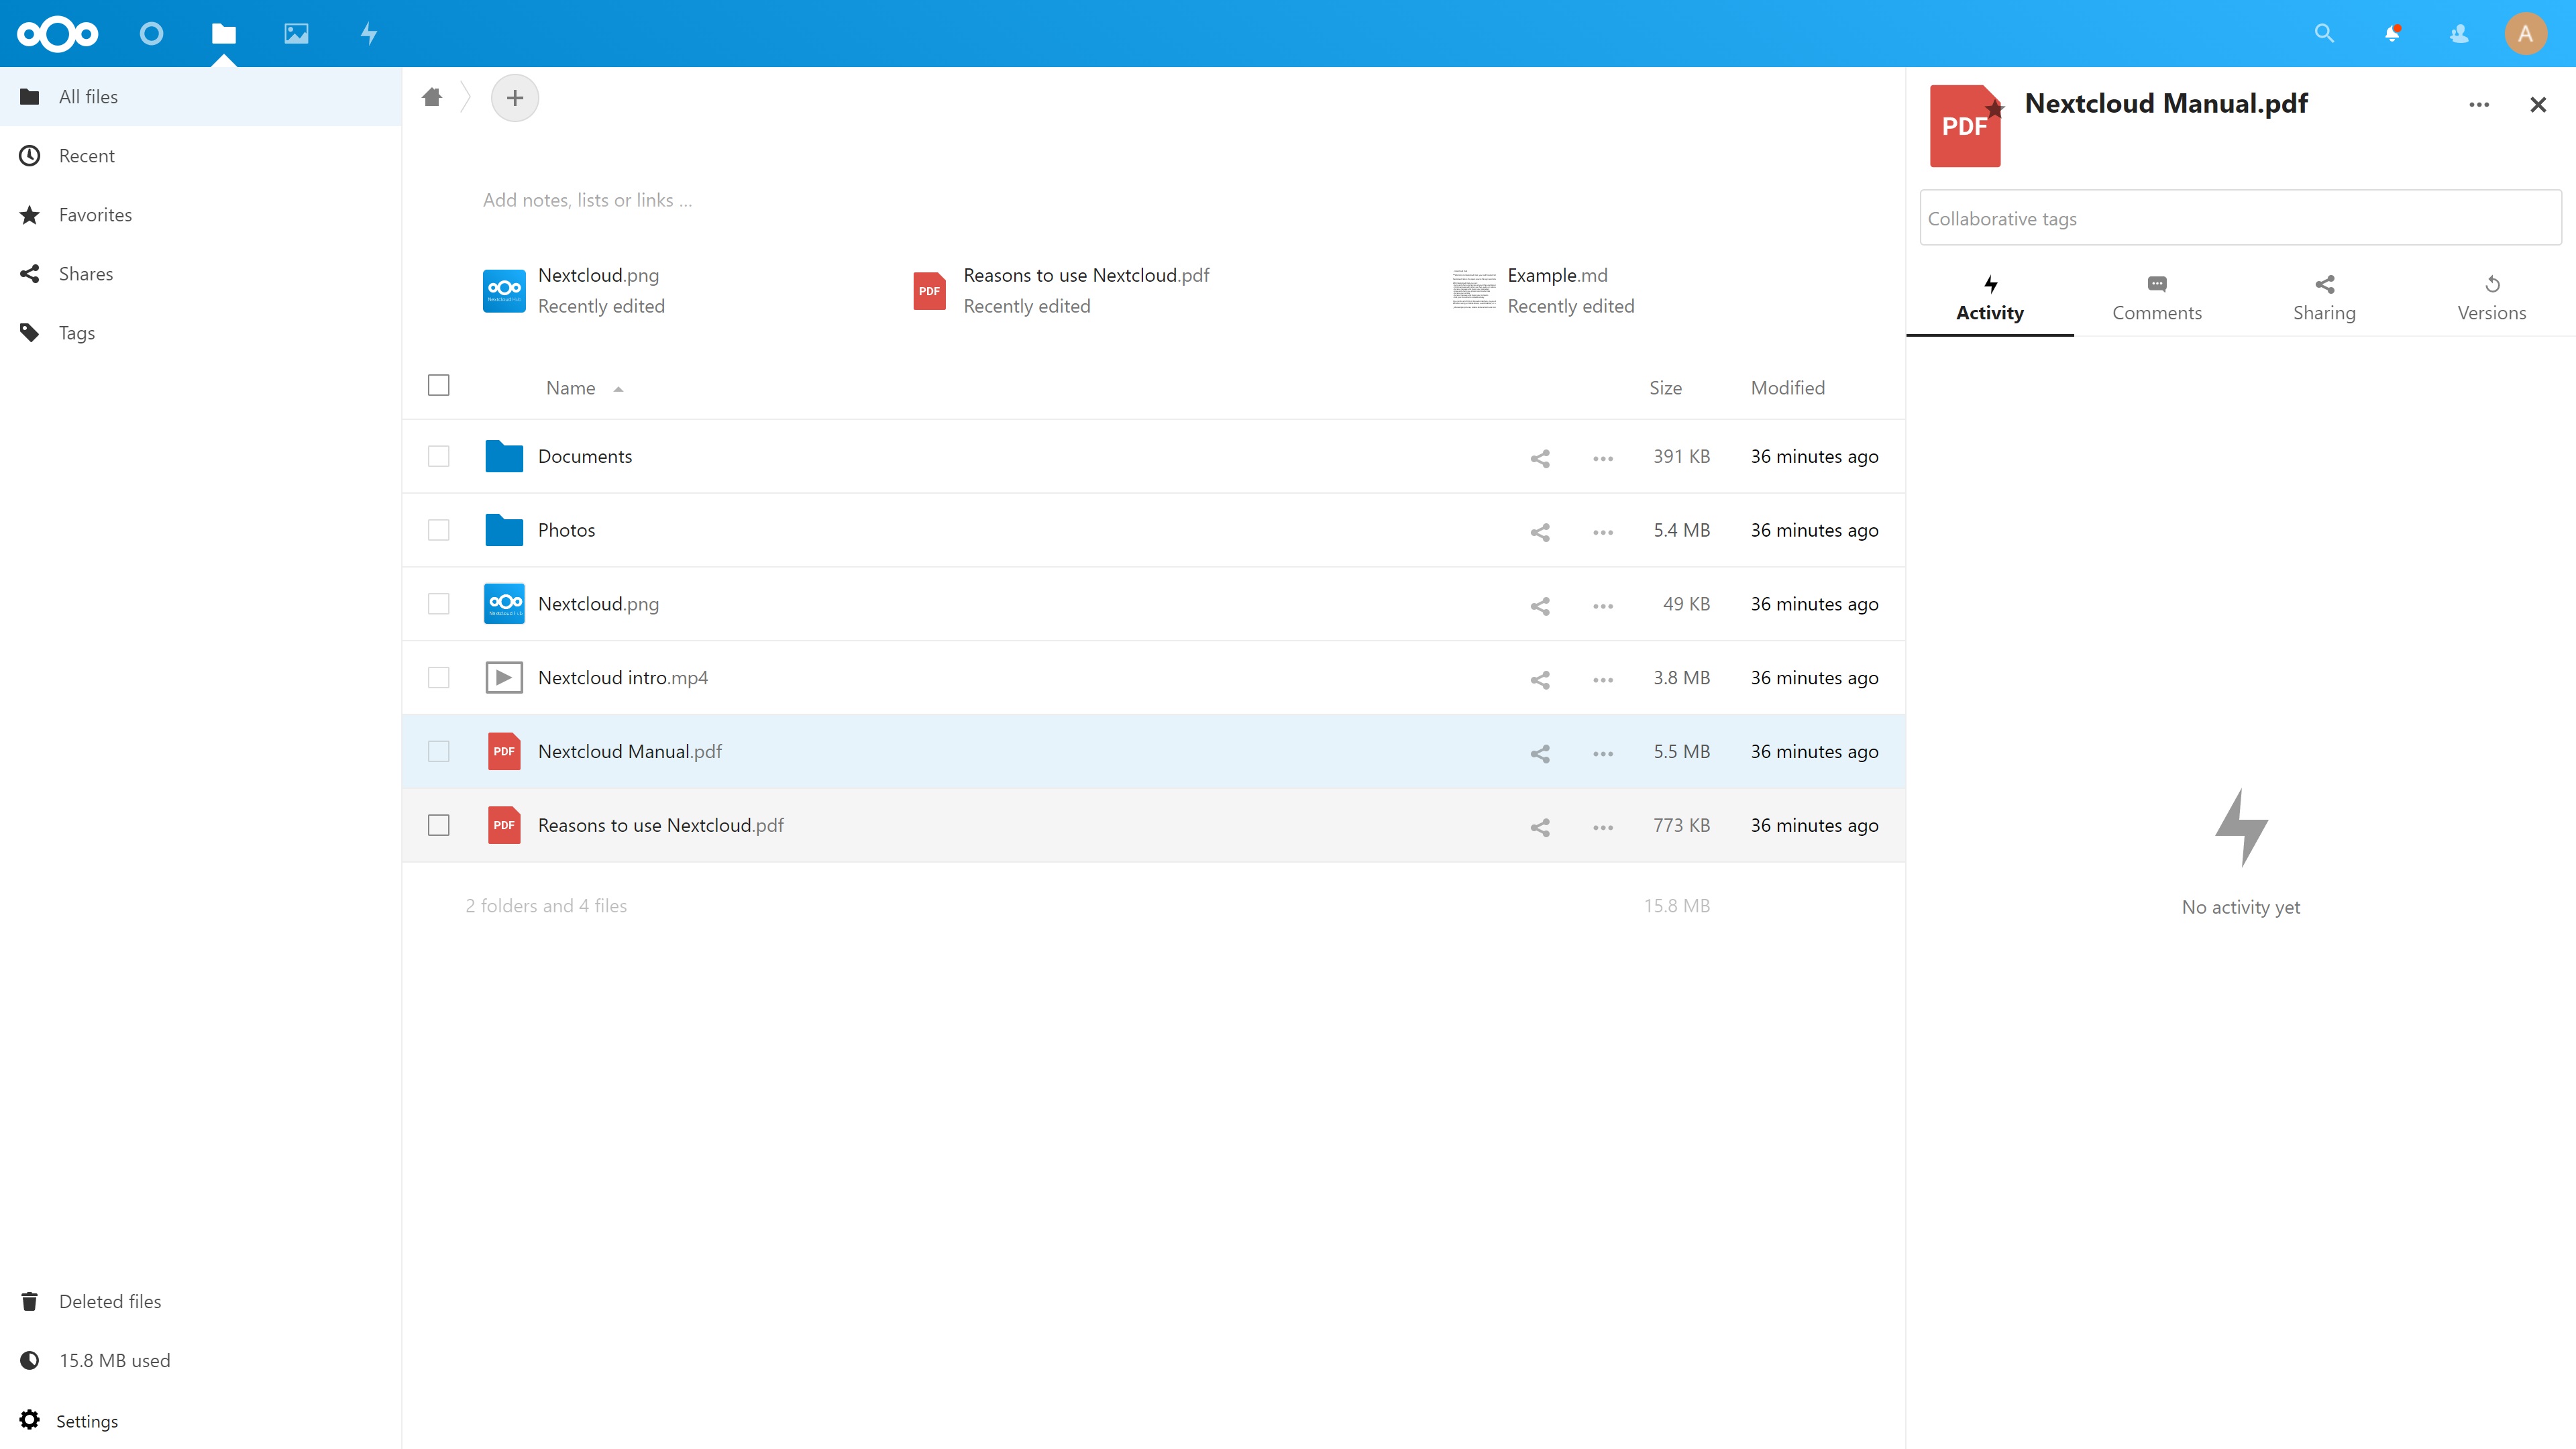
With Nextcloud Hub, you can create new folders and subfolders to help you organize your files. First, head to the main Files interface, where you will find a tidy list of your current files. You can upload files and add new folders by clicking the plus sign at the top of the screen, and folders can be dragged inside other folders to organize them better.
You can also sort files by tags, which can be added to your files each time you upload a new one. What’s more, there’s even a Favorites folder that enables you to quickly access flagged files.
Step 6: Download the desktop and mobile clients
Managing Nextcloud Hub via a web browser is easy, but you can also download the desktop and mobile apps for automatic file syncing. These are particularly useful if you want a complete backup of the data stored on your computer or mobile device. The desktop sync clients also ensure all files are shared between connected devices.
The Nextcloud Files mobile app is available for iOS and Android devices, and enables you to access, manage, and upload files directly from your mobile device.
Summary
Getting started with Nextcloud Hub is a straightforward process. Using the software with a reliable hosting provider such as Hostinger enables you to store your files and other data in a safe, highly secure way.
- Read our full Hostinger review.
You may also like to read about the alternatives to Hostinger in our guide to the best web hosting services, or discover alternative file hosts in our guide to the best secure file hosting services.
Read more in this series:
- How to start a blog with Joomla
- Build your own CRM using SugarCRM
- How to start your own help desk with Hesk
- How to build an HR System using OrangeHRM
- How to generate your own invoices using Invoice Ninja
- How to install live chat software with Sales Syntax
- Run your own ecommerce platform with PrestaShop
- How to create your own website with Soholaunch
- How to launch your own website with WebsiteBaker
- How to learn search engine optimization with SEO Panel
- How to kickstart your own Ancestry.com alternative with webtrees
- How to install a free ERP software called Dolibarr
- Demand gen vs lead gen: What's the difference?
- Host your own private forum with MyBB
- Build your own calendar application with WebCalendar
- Set up your own groupware service with Tiki Wiki CMS
- How to build your own email marketing service with phpList
- A Google Photos alternative: Store your photos online with Piwigo
- How to start with project management using The Bug Genie
- Make your own poll platform with LimeSurvey
- Roll out your own Wikipedia clone with MediaWiki
- How to host your own learning management software with Moodle LMS
- Set up an accounting system with FrontAccounting
- Produce your own bills with BoxBilling
Daniel is a freelance copywriter with over six years experience writing for publications such as TechRadar, Tom’s Guide, and Hosting Review. He specializes in B2B and B2C tech and finance, with a particular focus on VoIP, website building, web hosting, and other related fields.
