How to kickstart your own Ancestry.com alternative with webtrees
A super versatile family tree builder

webtrees is a free, super powerful open-source genealogy program. It supports standard GEDCOM files, which means that it’s compatible with most major desktop programs, and it comes with loads of excellent management features.
However, webtrees is a self-hosted program, and it can be pretty difficult to get started with—especially if you haven’t used self-hosted software before. In this guide, we’ve provided a complete step-by-step approach to installing and getting started with webtrees.
How to kickstart your own Ancestry.com alternative with webtrees: Preparation
Before you can begin using webtrees, you need to choose a web hosting provider for installation. Hosting provides the storage space, processing power, and other resources required to use the program. We’ve used Hostinger, a superb hosting option that usually offers super competitive prices.
Even better, we managed to bag an exclusive deal for our readers that provides free Hostinger web hosting!
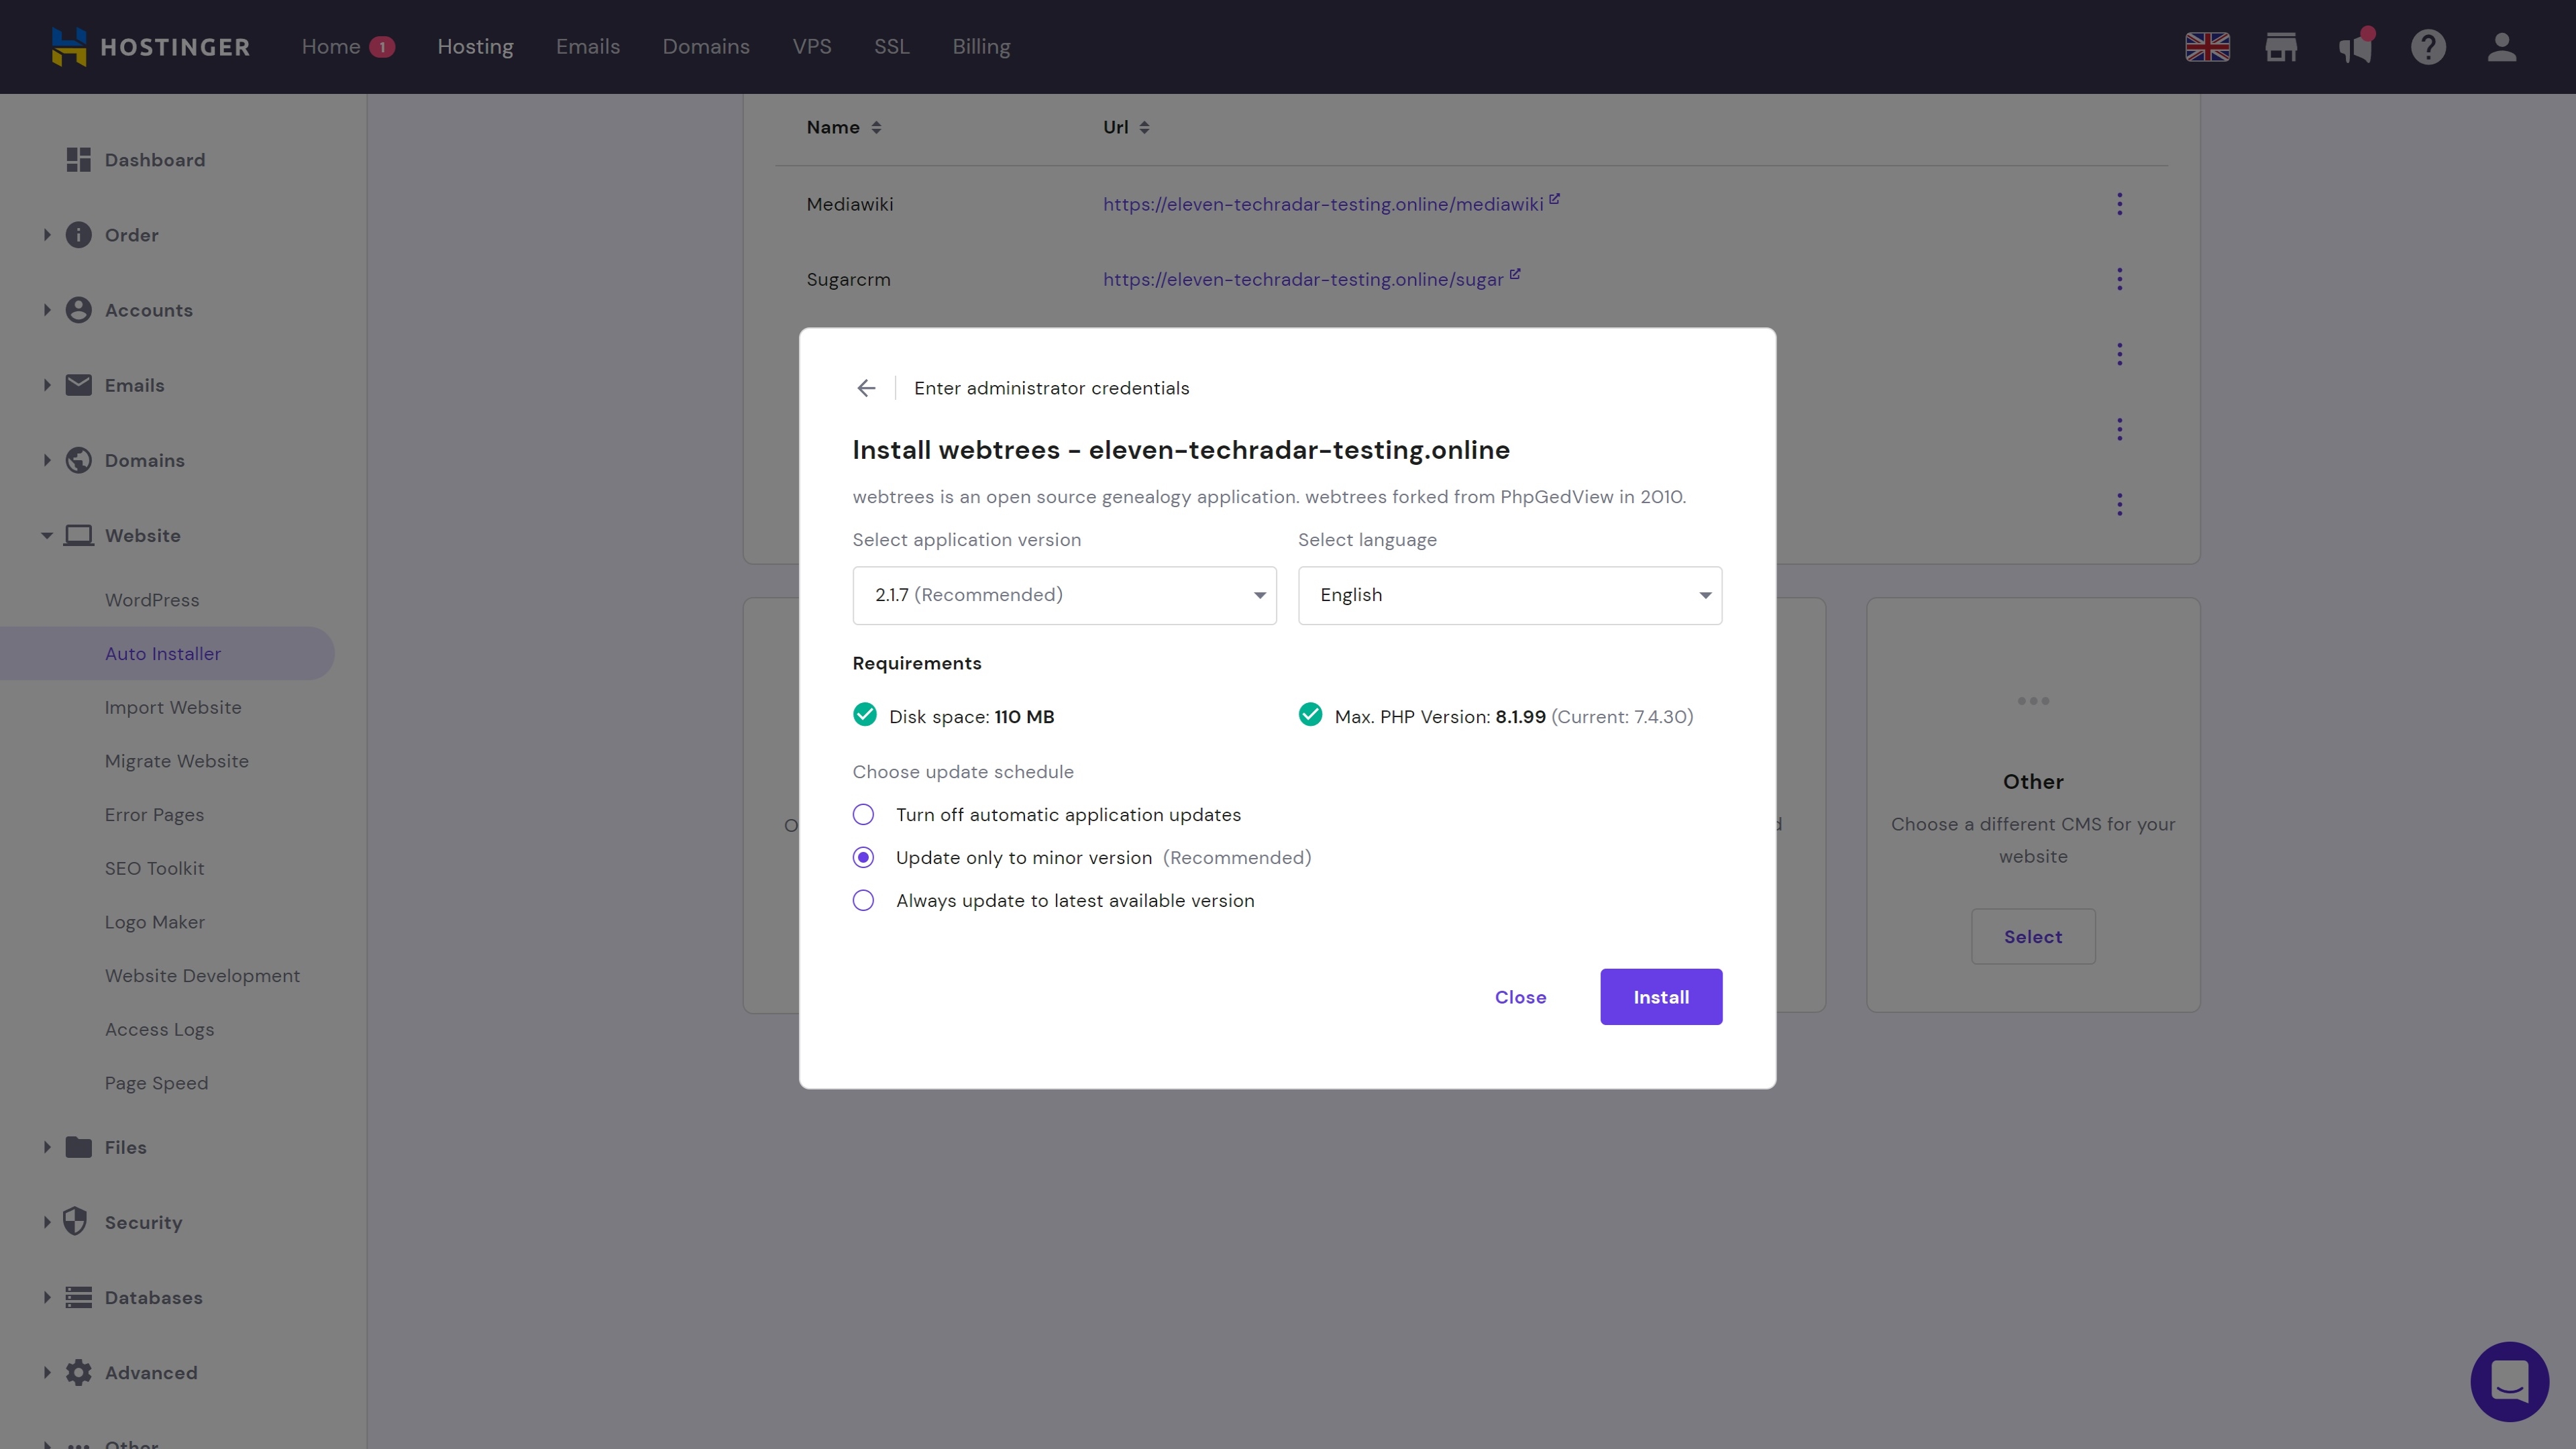
One of the best things about Hostinger is that it includes an Auto Installer enabling you to install webtrees (and numerous other scripts) in just a couple of clicks. You can find it on your hPanel control panel, and the whole process is quite self-explanatory. A full guide is available here.
If you use a different host, you will probably still have access to a one-click installer like Softaculous or Installatron. However, you may have to install webtrees manually if your host doesn’t support one-click installation.
Step 1: Start your first family tree
When you log in to your webtrees account for the first time, you will be taken directly to the family tree creation page. You can skip this and head straight to the control panel, but we’d recommend adding the outline of your family tree, at least.
Are you a pro? Subscribe to our newsletter
Sign up to the TechRadar Pro newsletter to get all the top news, opinion, features and guidance your business needs to succeed!
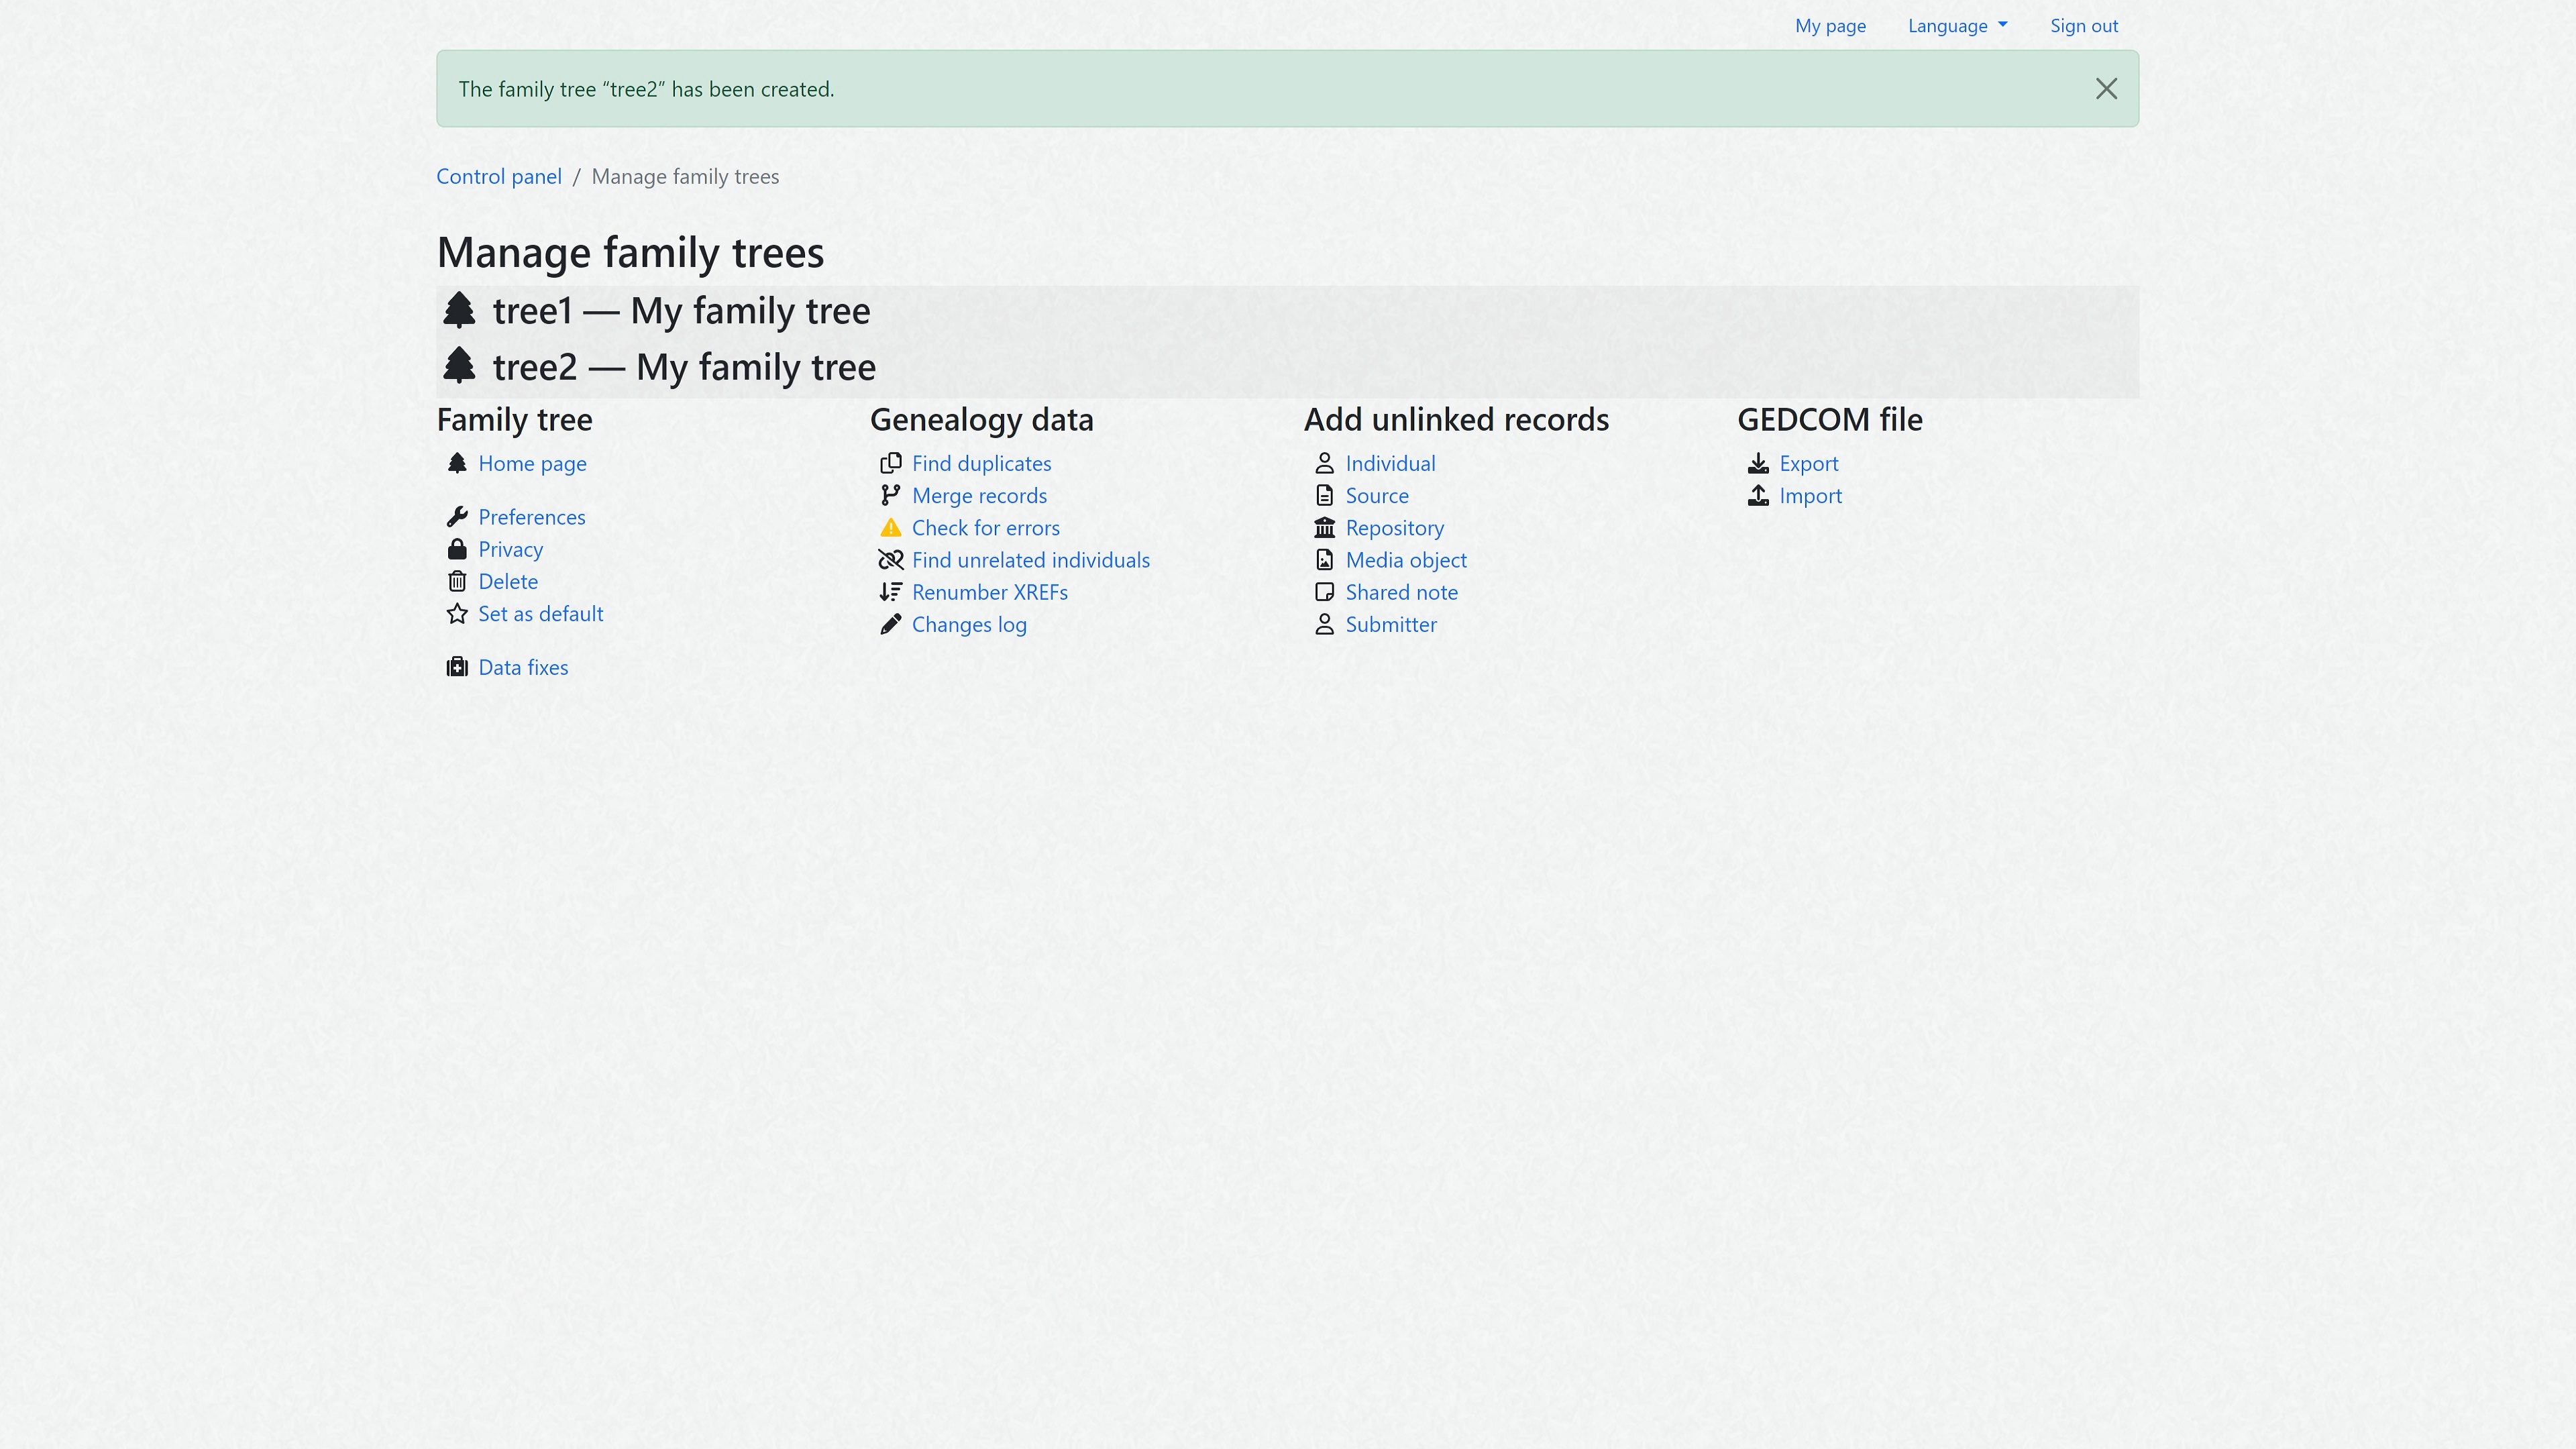
To do this, simply enter your family tree name, specify a URL, and hit the Create button. This will take you straight to the family tree management page, which enables you to begin building your tree.
Step 2: Add users
On your main webtrees dashboard, you will find a Users tab that lets you add and manage other users. This is a particularly useful tool if you’re working on your own family tree and want to collaborate with relatives, friends, and other interested parties.
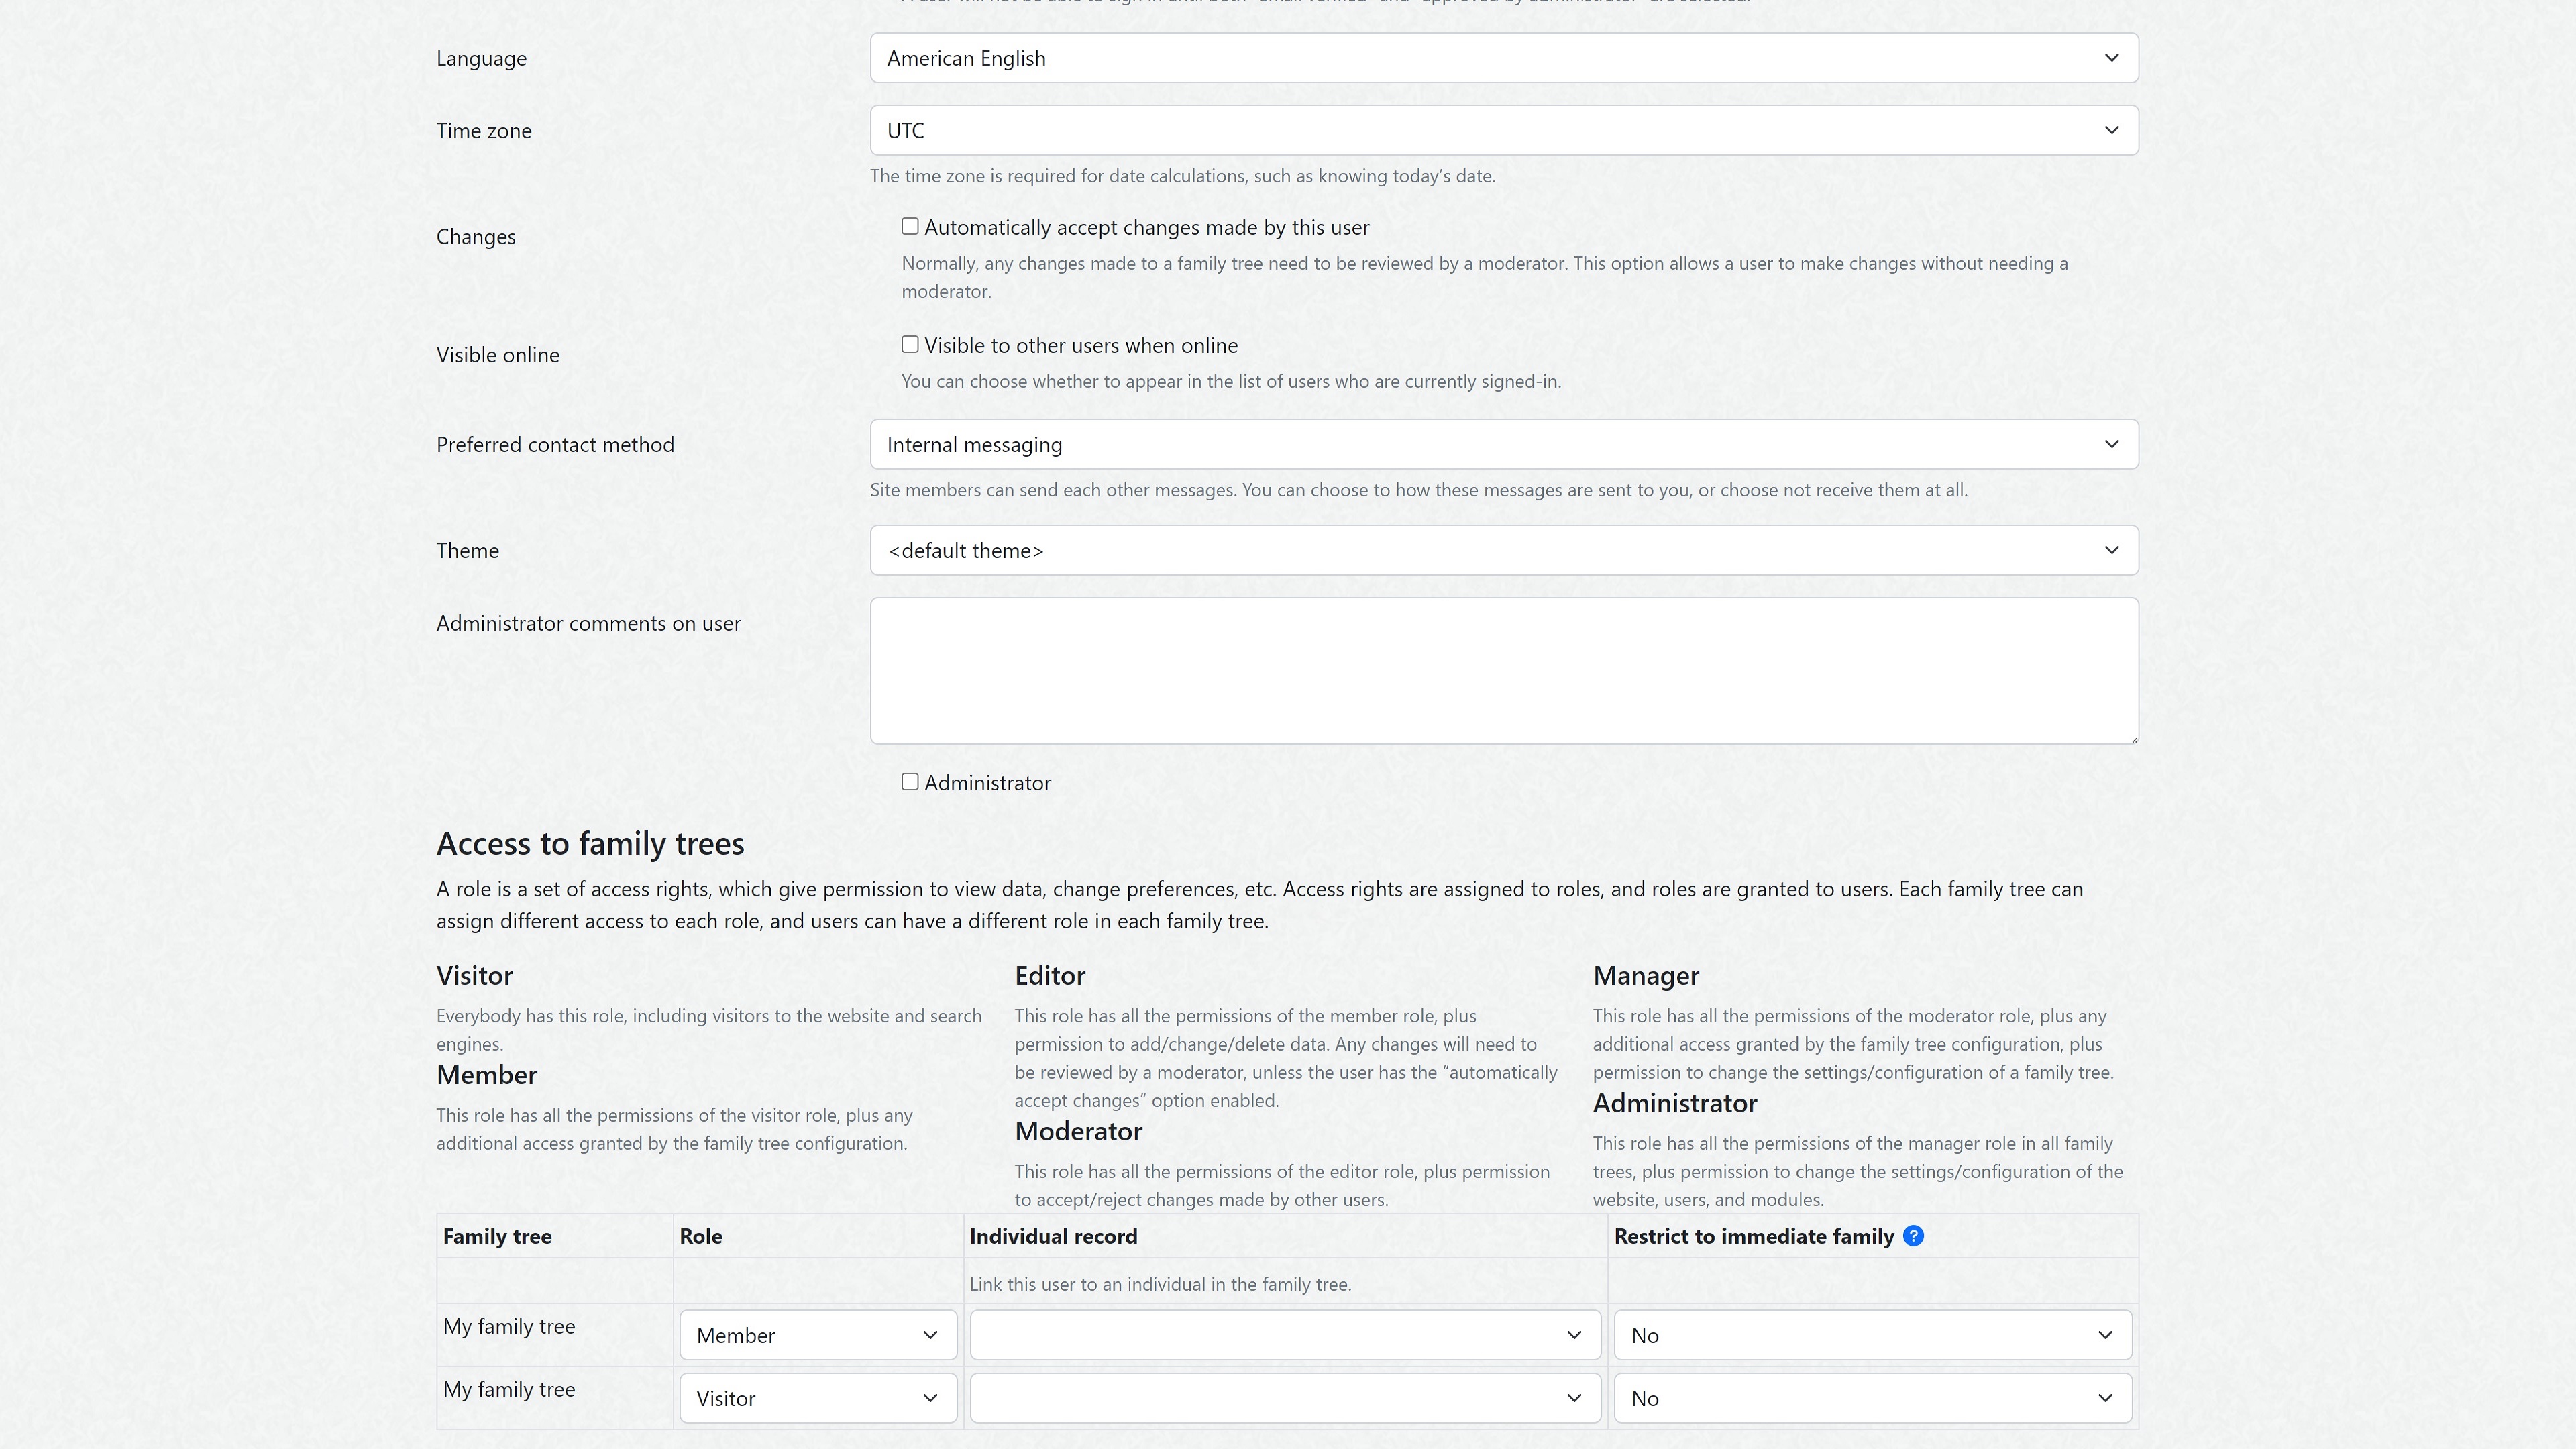
Hitting the Add a User link will take you to the new user creation page. Enter a name, username, password, and email address for your new team member, and hit the Save button to continue.
Next, you will be asked to specify the number of profile settings, including timezone, language, theme, and more. You can also set access rights for every user. These include visitor (no editing rights), editor (editing rights), manager (most permissions), and admin (all permissions).
Step 3: Set family tree preferences
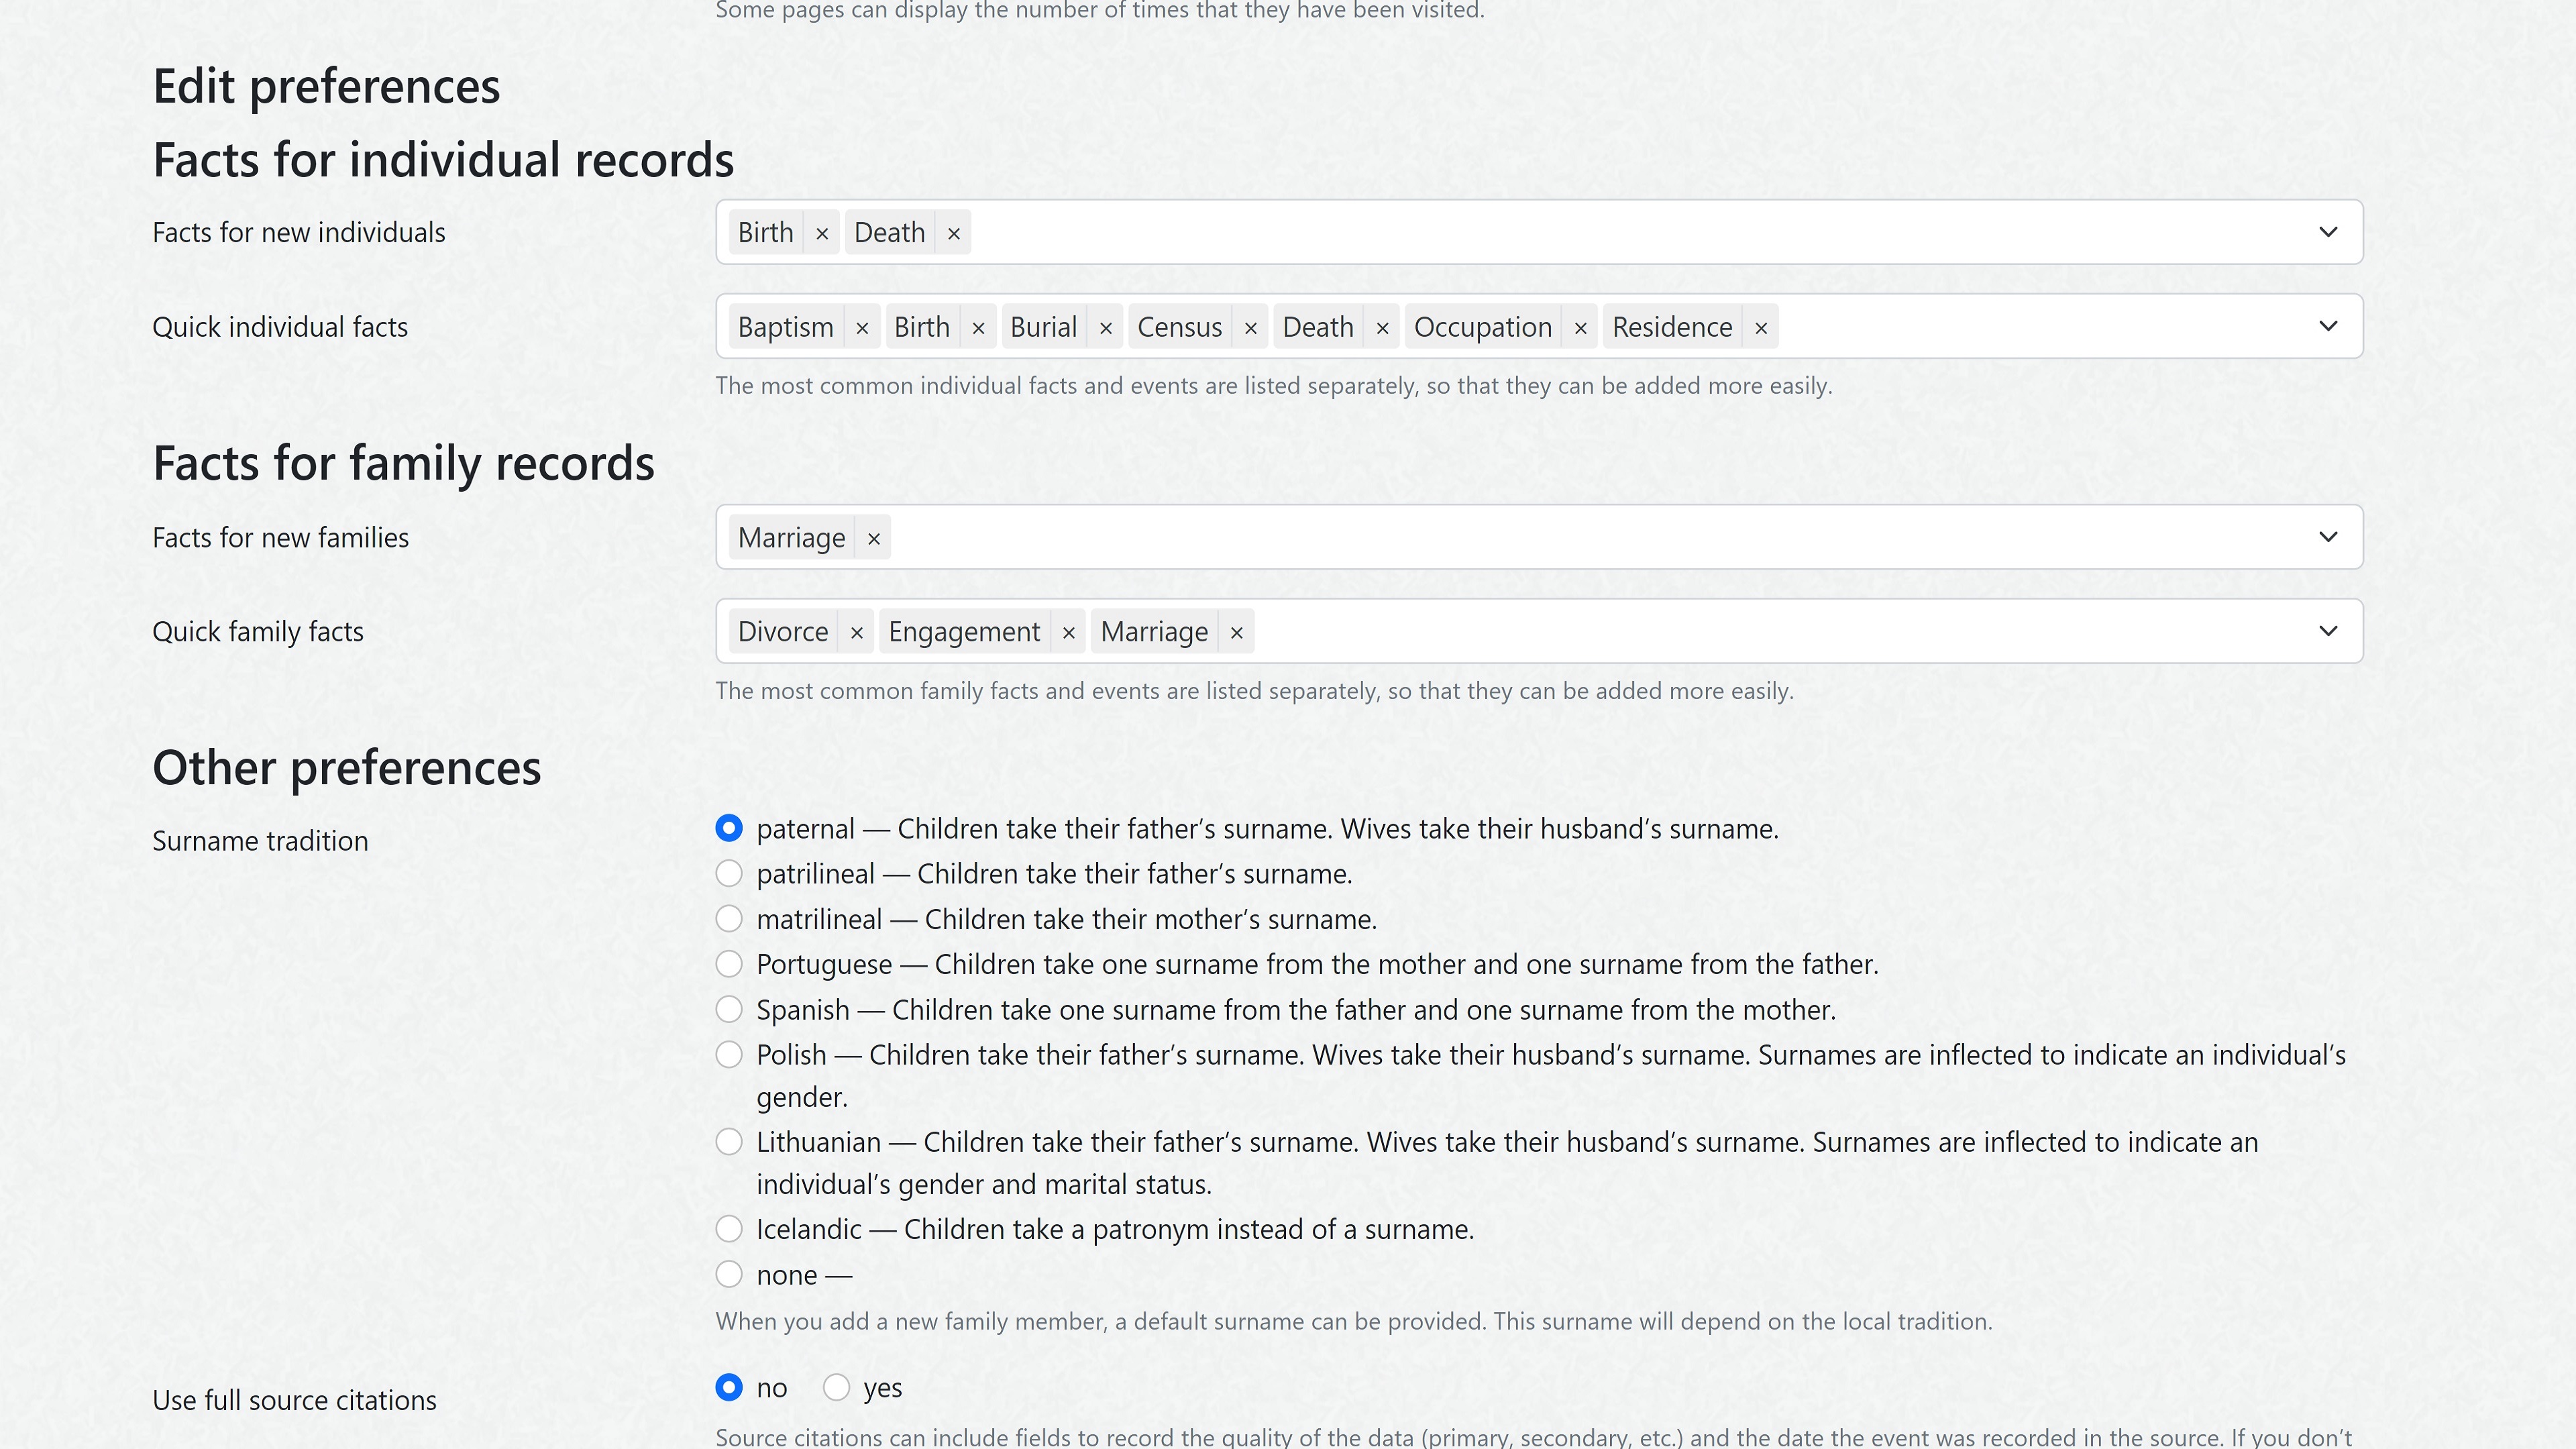
There are numerous settings that you can customize for each family tree you create on webtrees. You can find the Preferences menu on the individual family tree management panel.
Here, you can change your tree name and URL, and add contact information. You can also set numerous other preferences related to the way your family tree displays and what information is available.
Step 4: Add new modules (if required)
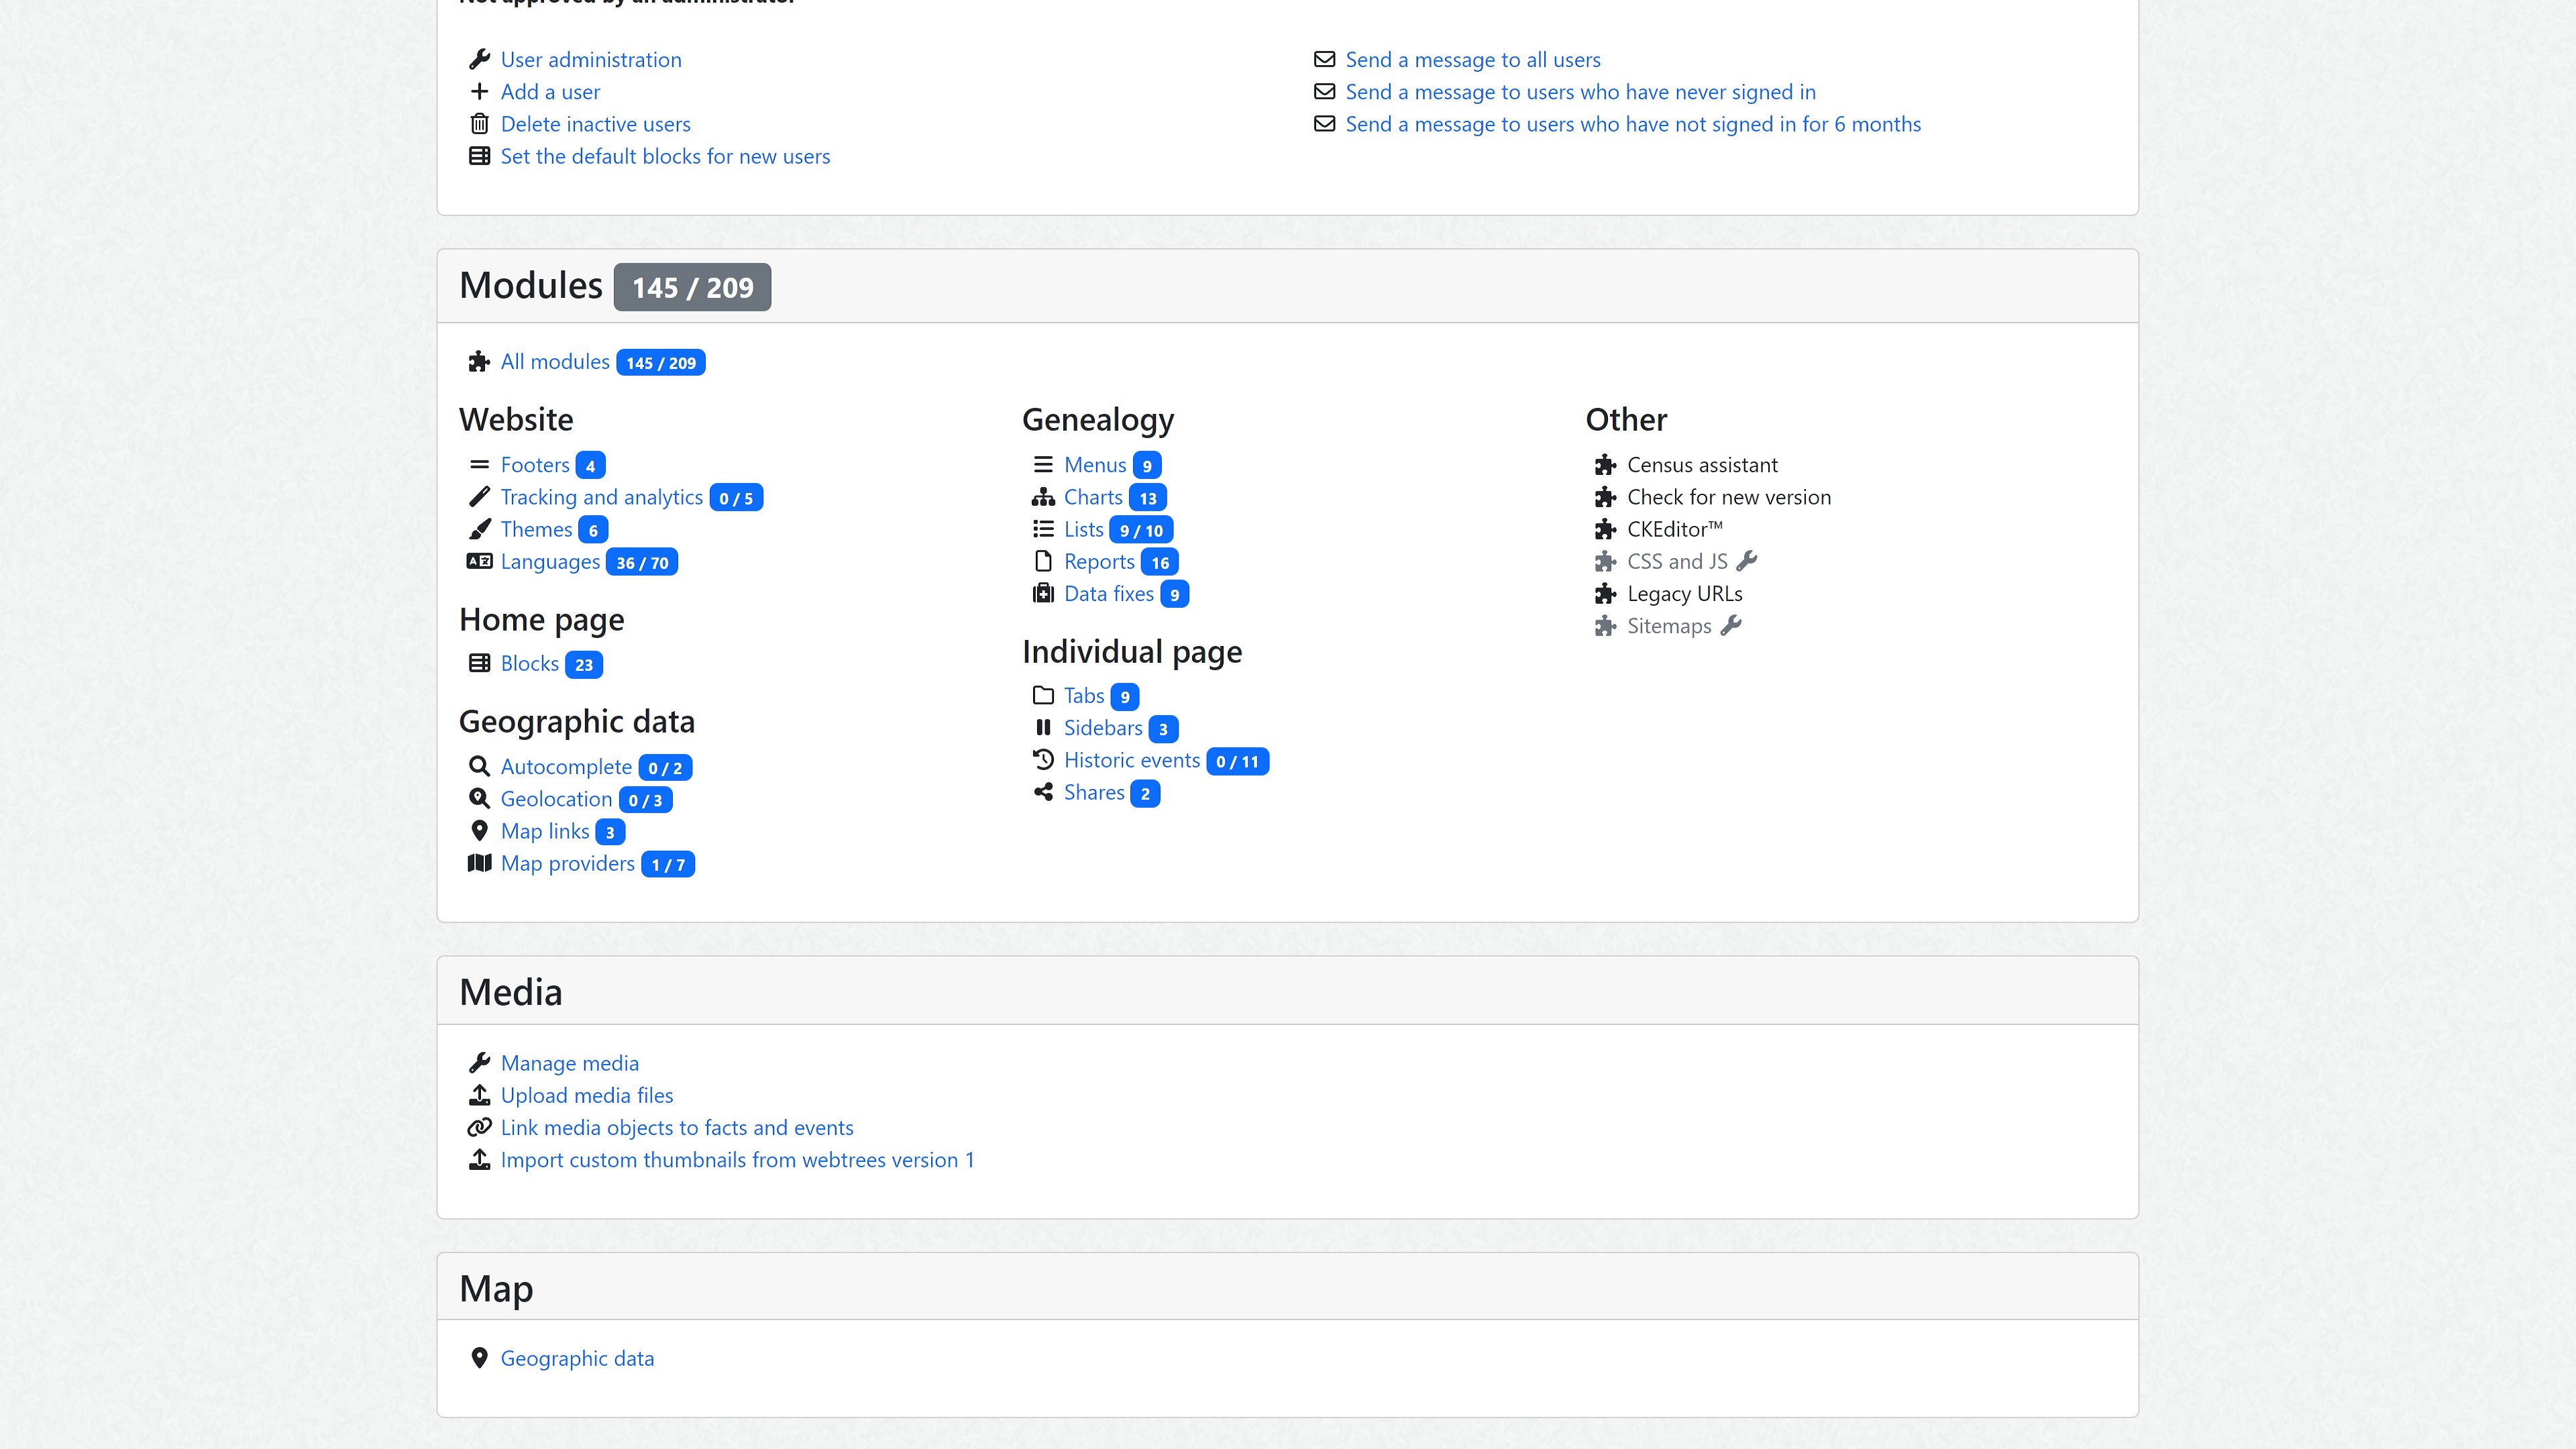
Another neat thing about webtrees is its large module library. This basically enables you to add extra features and tools to your family tree website. There are hundreds of basic modules to select from, including translations into dozens of different languages.
You can access these under the Modules tab on your main dashboard. The available modules are cleverly categorized by type, enabling you to find the ones you want in no time.
We’d suggest browsing the module library, uninstalling any you’re not likely to use (such as foreign languages), and adding any that appeal to you.
Step 5: Start building your tree!
By now, you should have most of the administrative work out of the way, which means that it’s time to start putting your family tree together. If you’ve been working with another program, you can import a GEDCOM file and start working with your existing data.
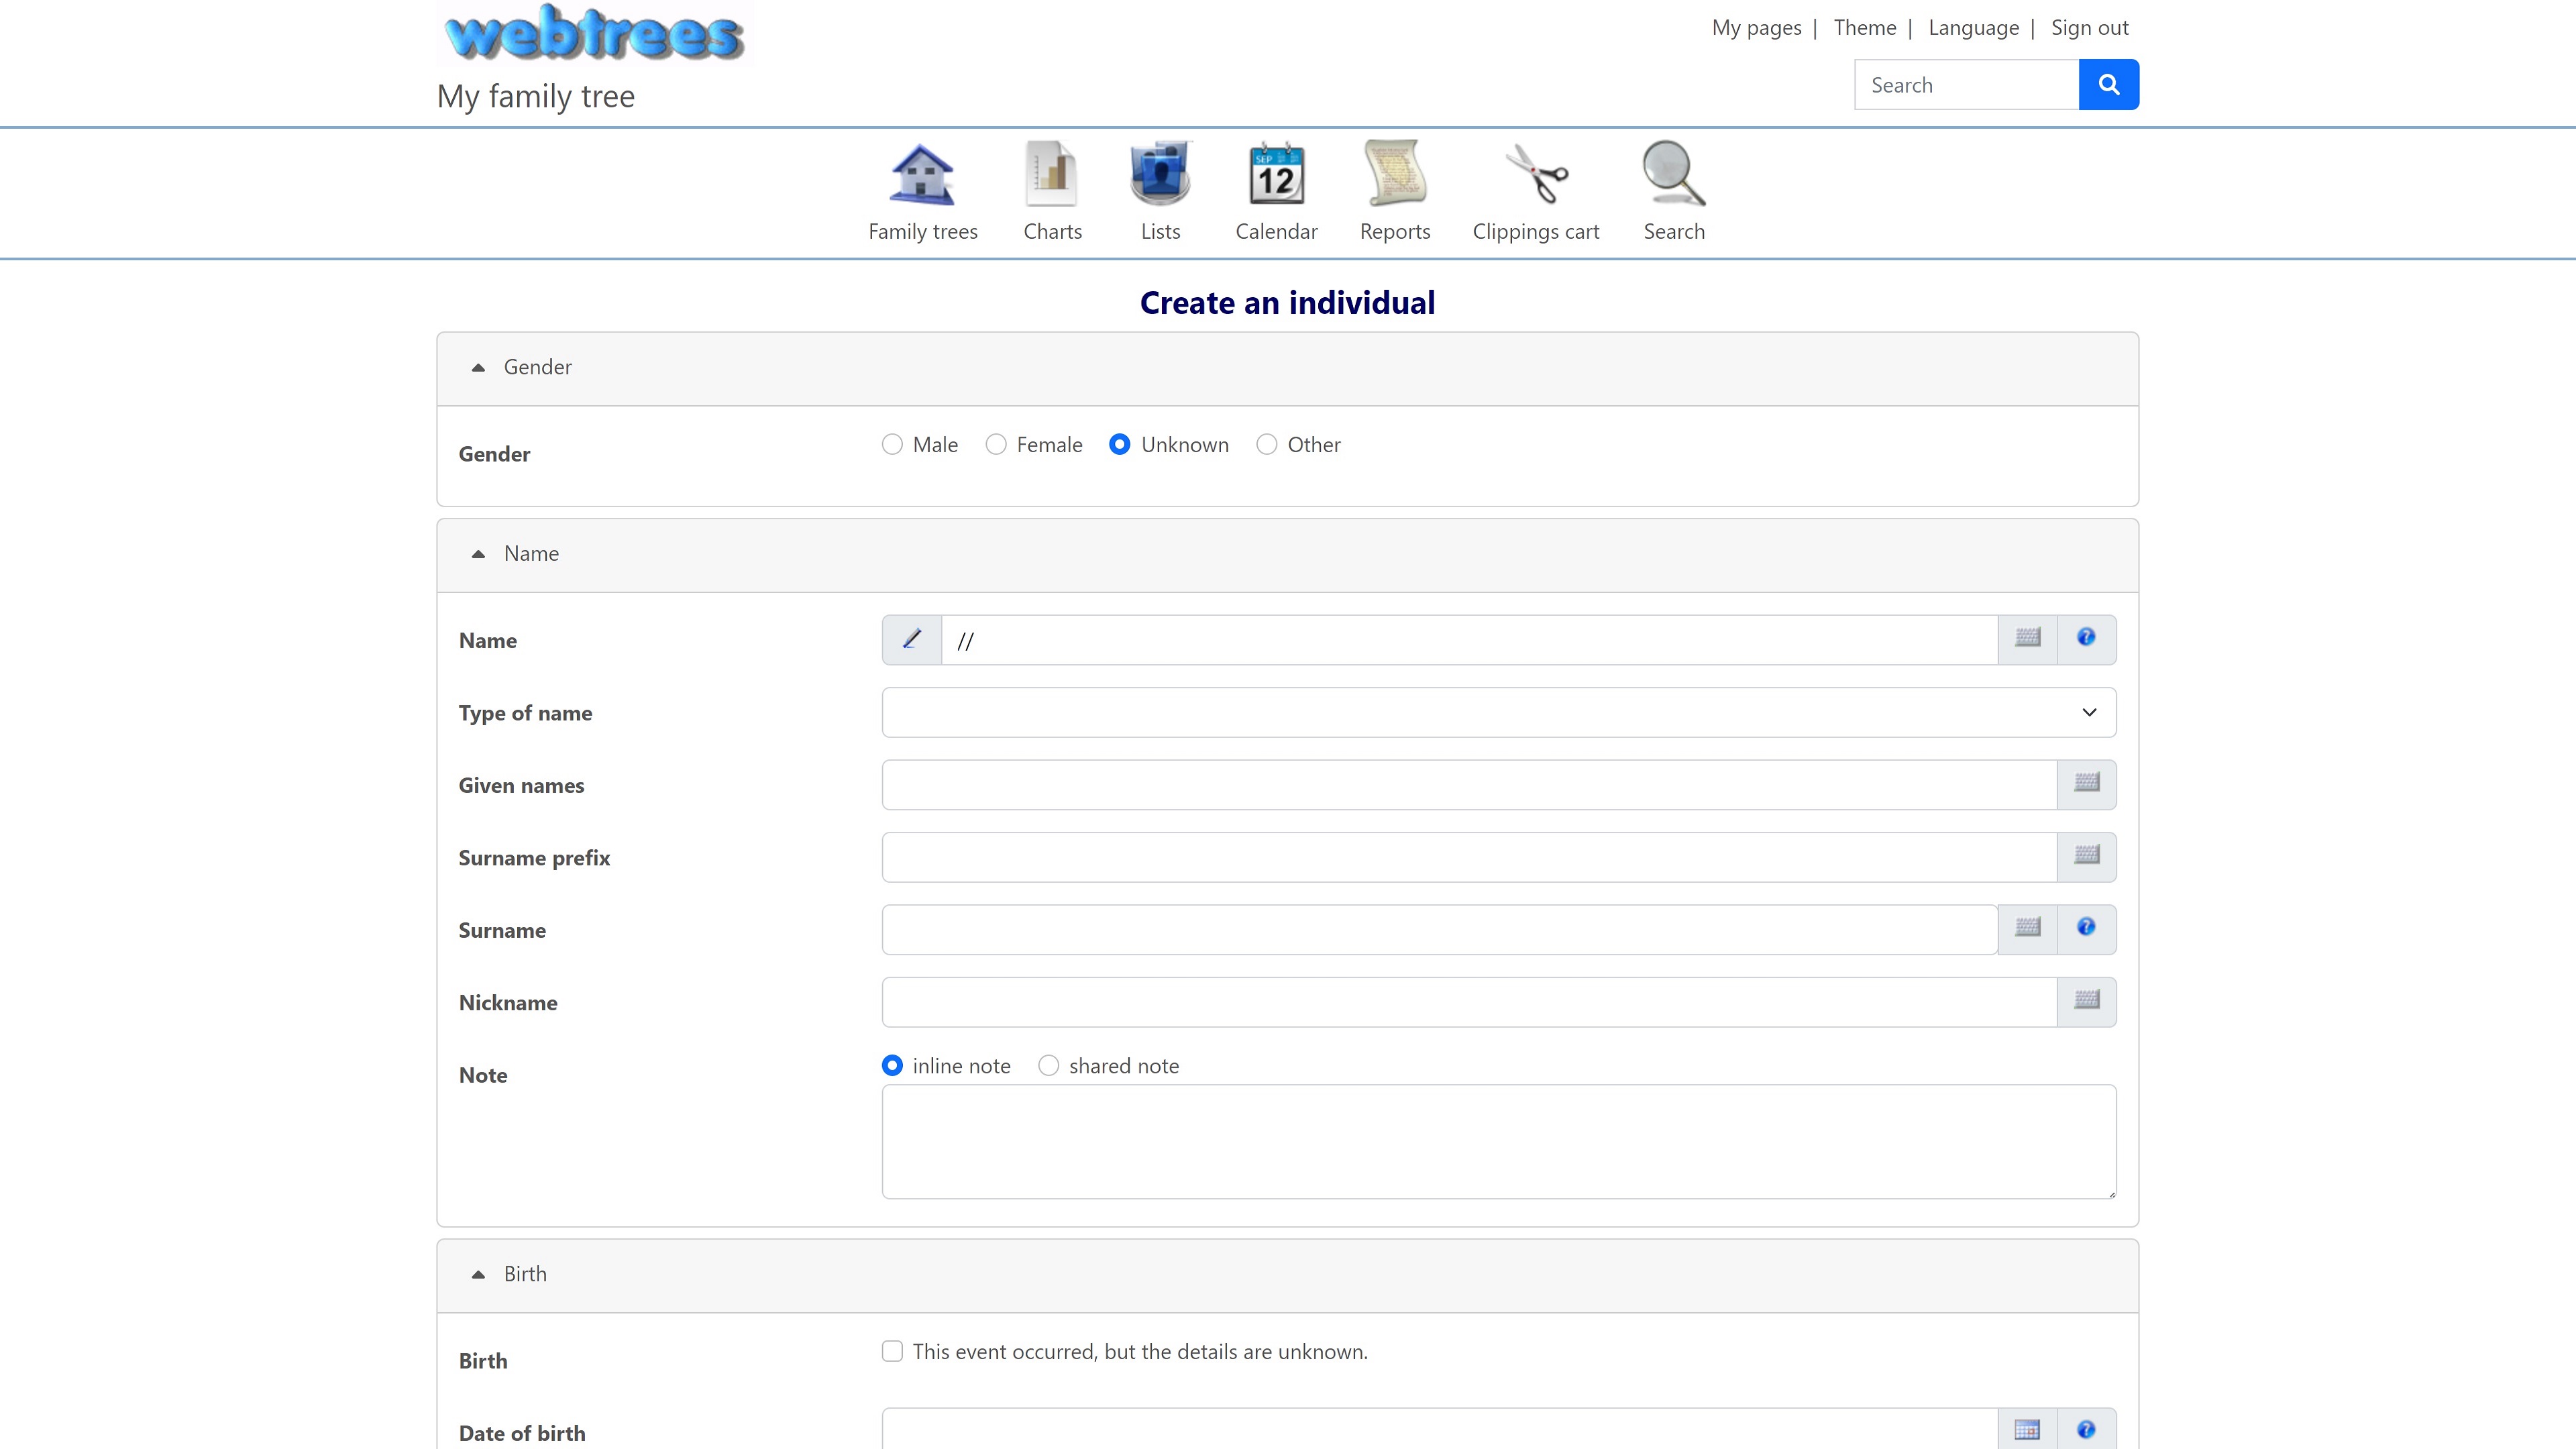
Alternatively, you can add new records directly from the family tree management page. Here, you can add individuals, notes, source info, and more. This page enables you to create new individual listings and comes with loads of data spaces, enabling you to enter birth, death, and other information.
There are loads of tools available, and it will take you some time to familiarize yourself with them. We’d suggest browsing the dashboard, spending a little time learning the rest of the family tree-building tools, and then putting them into action to create your very own genealogical chart.
Summary
Although it may seem like a lot of work to install and use webtrees instead of one of the more readily available alternatives, it’s certainly worth a look. We’ve provided a step-by-step guide to creating your own family tree with webtrees, outlining the basics that you have to know.
Check out our guide to the best web hosting available today if you’re not sure whether Hostinger is the right host for your needs. Or, have a read of our Hostinger review to find out why we rate this web host so highly.
Read more in this series:
- How to start a blog with Joomla
- Build your own CRM using SugarCRM
- How to host your files online using Nextcloud Hub
- How to start your own help desk with Hesk
- How to build an HR System using OrangeHRM
- How to generate your own invoices using Invoice Ninja
- How to install live chat software with Sales Syntax
- Run your own ecommerce platform with PrestaShop
- How to create your own website with Soholaunch
- How to launch your own website with WebsiteBaker
- How to learn search engine optimization with SEO Panel
- How to install a free ERP software called Dolibarr
- Demand gen vs lead gen: What's the difference?
- Host your own private forum with MyBB
- Build your own calendar application with WebCalendar
- Set up your own groupware service with Tiki Wiki CMS
- How to build your own email marketing service with phpList
- A Google Photos alternative: Store your photos online with Piwigo
- How to start with project management using The Bug Genie
- Make your own poll platform with LimeSurvey
- Roll out your own Wikipedia clone with MediaWiki
- How to host your own learning management software with Moodle LMS
- Set up an accounting system with FrontAccounting
- Produce your own bills with BoxBilling
Daniel is a freelance copywriter with over six years experience writing for publications such as TechRadar, Tom’s Guide, and Hosting Review. He specializes in B2B and B2C tech and finance, with a particular focus on VoIP, website building, web hosting, and other related fields.
