How to launch your own website with WebsiteBaker
Create an attractive website today

WebsiteBaker is a modern, open-source content management system (CMS) that’s designed with power and usability in mind. There are loads of developer tools on offer, but you don’t need any special tech skills to use its basic features—which makes it a versatile option for business users who want to create their own website.
That being said, it can still be a little difficult to launch your first WebsiteBaker site. We’ve put together the following guide to help you get started, outlining every step of the process in a clear, concise manner.
How to launch your own website with WebsiteBaker: Preparation
Before you can launch a website with WebsiteBaker, there are a few things you will need to do. First up is finding the right web hosting. This provides the storage and processing power required to render your site whenever someone travels to it.
We’ve used Hostinger, one of the world’s leading web hosts. It offers extremely cost-effective hosting solutions, and its proprietary hPanel control panel is super easy to use. To get your website up and running, you will also need a domain name. Hostinger offers affordable and streamlined domain registration services.
To install WebsiteBaker, simply navigate to the Auto Installer at the bottom of the hPanel. This enables you to install numerous scripts, including WebsiteBaker, in just minutes and is super easy to use. Here are some more instructions on installing applications automatically with hPanel.
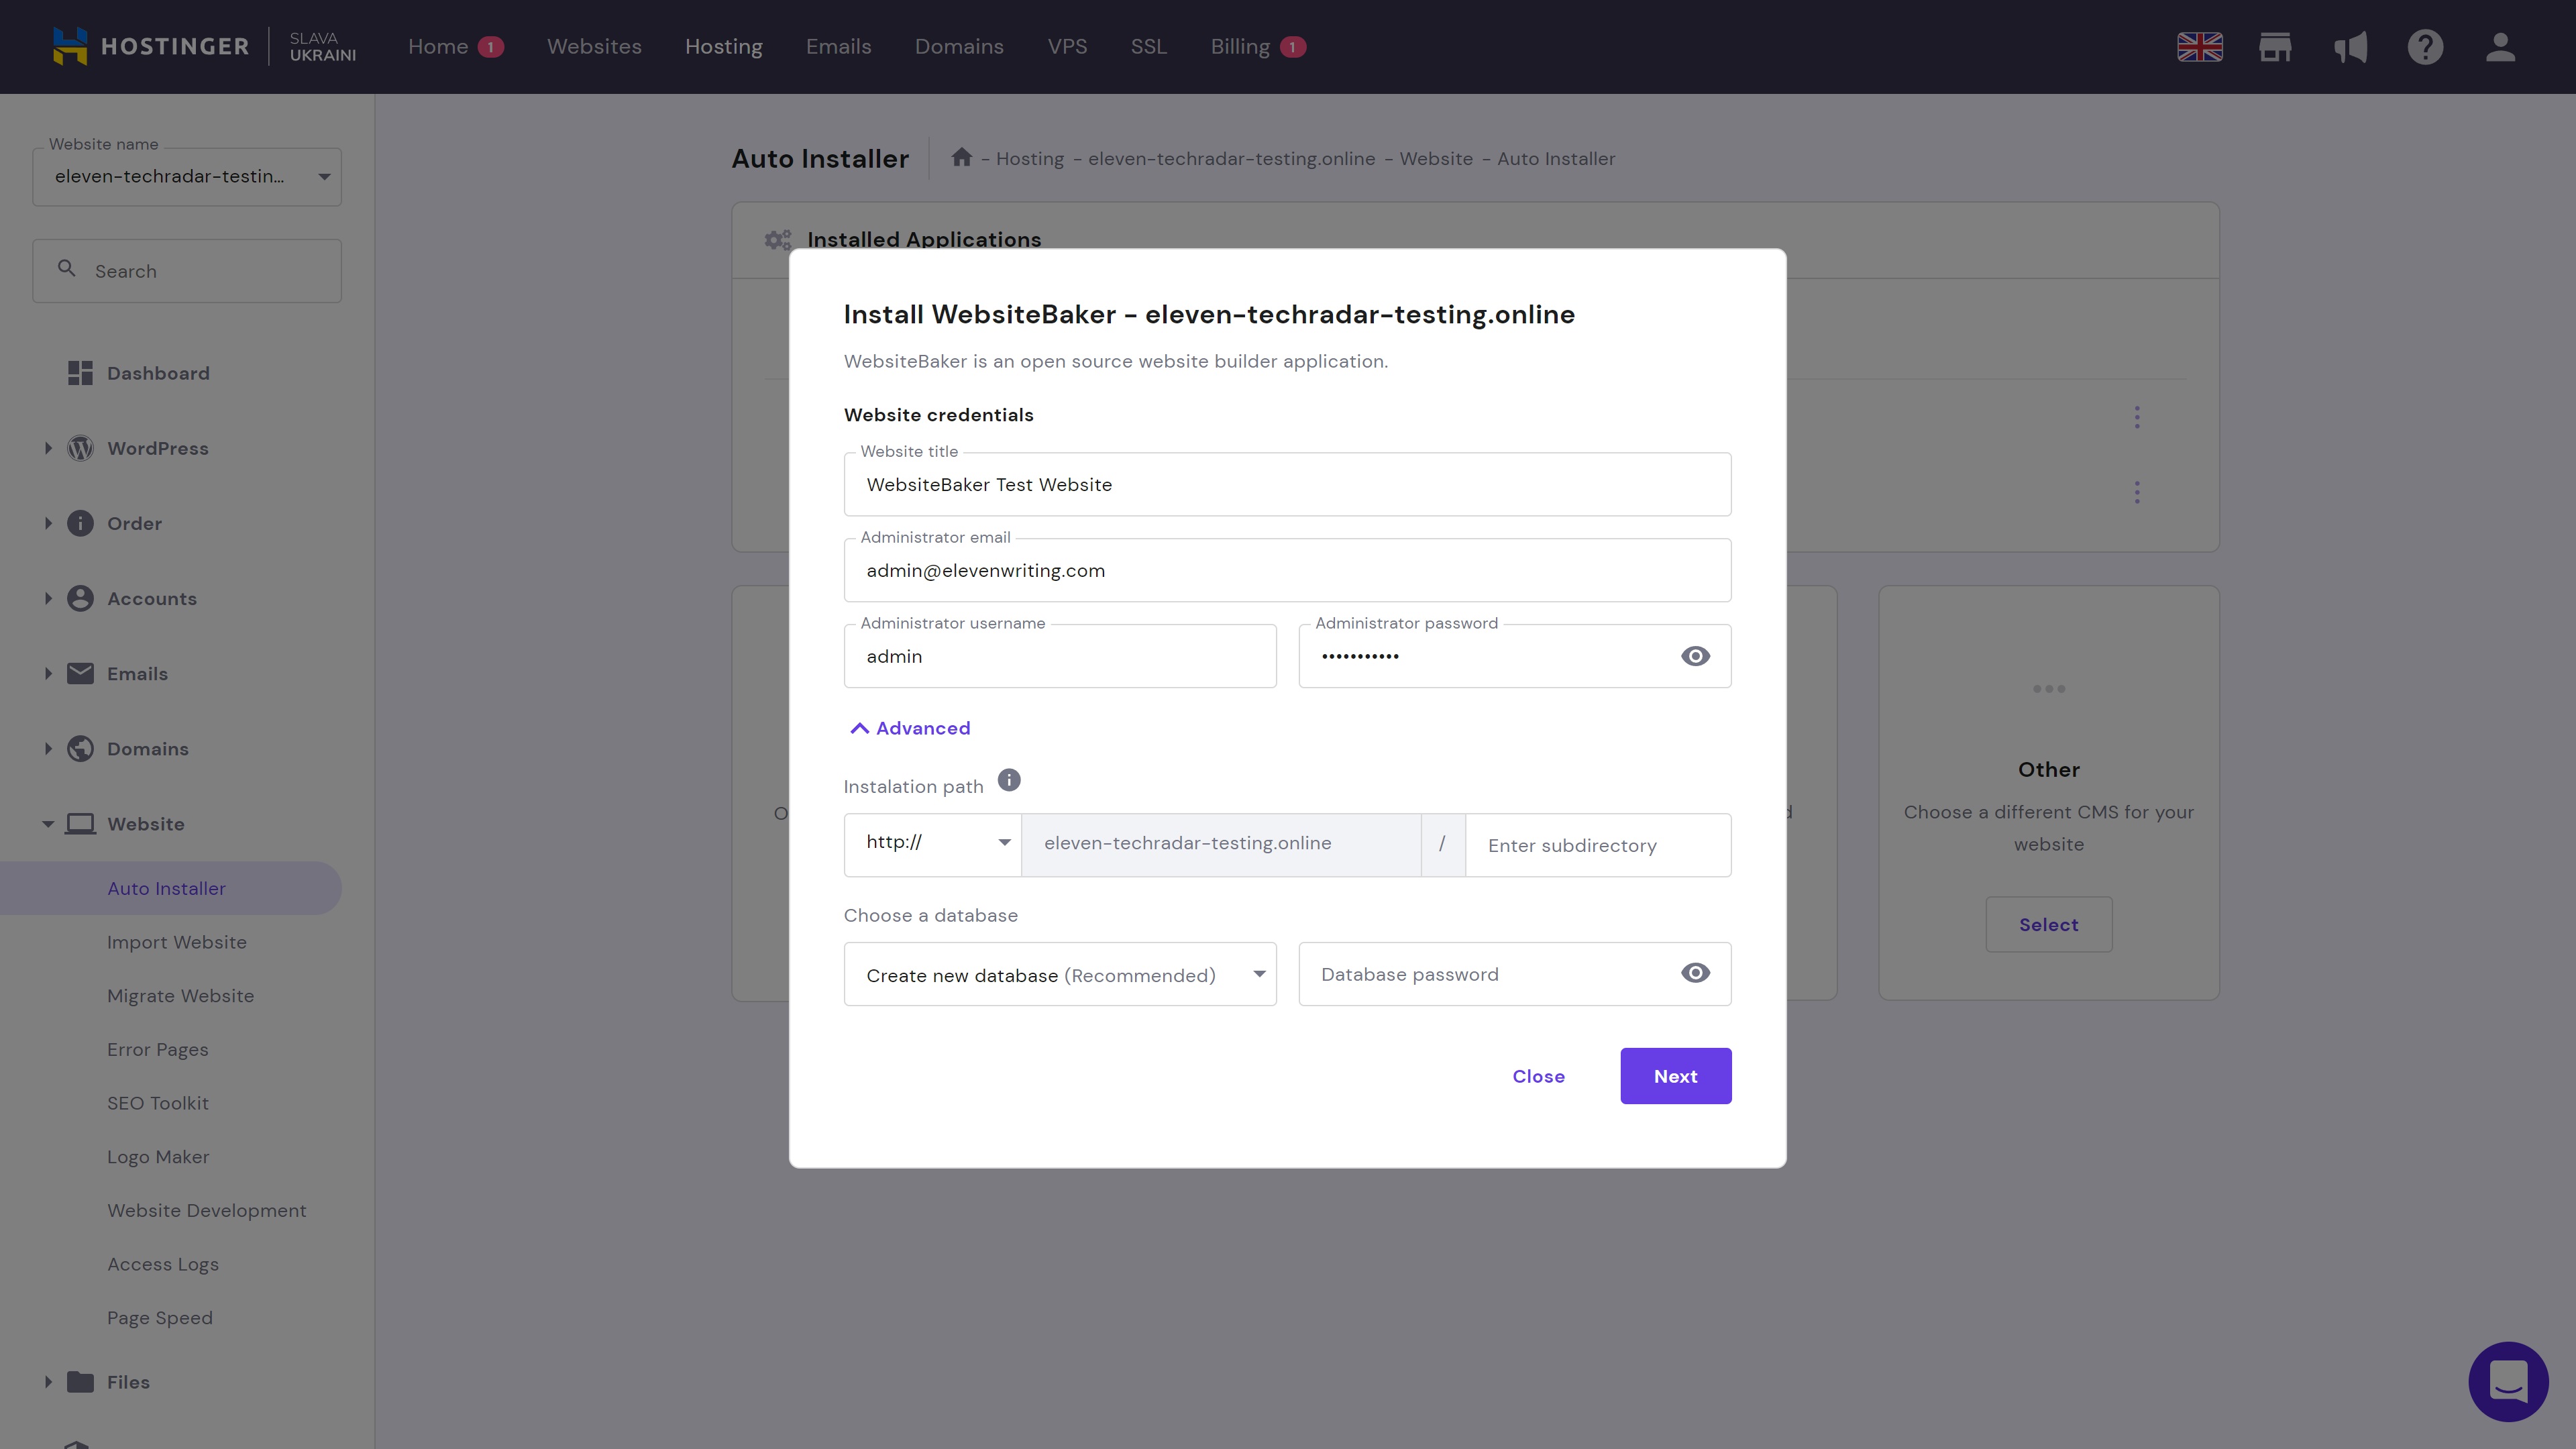
Installing the WebsiteBaker script with Hostinger’s Auto Installer took us under a minute, and we were able to head to the CMS dashboard and begin customizing our website immediately.
The best way to manage your WebsiteBaker installation is to head back to the Auto Installer. Here, you will see a list of your current installations with options to manage or delete them.
Are you a pro? Subscribe to our newsletter
Sign up to the TechRadar Pro newsletter to get all the top news, opinion, features and guidance your business needs to succeed!
Step 1: Add pages
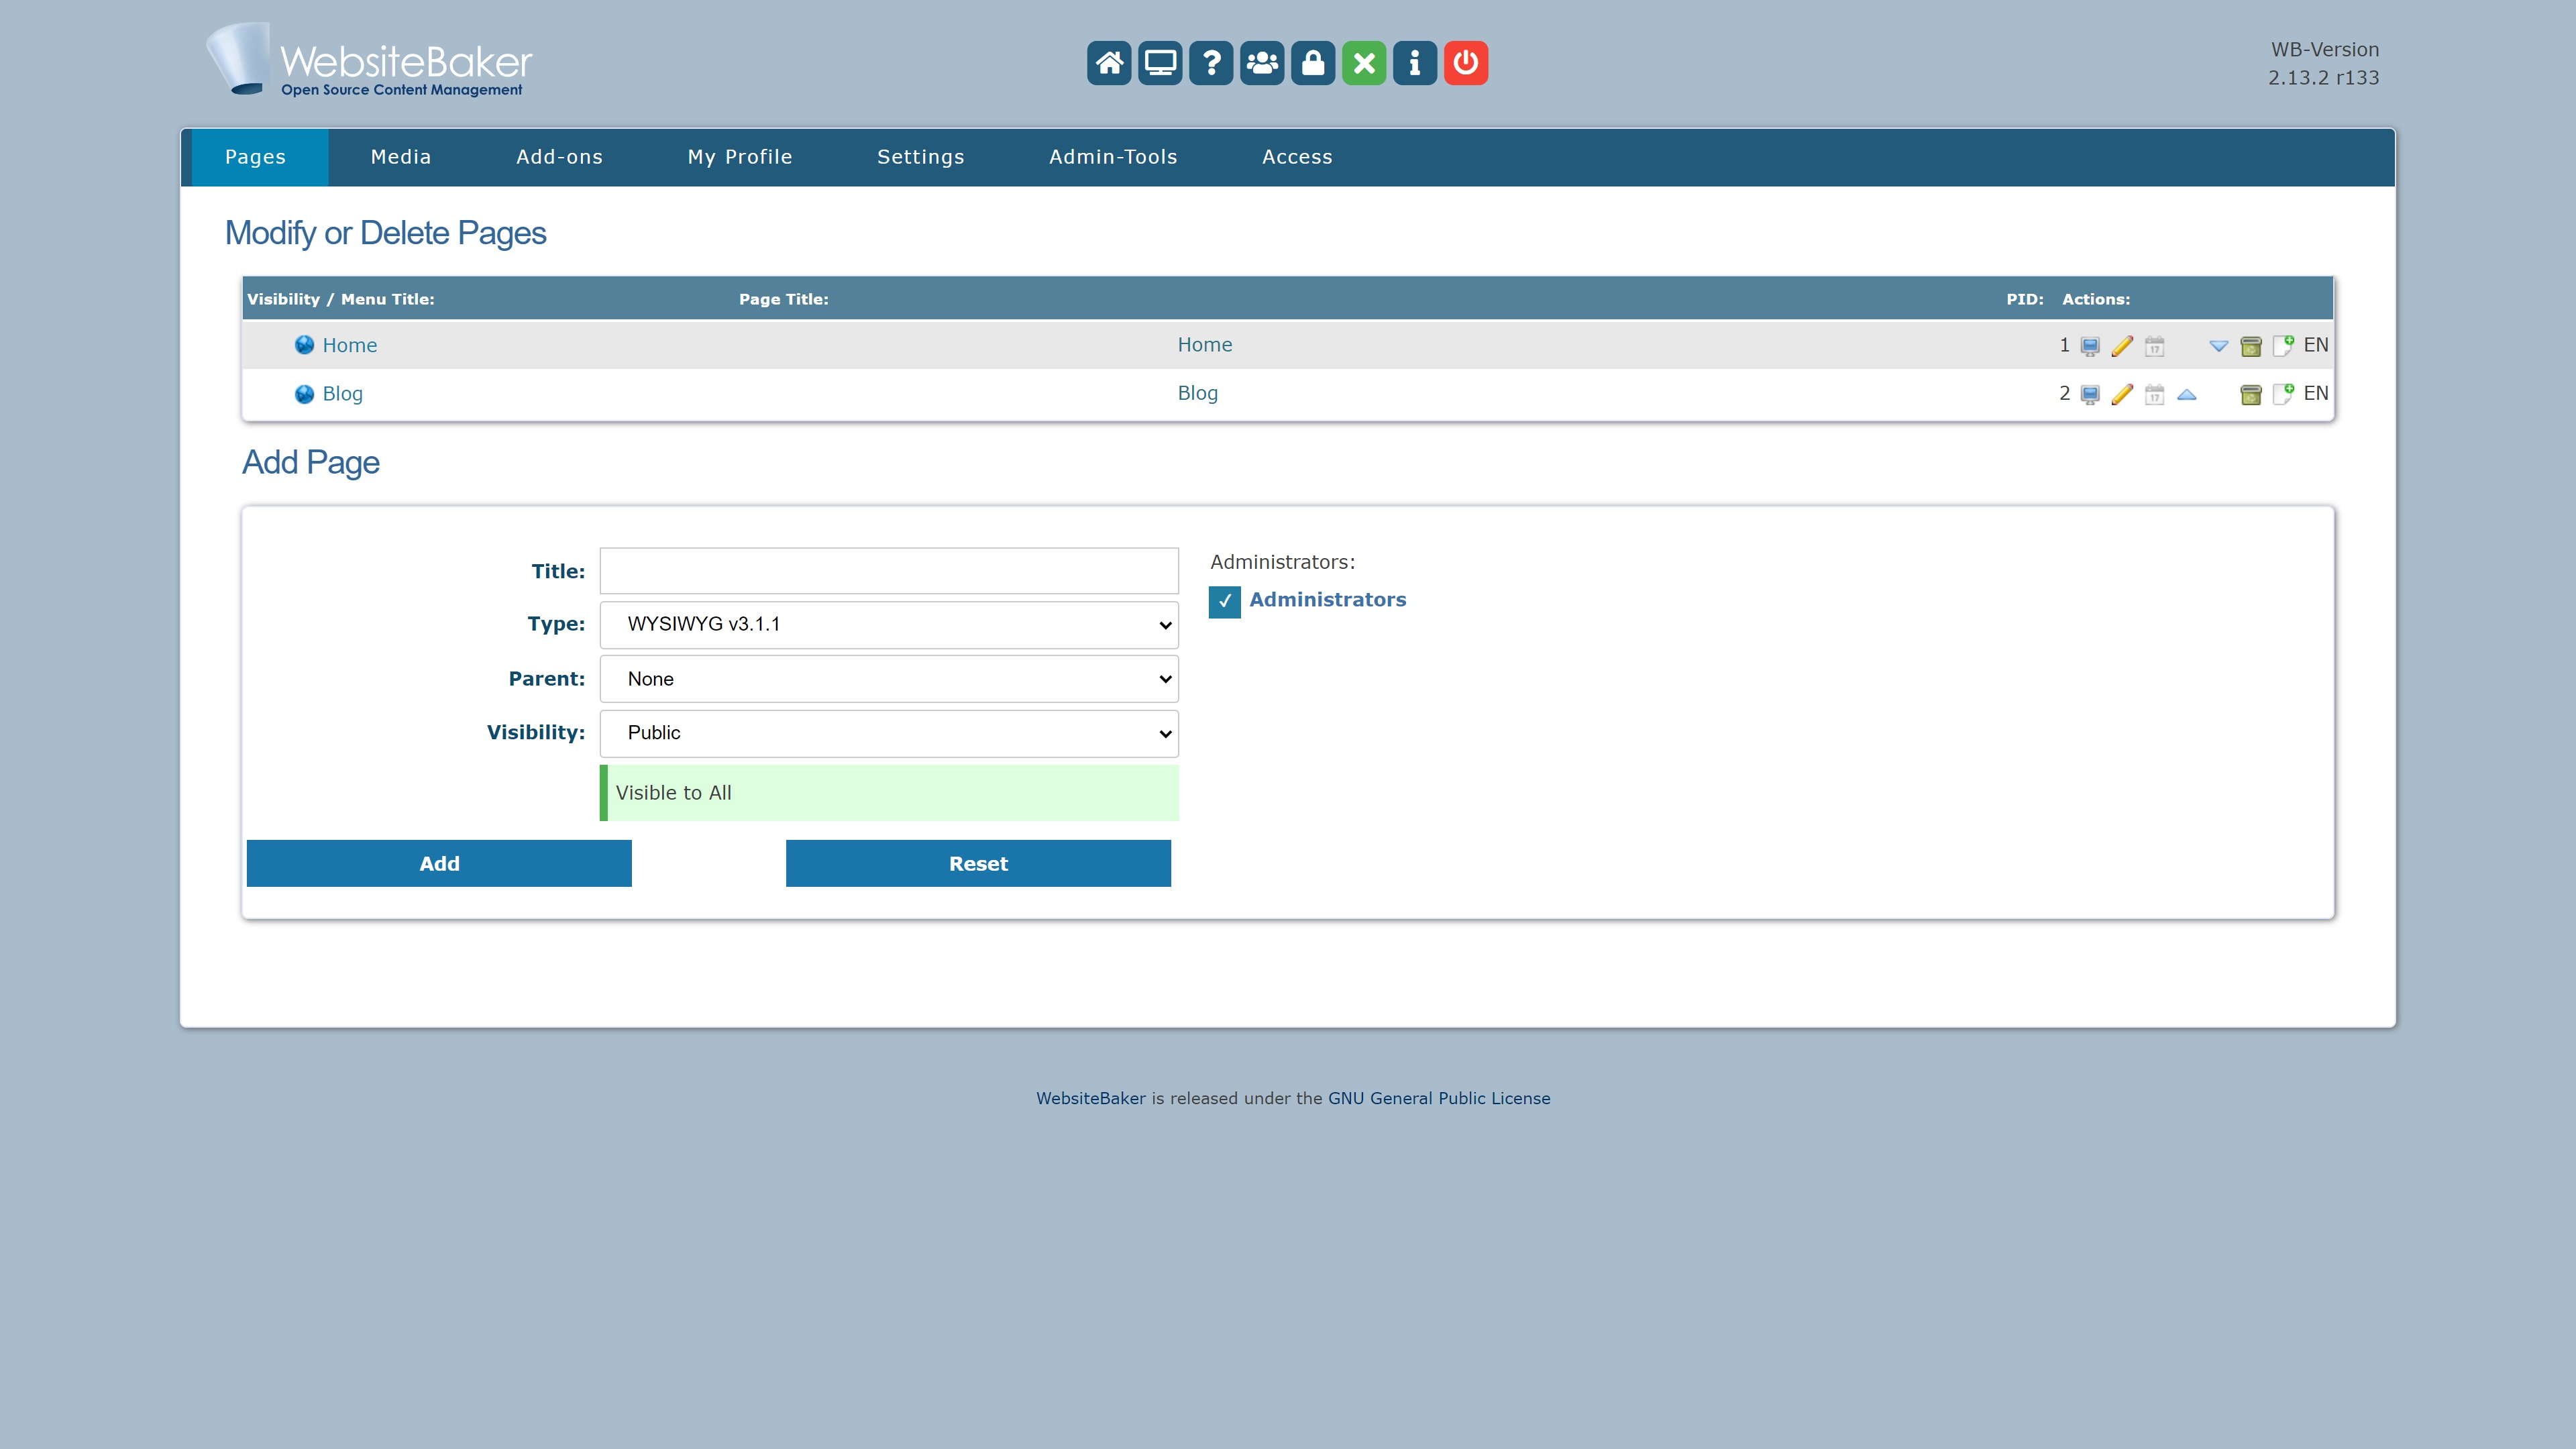
First, you will want to add the required pages to your WebsiteBaker site. Head to the Pages tab on the main menu, where you will find a list of currently installed pages that you can modify or delete.
You can also add extra pages, and there are a couple of different pre-installed page types available, these include news and forms layouts.
Step 2: Install add-ons (if required)
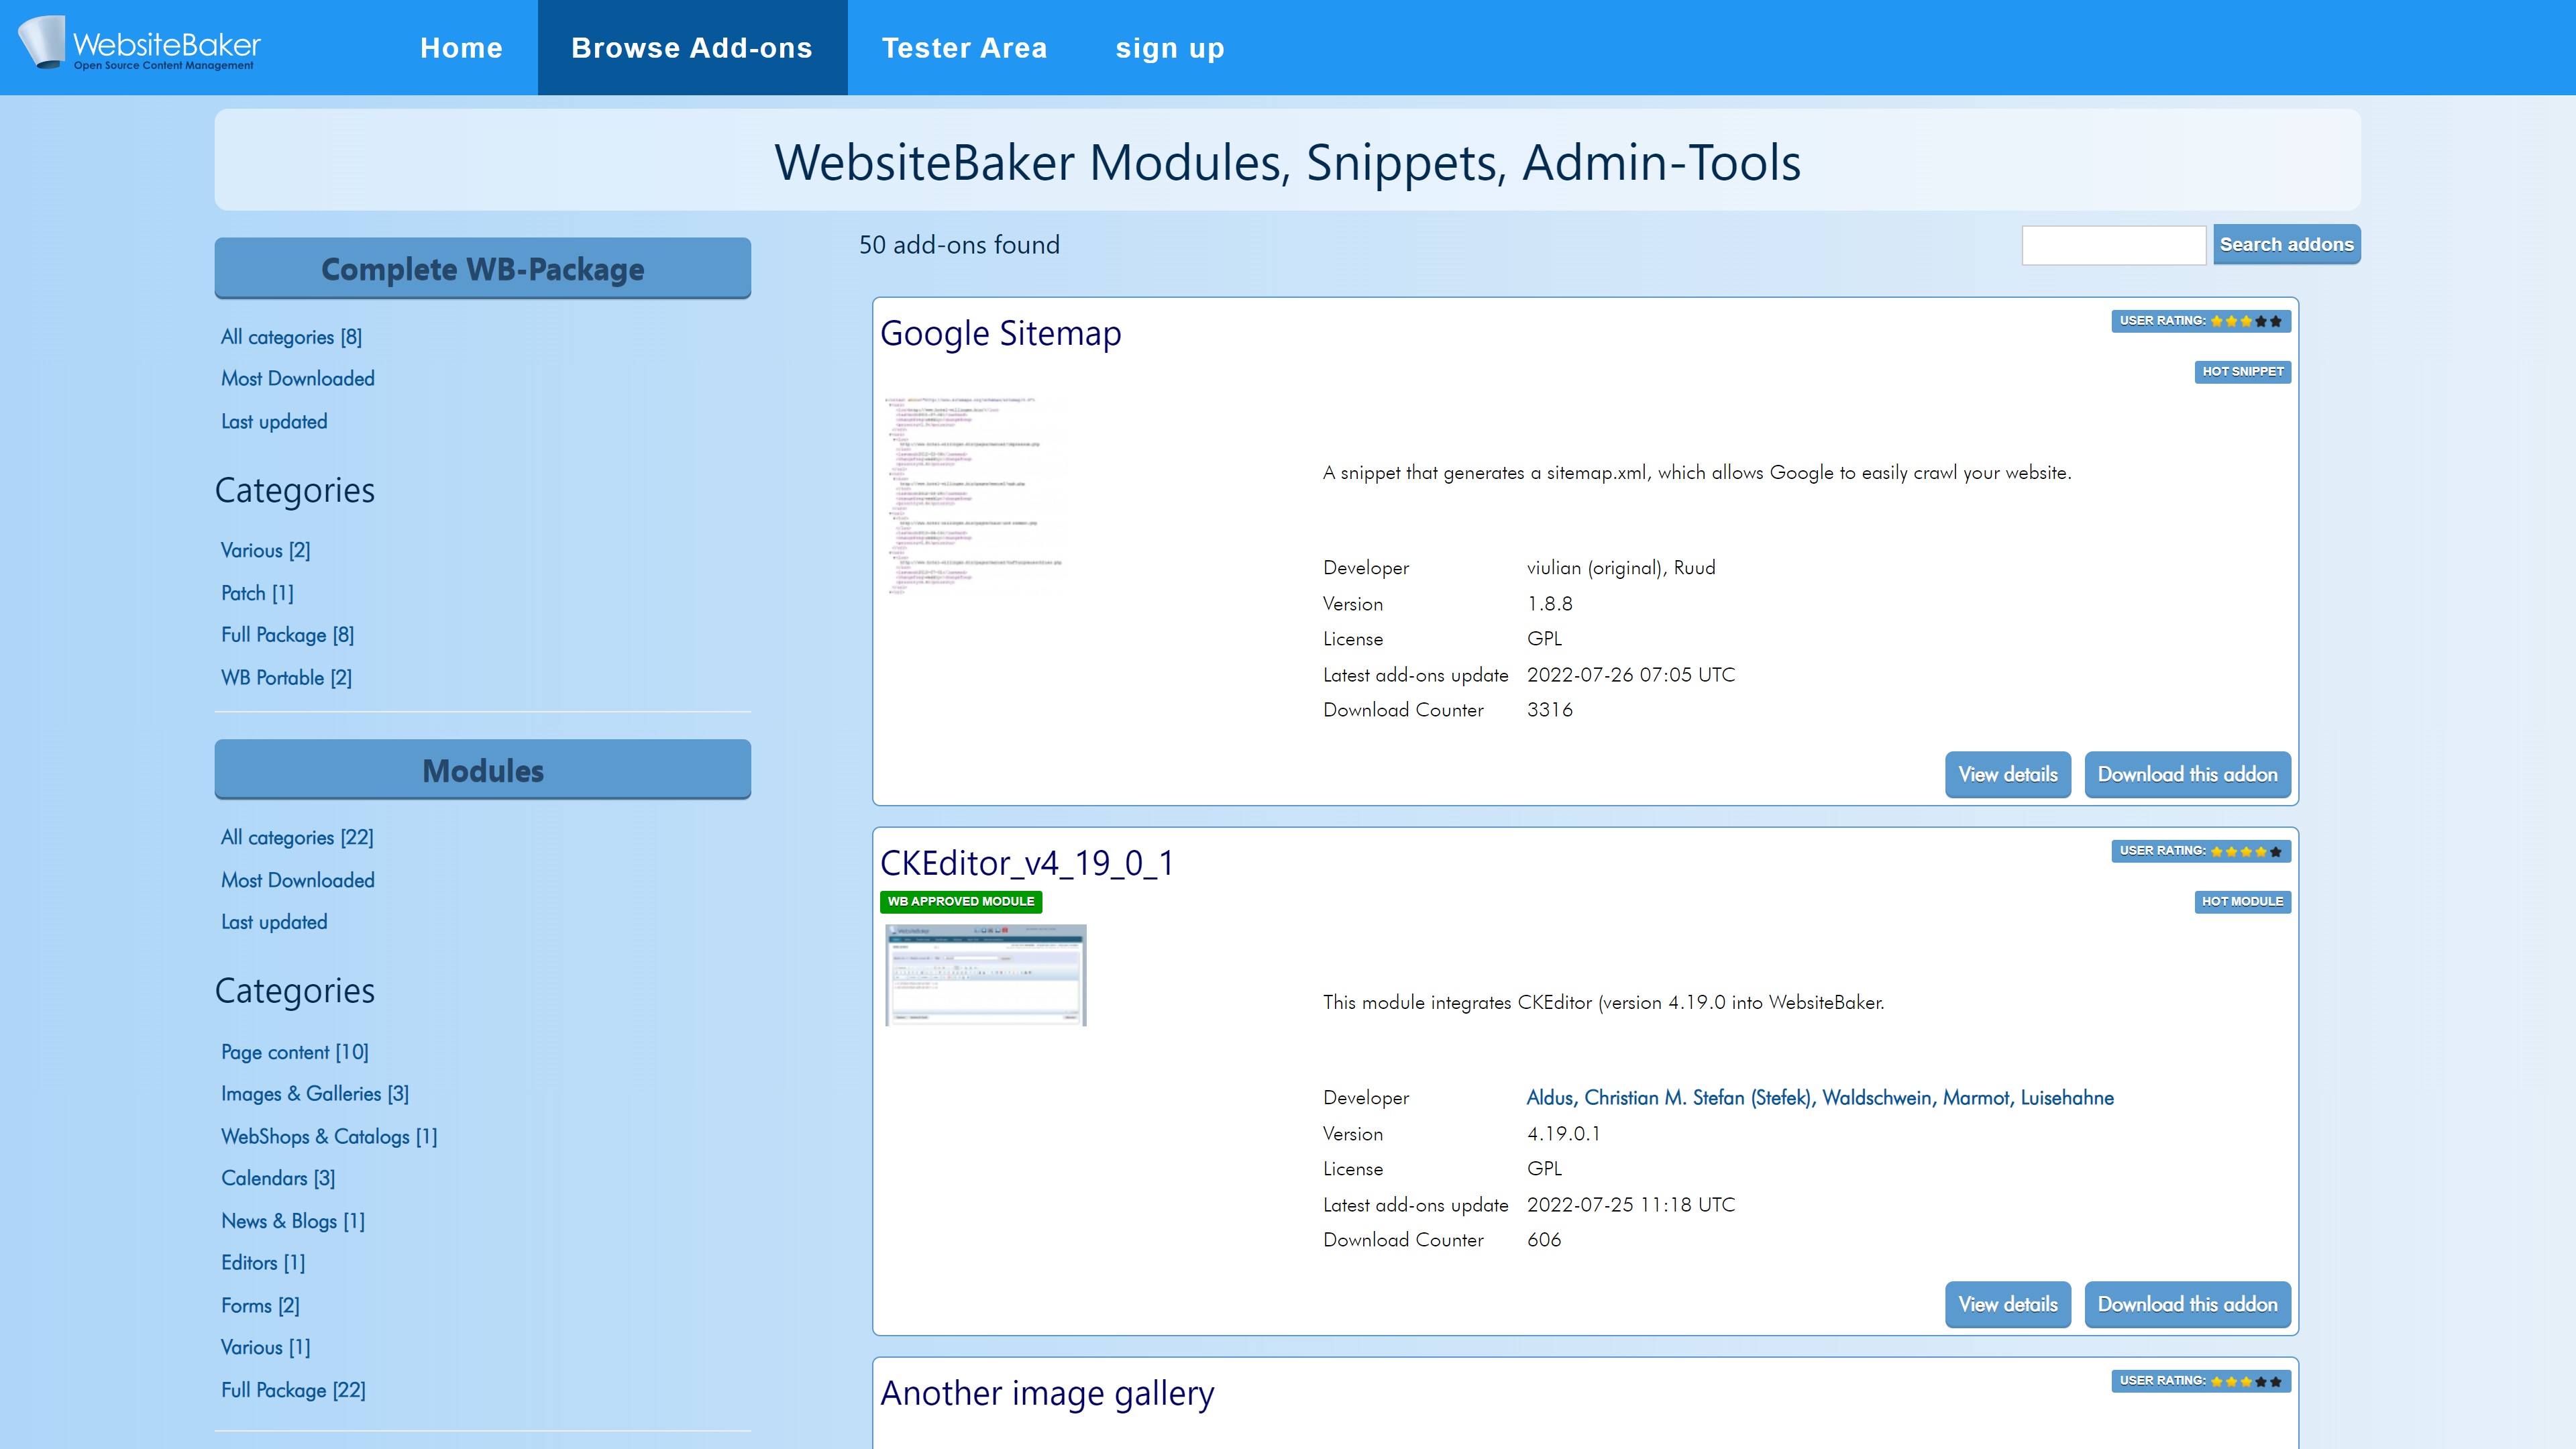
One of the best things about WebsiteBaker is that it enables you to upload various add-ons. For starters, you can install custom modules that enable you to add whatever functionality is required for your website. You can also uninstall existing modules if they’re no longer needed.
What’s more, WebsiteBaker enables you to upload custom templates. You can purchase these from various third-party retailers, and there are plenty of free downloadable options available online. You can also add and remove languages if required.
The WebsiteBaker Add-Ons repository contains a selection of free modules and other add-ons.
Step 3: Fine-tune your design
The base what you see is what you get (WYSIWYG) editor is quite similar to programs like Microsoft Word, and it enables you to customize each page exactly as required. It’s certainly not the most user-friendly interface we’ve used, but it’s actually quite powerful once you get the hang of its nuances.
You can add multiple blocks to each page, enabling you to customize headers, footers, sidebars, and main body blocks individually. There’s also a code importation tool if you already have your website coded.
Step 4: Familiarize yourself with the media library
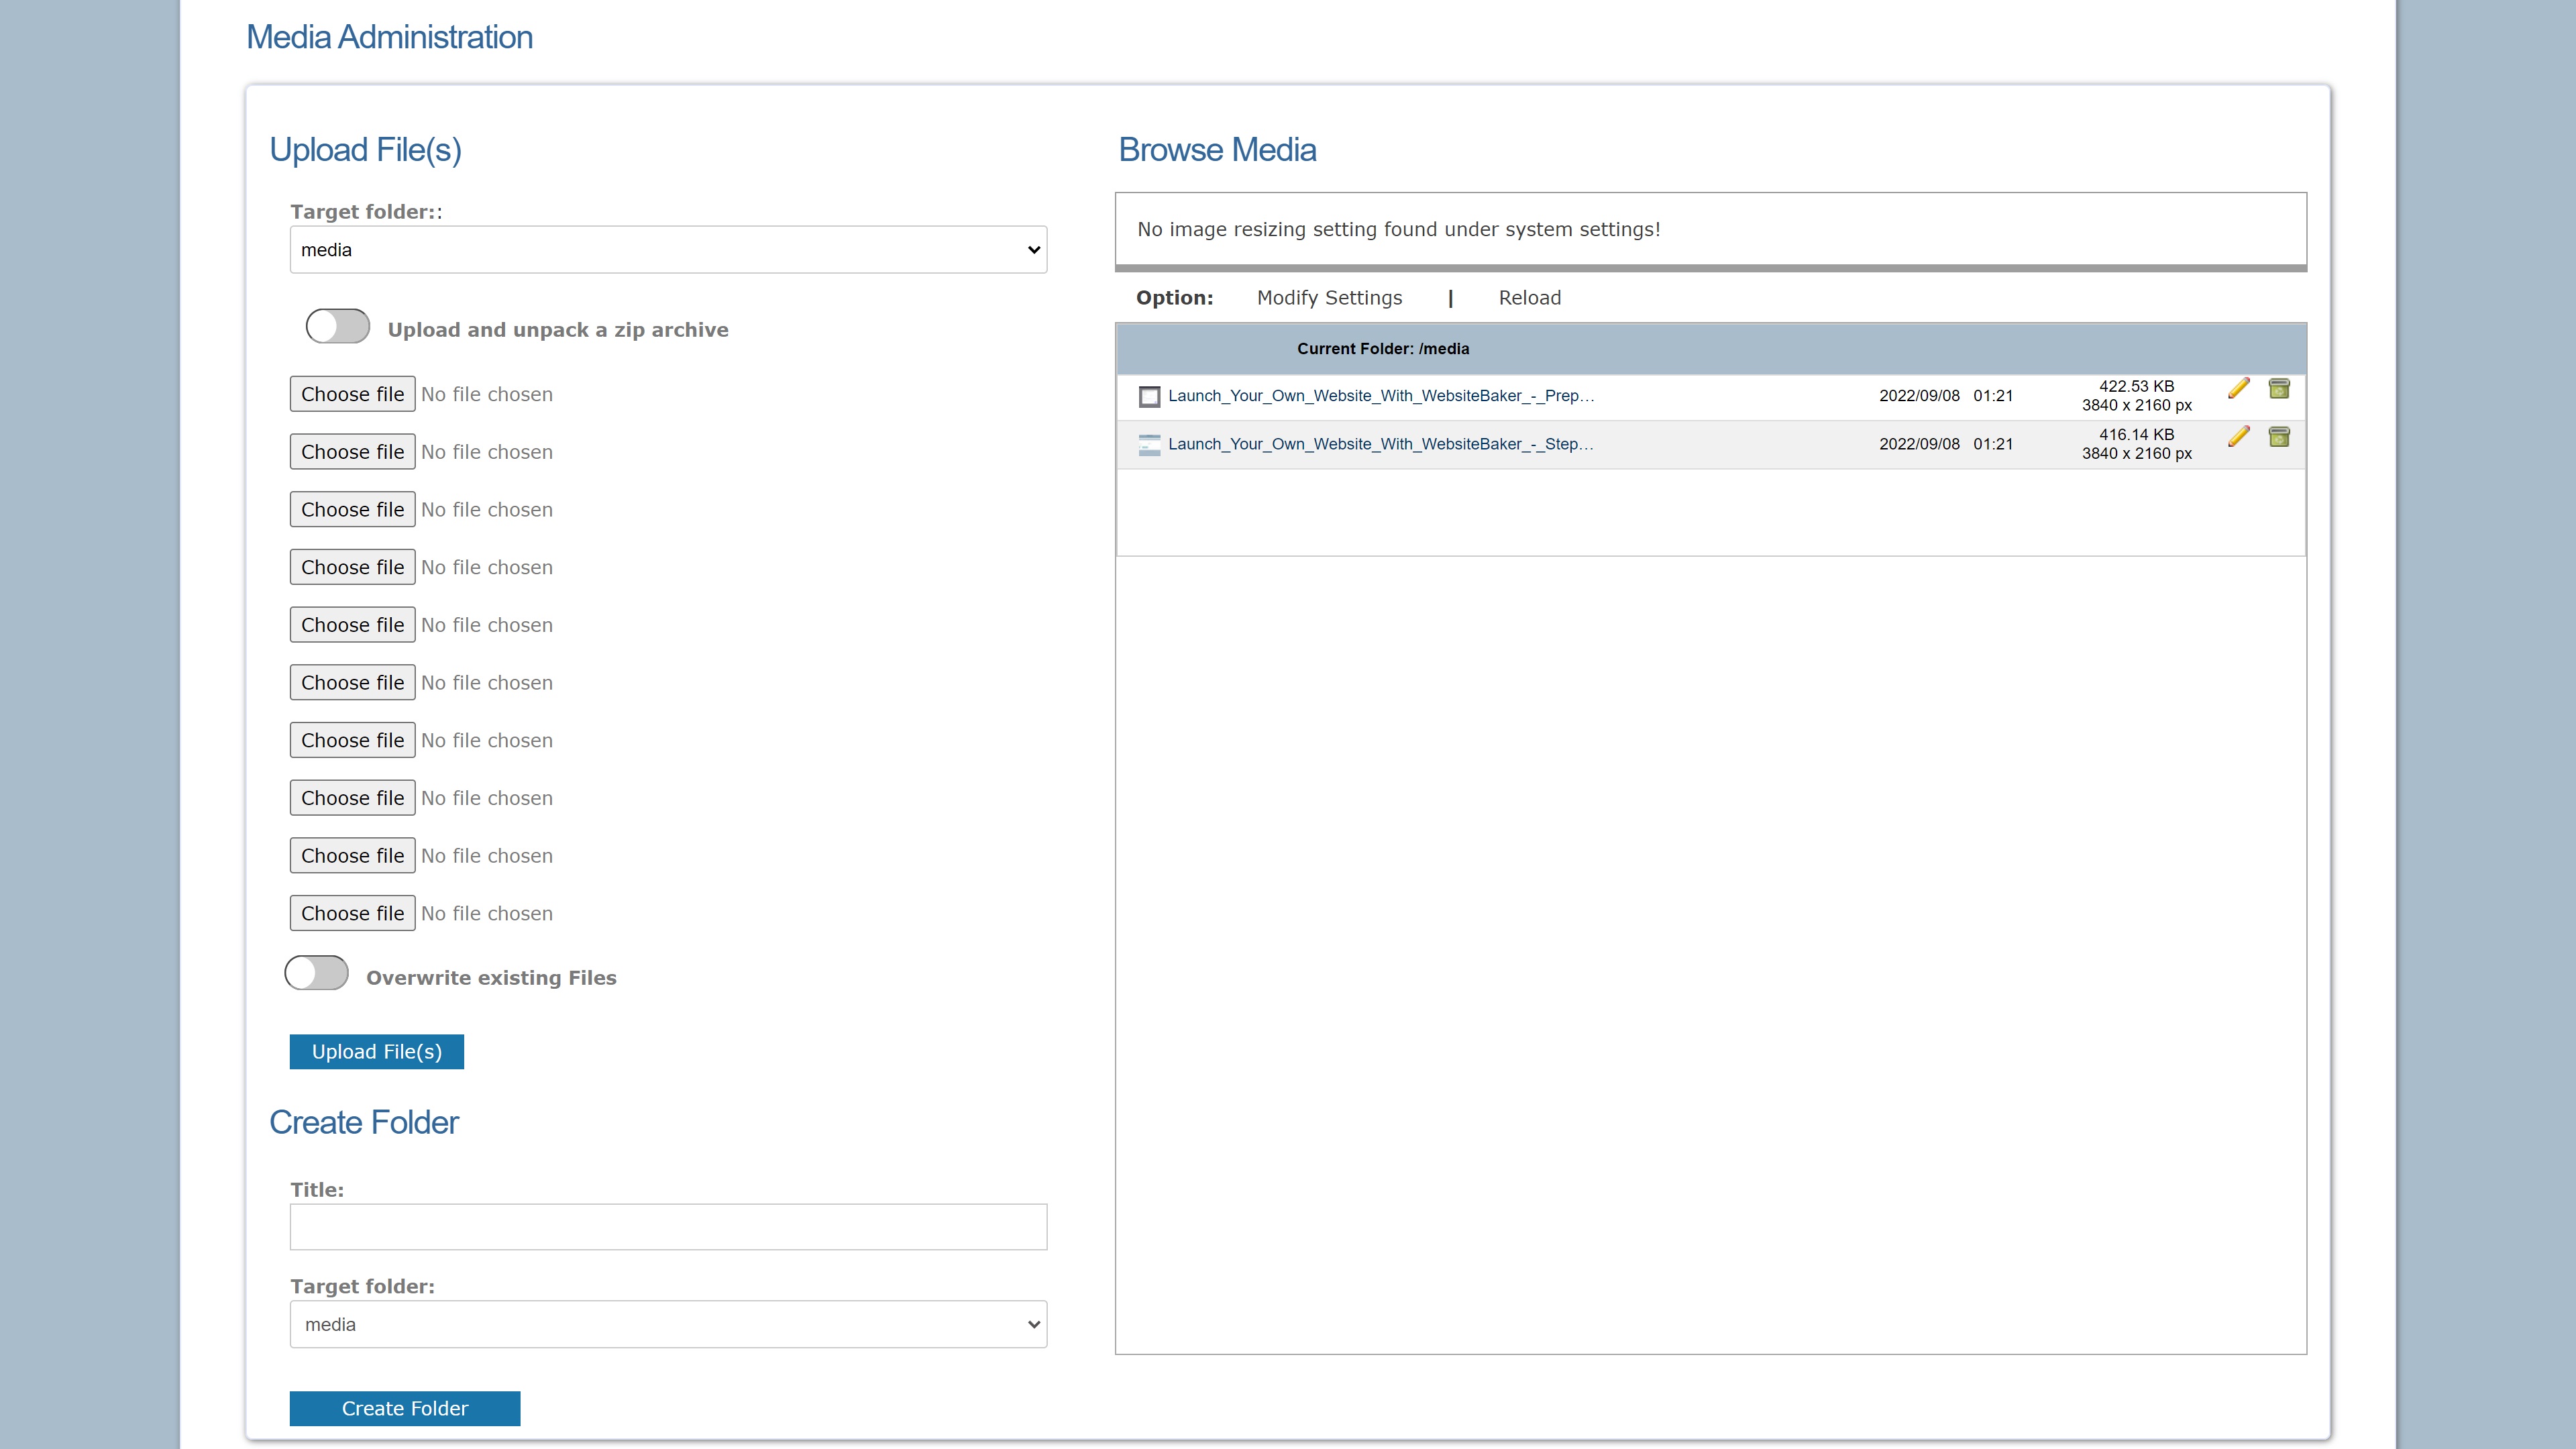
WebsiteBaker’s media management tools are one of its best selling points. It enables you to create customized media folders to help you store images and other media, and you can upload multiple files at once.
It’s a good idea to learn how to use this quite early on, as it will make your life much easier.
Step 5: Configure your site settings
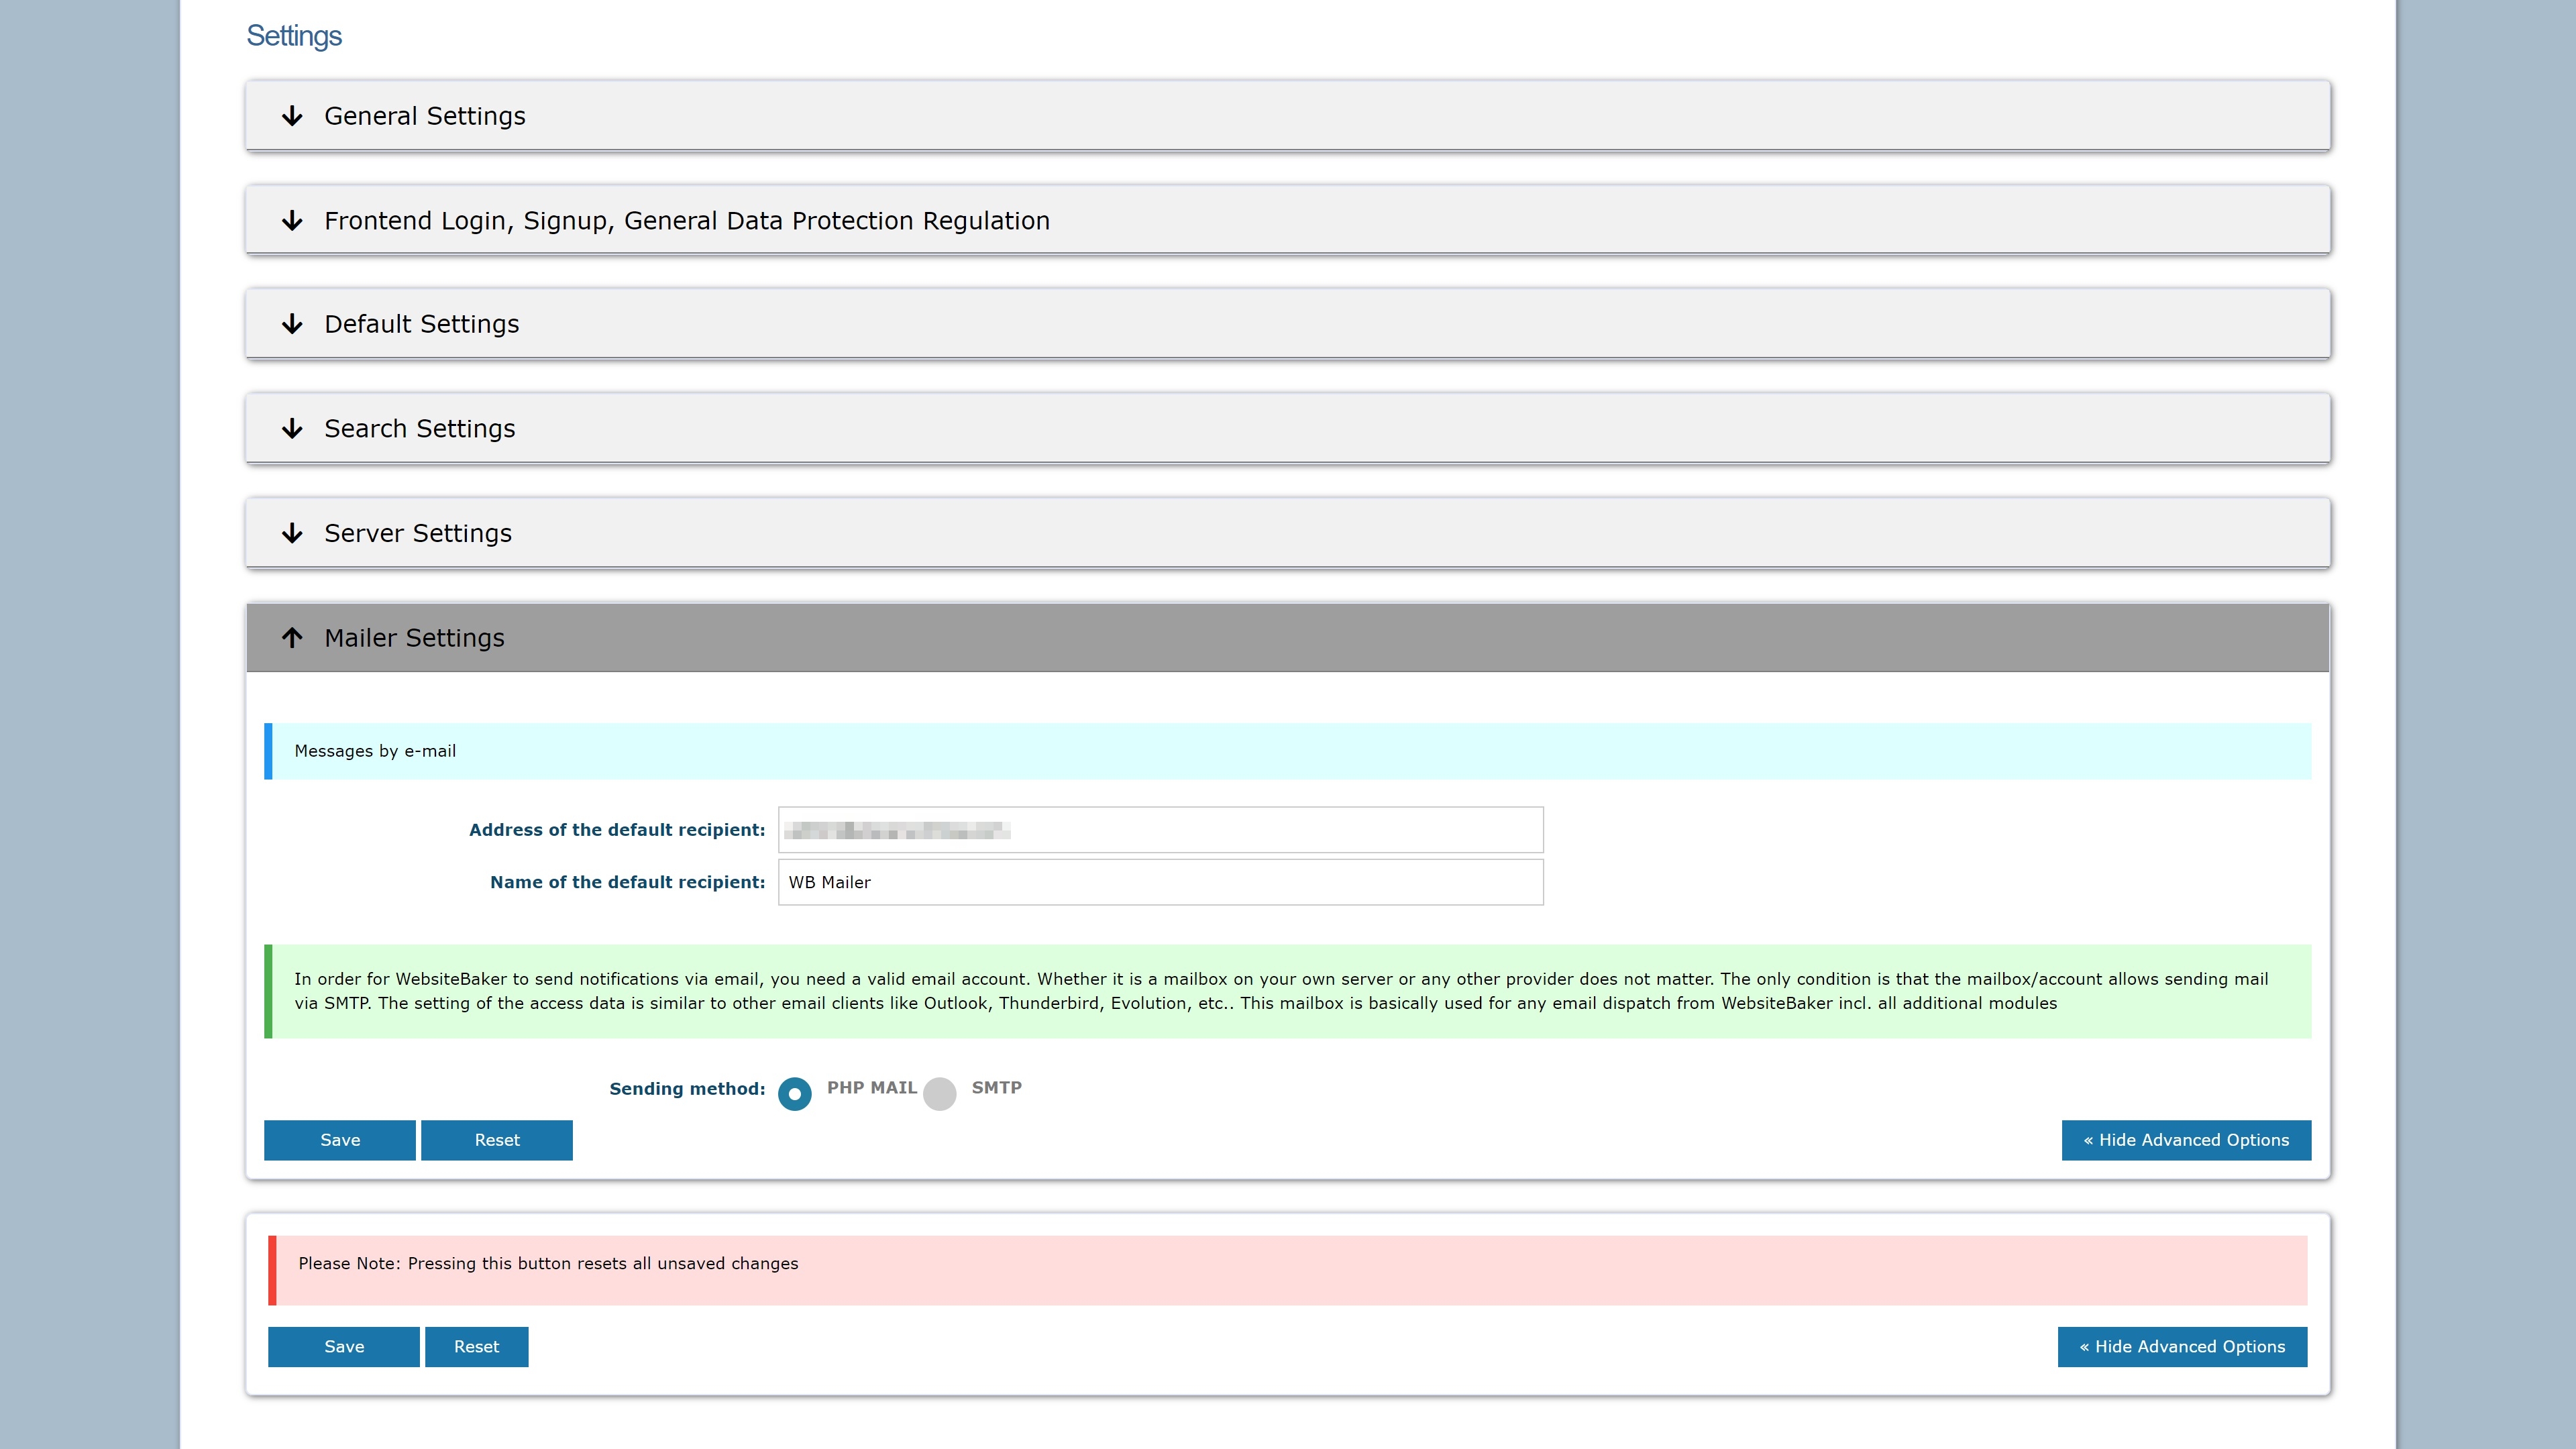
Before you can launch your new WebsiteBaker site, you should configure your website’s general settings. Head to the Settings tab on the main menu bar, where you will find a number of configuration options.
You can add important SEO information such as a meta title, a meta description, and meta keywords. You can also customize global headers and footers. Further down the page, you will be able to set important things like your language and timezone.
Various advanced settings are available enabling you to configure your server, add advanced search information, and more.
Step 6: Test, test, and test some more!
Last, but certainly not least, is the importance of spending time testing your website before its launch. Ensure you test it on different devices and browsers, clicking through each page to ensure everything looks and works as it should.
It’s also a good idea to ask friends and family members to run their eyes over it for you. It’s amazing how many little mistakes you can miss when you’ve been staring at the same screen for hours on end!
Once you’re satisfied that it’s good to go, it’s time to launch your site!
Summary
WebsiteBaker certainly isn’t the most beginner-friendly CMS available, but it’s an excellent option for starting a new website. In this guide, we’ve outlined the basic steps involved with launching your own WebsiteBaker site, making the process as easy as possible for you.
You might like to read our guide to the best CMS for launching your website if you’re not set on using WebsiteBaker. Alternatively, check out the best website builders on the market for a more beginner-friendly alternative.
Read more in this series:
- How to start a blog with Joomla
- Build your own CRM using SugarCRM
- How to host your files online using Nextcloud Hub
- How to start your own help desk with Hesk
- How to build an HR System using OrangeHRM
- How to generate your own invoices using Invoice Ninja
- How to install live chat software with Sales Syntax
- Run your own ecommerce platform with PrestaShop
- How to create your own website with Soholaunch
- How to learn search engine optimization with SEO Panel
- How to kickstart your own Ancestry.com alternative with webtrees
- How to install a free ERP software called Dolibarr
- Demand gen vs lead gen: What's the difference?
- Host your own private forum with MyBB
- Build your own calendar application with WebCalendar
- Set up your own groupware service with Tiki Wiki CMS
- How to build your own email marketing service with phpList
- A Google Photos alternative: Store your photos online with Piwigo
- How to start with project management using The Bug Genie
- Make your own poll platform with LimeSurvey
- Roll out your own Wikipedia clone with MediaWiki
- How to host your own learning management software with Moodle LMS
- Set up an accounting system with FrontAccounting
- Produce your own bills with BoxBilling
Daniel is a freelance copywriter with over six years experience writing for publications such as TechRadar, Tom’s Guide, and Hosting Review. He specializes in B2B and B2C tech and finance, with a particular focus on VoIP, website building, web hosting, and other related fields.
