How to learn search engine optimization with SEO Panel
Take advantage of this powerful, open-source SEO software

There are loads of cloud-based and downloadable SEO tools out there, but most of the ones that are worth using require a premium license. These can become very expensive, very quickly.
However, we’ve found an excellent exception to the rule. SEO Panel is a free open-source program that’s up there with the best search engine optimization tools available. It’s self-hosted, which means you will need to have a hosting account to use it, but this doesn’t have to cost more than a few dollars per month.
In this article, we’ve outlined the basic steps involved in setting up and getting started with SEO Panel.
How to learn search engine optimization with SEO Panel: Preparation
Before you can use SEO Panel, you will need to purchase web hosting, which provides you with the server and other infrastructure to run the program. We used Hostinger, a top-quality web host that offers some of the best prices in the industry.
To get started, you will need to install SEO Panel on your Hostinger server. On the hPanel control panel, you will find the Hostinger Auto Installer, which you can use to install SEO Panel in just a few minutes. Full instructions are available here.
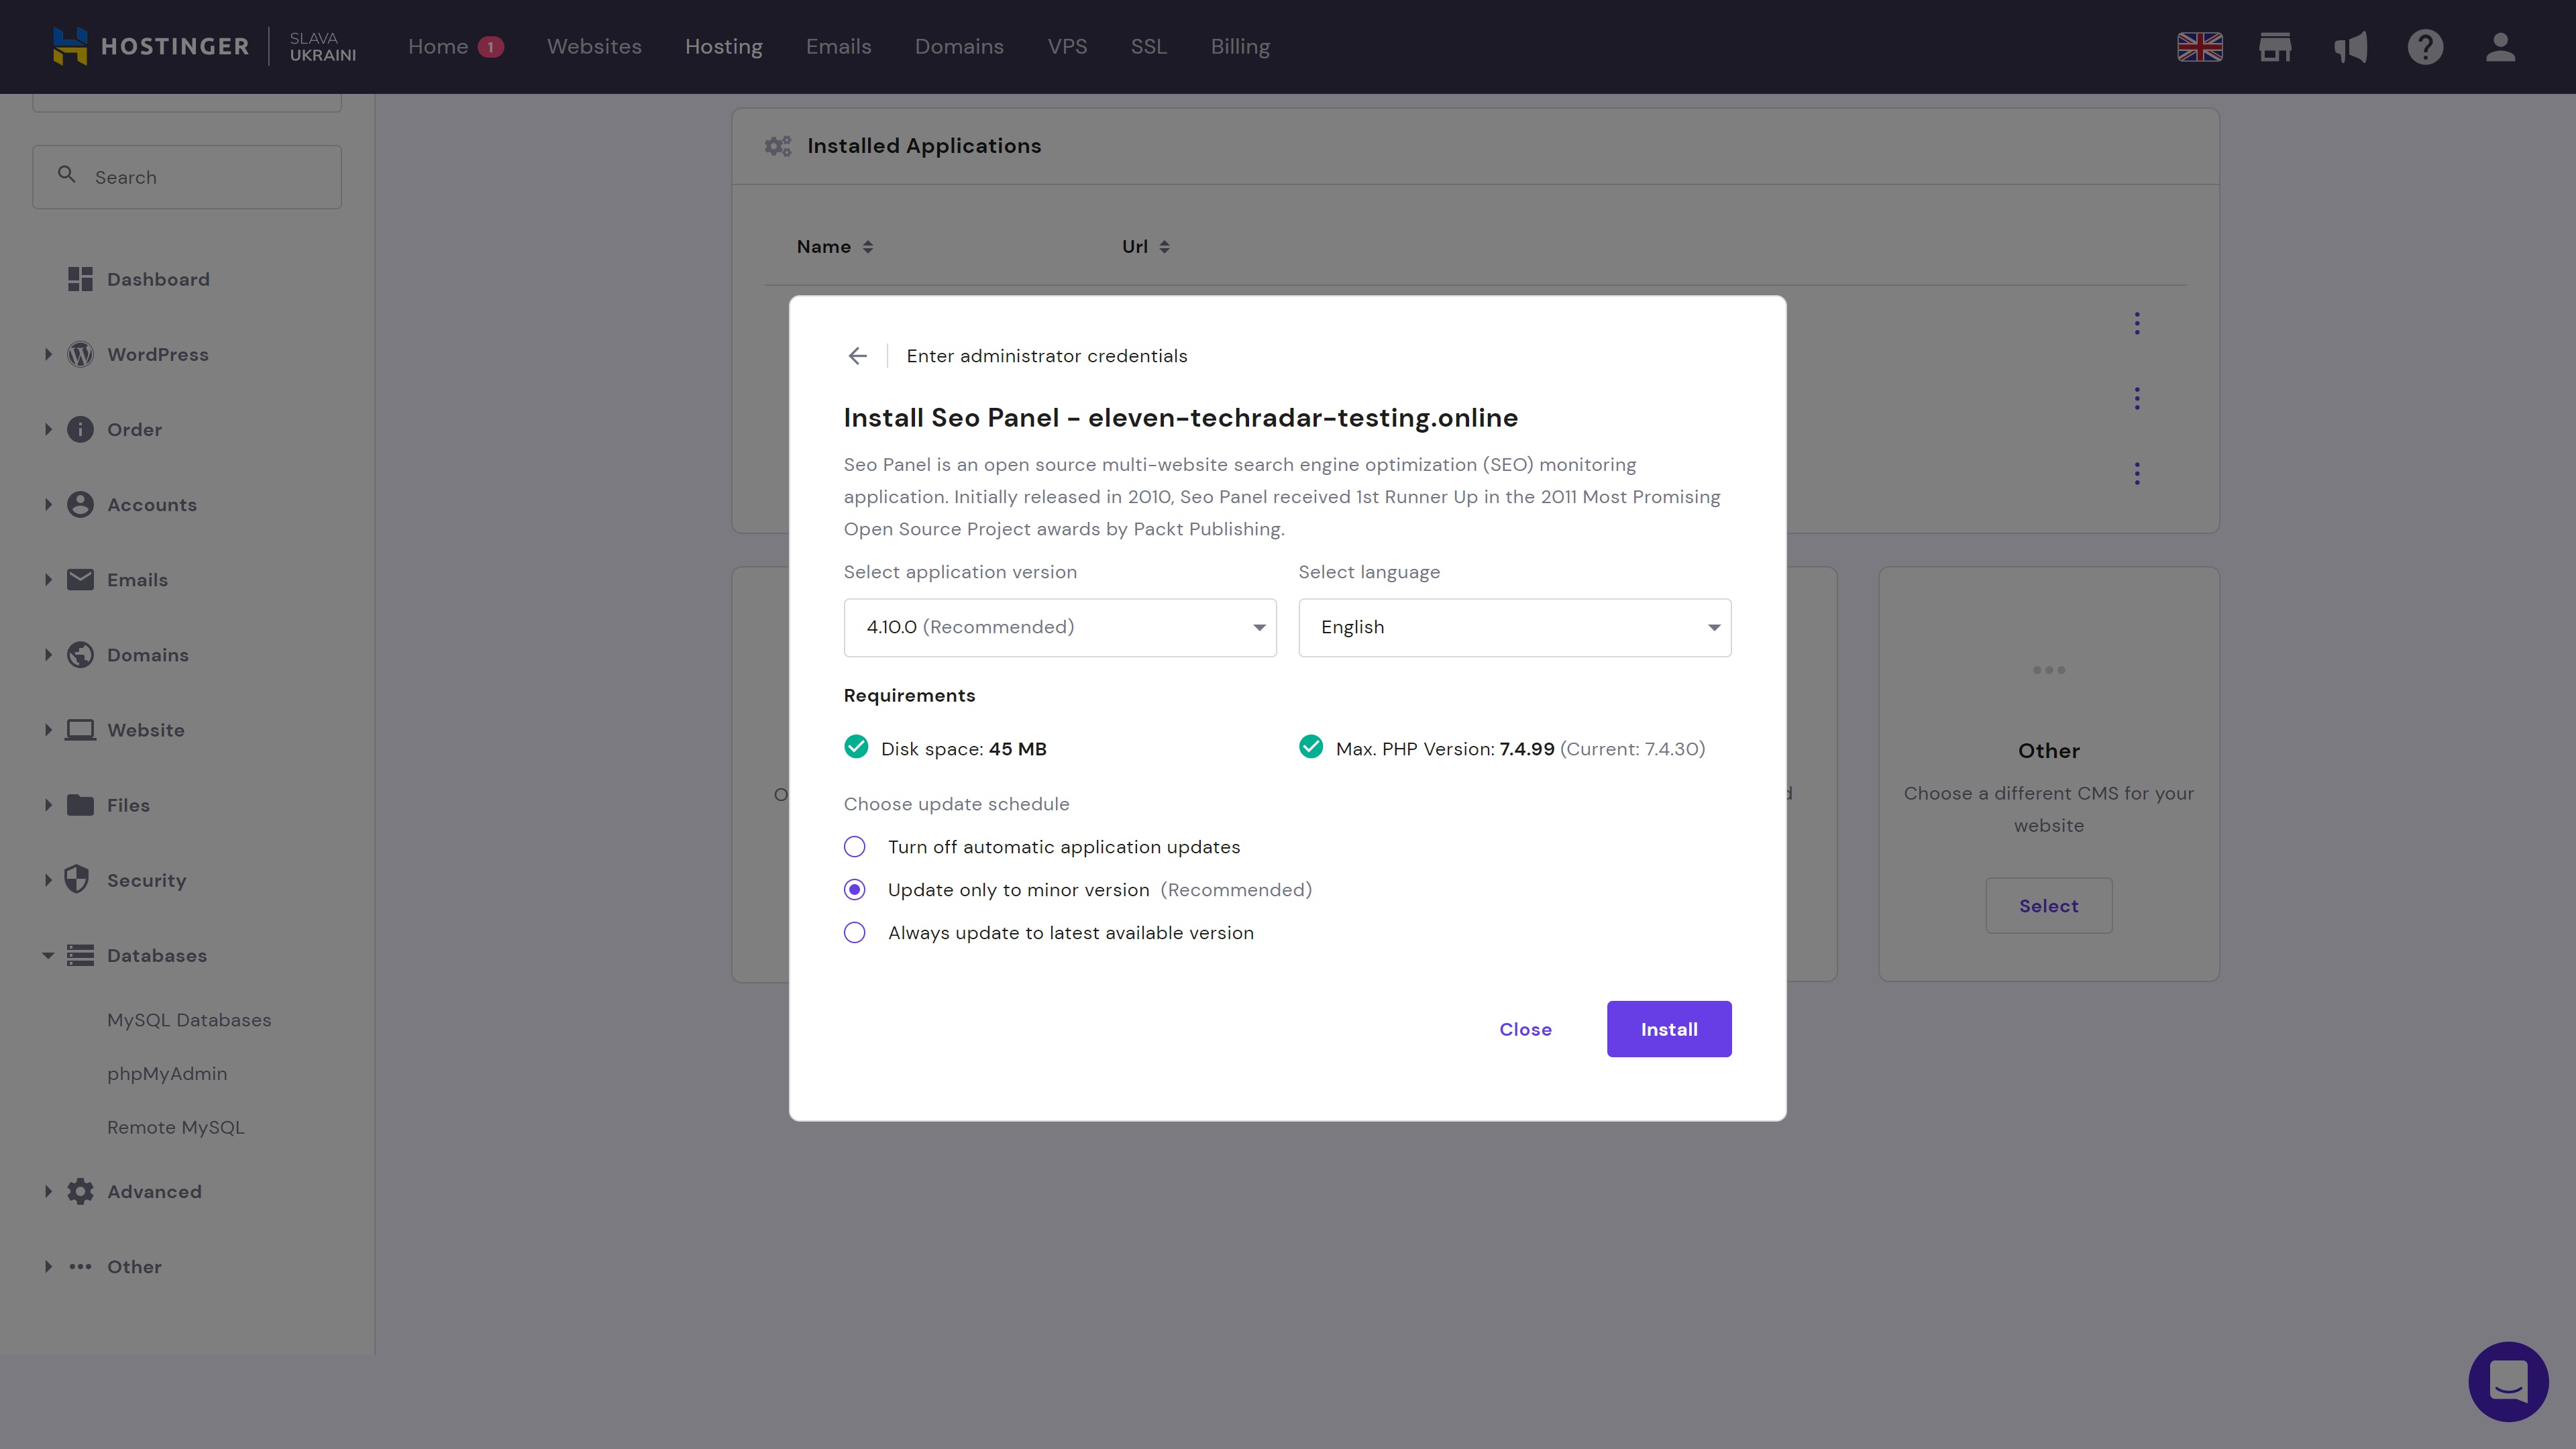
To install SEO Panel, simply follow the installation prompts. You will need at least 45MB of disc space, and you can select from numerous installation languages. Once you’ve worked through this process, it’s time to start learning how to use SEO Panel!
Be aware that you will need to return to the Auto Installer to manage your configuration in the future.
Are you a pro? Subscribe to our newsletter
Sign up to the TechRadar Pro newsletter to get all the top news, opinion, features and guidance your business needs to succeed!
Step 1: Add your website
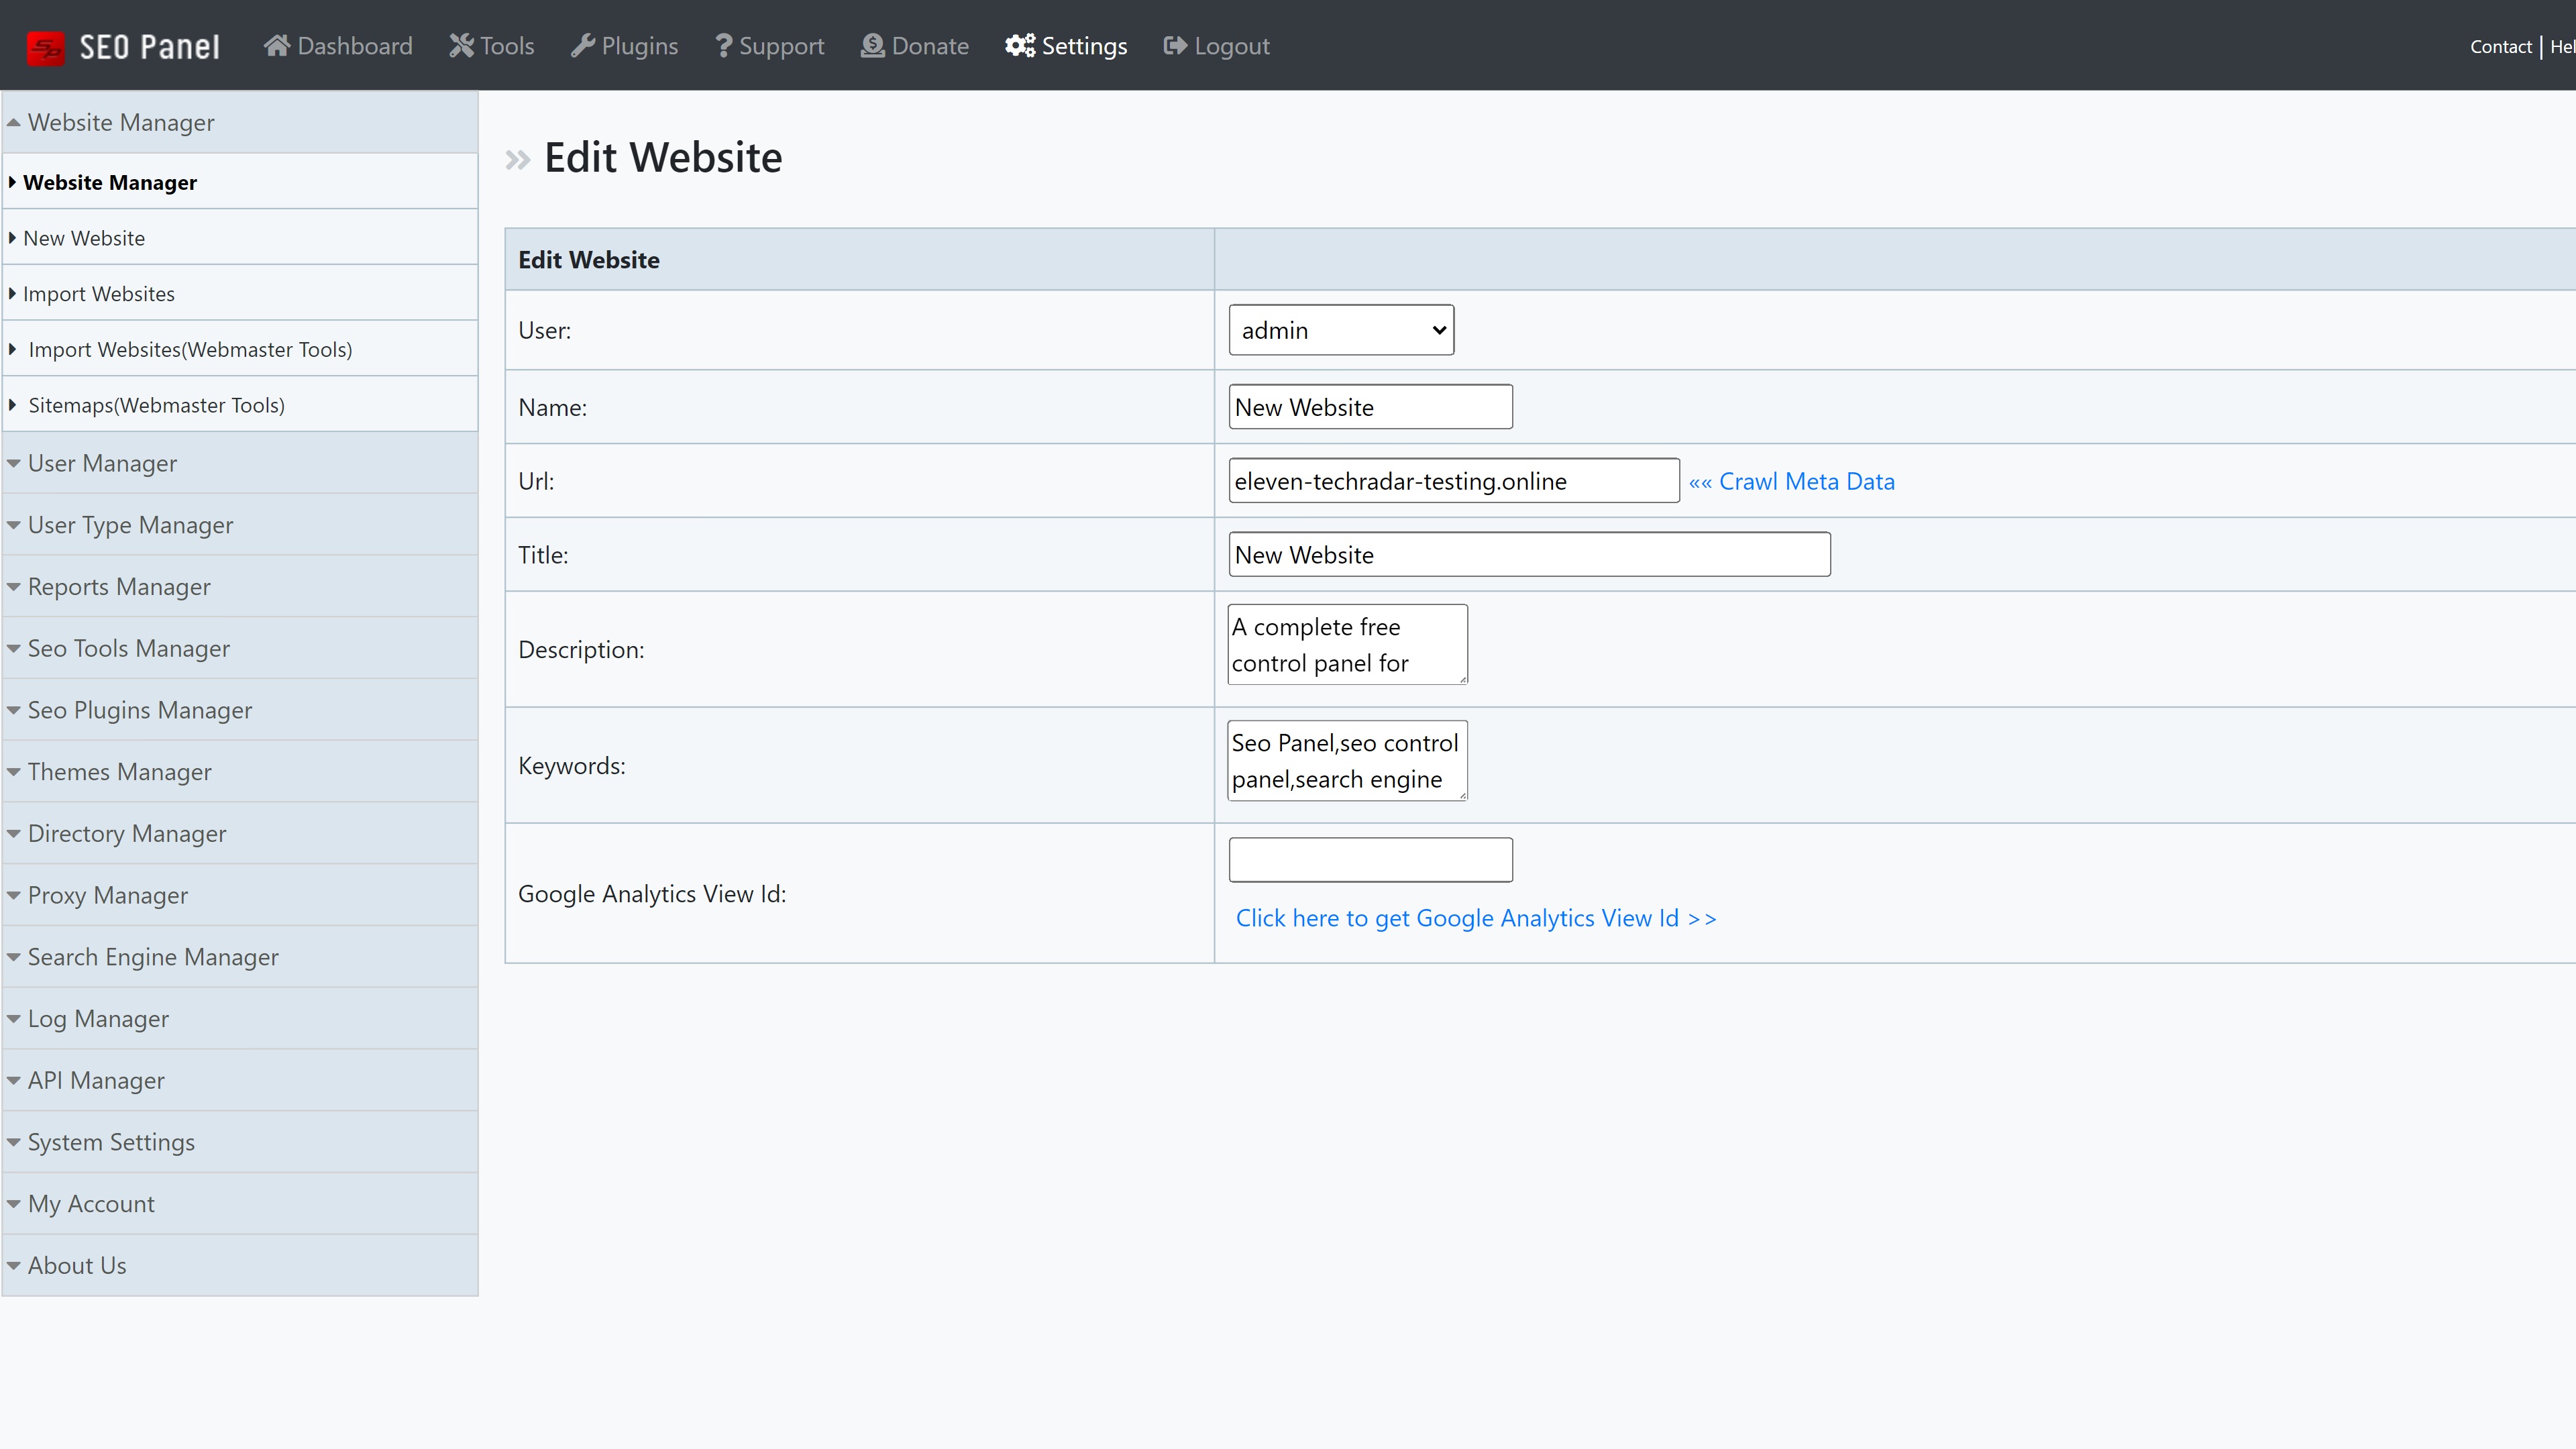
First up, you will need to add your website to enable SEO Panel to track and analyze it. To do this, log in to your SEO Panel and head to the settings tab. Click on the Website Manager tab on the left of the screen, and then select the New Website button to create a new site profile.
Adding a new site is super easy. Enter the URL where prompted, and click on the Crawl Meta Data button to fill in the rest of the information. Select Proceed, and you can start learning the ins and outs of SEO with this wonderful tool.
Step 2: Familiarize yourself with the main dashboard
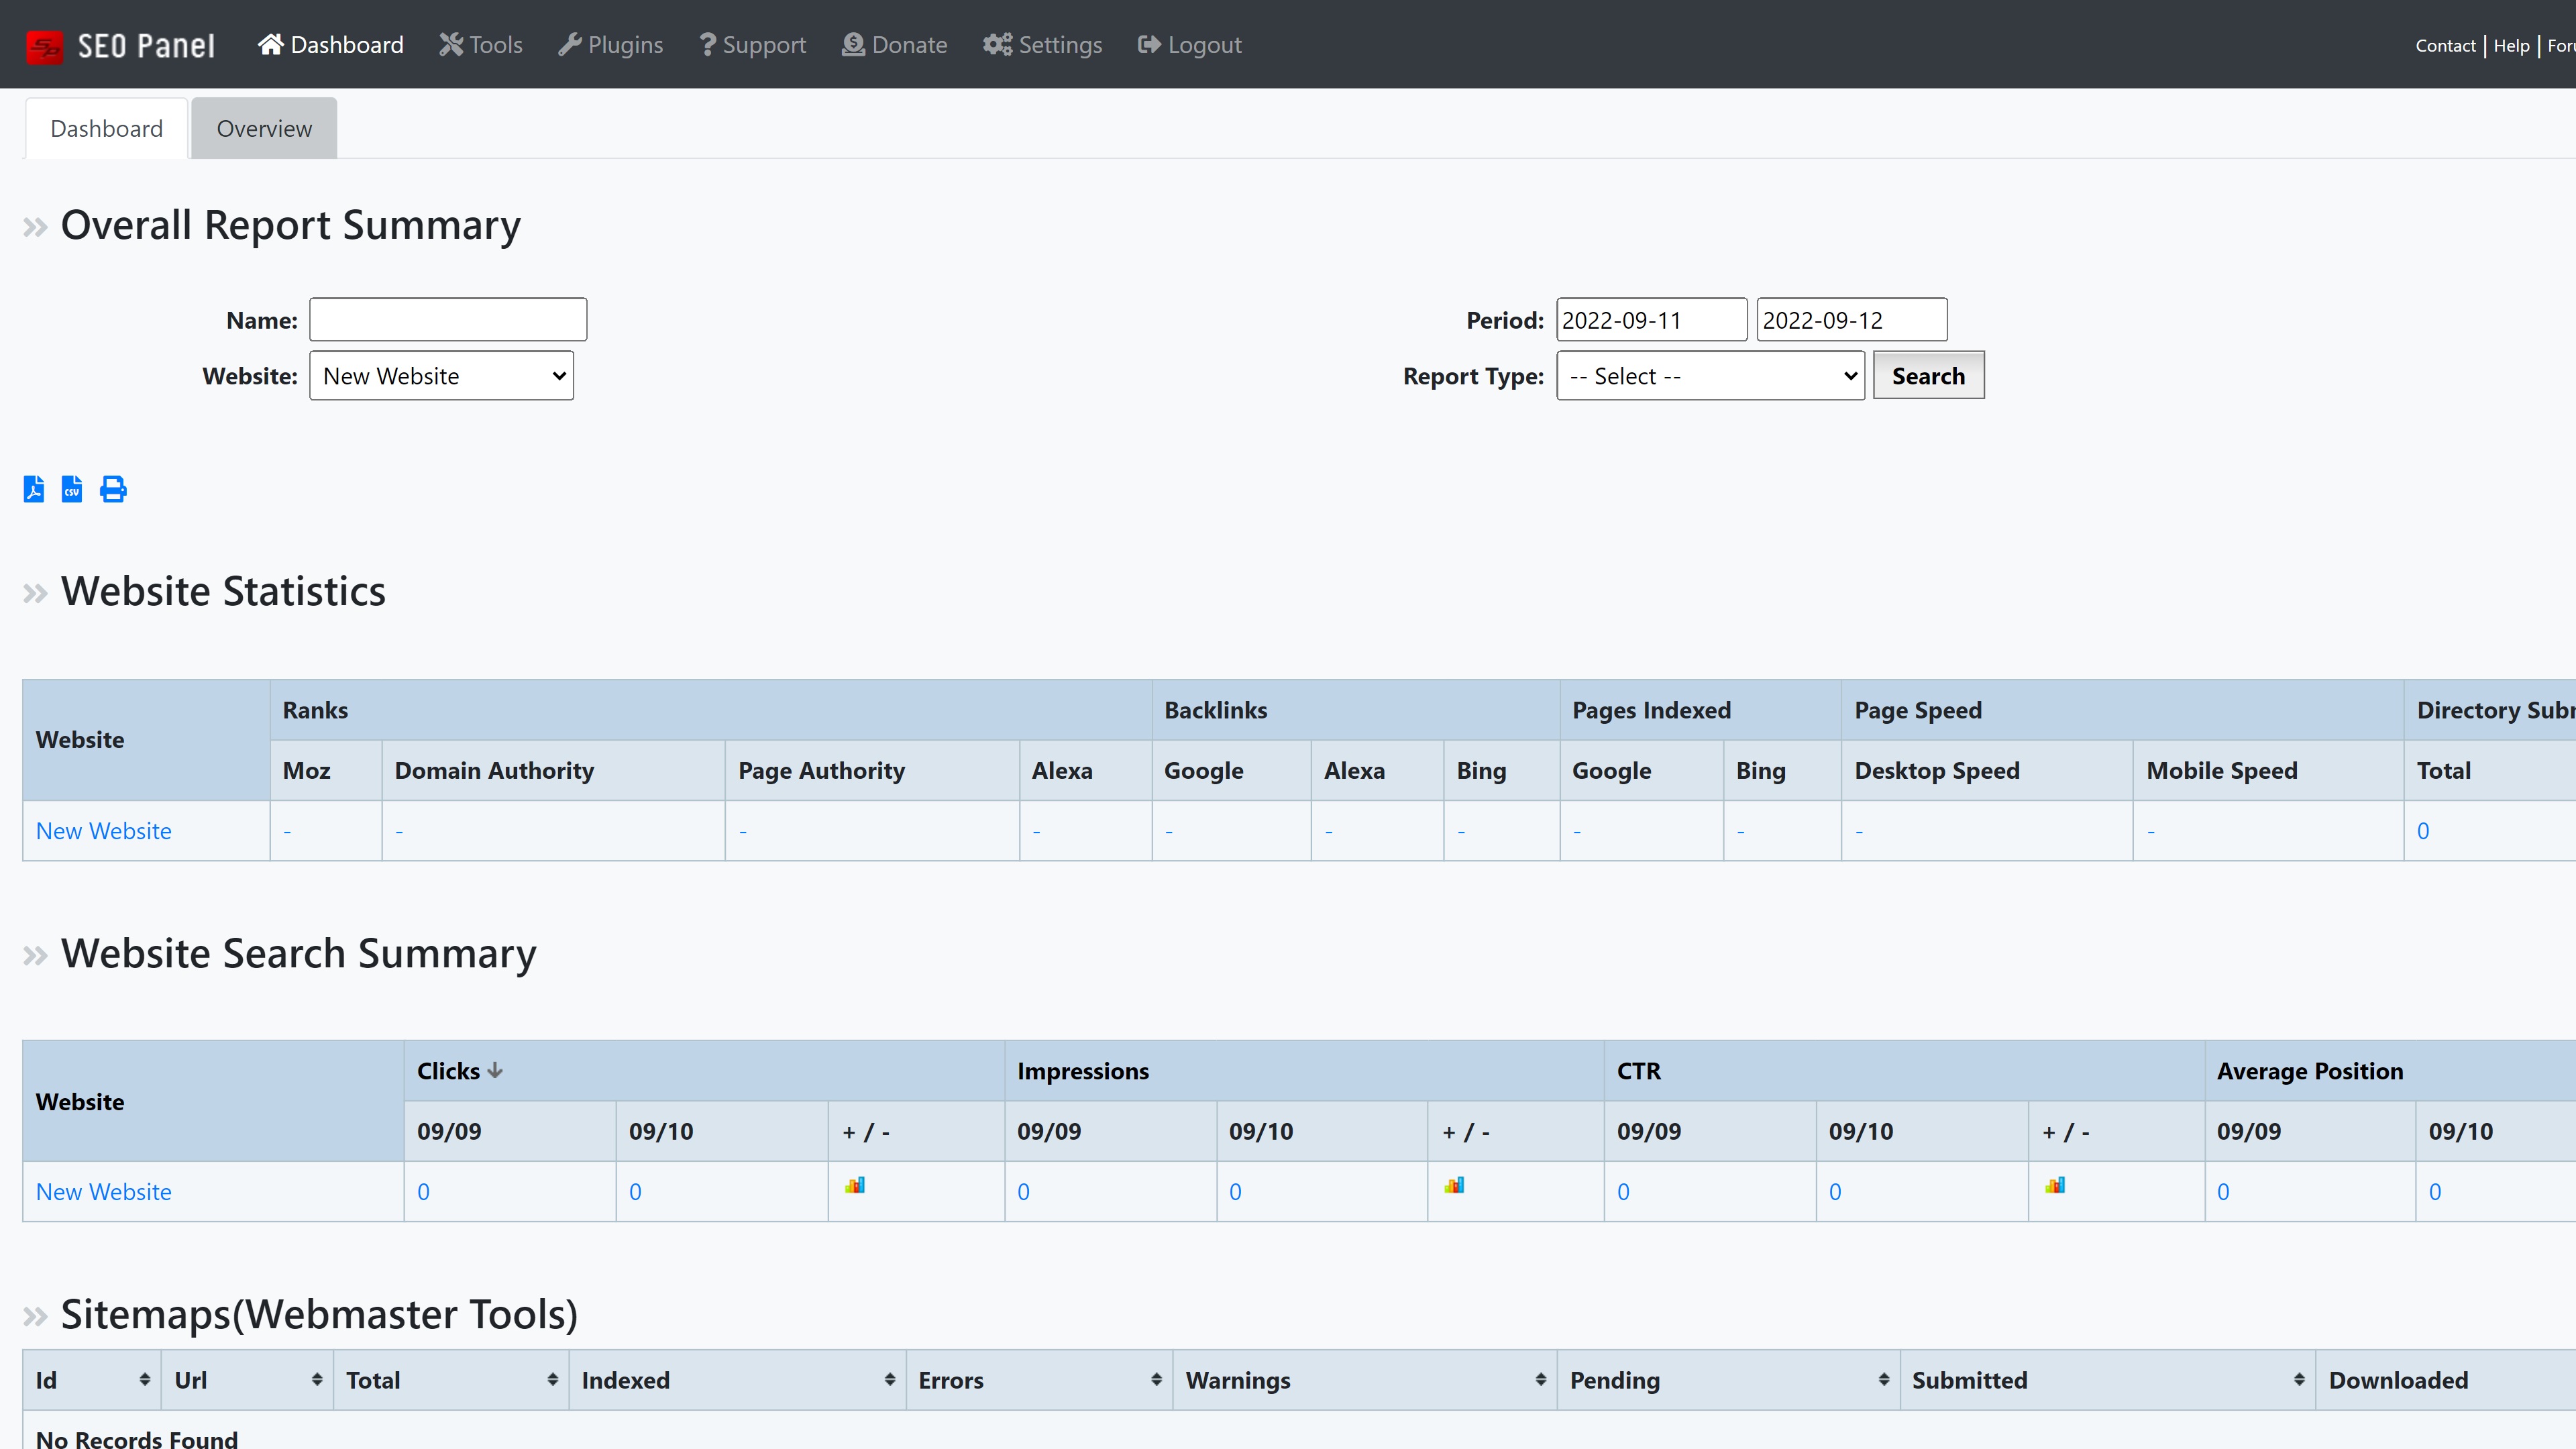
Next, we’d suggest taking a few minutes to browse the main dashboard and familiarize yourself with the information presented there. The very first thing you will see is a report generator which you can use to create highly detailed reports about each of your websites.
Below this, you will find basic information about your website stats, including your domain ranking, backlinks, page speed, and more. Data about your performance in the search results is also clearly outlined, along with more advanced information about keyword performance, site analytics, and social media use.
Step 3: Learn how to use the built-in tools
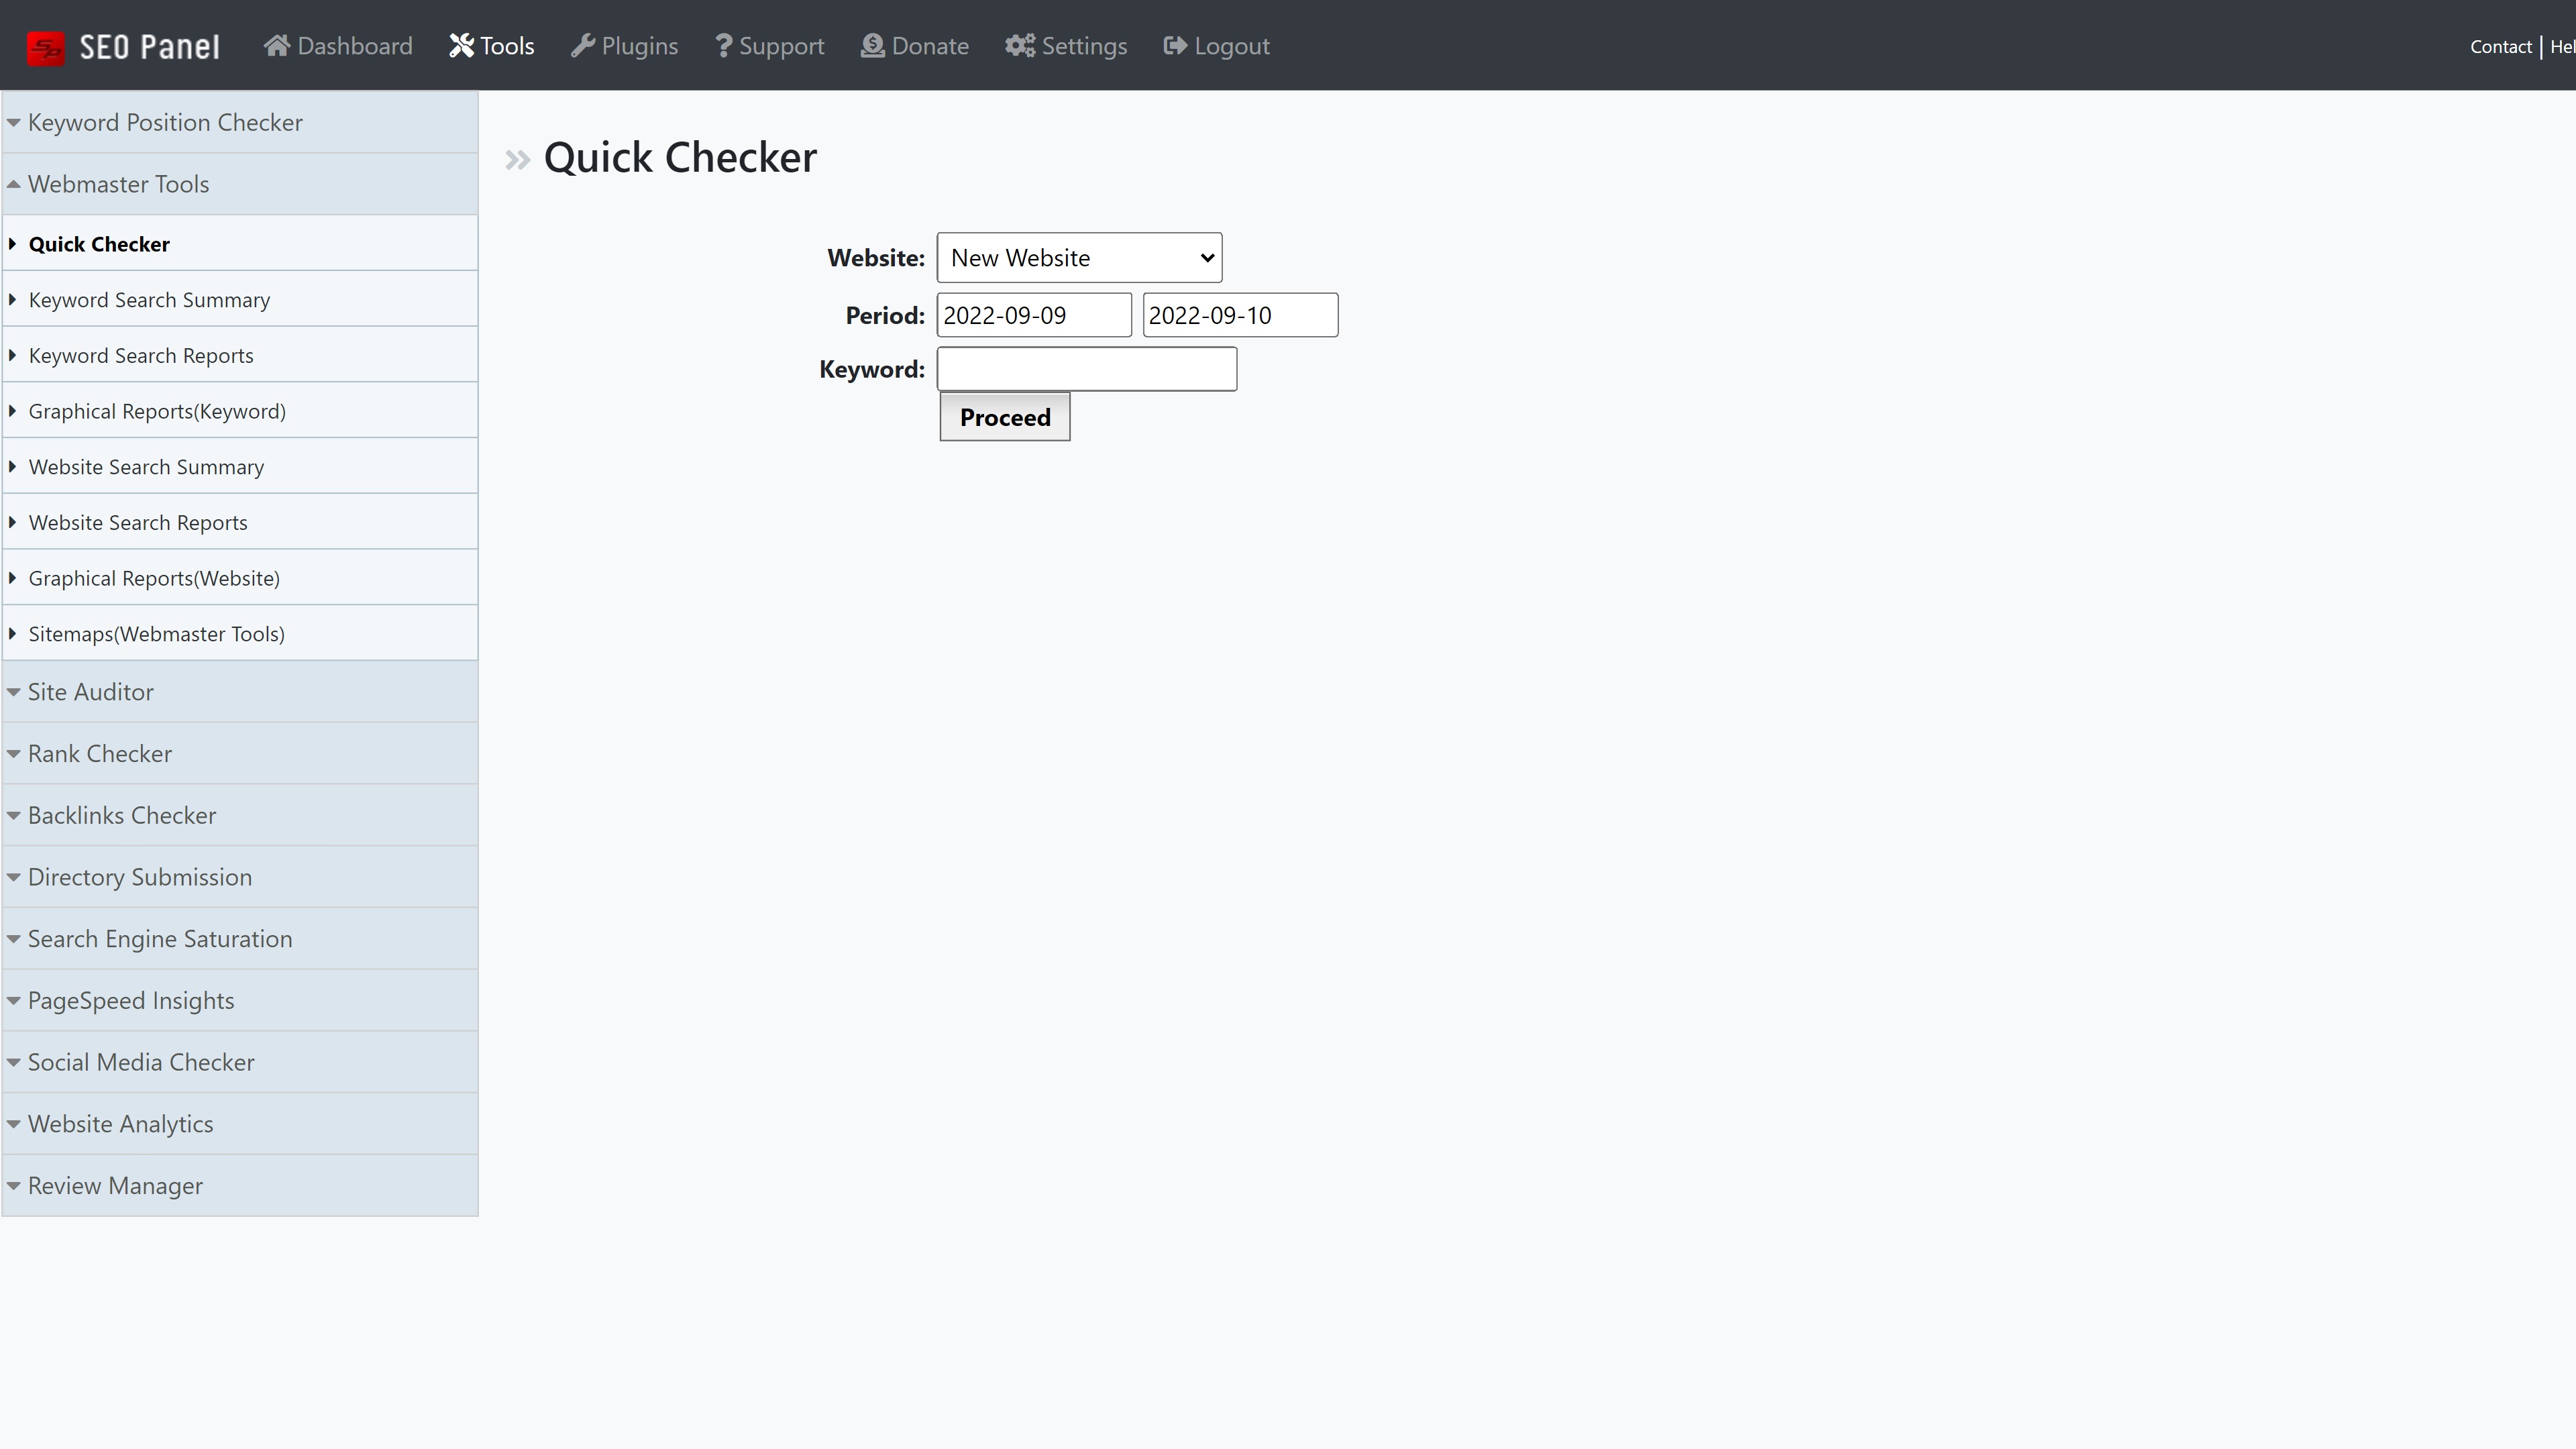
SEO Panel offers so many useful tools that it would take an entire series of articles to explain how to use them all. Fortunately, in-depth documentation is available and outlines everything you need to know about the program. We’d suggest following this closely, as you will learn how to use the platform’s SEO tools.
One of the most notable tools is the keyword position checker, which enables you to track the performance of numerous keywords. There is also a full site auditor that generates a complete report of your website’s SEO health, a rank checker, and a suite of webmaster tools, among other things.
Step 4: Check out the plugins
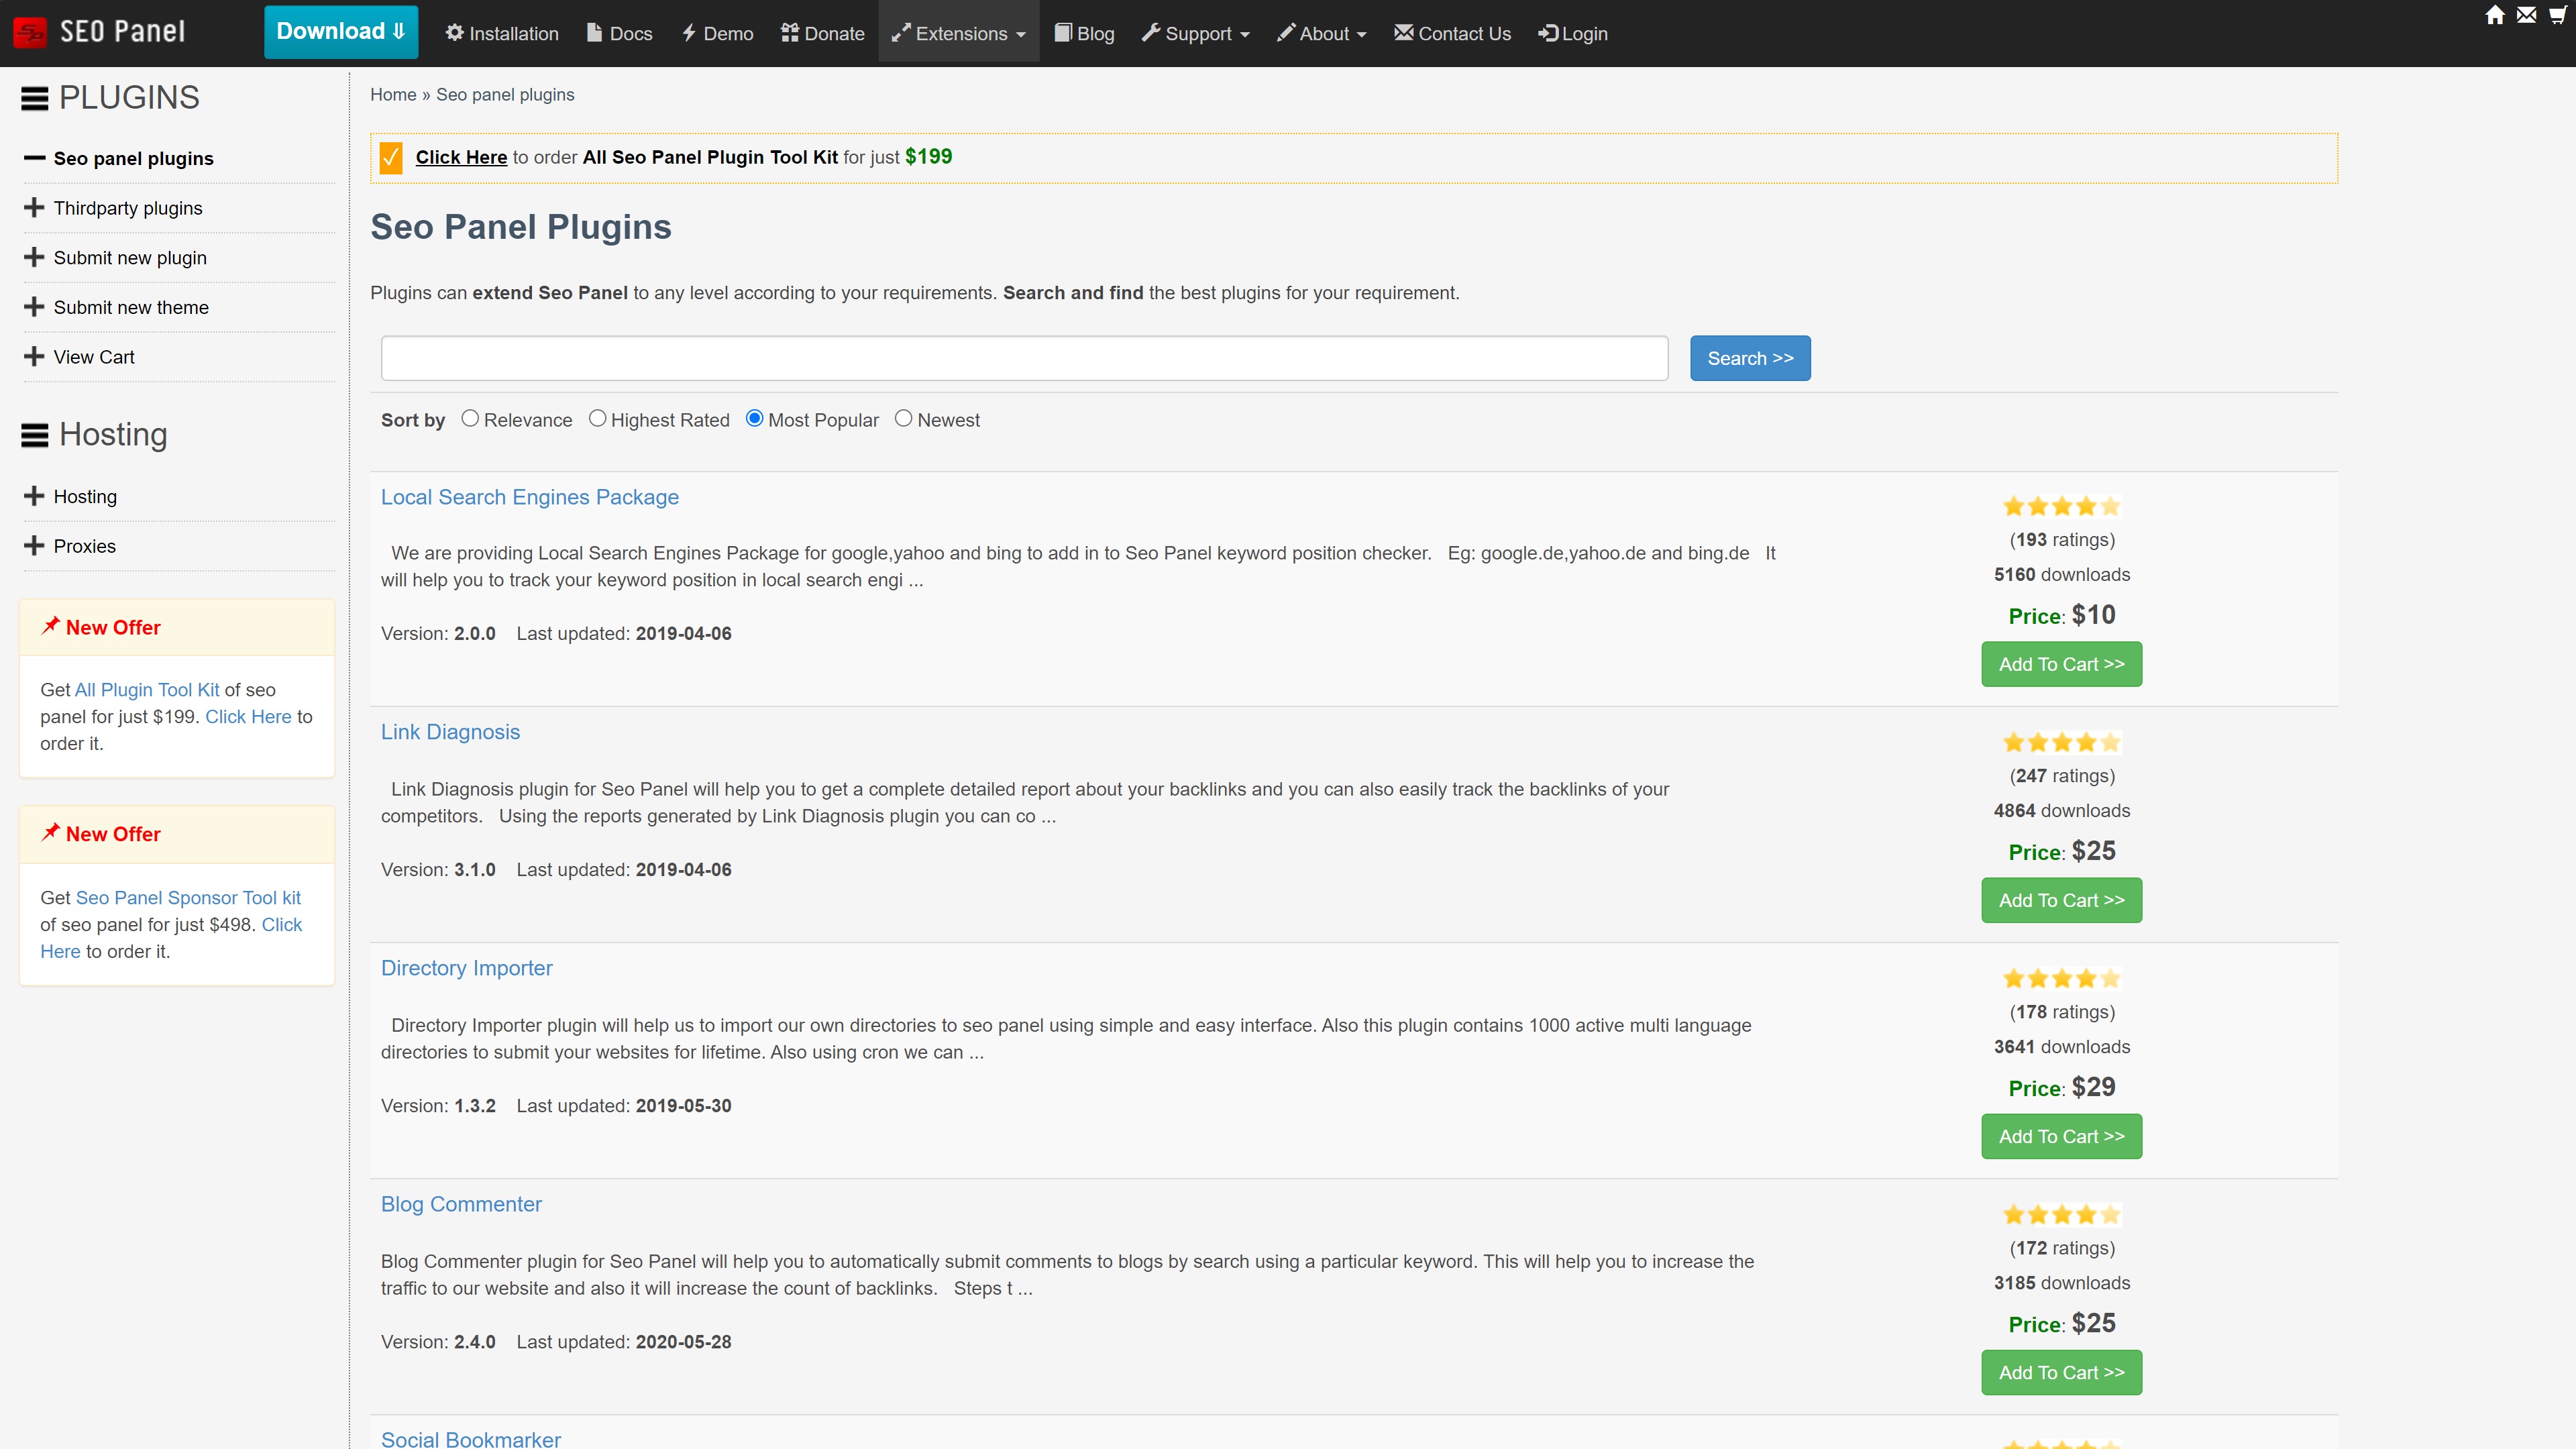
A wide range of plugins are available in the SEO Panel Plugin Library, and we’d suggest checking them out. A few of these are free, but most come with a small one-time fee that supports the developers and helps to keep the platform up and running.
For example, the SEO Panel All Plugin Tool Kit (Silver) contains 11 different plugins that have been developed by the SEO Panel team. These include a link diagnosis tool, the local search engines package, a newsletter plugin, and more. You will also find various plugins from third-party developers, and you can even create your own extensions if required.
Step 5: Configure your general settings
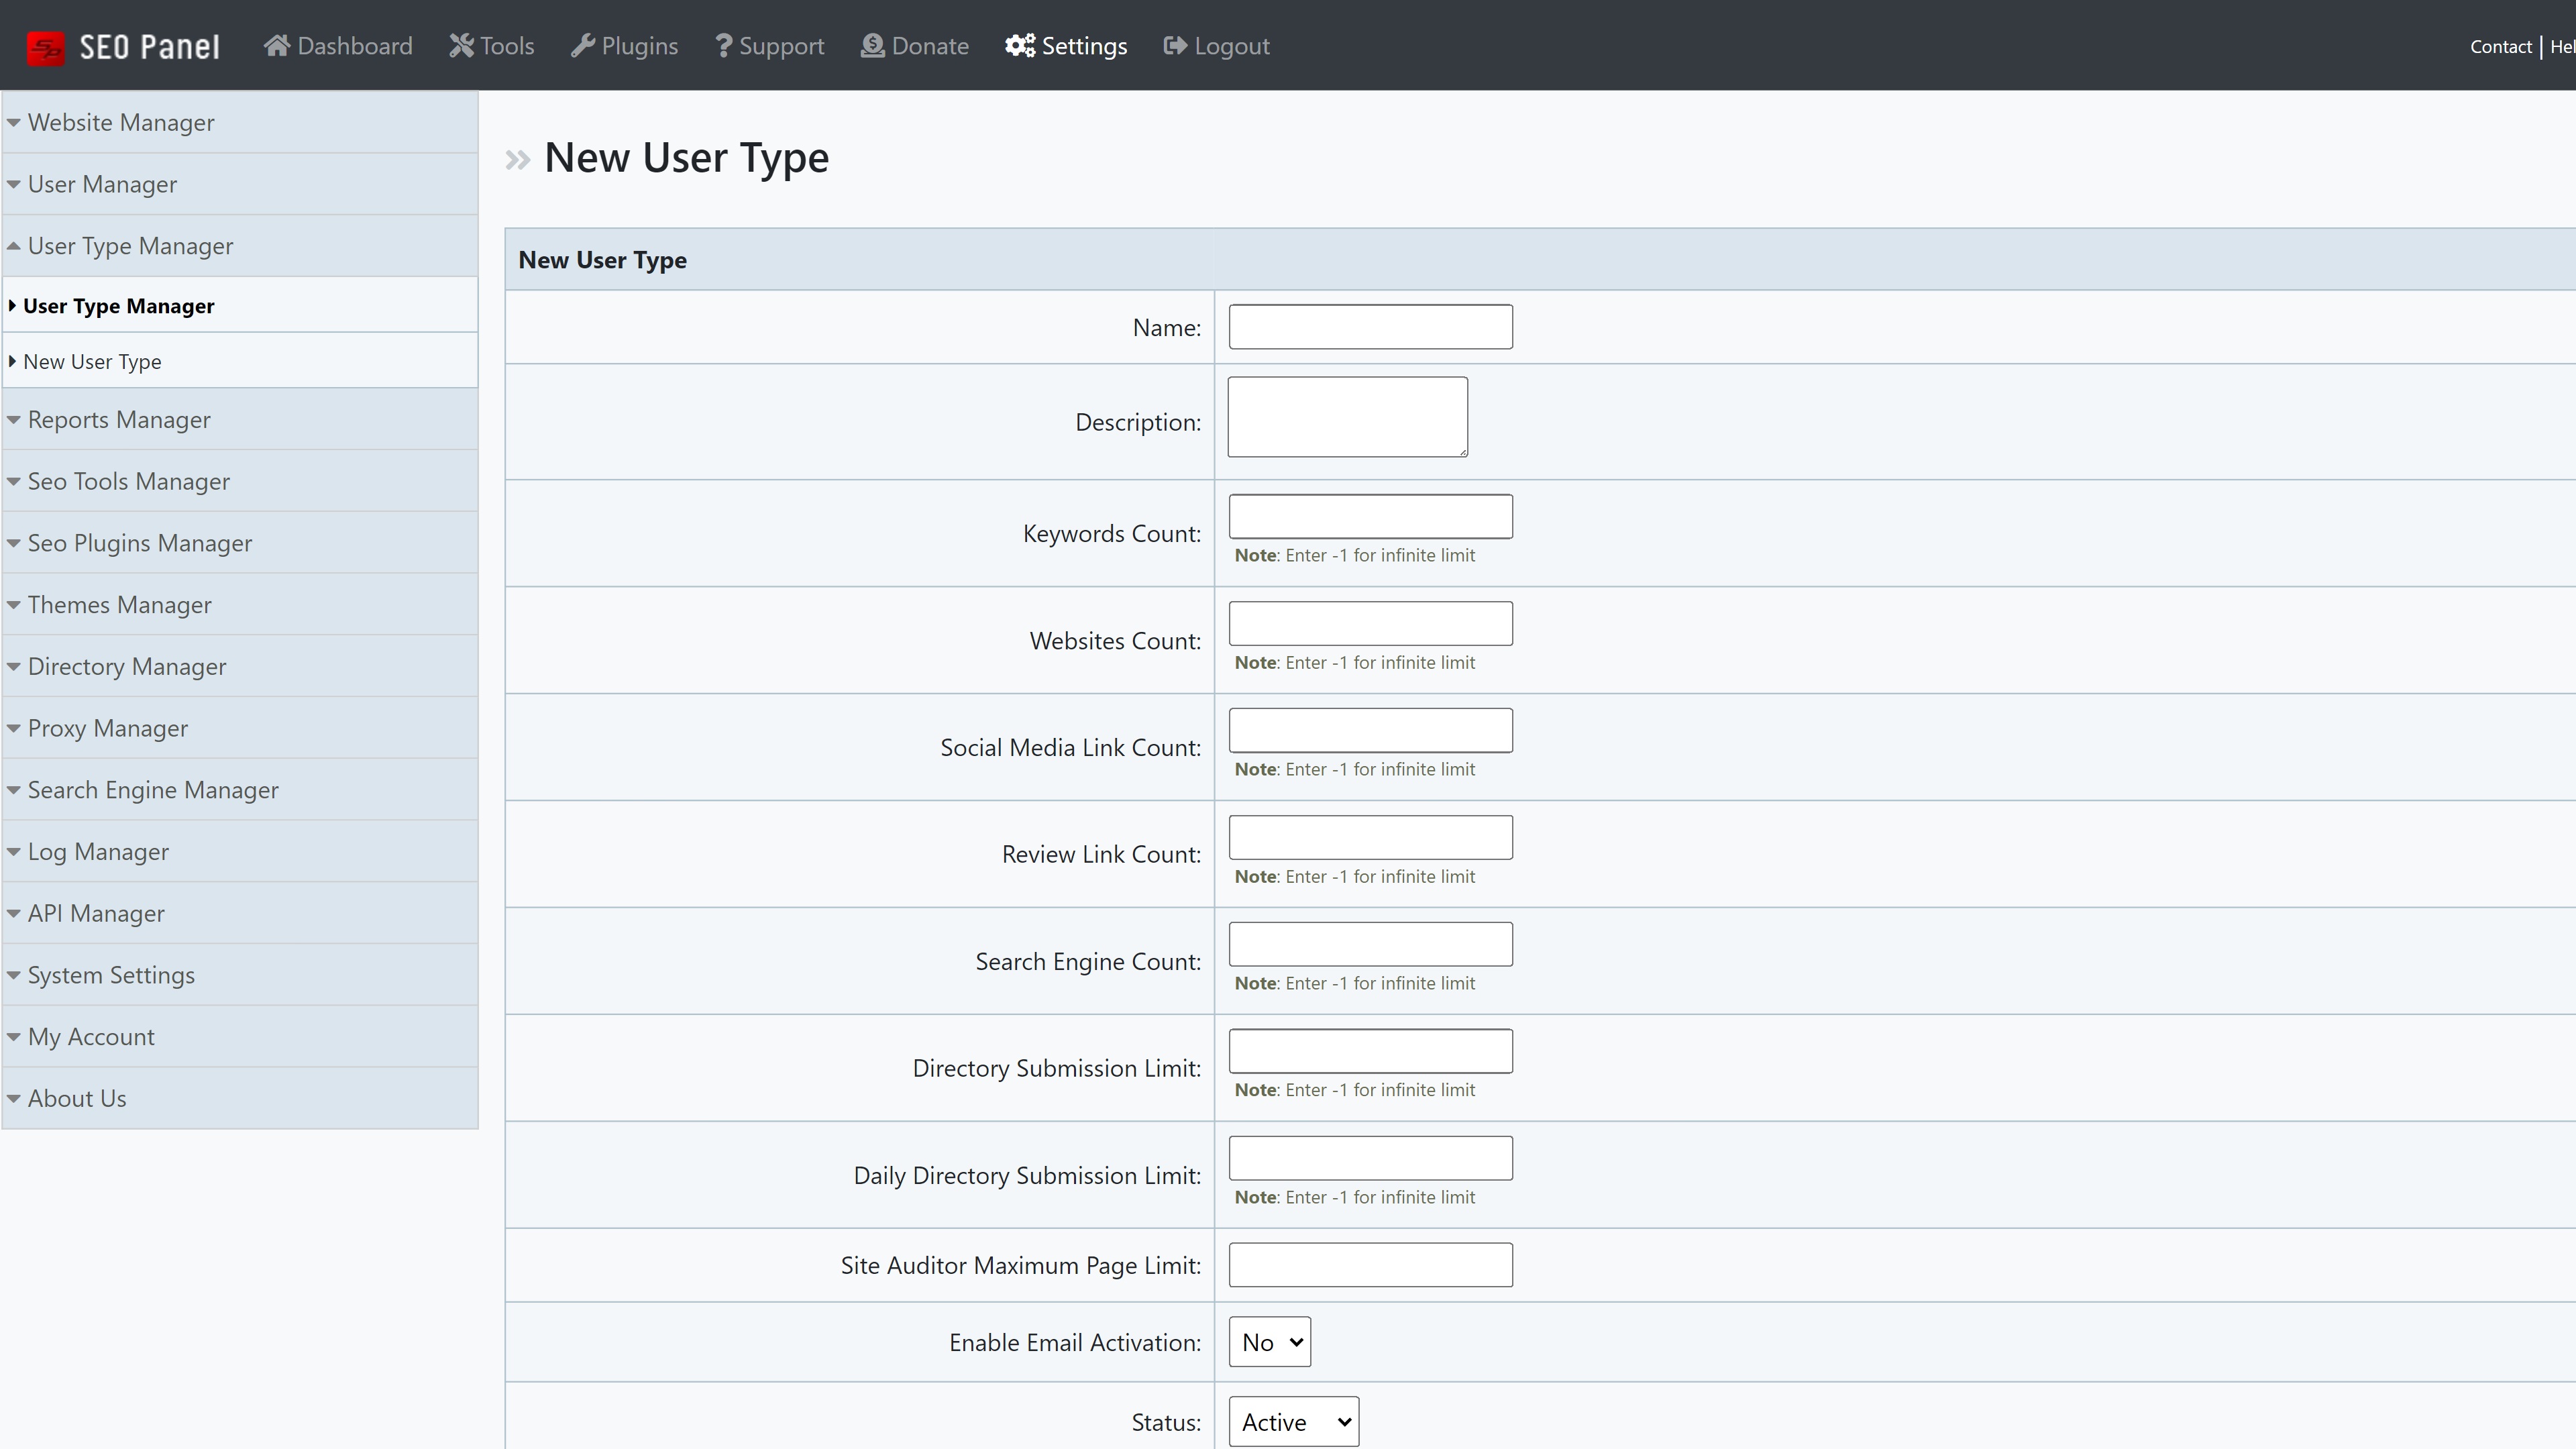
Last, but certainly not least, you will need to spend an hour or two working through the general settings and adding information where required. There’s a useful plugin manager, a proxy manager, a search engine manager, and more.
You can also add and remove users as required, enabling you to create custom profiles with fine-tuned access permissions. For example, you can control which tools and plugins each user can access and use.
It may take you a little while to work through each of the settings tabs, but doing so will make your life much easier.
Summary
SEO Panel is a powerful and intuitive search engine optimization tool that’s backed by numerous advanced features. It’s a self-hosted solution, so you will have to install it on your own hosting server—we used Hostinger. It’s easy to use, and it should help you boost your site’s search engine rankings.
To find out more, why not read our guide to the best SEO tools of 2022. You might also like to read about how web hosting impacts SEO and how scraping changed SEO.
Read more in this series:
- How to start a blog with Joomla
- Build your own CRM using SugarCRM
- How to host your files online using Nextcloud Hub
- How to start your own help desk with Hesk
- How to build an HR System using OrangeHRM
- How to generate your own invoices using Invoice Ninja
- How to install live chat software with Sales Syntax
- Run your own ecommerce platform with PrestaShop
- How to create your own website with Soholaunch
- How to launch your own website with WebsiteBaker
- How to kickstart your own Ancestry.com alternative with webtrees
- How to install a free ERP software called Dolibarr
- Demand gen vs lead gen: What's the difference?
- Host your own private forum with MyBB
- Build your own calendar application with WebCalendar
- Set up your own groupware service with Tiki Wiki CMS
- How to build your own email marketing service with phpList
- A Google Photos alternative: Store your photos online with Piwigo
- How to start with project management using The Bug Genie
- Make your own poll platform with LimeSurvey
- Roll out your own Wikipedia clone with MediaWiki
- How to host your own learning management software with Moodle LMS
- Set up an accounting system with FrontAccounting
- Produce your own bills with BoxBilling
Daniel is a freelance copywriter with over six years experience writing for publications such as TechRadar, Tom’s Guide, and Hosting Review. He specializes in B2B and B2C tech and finance, with a particular focus on VoIP, website building, web hosting, and other related fields.
